Advertisement
Available languages
Available languages
Quick Links
Advertisement
Chapters

Subscribe to Our Youtube Channel
Related Manuals for LaserPecker 4


Summary of Contents for LaserPecker 4
- Page 1 LaserPecker 4...
- Page 3 English Deutsch español Français...
- Page 5 Maximum Output: 2w(1064nm)&10w(450nm) Pulse Durati: Wavelength: 1064nm&450nm Laser Medium: Solid&Semiconductor CLASS IV LASER PRODUCT Brand: LaserPecker Model: LaserPecker 4 Shenzhen Hingin Technology Co., Ltd Tower F of Galaxy World,NO.1 Yabao Rd.,Bantian St., Longgang, Shenzhen,Guangdong, 518000,CHINA Lens cover indicator Laser export label...
- Page 6 Scan the QR code to Download the Android or iOS APP NOTE: After installing the APP, please read all and the correct operation of the product Tel: +86 0755-28913864 Apple App connects our diverse group of dedicated users www.laserpecker.net VIP Group...
-
Page 7: Table Of Contents
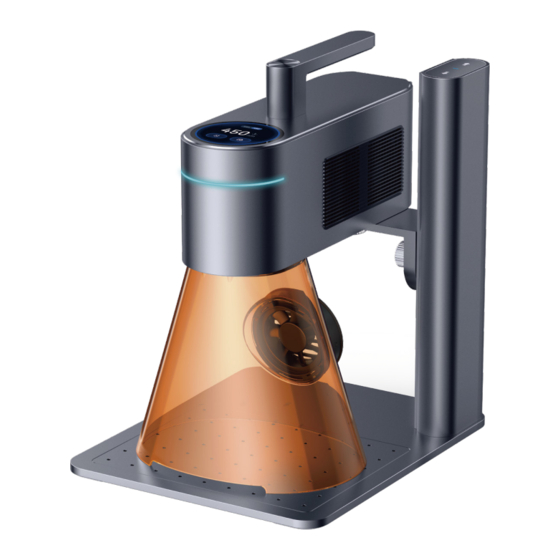
Contents List of Included Parts List of Included Parts Laser Unit *1 Electric Stand *1 Cable Organizer Clip *1 Control Interface Options Focal Ranging Methods Touch Screen Function Oblique Positioning AC Cord *1 & Power Adapter *1 Machine Maintenance... - Page 8 Long Press for Continuous Decent Long Press for Continuous Rise Laser Unit Touch Screen Electric Stand LED Indicator LED Operations Indicator Red Focal Measuring Light Source Field Lens / Lens Cover cable Organizer Clip...
- Page 9 DC Power Cable Input & Exhaust Fan...
- Page 10 Electric Stand Assembly Attach the tower to the base unit using the to tighten bolt...
- Page 11 Attaching the Laser Safety Cover Place the Laser Cover under the Field Lens and Magnet adsorption...
- Page 12 the AC Cord & Power Adapter & Exhaust Fan Connect to Electric Stand...
-
Page 13: Control Interface Options
Mobile APP Connection PC Software Connection Connection I Connection II LED Operations Indicator · Multi Color: Job in Progress... -
Page 14: Focal Ranging Methods
Focal Ranging Methods Red Dot Focusing While in Preview Mode on the Mobile App or PC Software, set Laser Unit with the Electric Stand controls until the the 2 red dots align into 1 or touch each other on the surface Indicates Focal Distance... -
Page 15: Touch Screen Function
Touch Screen Functions Tap to select laser Swipe left & right Tap for File Selection Screen File Selection Screen... - Page 16 Touch Screen Functions Continued Tap for Pause engraving Slide to adjust the brightness Tap to stop previewing...
-
Page 17: Oblique Positioning
Oblique Angle Positioning Turn the bolt to adjust the Laser Unit to the Focal Length... - Page 18 Attaching Alignment Fixtures Tighten the screw...
-
Page 19: Machine Maintenance
Machine Maintenance Magnetic Dust Screen do not get inside the Laser Unit while the screen is... - Page 20 Size Weight Laser source Engraving area Appearance Mobile APP: JPG/PNG/G-code/SVG APP & software connection Power input Pulse width 50us Wavelength...
- Page 21 Safety Instructions · · · · · · · · · · · · · · · ·...
- Page 22 Laser Engraving Instructions · · · · · · · · · Emergency Response · (1) (2) · Inhale smoke and particulate matter (1) (2)...
- Page 23 · Personal injury, property or product damage caused by improper operation, failure to follow instruction manual or other uncertainties. · The work that user created by LaserPecker products infringes the intellectual property rights of the third party or violates the relevant laws and regulations.
- Page 24 Warranty Terms · To the extent permitted by law, this warranty is exclusive and supersedes all other express or implied or legal warranty conditions (including in any case for a particular purpose, provided by the statute or any other circumstance), including, but not limited to, any liability derived the commodity suitable for a particular use.
- Page 25 RADIATION OPTICAL Maximum Output: 2w(1064nm)&10w(450nm) Pulse Durati: Wavelength: 1064nm&450nm Laser Medium: Solid&Semiconductor CLASS IV LASER PRODUCT Brand: LaserPecker Model: LaserPecker 4 Shenzhen Hingin Technology Co., Ltd Tower F of Galaxy World,NO.1 Yabao Rd.,Bantian St., Longgang, Shenzhen,Guangdong, 518000,CHINA Laserstufe vier Standard...
- Page 26 Download zur APP/PC-Anwendung www.laserpecker.net Apple App Kundendienst Tel: +86 0755-28913864...
- Page 27 Inhaltsverzeichnis Zube hörliste des Gerätes Montage der Schutzhaube Schutzhaube *1 Schutzbrille*1 Touchscreen Neigen der Gravur Installieren Sie die Positioniervorrichtung /Netzadapter *1 Sicherheitshinweise & Reparaturen...
- Page 28 Notstopp-Taste Touchscreen Anzeigeleuchte der Anzeigeleuchte des Anzeigeleuchte der Positionierung der Haltevorrichtung...
- Page 29 PC-Verbindungsanschluss DC-Netzanschluss Netzanschluss der...
- Page 30 Montage des elektrischen Hebe- und Senkvorrichtung Festschrauben...
-
Page 31: Montage Der Schutzhaube
Montage der Schutzhaube Einbau der Schutzhaube beendet Montage des Magneten... - Page 32 Verbinden Sie die Schutzhaube Verbinden Sie die e...
- Page 33 Mobile App-Verbindung PC Software Verbindung Verbindung 1 Verbindung 2 · · Anzeigeleuchte · ·...
- Page 34 Methode zur Abstandsmessung des Rotlichts dass der Abstand zwischen der Unterseite der Feldlinse des Lasers...
-
Page 35: Touchscreen
Tastenbeschreibung für den Touchscreen zu gravierende Datei und rufen Sie die... - Page 36 Tastenbeschreibung für den Touchscreen Gravur pausieren zu stoppen Vorschau zu beenden des Vorschaubereichs einzustellen...
-
Page 37: Neigen Der Gravur
Neigen der Gravur... -
Page 38: Installieren Sie Die Positioniervorrichtung
Installieren Sie die Positioniervorrichtung Positionieren Sie die Haltevorrichtung und der Festschrauben... - Page 40 Laserleistung&Laserquelle Art der Vorschau Mobiltelefon: JPG, PNG, G-code, SVG Verbindung Eingangsleistung 50us Wiederholungsfrequenz...
-
Page 41: Sicherheitshinweise
Sicherheitshinweis · · Nutzerhandbuches erfolgen! · · · · · · · · · · · · · · Lasergravurhinweise ·... - Page 42 · · · · · · · · Medidas de emergencia. · Si hay una llama abierta durante el corte, tome las siguientes medidas. (1)apague la energía (2) ·Absorption des Rauchs und der Partikel (1) (2)...
- Page 43 Haftungsausschlusserklärung LaserPecker haftet nicht für die Folgen der nachstehenden Umstände, da die Bedingungen und die Art und Weise der Verwendung dieses Gerätes durch den Benutzer außerhalb der Kontrolle von LaserPecker liegen: · · · · Urheberrechtserklärung · ·...
-
Page 44: Reparaturen
Klausel für Garantien auf Reparaturen · · · · · · · ·... - Page 45 Pulse Durati: Wavelength: 1064nm&450nm Laser Medium: Solid&Semiconductor CLASS IV LASER PRODUCT Brand: LaserPecker Model: LaserPecker 4 Shenzhen Hingin Technology Co., Ltd Tower F of Galaxy World,NO.1 Yabao Rd.,Bantian St., Longgang, Shenzhen,Guangdong, 518000,CHINA Indicador de Nivel láser cuatro estándar cubierta de lente...
- Page 46 NOTA: Después de descargar e instalar la app, por www.laserpecker.net Apple App Servicio Posventa global en línea para este producto, si tiene algún Tel: +86 0755-28913864...
- Page 47 Índice Lista de accesorios del producto Lista de accesorios del producto Unidad principal *1 Soporte eléctrico *1 Conexiones Cubierta protectora *1 Ranura para cables *1 pantalla táctil Grabado inclinado /adaptador de corriente *1 Instale el dispositivo de Instrucciones de seguridad Instrucciones de seguridadInstrucciones Condiciones de la garantía...
-
Page 48: Pantalla Táctil
Mantenga presionado para un descenso continuo/Pulse una vez continuo / Presiona una vez para Pantalla táctil Luz indicadora del Luz indicadora soporte eléctrico de la unidad principal Luz indicadora de Ranura para cables... - Page 49 Perilla de ajuste de ángulo Cubierta protectora del soporte eléctrico...
- Page 50 Instalación del soporte eléctrico ajuste el tornillo...
- Page 51 Colocación de la cubierta protectora Couvercle de protection installé Tenir le couvercle de protection près de la lentille de Installation...
- Page 52 l'unité principale couvercle de protection...
- Page 53 Connexion au PC Assurez-vous que l'appareil est installé, branchez Connexion 1 Connexion 2 · · Luz indicadora de · la unidad principal ·...
- Page 54 Rangos de enfoque con la luz roja Ajustar la altura del soporte eléctrico para asegurar que Ajuste la altura del soporte, cuando los dos puntos láser la distancia desde la parte inferior del visor hasta la Point focal laser La distancia de...
- Page 55 Descripción de los botones de la pantalla táctil Pulse para apagar la pantalla/Pulse en cualquier lugar para activarlo Pulse para entrar a la Pulse para volver a la interfaz principal...
- Page 56 Descripción de los botones de la pantalla táctil Pulse para acceder a la Haga clic para acceder a la interfaz Pulse para detener Pausa de Pulse para detener el grabado grabado la vista previa Deslice a izquierda el brillo de la vista previa...
-
Page 57: Grabado Inclinado
Grabado inclinado La distancia de... -
Page 58: Instale El Dispositivo De
Instale el dispositivo de posicionamiento Positionieren Sie die Haltevorrichtung und der Einbau ist abgeschlossen ajuste el tornillo... - Page 59 Mantenimiento La red antipolvo está en el costado de la unidad principal, se puede retirar...
- Page 60 Peso neto Área de grabado Aspecto Vista previa Conectividad Potencia de entrada 50us Fréquence de répétition Longueur d'onde...
-
Page 61: Instrucciones De Seguridad
Instrucciones de seguridad · · · · · · · · · · · · · · · · · Instrucciones sobre el grabado láser ·... - Page 62 · · · · · · · · Medidas de emergencia. · Si hay una llama abierta durante el corte, tome las siguientes medidas. (1)apague la energía (2) · Inhalación de humo y partículas. (1) (2)...
-
Page 63: Instrucciones De Seguridadinstrucciones
Instrucciones de seguridadInstrucciones de seguridad Dado que las condiciones y métodos de uso del producto por parte del usuario no están dentro del control de LaserPecker, cualquier consecuencia que surja de una de las siguientes situaciones será responsabilidad personal del usuario y LaserPecker no asume ninguna responsabilidad al respecto: ·... -
Page 64: Condiciones De La Garantía
Condiciones de la garantía · · · · · · ·... - Page 65 Pulse Durati: Wavelength: 1064nm&450nm Laser Medium: Solid&Semiconductor CLASS IV LASER PRODUCT Brand: LaserPecker Model: LaserPecker 4 Shenzhen Hingin Technology Co., Ltd Tower F of Galaxy World,NO.1 Yabao Rd.,Bantian St., Longgang, Shenzhen,Guangdong, 518000,CHINA Indicateur du Niveau laser quatre standard cache-objectif Marque d'exportation laser...
- Page 66 Apple App Service après - vente Nous fournissons des services d'assistance technique en ligne pour ce produit, si vous plus brefs délais Tel: +86 0755-28913864...
- Page 67 Table des matières Liste des accessoires Unité Principale *1 Support Motorisé *1 Liste des accessoires Installer le couvercle de protection Méthode de connexion Couvercle de Lunettes de Protection *1 Protection *1 Mesure de la distance Instruction des touches de l'écran tactile Gravure Inclinée /Adaptateur de Courant Entretien de l'appareil...
- Page 68 Écran Tactile Indicateur de l'unité Principale Indicateur de Portée capuchon de lentille...
- Page 69 Couvercle de protection...
- Page 70 Installation du support motorisé Fixation de l'unité principale sur le Serrer le bouton...
-
Page 71: Installer Le Couvercle De Protection
Installer le couvercle de protection... - Page 72 de la unidad principal la cubierta protectora...
- Page 73 · · Indicateur de · l'unité principale ·...
-
Page 74: Mesure De La Distance
Mesure de la distance Punto de enfoque láser... -
Page 75: Instruction Des Touches De L'écran Tactile
Instruction des touches de l'écran tactile Cliquez sur le bouton pour passer Cliquez pour éteindre l'écran/Cliquez quitter la veille écran l'interface principale... - Page 76 Instruction des touches de l'écran tactile Cliquez pour Pause de la Cliquez pour arrêter arrêter la gravure gravure la prévisualisation et la droite pour régler...
-
Page 77: Gravure Inclinée
Gravure inclinée... - Page 78 Montage et positionnement des pinces Serrer le bouton...
-
Page 79: Entretien De L'appareil
Entretien de l'appareil... - Page 80 Taille du produit Poids net du produit Puissance et source laser Zone de gravure Aspect Prévisualisation des bordures + prévisualisation graphique Méthode de prévisualisation Méthode de connexion Puissance d'entrée 50us Ancho de pulso Longitud de onda...
- Page 81 Information de sécurité · · · · · · · · · · · · · · · · Informations sur la gravure laser ·...
- Page 82 · · · · · · · · Mesures d'urgence · (1) (2) · Inhalation de fumée et de particules (1) (2)...
-
Page 83: Clause De Non-Responsabilité
Clause de non-responsabilité Merci d'avoir acheté LaserPecker 4. Ce manuel concerne votre sécurité, vos responsabilités légales et vos droits. Veuillez lire attentivement et comprendre le manuel avant utilisation. Le non-respect des instructions du manuel peut entraîner des blessures, un mauvais résultat de gravure ou des dommages à... -
Page 84: Garantie
· Les produits sont couverts par une garantie avec livraison gratuite pour les réparations gratuites dans les 7 jours suivant la date d'expédition, d'un an pour les commandes originales achetées auprès de LaserPecker). · Pour tous les produits après le remplacement ou l'entretien, Hingin accordera une garantie plus longue de la période de garantie restante du produit d'origine ou la garantie de 30 jours suivant le remplacement. - Page 86 Shenzhen Hingin Co We support global online technical support services for this product ou have an proble s duri our use, please contact us E ail:support@la Tel: +86 0755-28913864...
Need help?
Do you have a question about the 4 and is the answer not in the manual?
Questions and answers