Table of Contents
Advertisement
Quick Links
Premia
Coffee Brewer
™
Bean-to-Batch Medium to High Volume Brewer
PROGRAMMING MANUAL
For Technical Service, contact Bunn-O-Matic Corporation at 1-800-286-6070.
Bunn-O-Matic Corporation
Post Office Box 3227, Springfield, Illinois 62708-3227
Phone (217) 529-6601 | Fax (217) 529-6644
www.bunn.com
58821.0000 A 10/23 © 2023 Bunn-O-Matic Corporation
Advertisement
Table of Contents

Related Manuals for Bunn BUNN Premia 61000.0000


Summary of Contents for Bunn BUNN Premia 61000.0000
- Page 1 Premia Coffee Brewer ™ Bean-to-Batch Medium to High Volume Brewer PROGRAMMING MANUAL For Technical Service, contact Bunn-O-Matic Corporation at 1-800-286-6070. Bunn-O-Matic Corporation Post Office Box 3227, Springfield, Illinois 62708-3227 Phone (217) 529-6601 | Fax (217) 529-6644 www.bunn.com 58821.0000 A 10/23 © 2023 Bunn-O-Matic Corporation...
- Page 2 BUNN-O-MATIC COMMERCIAL PRODUCT WARRANTY Warranty statements and information can be found on our website. Please visit https://commercial.bunn.com/support/warranty-lookup for further details.
-
Page 3: Table Of Contents
CONTENTS Operating Interface User Interface ....................4 ADA Interface ....................4 Info Screen ....................5 Service Access Menu Service Access Menu .................. 5 Active Notices ....................6 Reservoirs ....................7 Care and Cleaning ..................8 Advanced Menu Advanced Menu ................... 9 Product and Recipe Setup Recipes ..................... -
Page 4: Operating Interface
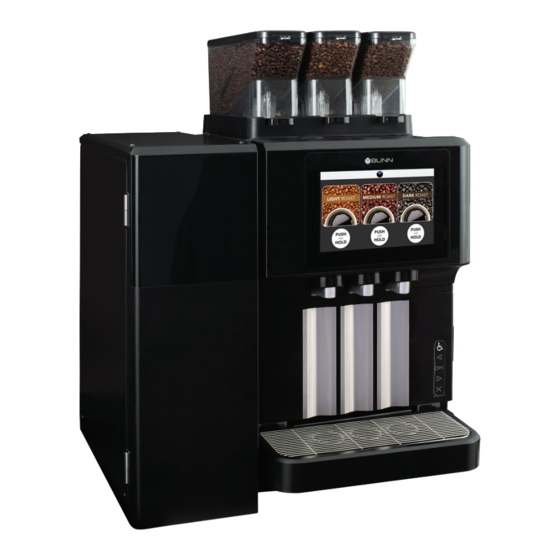
OPERATING INTERFACE Customer Interface The first screen to appear is the CUSTOMER INTERFACE screen, also known as the Home Screen. 1. After placing a cup under the dispense nozzle, available drinks are dispensed by pushing and holding the onscreen button below the beverage of choice. -
Page 5: Info Screen
OPERATING INTERFACE Info Screen How to Access: 1. Tap on the BUNN logo and the Info Screen appears on the display. The Info Screen will display the status of the following: Bean Hoppers: Displays status of beans in the hopper and will alert when empty. -
Page 6: Active Notices
SERVICE ACCESS MENU < ACTIVE NOTICES Active Notices How to Access: 1. Touch and hold the BUNN logo for a few seconds until SERVICE ACCESS appears on the display. 2. From the SERVICE ACCESS screen, press the ACTIVE NOTICES icon. -
Page 7: Reservoirs
SERVICE ACCESS MENU < RESERVOIRS Reservoirs How to Access: 1. Touch and hold the BUNN logo for a few seconds until SERVICE ACCESS appears on the display. 2. Select the RESERVOIRS icon. 3. This screen will display the volume level for each reservoir. -
Page 8: Care And Cleaning
SERVICE ACCESS MENU < CARE & CLEANING Care and Cleaning How to Access: 1. Touch and hold the BUNN logo for a few seconds until SERVICE ACCESS appears on the display. 2. Select the Care and Cleaning icon. The Care and Cleaning screen contains a... -
Page 9: Advanced Menu Advanced Menu
ADVANCED MENU Advanced Menu How to Access: 1. Touch and hold the BUNN logo for a few seconds until SERVICE ACCESS appears on the display. 2. Select the Advanced Setup icon. 3. Enter passcode 6601. The Advanced Menu screen contains a menu of items that can be accessed behind a pass- code. -
Page 10: Recipes
ADVANCED MENU < RECIPES Recipes How to Access: 1. Touch and hold the BUNN logo for a few seconds until SERVICE ACCESS appears on the display. 2. Select the Advanced Setup icon. 3. Enter passcode 6601. 4. Select Recipes icon. -
Page 11: Recipes Setup
ADVANCED MENU < RECIPES Recipe Setup This tab will allow the operator to enable, modify, add, reset or delete recipes stored in the brewer. 1. Select the Recipe tab and Press the New button. 2. Or, edit an existing Recipe. For this example, we will select Medium Roast to edit. - Page 12 ADVANCED MENU < RECIPES Recipe Setup (continued) By pressing the Recipe Name Line 1 and Recipe Description Line 1 text fields, an input screen will appear. 7. Type the description. 8. Press the Return key to complete. 9. Next, the Recipe Image can be changed, if preferred.
- Page 13 ADVANCED MENU < RECIPES Recipe Setup (continued) 1. Choose the Coffee tab to edit the recipe for Medium Roast. Example: Each size with a green box is enabled. Coffee Recipes can be edited from this screen by clicking any of the numbers in the table cells. 2.
- Page 14 ADVANCED MENU < RECIPES Recipe Setup (continued) 1. Choose the Schedules tab to edit the recipe hold volumes for each hour/day. There are options available to use an existing template to edit with, create a new schedule from blank, or upload an existing schedule from a saved file using a USB stick.
-
Page 15: Recipe Product
ADVANCED MENU < RECIPES Recipe Products This tab will allow the operator to enable, modify, add, reset or delete products stored in the brewer. 1. Select the PRODUCTS tab to make edits to any product listed. 2. Choose a product to edit. 3. - Page 16 ADVANCED MENU < RECIPES Recipe Products (continued) 9. Next, scroll side-to-side to see the available images. Press the chosen Product Image. 10. If a new image is chosen, press OK. 11. Press OK to complete this Product creation. continued >...
-
Page 17: Product Calibration
ADVANCED MENU < RECIPES Product Calibration 1. Select the Grinder Calibration button. 2. Choose a hopper from the tabs. The default is the left hopper. NOTE: Choosing the hopper during calibration is simply telling the machine which grinder to turn on. WARNING: All three hoppers must be locked in position before starting. - Page 18 ADVANCED MENU < RECIPES Product Calibration (continued) It’s time to Calibrate the grinder. 6. Place a the empty container that was tared on a digital scale under the Grounds Chute. 7. Return to CALIBRATION screen. Press START button. 8. Allow time for the grind to finish. Once the grind is finished, take the container and place it on the digital scale.
- Page 19 ADVANCED MENU < RECIPES Product Calibration (continued) After pressing the 1st Field to log the weight of the coffee in the cup, the Input Screen will appear for you to input in these numbers. 11. Type the weight of the cup 12.
- Page 20 ADVANCED MENU < RECIPES Product Calibration (continued) IMPORTANT: A grinder calibration for a specific product can be applied to the grinder selected (The Left grinder is the default), or applied to All. If this step is completed and the Apply to Left Center, or Right button is selected, the recipe will need to be recalibrated if it’s moved from the specified grinder to either of the other two...
-
Page 21: Product Setup
ADVANCED MENU < PRODUCT SETUP Product Setup How to Access: 1. Touch and hold the BUNN logo for a few seconds until SERVICE ACCESS appears on the display. 2. Select the Advanced Setup icon. 3. Enter passcode 6601. 4. Select Product Setup icon. - Page 22 ADVANCED MENU < PRODUCT SETUP Product Setup < Beverages Offered This tab will allow an operator to select what beverages will be made available to the consumer. The enabled products will be displayed on the main screen. The reservoir schedule can also be assigned from a template using this screen.
-
Page 23: Reservoir Schedule
ADVANCED MENU < RESERVOIR SCHEDULE Reservoir Schedule How to Access: 1. Touch and hold the BUNN logo for a few seconds until SERVICE ACCESS appears on the display. 2. Select the Advanced Setup icon. 3. Enter passcode 6601. 4. Select Reservoir Schedule icon. - Page 24 ADVANCED MENU < RESERVOIR SCHEDULE Override Reservoir Schedule 1. Select the Active Assignments tab to override active reservoir schedules to a specific hold volume. 2. Select a checkbox next to the active reservoir schedule to override. 3. Select the hold volume that will override the active reservoir schedule.
-
Page 25: Machine Settings Machine Settings
ADVANCED MENU < MACHINE SETTINGS Machine Settings How to Access: 1. Touch and hold the BUNN logo for a few seconds until SERVICE ACCESS appears on the display. 2. Select the Advanced Setup icon. 3. Enter passcode 6601. 4. Select Machine Settings icon. - Page 26 ADVANCED MENU < MACHINE SETTINGS Temperature Adjustment (continued) 4. Touch the Temperature box to edit the temperature setting. 5. Press Enter to accept. 6. If the tank temperature falls below the ready temperature setting, brewing will be disabled until the ready temperature is reached. Press the Ready Temperature box to alter the ready temperature.
- Page 27 ADVANCED MENU < MACHINE SETTINGS Bean Hopper Hoppers have sensors which will indicate when the hopper is low on beans. 1. Select the Bean Hopper tab to adjust the sensor sensitivity or enable/disable sensors individually. 2. To enable/disable bean hopper level monitoring, press in the check box for any or all hoppers.
- Page 28 ADVANCED MENU < MACHINE SETTINGS BUNNlink ® If BUNNlink hardware has been installed in the machine, this screen will indicate that it is active, and provide other data. There is no editable information on this screen. NOTE : BUNNlink has to be Enabled at Setup after it is installed.
- Page 29 ADVANCED MENU < MACHINE SETTINGS Service Information 1. In the event service may be required, information for contacting the appropriate service provider may be entered on this screen for ready access. 2. If any changes to the screen have been made, press Save to confirm.
-
Page 30: Regional Settings Regional Settings
ADVANCED MENU < REGIONAL SETTINGS Regional Settings How to Access: 1. Touch and hold the BUNN logo for a few seconds until SERVICE ACCESS appears on the display. 2. Select the Advanced Setup icon. 3. Enter passcode 6601. 4. Select Regional Settings icon. -
Page 31: Reminders
ADVANCED MENU < REMINDERS Reminders How to Access: 1. Touch and hold the BUNN logo for a few seconds until SERVICE ACCESS appears on the display. 2. Select the Advanced Setup icon. 3. Enter passcode 6601. 4. Select Reminders icon. - Page 32 ADVANCED MENU < REMINDERS Preventive Maintenance Reminders When enabled, the machine will prompt the user to perform preventive maintenance work, at the day and time selected on the screen. Preventive Maintenance Select tab. 2. Enable Reminder for PM Alert based on Cycles is checked as a default.
- Page 33 ADVANCED MENU < REMINDERS Water Filter Reminders When enabled, the machine will prompt the user to replace the water filter, at the day and time selected on the screen. Water Filter Select tab. 2. Enable Reminder for Water Filter Alert based on Cups is checked as a default.
-
Page 34: Your Brand
ADVANCED MENU < YOUR BRAND Your Brand How to Access: 1. Touch and hold the BUNN logo for a few seconds until SERVICE ACCESS appears on the display. 2. Select the Advanced Setup icon. 3. Enter passcode 6601. 4. Select Your Brand icon. - Page 35 ADVANCED MENU < YOUR BRAND Screen Saver (cont) SHOW PROMPT BUTTON a. Select Show Prompt Button box. b. Select Prompt Button to edit text. c. Select Save. 3. Select either Screen Saver Timeout field. - Customer field edits seconds after customer dispenses beverage.
- Page 36 USB Stick, and then copy this information to other machines (if they are to be setup the same way). 1. Press and hold the BUNN Logo Icon for three (3) seconds to access the SERVICE ACCESS screen.
- Page 37 USB stick and enter a configuration name. 7. The USB port is located behind the lower ac- cess door. NOTE: The BUNN default USB Stick is part number 64165.0000 8. Press Start and a confirmation screen will appear showing the progress of the export.
- Page 38 EXPORTING DATA USING USB 10. When the export is completed, the OK button can be selected and the USB Stick can be safely removed. NOTE: If the screen says FAILURE!, no USB memory stick found! Then press the Reboot button to Power Cycle the machine. The USB should be recognized after machine is fully powered up.
- Page 39 EXPORTING DATA USING USB Copying Settings Machine to Machines (continued) 3. The USB port is located behind the lower ac- cess door. 4. Now that the USB stick is inserted, press Start. 5. A confirmation screen will appear showing the progress of the import.
- Page 40 IMPORTING DATA USING USB The Update screen will appear. Updating... The Importing Data steps are complete. The imported settings and recipes should be available for use.
Need help?
Do you have a question about the BUNN Premia 61000.0000 and is the answer not in the manual?
Questions and answers