Advertisement
Quick Links
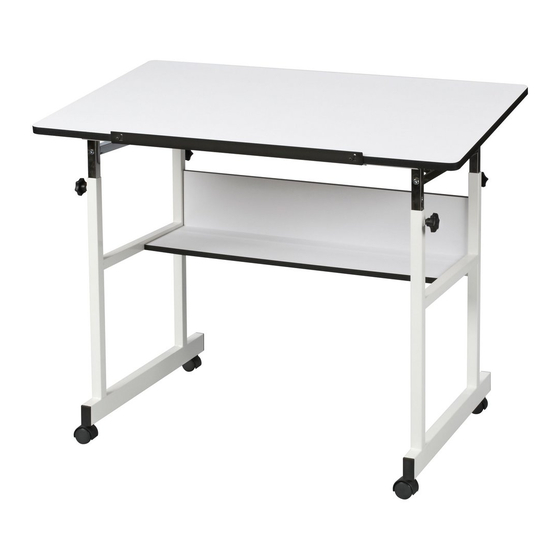
MiniMaster Il drawing Table
Assembly Instructions
April 2008
Tools required: Phillips screwdriver.
Parts Included:
E 1pc Back Panel
G
2pcs
A 2pcs LegFrame
B 1pc Table Top
Colored surface both sides Rear Extension Tubes
F {ipc Shelf
Colored surface one side
py
Front Extension Tubes
DB
ta es
_——
Rear
Front
Zz
C 4pcs Casters
D 4pcs
J 2pcs
K 6pcs
L 1pc
Height Adjustment Knobs
Side Cross Bars
1-1/2" Allen Bolts
Front Cross Bar
M 2pcs
N 2pcs
O 6pcs
P 12pcs
Q 2pcs
5/8" Wood Screws
—
Allen Key
D
p
To Assemble:
El Unpack and inspect contents to confirm that you have all parts listed above
Screw casters (C) or floor glides (D), whichever you prefer, into
bottom tubes of left and right leg frames (A)
El Place back panel (E) on a bench or table (at least 20" high) with
ends hanging over the edge and threaded holes facing up.
Note Back panel has colored PVC coating on both sides.
Dont confuse it with the shelf that has coating only on one side.
C/D
Hang left leg frame (A) on top of back panel (E) as shown in diagram.
4 Align holes in steel flange with holes in back panel and install
1D Allen Bolts (P). Be sure ends of back panel are pushed flush
against steel tubing and tighten bolts securely.
Gi Repeat step #4 for right leg frame (A)
Advertisement


Need help?
Do you have a question about the MiniMaster II and is the answer not in the manual?
Questions and answers