
Related Manuals for Argo Xplorer XR 500 2024


Summary of Contents for Argo Xplorer XR 500 2024
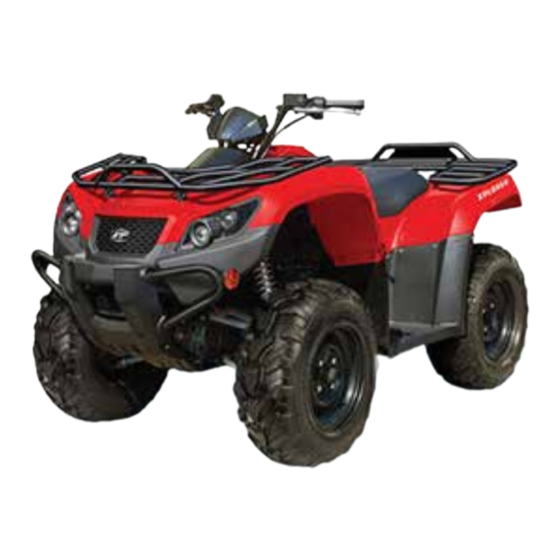
- Page 1 2024 OPERATOR’S MANUAL Xplorer XR 500 Xplorer XR 500 SE This vehicle is not a toy. Never allow anyone under 16 years of age to operate this ATV. Part #: 085-2833 Effective Date 3/2023...
- Page 2 Read this manual before you operate your ARGO ATV. It contains safe operating instructions and warns the user about potential hazards that can result in personal injury. Warnings are identified in the text by the following symbol: WARNING Warning text warns the user about potential hazards that can result in personal injury or death.
- Page 3 This manual describes the controls, operation and basic maintenance procedures for the ARGO ATV from date of printing. Please take the time to read this manual carefully, for your safety and that of others. By following these instructions, you will ensure extended, trouble free operation of your ATV.
-
Page 4: Table Of Contents
TABLE OF CONTENTS SECTION I - Introduction Introduction ......................1 Getting Acquainted With Your ATV ..............4 SECTION 2 - Safety Information Safety Information ....................7 Warnings ......................12 Hangtags and Warning Labels ................. 21 SECTION 3 - Specifications Specifications ....................25 SECTION 4 - Description and Identification Identification Number Records ................. - Page 5 No Modifications ....................42 For Off-Road Use Only ..................42 Environment ..................... 42 Weather ......................42 Terrain....................... 43 Night Riding ...................... 43 Paved Surfaces ....................43 Trail Riding ....................... 43 Turning Your ATV ....................44 Leaning, Weight Shift, and Balance ..............44 Wide Turns .......................
- Page 6 SECTION 7 - Operation Mounting the ATV ..................... 65 Starting the Engine ................... 65 Warming up the Engine ..................66 Braking / Stopping .................... 66 Transmission Ranges ..................67 Parking ......................68 Dismounting the ATV ..................68 SECTION 8 - General Maintenance General Maintenance ..................
- Page 7 Headlight Aim Adjuster ..................91 Fuses ........................ 91 Noise Regulation ....................92 Troubleshooting ....................93 SECTION 9 - Preparation For Storage Preparation For Storage ................... 95 SECTION 10 - Warranty Limited Warranty ....................97 Emissions Warranty ..................99 Maintenance Record ..................101...
-
Page 8: Introduction
Proper setup, maintenance and safe operating practices will help you get years of satisfactory use from this ATV. Your safety and the safety of all ARGO users is of the greatest concern to us. You will find numerous safety statements in this manual. Please read and follow them carefully. - Page 9 Introduction Thank you for choosing this quality ARGO ATV. It has been designed and manufactured to provide you with reliable and enjoyable operation. This Owner’s Manual should be considered a permanent part of your ATV and must remain with the ATV in the event of a resale.
- Page 10 PLEASE TAKE A FEW MOMENTS TO GET ACQUAINTED WITH YOUR ATV BY READING THIS OWNER’S MANUAL NOTE: The manufacturer DISCLAIMS LIABILITY FOR ERRORS IN THIS MANUAL, and SPECIFICALLY DISCLAIMS LIABILITY FOR INCIDENTAL AND CONSEQUENTIAL DAMAGES resulting from the use of the information and material in this manual. Name: ________________________________________ Address: ______________________________________ Telephone: ____________________________________...
-
Page 11: Getting Acquainted With Your Atv
GETTING ACQUAINTED WITH YOUR ATV This manual will provide you with a good basic understanding of the features and operation of this ATV. This manual includes important safety information. It provides information about special techniques and skills necessary to ride the ATV. It also includes basic maintenance and inspection procedures. - Page 12 Emissions Warranty section of this Owner's Manual or visit our website. ARGO WANTS YOU TO BE SATISFIED WITH YOUR NEW ATV. IF YOU DO NOT UNDERSTAND ANY PART OF THIS MANUAL OR ARE NOT SATISFIED WITH THE SERVICE RECEIVED, PLEASE TAKE THE FOLLOWING ACTIONS: Discuss the matter with your dealership service manager.
-
Page 14: Safety Information
Safety Institute at: U.S. - 1-800-887-2887 or Canada - 1-613-739-1535 to find out about a training course nearest you. Visit www.atvsafety.org to register for free ATV safety training. ARGO is offering a $100 incentive for completion of the ASI approved safety training. - Page 15 An ATV is NOT a Toy and Can Be Hazardous To Operate • Always follow proper procedures for climbing hills as described in this manual. Check the terrain carefully before you start up any hill. Never climb hills with slippery or loose surfaces. Shift your weight forward. Never accelerate suddenly. Never go over the top of any hill at a high rate of speed.
- Page 16 An ATV is NOT a Toy and Can Be Hazardous To Operate IMPORTANT MESSAGE Your safety is very important to ARGO. That is why we urge you to read this message before you operate this ATV. Off-road riding can be fun. However, an ATV is not a toy and it can be hazardous to operate.
- Page 17 An ATV is NOT a Toy and Can Be Hazardous To Operate Always Supervise Inexperienced Riders Supervision is another important obligation of the owner. Even after riders become skilled off-road riders, it also helps to regularly remind all riders to follow the instructions and warnings in this manual.
- Page 18 An ATV is NOT a Toy and Can Be Hazardous To Operate Boots/Ankle Protection Choose a boot that protects the largest possible of your leg (preferable up to your knee) and can handle impact of rocks, dirt or branches. Choose a boot that has low heel and a good tread will help prevent your feet from slipping off the footrests in wet or rugged conditions.
-
Page 19: Warnings
Warnings WARNING POTENTIAL HAZARD Failure to follow the age recommendations for this ATV. WHAT CAN HAPPEN If children use ATVs that are not recommended for their age, severe injury or death can result. Even though a child may be within the age group for which an ATV is recommended, he or she may not have the skills, abilities, or judgment needed to operate the ATV safely and may be involved in a serious accident. - Page 20 Warnings POTENTIAL HAZARD Carrying a passenger on this ATV. WHAT CAN HAPPEN Greatly reduces your ability to balance and control this ATV. Could cause an accident, resulting in personal injury or death to you and/or your passenger. HOW TO AVOID THE HAZARD Never carry a passenger.
- Page 21 Warnings POTENTIAL HAZARD Operating this ATV without wearing an approved motorcycle helmet, eye protection, and protective clothing. WHAT CAN HAPPEN Operating without an approved helmet increases your chances of a severe head injury or death in the event of an accident. Operating without eye protection can result in an accident and increases your chances of a severe injury in the event of an accident.
- Page 22 Warnings POTENTIAL HAZARD Attempting wheelies, jumps and other stunts. WHAT CAN HAPPEN Increases the chance of losing control of the ATV, which can result in an accident. HOW TO AVOID THE HAZARD Never attempt stunts, such as wheelies or jumps. Don’t try to show off. POTENTIAL HAZARD Failing to keep hands on handlebars or feet on footrests during operation.
- Page 23 Warnings POTENTIAL HAZARD Operating on steep hills. WHAT CAN HAPPEN This ATV can overturn more easily on steep hills than on level surfaces. HOW TO AVOID THE HAZARD Never operate this ATV on hills too steep for the ATV or for your abilities. Practice on smaller hills before attempting larger hills.
- Page 24 Warnings POTENTIAL HAZARD Going down a hill improperly. WHAT CAN HAPPEN You may lose control, which could result in an accident. HOW TO AVOID THE HAZARD Always follow proper procedures for going down hills. Always check the terrain carefully before you start down any hill.
- Page 25 Warnings POTENTIAL HAZARD Operating the ATV in deep or fast flowing water. WHAT CAN HAPPEN Tires may float, causing loss of traction and loss of control, which could result in an accident. HOW TO AVOID THE HAZARD Never operate the ATV in fast flowing water or in water deeper than the footrests.
- Page 26 Warnings POTENTIAL HAZARD Failure to release the parking brake before operating the ATV. WHAT CAN HAPPEN Operating the ATV with the parking brake engaged could cause a change in handling or loss of brakes and cause an accident. HOW TO AVOID THE HAZARD Always release the parking brake before operating the ATV.
- Page 27 Warnings POTENTIAL HAZARD Operating in areas where you might not be seen by other off-road ATV’s. WHAT CAN HAPPEN You may be in a collision which may result in personal injury. HOW TO AVOID THE HAZARD Always mount a caution flag on the ATV to make you more visible.
-
Page 28: Hangtags And Warning Labels
The hangtags and labels are considered to be a permanent part of the ATV. If a label becomes hard to read or comes off the vehicle, contact your ARGO ATV dealer for a replacement. - Page 29 Hangtags and Warning Labels General Use Hangtag...
- Page 30 Hangtags and Warning Labels...
- Page 31 Hangtags and Warning Labels...
-
Page 32: Section 3 - Specifications Specifications
SECTION 3 Specifications Specifications ENGINE AND DRIVE Type Four-Cycle/Liquid Cooled Bore x Stroke 89 x 71.2 mm (3.56 x 2.80 in.) Displacement 443 cc (27.03 cu in.) Cylinder Arrangement Single Compression Ratio 9.0:1 Starting System Electric Lubrication System Wet sump Ignition System ID (Inductive Discharge Ignition) Generator System... - Page 33 Specifications MISCELLANEOUS XR 500: Steel Rims XR 500 SE: Aluminum Fuel (Recommended) 87 Octane Regular Unleaded Gas Tank Capacity (Rated) 4.0 U.S. Gal. (15 L) Engine Oil (Recommended) 5W-30 Rebuild: 3.02 qt (2.85 L) Engine Oil Capacity Change: 2.33 qt (2.20 L) Change w/filter: 2.54 qt (2.40 L) Front / Rear Gear Case Oil (Recommended) 80W-90 Hypoid...
-
Page 34: Section 4 - Description And Identification Identification Number Records
The engine serial number is stamped on the left crankcase. These numbers are required by the dealer to complete any Warranty process. No warranty will be allowed by ARGO if the VIN or ESN has been tampered with in any way. -
Page 35: Location Of Parts And Controls
Location of Parts and Controls Front View Brake Reservoir Throttle Limiter Headlights Electrical Access Panel NOTE: The machine you have purchased may differ slightly from those shown in the illustrations of this manual. Rear View 5. Hand Brake Lever (Front/Rear) 6. - Page 36 Location of Parts and Controls Left Side View 21. Accessory Socket 22. Drive Select Lever 23. Storage Compartment 24. Rear Cargo Rack 25. Flag Pole Bracket 26. Front Cargo Rack...
-
Page 37: Control Functions Ignition Switch
Control Functions Ignition Switch Functions of the respective switch positions are as follows: “OFF” position: All electrical circuits (except the accessory plug) are switched off. The engine will not start or run. The key can be removed in this position. “ON”... -
Page 38: Headlight Switch
However, it is recommended to shift into “N” (Neutral) or “P” (Park) before starting the engine. If either indicator light fails to illuminate when the gear select lever is in the neutral or park position, have an ARGO dealer inspect the electrical circuit. -
Page 39: 2Wd / 4Wd Selector Switch
Control Functions 2WD / 4WD Selector Switch The 2WD/4WD selector switch allows you to operate your ATV in either two-wheel drive (rear wheels powered) or four-wheel drive (open front differential). The 2WD/4WD/LOCK select switch is located above the throttle lever. To select the LOCK mode, rotate the switch to the LOCK position. -
Page 40: Brakes
3. Attempt to push the ATV. NOTE: The parking brake lock must lock the ATV’s front and rear wheels. If it does not, take your ATV to an authorized ARGO dealer for service. WARNING Ensure the parking brake lock has been disengaged before operating your ATV. An accident can result if the parking brake lock is left engaged while the ATV is being operated. -
Page 41: Rear Brake Pedal
Check the operation before you start the engine. If it does not work smoothly, check for the cause. Correct the problem before riding the ATV. Consult an authorized ARGO dealer if you can not locate or solve the issue yourself. -
Page 42: Speed Limiter
Control Functions Speed Limiter The speed limiter keeps the throttle from fully opening, even when the throttle lever is pushed to the maximum. Turning IN the adjuster limits the top speed of the ATV. Turning OUT increases the top speed of the ATV. Adjuster Locknut 0.52 in (13 mm maximum) -
Page 43: Gauge
Control Functions Multifunction Meter Adjust / Set Button (1) - Use in conjunction with the Mode Button (2) to set the clock and reset the trip meter to zero. This button is also used to toggle between MPH and km/h. NOTE: Depress and hold the Adjust / Set Button (1) and the Mode Button (2) simultaneously for three seconds to activate the gauge setting functions. -
Page 44: Fuel Tank Cap
CELP Indicator (7) - If flashing, it indicates that a fault has been detected in the EFI or electrical system. Requires immediate inspection by an authorized ARGO dealer. NOTE: The CELP indicator illuminates momentarily when the ATV is turned “ON”... -
Page 45: Seat Installation
CAUTION Always replace a failed fuse with a fuse of the same type and rating. If the new fuse fails after a short period of use, consult an authorized ARGO dealer immediately. Electrical Output Terminals The accessory plug is located on the front body panel. -
Page 46: Storage Compartment
Control Functions To use the accessory socket: 1. Turn the ignition switch to the “ON” position, then start the engine. 2. Turn the headlights “OFF”. 3. Open the accessory socket cap and then insert the accessory plug into the socket. Be sure the engine is running and the headlights are turned off before using the accessory socket, otherwise you may drain the battery. -
Page 48: Section 5 - Getting To Know Your Atv
SECTION 5 Getting to Know Your ATV Getting To Know Your ATV This ATV is for recreation use. This section, riding your ATV, provides general ATV riding instructions for recreational riding. The skills and techniques described in this section, however, are appropriate for all types of riding. Riding your ATV requires special skills acquired through practice over a period of time. -
Page 49: Weight Limits
Accessories Genuine ARGO accessories have been specifically designed for and tested on this vehicle. Because ARGO cannot test all other accessories, you are personally responsible for properly selecting, installing, and using non- ARGO accessories. 1. Carefully inspect the accessory to make sure it does not block any lights, reduce ground clearance, or limit suspension travel, steering travel, or other controls. -
Page 50: Terrain
Getting To Know Your ATV Terrain Always pay close attention to the terrain you’re on, even if it is in an area familiar to you. Do not assume that the landscape you’re used to doesn’t change. Changes to landscape can happen at any time; fences can be constructed and excavations dug in a short period of time. -
Page 51: Turning Your Atv
Getting To Know Your ATV Turning Your ATV WARNING Always follow proper procedures for turning as described in this Owner’s Manual. Practice turning at low speeds before attempting to turn at faster speeds. Do not turn at speeds too fast for your skills or the conditions. ATV could go out of control causing a collision or overturn. -
Page 52: Sharp Turns
Getting To Know Your ATV Sharp Turns After mastering wide turns, practice the advanced skill of sharp turns. Use this riding method for sharp turns: 1. Ease off the throttle as you approach the turn to slow down. 2. Use the principles of leaning, weight shifting, and balancing: shift your body weight to the inside of the turn. -
Page 53: K-Turns
Getting To Know Your ATV K-Turns Use the K-turn maneuver if you accidentally stall your ATV while riding uphill. Use a K-turn will enable you to point the ATV downhill in a controlled manner and prevent the ATV from rolling back. Use this turning method for K-turns: 1. -
Page 54: Climbing Uphill
Getting To Know Your ATV Climbing Uphill WARNING Climbing hills improperly can cause overturns or loss of control. Use proper riding techniques described in this Owner’s Manual. Approximately 20% of ATV accidents that happen while riding on hills and as a result of the ATV rolling or flipping over. -
Page 55: Riding Downhill
Getting To Know Your ATV Riding Down Hill WARNING Going down a hill improperly could cause overturns or loss of control. Always follow proper procedures for going down hills as described in this Owner’s Manual. Success in riding downhill depends on how familiar and skilled you are with using your brakes. -
Page 56: Swerving
Getting To Know Your ATV Swerving Swerving is an emergency maneuver required to avoid an obstacle, but is similar to a quick turn. Swerving differs as a quick turn involves slight acceleration during the turn. Do not accelerate if you swerve to maintain better control of your ATV. If you are in a situation where you feel you must swerve, use this riding method: 1. -
Page 57: Crossing Through Shallow Water
Getting To Know Your ATV To clear a single-track (only one tire contacts the obstacle) hazards, follow the same guidelines, except: 1. Use the ATVs momentum to clear the obstacle. 2. Do not pull up on the handlebar. 3. Do not apply any throttle. Crossing Through Shallow Water WARNING Operating this vehicle through deep or fast flowing water can lead to loss of control... -
Page 58: Sliding Or Skidding
Getting To Know Your ATV Sliding and Skidding WARNING Skidding or sliding improperly may cause you to lose control of this ATV. You may also regain traction unexpectedly, which may cause the ATV to overturn. Care should be used when riding on loose or slippery surfaces since the ATV may slide. -
Page 59: Braking
Getting To Know Your ATV 3. If the brakes are frozen, move the ATV to a warm location to thaw out the brakes. WARNING For your personal safety, do not attempt to free frozen brakes by pouring warm water on the brakes. NOTE: After the brakes have thawed, dry them by compressing the brake lever several times while riding slowly. -
Page 60: Parking
Getting To Know Your ATV Parking Parking requires following the previous rules of braking; then: 1. When the ATV comes to a complete stop, shift ATV into the neutral “N” position. 2. Stop the engine using the engine stop switch located on the handlebar. 3. -
Page 61: Stopping The Engine
WARNING Never use the cargo racks as a towing or trailering point. Your ARGO ATV is equipped with a frame-mounted receiver for a standard 2 inch (5.1 cm) receiver hitch. A standard receiver hitch must be purchased separately. When loading a trailer properly, two items are critical. -
Page 62: Transporting Your Atv
Getting To Know Your ATV Transporting Your ATV When transporting your ATV, ARGO recommends to set the ATV in its normal operating position (level, on all four wheels) and use the following procedure: 1. Engage the parking brake and place the transmission in forward gear. -
Page 63: What To Do If
Getting To Know Your ATV WHAT TO DO IF This section is designed to be a reference guide only. Be sure to read each section on riding techniques completely. WHAT TO DO..If your ATV doesn't turn when you want it to: Bring the ATV to a stop and practice the turning maneuvers again. -
Page 64: Section 6 - Before You Ride Engine Break-In
ATV to arrange for and pay for this initial service. Because of the technical ability and resources available at an authorized ARGO dealer, it is best to take your ATV to the dealer for service rather than attempting to perform this initial service yourself. -
Page 65: Pre-Operation Check Table
Operation - Before You Ride Before operating this ATV, check the following points: ITEM ROUTINE • Check fuel level in fuel tank and add recommended fuel if Fuel necessary. • Check fuel line for leakage. Correct if necessary. • Check oil level in engine and add recommended oil to Engine Oil specified level if necessary. -
Page 66: Front And Rear Brakes
Always check the brakes at the start of every ride. Do not ride the ATV if you find any problem with the brakes. If a problem cannot be corrected by the adjustment procedures provided in this manual, have the ATV inspected by an authorized ARGO dealer. Fuel Fill the fuel tank when necessary and make sure there is sufficient gasoline in the tank. -
Page 67: Engine Coolant Reservoir
3. If the coolant level is low, remove the cap from the reserve tank and add coolant or distilled water through the filler opening to the “F” (Full) mark. Install the cap. NOTE: If water is added, have an authorized ARGO dealer check the antifreeze content of the coolant as soon as possible. -
Page 68: Engine Oil
SAE 5W-30. Ambient temperature should determine the correct weight of oil. See the viscosity chart or consult an authorized ARGO dealer for guidance. CAUTION Be sure to use motor oils that do not contain anti-friction modifiers. Passenger car motor oils (often labeled “Energy Conserving”) contain anti-friction additives which will cause starter clutch slipping, resulting in reduced component life and poor engine performance. -
Page 69: Front Differential / Rear Drive
Fittings and Fasteners Always check chassis fittings and fasteners to ensure they are tight and secure. Take the ATV to an authorized ARGO dealer or refer to the Service Manual for correct torque specifications. Lights Check the headlight, taillight and brakelight to ensure they are in proper operating condition. -
Page 70: Tires
Operation - Before You Ride Tires 1. The tires listed below have been approved by ARGO for this model. Other tire combinations are not recommended. How to Measure Tire Pressure Use the low-pressure tire gauge found in the tool kit. -
Page 72: Section 7 - Operation
However, it is recommended to shift into “N” (Neutral) before starting the engine. If either indicator light fails to illuminate when the gear select lever is in the neutral or park position, have an ARGO dealer inspect the electrical circuit. -
Page 73: Warming Up The Engine
Operation 5. Depress the starter button. CAUTION Do not run the starter motor for more than 5 (five) seconds per starting attempt as the starter motor may overheat causing severe damage. Allow 10 (ten) seconds between starting attempts to allow the starter motor to cool. Pay attention not to discharge the battery. -
Page 74: Transmission Ranges
Operation WARNING Use only ARGO approved brake fluid. Never substitute or mix different types or grades of brake fluid, as unexpected loss of braking ability can result. Check the ATVs brake fluid level and pad wear before each use. The loss of braking ability can result in severe injury or even death. -
Page 75: Parking
Operation Parking Parking requires following the previous rules of braking; then: 1. When the ATV comes to a complete stop, shift ATV into the neutral “N” position. 2. Stop the engine using the emergency stop switch located on the handlebar. 3. -
Page 76: General Maintenance
You may choose any qualified repair shop or person to maintain, replace, or repair emission control devices and systems with original or equivalent replacement parts. However, warranty, recall and all other services paid for by ARGO must be performed at an authorized ARGO service center which will complete repairs in a reasonable amount of time. -
Page 77: Maintenance Schedule
Maintenance Schedule Initial Every Every Item 100 miles/150 Km 600 miles/1000 Km 1200 miles/2000 Km 1 month 6 months 12 months Engine oil *Oil strainer Engine oil filter Rear gear oil Front differential gear oil Air filter element (for engine and *V-belt compartment) *Throttle body *Cylinder head cover breather... -
Page 78: Radiator
General Maintenance Radiator The radiator area requires to be checked periodically for debris. Inspect the radiator fins, they must be clean, free of mud, dirt, leaves and any other debris that would prevent the radiator to cool properly. Remove as much of the debris as possible with your hands. -
Page 79: Engine Oil - Inspection
General Maintenance General Lubrication Cables Under normal use, the cables do not require lubrication. However, it is advisable to lubricate the ends of the cables periodically with a quality cable lubricant. Engine Oil Level Inspection NOTE: The ATV should be parked on level Oil Level Stick ground, with the engine key switch in the “OFF”... - Page 80 General Maintenance Oil Level Stick Drain Plug Bottom of ATV 2. Warm up the engine for several minutes and stop the engine. 3. Place a suitable drain pan under the ATV. 4. Remove the drain plug from the bottom of the engine and drain the oil into the drain pan.
-
Page 81: Front Gear Case Oil Inspection
4. Place the drain pan under the rear drive drain plug (2) and drain the fluid into the pan. CAUTION Inspect the oil for any signs of metal filings or water. If either are present, take your ATV to an authorized ARGO dealer for service. -
Page 82: Brake Hoses
7. Reinstall the fluid filler plug and level plugs. Tighten securely. Brake Hoses Carefully inspect the hydraulic hoses for cracks or other visible damage. If damage is found, take the ATV to an authorized ARGO dealer for service. Hydraulic Brakes WARNING Be sure to inspect the hydraulic brake system before every use. -
Page 83: Brake Fluid
1. Squeeze the brake lever two or three times. (Front and rear brakes). 2. Compress and hold the brake lever. 3. Attempt to push the ATV forward and backward. NOTE: The parking brake lock must lock the wheels. If not, take your ATV to an authorized ARGO dealer for service. -
Page 84: Rear Foot Brake
6. Measure the thickness of each brake pad. If the thickness of the pads are less than 0.039 in (1 mm), take your ATV to an authorized ARGO dealer to have the brake pads replaced. 7. Install the wheel and install wheel nuts. -
Page 85: Protective Rubber Boots
8. If boot damage is noted or ball joint free-play seems excessive, contact an authorized ARGO dealer for service. 9. Install the wheel and reinstall the wheel nuts. 10. Tighten the wheel nuts in a criss-cross pattern to 40 ft lb (54 N-m). -
Page 86: Drive Axle Boots
10. Tighten the wheel nuts in a criss-cross pattern to 40 ft lb (54 N-m). 11. Remove the support stand and jack. Drive Axle Boots 1. Inspect all drive axle boots for cracks, tears, perforations, or any other visible damage. 2. If boot damage is noted, contact an authorized ARGO dealer for service. -
Page 87: Wheel Removal
General Maintenance Wheel Removal 1. Park the ATV on level ground and engage the parking brake lock. 2. Loosen the wheel nuts on the wheel to be removed. Do not remove the wheel nuts from the wheel studs. 3. Using a suitable jack, elevate the ATV. Support the ATV on a support stand. WARNING Ensure the ATV is safely supported on the stand to avoid injury. -
Page 88: Battery
NOTE: You can perform your own battery maintenance if you are qualified to do so. If you do not feel qualified, take your ATV to an authorized ARGO dealer for battery service. As with all other periodic maintenance, you are responsible for any charges associated with these services. - Page 89 General Maintenance WARNING Any time service is performed on a battery, the following must be observed: keep sparks, open flame, cigarettes, or any other flame away. Always wear safety glasses. Protect skin and clothing when handling a battery. When servicing a battery in an enclosed space, keep the area well-ventilated.
-
Page 90: Charging / Maintenenace Charging
ARGO dealer for further troubleshooting. Jump-Starting NOTE: ARGO does not recommend jump-starting a vehicle with a dead battery but rather to remove the battery, service it, and correctly charge it. WARNING Improper handling or connecting of a battery may result in severe injury including acid burns, electrical burns, or blindness as a result of an explosion. -
Page 91: Spark Plug
Consult an authorized ARGO dealer if the plug insulator is not a light brown color. To help prevent cold weather fouling (a buildup of carbon and unburned fuel on the spark plug) make sure you thoroughly warm up your ATVs engine before riding. -
Page 92: Air Filter
General Maintenance Air Filter The air filter inside the air filter housing must be kept clean to provide good engine power, gas economy and to prevent premature engine wear. If you use your ATV under normal conditions, service the filter at the intervals specified. If you ride it in dusty, wet, or muddy conditions, inspect and service the filter more frequently. -
Page 93: Air Filter Housing Drain
General Maintenance CAUTION A torn air filter can cause damage to your ATVs engine. Dirt or dust may get inside the engine if the air filter is torn. Carefully inspect the air filter for tears before and after cleaning it. Replace the air filter with a new one if it is torn or damaged in any way. -
Page 94: Tires
General Maintenance Tires WARNING Always use the size and type of tires specified for your ARGO ATV. Refer to the specifications chart in this manual for tire-related information and always maintain proper tire inflation pressure. Tire Replacement This ATV has low-pressure tubeless tires. Air is sealed by the contact surfaces of the inner rim and the tire bead. -
Page 95: Muffler / Spark Arrester
General Maintenance Muffler / Spark Arrester The muffler on this ATV is equipped with a spark arrester which must be periodically cleaned. Refer to the intervals listed in the Maintenance Schedule and clean the spark arrester using the procedure listed below. WARNING Before service, wait for the muffler to properly cool to avoid possible burns. -
Page 96: Headlight
General Maintenance Headlight NOTE: The LED headlights are fragile and must be replaced as an assembly. HANDLE WITH CARE. To replace the headlight, use the following procedure: 1. Ensure the ignition switch is in the “OFF” position. 2. Disconnect the wiring connector from the back of the headlight. -
Page 97: Taillight / Brakelight
General Maintenance Taillight / Brakelight To replace the taillight / brakelight bulb, use the following procedure: 1. Ensure the key switch is in the “OFF” position. 2. Rotate the socket counter-clockwise to remove the assembly from the housing. 3. To remove the bulb from the socket, gently push in and rotate the bulb counter-clockwise. -
Page 98: Headlight Aim Adjuster
CAUTION Always replace a failed fuse with a fuse of the same type and rating. If the new fuse fails after a short period of use, consult an authorized ARGO dealer immediately. WARNING POTENTIAL HAZARD Using an improper fuse. -
Page 99: Noise Regulation
General Maintenance NOISE REGULATION TAMPERING WITH NOISE CONTROL SYSTEM PROHIBITED: Federal law prohibits the following acts or the causing thereof: (1) The removal or rendering inoperative by any person other than for purposes of maintenance, repair, or replacement of any device or element of design incorporated into any new vehicle for the purpose of noise control prior to its sale or delivery to the ultimate purchaser or while it is in use or (2) the use of the vehicle after such device or element of design has been removed or rendered inoperative by any person. -
Page 100: Troubleshooting
Troubleshooting Engine doesn’t turn over Possible Cause Solution Failed fuse Replace the fuse Low battery voltage Recharge battery to 12.5 VDC Loose battery connections Check all connections and ignition Loose solenoid connections Check all connections and ignition Engine turns over but fails to start Possible Cause Solution Out of fuel... - Page 101 Troubleshooting Possible Cause Solution Possible lean mixture fuel cause Low or contaminated fuel Add or change fuel, clean fuel system Low octane fuel Replace with recommended fuel Possible rich mixture fuel cause Fuel is very high octane Replace with lower octane fuel Engine stops or loses power Possible Cause Solution...
-
Page 102: Section 9 - Preparation For Storage
SECTION 9 Preparation For Storage CAUTION Prior to storing your ATV, it must be properly serviced to prevent rusting and component deterioration. Cleaning the Vehicle Frequent, thorough cleaning of your ATV will not only enhance its appearance but will improve its general performance and extend the useful life of many components. 1. - Page 103 Storage Short Term Always store your ATV in a cool, dry place and if necessary, protect it against dust with a porous cover. WARNING Storing the ATV in a poorly ventilated room or covering it with a tarp while it is still wet, will allow water and humidity to seep in and cause rust.
-
Page 104: Section 10 - Warranty
The warranty is validated upon examination of said parts by ARGO or an authorized ARGO dealer. ARGO reserves the right to inspect such parts at its factory for final determination if warranty should apply. ARGO will repair or replace, at its option (including any related labor charges), any parts that are found to be warrantable in material or workmanship. - Page 105 If a warrantable condition appears to exist, the dealer will repair or replace, at ARGO’s option, including any related labor costs, all parts that are found to be warrantable and any other parts which the warrantable part caused to be damaged.
-
Page 106: Emissions Warranty
EPA EMISSIONS CONTROL SYSTEM WARRANTY: LIMITED WARRANTIES EMISSION CONTROL SYSTEMS: ARGO warrants to the owner of any 2024 and subsequent model year ATV that the ATV is designed, built and equipped to conform at the time of sale with all applicable... - Page 107 Emissions Warranty Coverage: This warranty begins on the date the ATV is delivered to the first purchaser, or the date it is first used as a demonstrator, lease, or company ATV, whichever comes first and continues for the time and mileage listed below: Time: 30 months OR Mileage: 5,000 kilometers (3,100 miles) whichever comes first.
-
Page 108: Maintenance Record
Maintenance Record...
Need help?
Do you have a question about the Xplorer XR 500 2024 and is the answer not in the manual?
Questions and answers