
Related Manuals for Argo Explorer XRT 1000 LE


Summary of Contents for Argo Explorer XRT 1000 LE
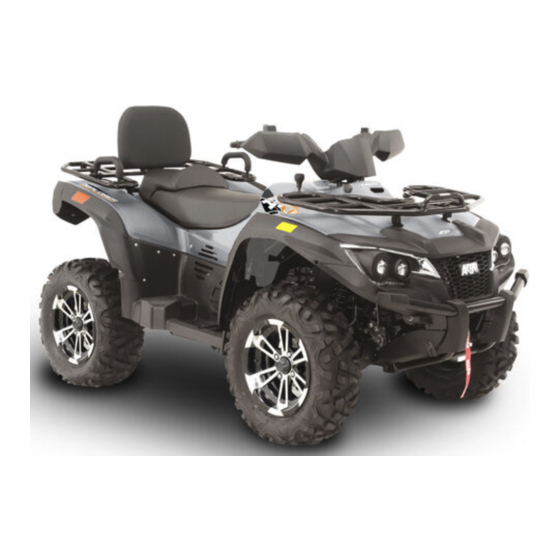
- Page 1 OWNER’S MANUAL XRT 1000 LE READ THIS MANUAL CAREFULLY! It contains important safety information. This vehicle should not be operated by those under 16 years of age.
- Page 2 Dear customer: Our ATV is manufactured under a strict quality control system. Separate documents supplied to the dealer provide information on Product Warranty and Emissions Warranty. Failure to follow instructions for emission parts replacement may violate U.S. Federal Law (40 CFR part 1068.105 (b)) and be subject to fines and other penalties as described in the Clean Air Act.
- Page 3 The manufacturer DISCLAIMS LIABILITY FOR ERRORS IN THIS MANUAL, and SPECIFICALLY DISCLAIMS LIABILITY FOR INCIDENTAL AND CONSEQUENTIAL DAMAGES resulting from the use of the information and material in this manual. NAME: ADDRESS: TELEPHONE: PURCHASE DATE: mm/dd/yyyy ATV MODEL: FRAME NO. ENGINE NUMBER: KEY NUMBER:...
-
Page 4: Introduction
INTRODUCTION Read this manual carefully before operating this vehicle. This manual should stay with vehicle if it is sold. This manual will provide you with a good basic understanding of the features and operation of this ATV. This manual includes important safety information. It provides information about special techniques and skills necessary to ride the ATV. -
Page 5: Table Of Contents
CONTENTS INTRODUCTION ................................. 4 CONTENTS ................................. 5 SPECIFICATIONS ................................ 6 LOCATION OF THE WARNING AND SPECIFICATION LABELS ..................9 SAFETY INFORMATION ............................13 PRE-OPERATION CHECKS ............................17 USER CONTROLS LAYOUT ............................20 INTRUMENT AND CONTROL FUNCTION ......................20 IGNITION SWITCH FUNCTION / POSITION ....................20 SIGNS AND FUNCTIONS ........................... -
Page 6: Specifications
SPECIFICATIONS Xplorer XRT 1000 Xplorer XRT 1000 (no EPS) Overall Length 2330/91.7 [mm/inch] Overall Width 1200/47.2 [mm/inch] Overall Height 1290/50.8 [mm/inch] Wheel Base 1445/56.9 [mm/inch] Type 4-Stroke Engine, V-Twin Installation and arrangement Vertical, below center, incline Fuel Used 87 Octane Cycle/Cooling 4-stroke/Water cooled Bore... - Page 7 Fuel capacity 23 / 6.1 [l/gal] Lubrication System Forced circulation & splashing Engine oil SAE 10 W/ 40 Engine oil Capacity 2.3 / 0.6 [l/gal] Spec. SAE 85W/140 [ml/gal] Transmission 900 / 0.23 Gear lubrication 0.23 Front Diff. 350 / 0.09 [ml/gal] 0.09 Rear Diff.
- Page 8 IMPORTANT IDENTIFICATION NUMBERS 1. Frame Number: Record chassis and engine number for future reference. Number is located front right hand side of chassis as shown in (1). 2. Engine number is located front of the engine as shown in (2). TST*000001*...
-
Page 9: Location Of The Warning And Specification Labels
LOCATION OF THE WARNING AND SPECIFICATION LABELS... - Page 10 17 18 Read and understand all of the labels on your ATV. These labels contain important information for safe and proper operation. Never remove any labels from your ATV. If a label becomes difficult to read or comes off, request a replacement label from your dealer.
-
Page 13: Safety Information
SAFETY INFORMATION AN ATV IS NOT A TOY AND CAN BE HAZARDOUS TO OPERATE An ATV handles differently from other vehicles, including motorcycles and cars. A collision or rollover can occur quickly, even during routine maneuvers such as turning and riding on hills or over obstacles, if you fail to take proper precautions. - Page 14 low speeds before attempting to turn at faster speeds and never turns at excessive speeds. ◆ Never operate the ATV on hills too steep for the ATV or for your abilities. Practice on smaller hills before attempting larger hills. ◆ Always follow proper procedures for climbing hills as described in this manual. Check the terrain carefully before you start up any hill.
- Page 15 WARNING! All engine exhaust contains carbon monoxide, a deadly gas. Carbon Monoxide is a colorless, odorless, tasteless gas, which may be present even if you do not see or smell any engine exhaust. Avoid Carbon Monoxide Poisoning. Do not run engine indoors. Even if you try to ventilate engine exhaust with fans or open windows and doors, carbon monoxide can rapidly reach dangerous levels.
- Page 16 GREASE POINT...
-
Page 17: Pre-Operation Checks
PRE-OPERATION CHECKS Inspect your vehicle each time you use it to make sure the vehicle is in safe operating condition. Always follow the inspection and maintenance procedures and schedules described in Owner’s Manual. WARNING! Failures to inspect or maintain the vehicle properly increase the possibility of accident or equipment damage. - Page 18 Make sure that operation is smooth. Lubricate pedal pivoting Brake pedal point if necessary. Make sure that operation is smooth. Lubricate lever pivoting Brake levers point if necessary. Check for cracks or damage and replace if necessary. Axle boots ...
- Page 19 Parking on a slope WARNING! Avoid parking on hills or other inclines. Parking on a hill or other incline could cause the ATV to roll out of control, increasing the chance of an accident. If you must park on an incline, place the ATV transversely across the incline, stop the engine, pull the parking brake lever to the parking position, and then block the front and rear wheels with rocks or other objects.
-
Page 20: User Controls Layout
USER CONTROLS LAYOUT 1. Winch Switch (Optional) 7. Speedometer 2. Stop Switch 8. 2D/4D/LOCK Switch 3. Head Lamp Switch 9. Throttle 4. Hand brake Lever 10. L/H/N/R/P Lever 5. Starter Switch 11. Ignition Switch 6. Over Ride INTRUMENT AND CONTROL FUNCTION 1. -
Page 21: Four-Wheel Brake Lever And Brake Pedal
OVERRIDE 3. FOUR-WHEEL BRAKE LEVER AND BRAKE PEDAL The brake lever is located on the left handlebar and the brake pedal is located on the right side of the ATV. To apply the brake, pull the brake lever toward the handlebar grip or push down on the brake pedal. -
Page 22: Shift Lever
NOTES: The brake fluid level must be above the MIN mark. If the level keeps going down, have an authorized dealer check it. Always DOT #4 brake fluid. 4. SHIFT LEVER L: High torque use (advance gear) H: Normal use (driving gear) N: Neutral R: Reverse use P: Parking use... -
Page 23: Drive Mode Select
5. DRIVE MODE SELECT This ATV equipped with four kinds of drive modes with either front or rear differential functions. You can choose a different mode on the type of terrain. The model is equipped with both front and rear differential function. 2WD/4WD/LOCK SELECT BUTTON The 2WD/4WD/LOCK SELECT BUTTON is for the use of changing the engine power engages on the wheels. - Page 24 rear wheel drive with rear lock function RWD: The ATV on the rear drive mode with Lock on the rear differential. Power is supplied to the rear wheels without rear differential function. This is mainly use for normal riding with front differential only.
-
Page 25: Tires
WARNING! Always ride at a slow speed when the ATV is in differential gear lock and allow extra time and distance for maneuvers. All wheels turn at the same speed when the differential gear is locked, so it takes more effort to turn the ATV. -
Page 26: Coolant
tire pressure and use the second reading. Dust or dirt in the gauge could cause the first reading to be incorrect. Tire wear limit When the tire groove decreases to 3 mm (0.12 in) due to wear, replace the tire. Tire information This ATV is equipped with tubeless tires with valves. - Page 27 The coolant should be between the minimum and maximum level marks. If the coolant is at or below the minimum level mark, remove the coolant reservoir cap, add coolant or distilled water to the maximum level mark and install the reservoir cap. CAUTION! If coolant is not available, use distilled water or soft tap water instead.
-
Page 28: Speedometer
11. Pour the recommended coolant into the radiator until it is full. Antifreeze/water mixture ratio: 1:1 Recommended antifreeze: High quality ethylene glycol antifreeze containing corrosion inhibitors for aluminum engines Coolant quantity: Radiator capacity (including all routes): 2.6 L Reservoir capacity (up to the maximum level mark): 1.1 L 12. - Page 29 Daytime running lamp / Green Drive Gear/ Green Main-Bean Headlamp/Blue Neutral Gear/ Green Engine oil indicator/Red Reverse Gear/ Red Battery charge indicator Parking Gear/ Green Engine coolant Temperature/ Red MIL / Yellow 1. Engine oil indicator (Red): if this light turns on, please check if there is enough engine oil, otherwise, please contact your local dealer for inspection.
- Page 30 SPEED: Speed Meter 1. Speed meter display is on 1 row of the screen. 2. Displays speedometer reading up to 199 Km/H or 124 MPH. MAX SPEED: Maximum Speed Meter 1. MAX is displayed on 2 row. 2. Displays highest speed achieved after last RESET operation. SPEED AVG: Average Speed Meter 1.
-
Page 31: Spark Plug
2. ODO, Clock and TT data cannot be reset. TIME FUNCTION 1. Press MODE to the TIME screen then presses MODE and SET button simultaneously for 3 seconds to set up the time. 2. When the digit is blinking, press SET button to desired digit then press MODE button to set up and jump to next digit. -
Page 32: Air Cleaner
Specified spark plug: NGK DCPR8E 3. Measure the spark plug gap with a wire thickness gauge and if necessary, adjust the gap to specification. Spark plug gap: 0.7~0.8 mm To install the spark plug 1. Clean the surface of the spark plug gasket and its mating surface and then wipe off any grime from the spark plug threads. -
Page 33: Engine Oil And Oil Filter
11. ENGINE OIL AND OIL FILTER The engine oil level should be checked before each ride. In addition, the oil must be changed and the oil filter replaced at the intervals specified in the periodic maintenance and lubrication chart. To check the engine oil level 1. -
Page 34: Transmission Gear Oil
6. Remove the three screws of oil filter cap. 7. Apply a thin coat of engine oil to the O-ring of new oil filter. 8. Install the new oil filter and tighten the screws of the cap. Tighten torque: 17.65 Nm (13.0 ft. lbs) 9. -
Page 35: Front Differential Gear Oil
3. Remove the transmission gear oil drain bolt and its washer to drain the oil from the transmission case. NOTES: Dispose of lubricant in accordance with local regulations. 4. Install the drain bolt and washer then tighten the bolt to the specified torque. Tighten torque: 32.36 Nm or 24 ft. -
Page 36: Rear Differential Gear Oil
case to collect the used oil. 3. Remove the differential gear oil filler bolt, the differential gear oil drain bolt and their gasket to drain the oil from the differential gear case. NOTES: Dispose of lubricant in accordance with local regulations. 4. -
Page 37: Seat
NOTES: Dispose of lubricant in accordance with local regulations. 4. Install the drain bolt and its new gasket and then Drain Bolt tighten the bolt to the specified torque. Tighten torque: 32.36 Nm or 24 ft. lb 5. Refill with the recommended final gear oil to the brim of the filler hole as shown. -
Page 38: Fuses And Battery Battery
A drain plug is fitted at the bottom of the front storage compartment. If any water collects in a storage compartment, remove the drain plug and drain the water then install them. Drain plug 18. FUSES AND BATTERY BATTERY The battery is located under the seat. This model is equipped with a maintenance free battery. There is no need to check the electrolyte or to add distilled water. - Page 39 CAUTION! To charge free maintenance battery, a special (constant voltage) battery charger is required. Using a conventional battery charger will damage the battery. To store battery 1. If the ATV will not be used for more than one month, remove the battery, fully charge it and then place it in a cool dry place.
-
Page 40: Replacing A Headlight Bulb
Replacing a fuse The main fuse box and the EPS fuse box are located under the seat. If a fuse is blown, replace it as follows. 1. Turn the key to “OFF” and turn off all electrical circuits. CAUTION! To prevent accident short-circuiting; turn off the main switch when checking or replacing fuse. -
Page 41: Replacing The Tail/Brake Light Bulb
3. Removing the headlight bulb holder by pushing it in and turning it counterclockwise. 4. Remove the burnt out bulb by pulling it out. 5. Insert a new headlight bulb into the bulb holder by pushing it in. CAUTION! Do not touch the glass part of the headlight bulb to keep it free from oil, otherwise the transparency of the glass;... -
Page 42: Precaution Of Atv Riding
4. Open the auxiliary DC jack cap and then insert the accessory power plug into the jack. 5. Turn the accessory on. 6. When the auxiliary DC jack is not being used, cover it with the cap. CAUTION! Do not use accessories requiring more than 5 A. This may overload the current and cause the fuse to blow. - Page 43 attempting more difficult maneuvers. Become familiar with this ATV at slow speeds first, even if you are an experienced operator. Not recommended for children under 16 years of age. WARNING! A child under 16 should never operate an ATV with engine size greater than 90 cc. ATV use by children is not recommended, their age can lead to severe injury or death.
- Page 44 WARNING! Operating without eye protection can result in an accident and increases your chances of a severe injury in the event of an accident. Do not operate after or while consuming alcohol or drugs. The operator’s performance capability is reduced by the influence of alcohol or drugs. Consuming alcohol or drugs could seriously affect your judgment, cause you to react more slowly and affect your balance and perception.
- Page 45 Take extra precautions when driving with a load or trailer. Follow these instructions and always use common sense and good judgment when carrying cargo or towing a trailer. MAXIMUM LOADING LIMIT Front carrier: 30 kg (66 lb) Rear carrier: 50kg (110 lb) Trailer max weight: 200 kg (440 lb)on level ground Drive more slowly than you would without a load.
- Page 46 let brush, grass and other materials collect under the vehicle, near the muffler or exhaust pipe or next to other hot parts. Check under the vehicle after operating in areas where combustible materials may have collected. Do not idle or park the vehicle in long dry grass or other dry ground cover.
- Page 47 WARNING! The ATV could go out of control if you do not have enough time to react to hidden rocks, bumps or holes. Go slowly and be extra careful when operating on unfamiliar terrain. Always be alert to changing terrain conditions when operating the ATV. Do not operate on rough, slippery or loose terrain until you have learned and practiced the skills necessary to control the ATV on such terrain.
- Page 48 TURNING YOUR ATV WARNING! Always follow proper procedures for turning as described in this Owner’s Manual. Practice turning at low speeds before attempting to turn at faster speeds. Do not turn at speeds too faster your skills or the conditions. ATV could go out of control causing a collision or overturn.
- Page 49 Remember: Avoid higher speeds until you are thoroughly familiar with the operation of your ATV. CLIMBING UPHILL CAUTION! Climbing hills improperly can cause overturns or loss of control. Use proper riding techniques described in this Owner’s Manual. Never operate the ATV on hills too steep for the ATV or for your abilities. The ATV can overturn more easily on extremely steep hills than on level surfaces or small hills.
- Page 50 make sure you do not lift the front wheels which could cause you to lose control. If you are unable to continue up the hill, dismount the ATV on the uphill side. Physically turn the ATV around and then descend the hill. If you start to roll backwards, DO NOT apply either brake abruptly.
- Page 51 When this ATV is in “4WD”, all wheels are interconnected by drive train. This means that applying either the front brake or the rear brake will brake all wheels. When descending hills, using either brake lever or the brake pedal will brake the wheels on the downhill side. Avoid sudden application of either the front or rear brake because the wheels on the uphill side could come off the ground.
- Page 52 The ATV can be used to cross slow moving, shallow water of up to maximum of 35 cm (14 in) in depth. Before entering the water, choose your path carefully. Enter where there is no sharp drop off, and avoid rocks or other obstacles, which may be slippery or upset the ATV. Drive slowly and carefully.
- Page 53 weight over the front wheels will sometimes help. If the rear wheels of your ATV start to slide sideways, control can usually be regained by steering in direction of the slide. Applying the brakes or accelerating is not recommended until you have corrected the slide.
-
Page 54: Periodic Maintenance
PERIODIC MAINTENANCE Periodic inspection, adjustment and lubrication will keep your vehicle in the safest and most efficient condition possible. Safety is an obligation of the vehicle owner/operator. WARNING! Failure to properly maintain the vehicle or performing maintenance activities incorrectly may increase your risk of injury or death during service or while using the vehicle. If you are not familiar with vehicle service, have a dealer perform the service. - Page 55 Change Front Differential Check ATV for oil leakage and correct if gear oil Replace every 4 years necessary Change Rear Differential Check ATV for oil leakage and correct if gear oil Replace every 4 years necessary ...
-
Page 56: Cleaning And Storage
Have your ATV serviced and checked by an authorized dealer. Ensure the service book is stamped and signed. Failure to do so could invalidate your warranty. The maintenance schedule is based on months of use or kilometers traveled. Do the scheduled maintenance based on whichever comes first. - Page 57 Rinse the ATV off immediately with clean water and dry all surfaces with a chamois, clean towel or soft absorbing cloth. Clean the seat with vinyl upholstery cleaner to keep the cover pliable and glossy. Automotive type wax may be applied to all painted and chrome plated surfaces. Avoid combination cleaner-waxes.
-
Page 58: Trouble Shooting
TROUBLE SHOOTING Contact your dealer for service if you're unable to identify solutions using the following charts. Engine doesn’t turn over Possible cause Solution Tripped circuit breaker Reset the breaker Low battery voltage Recharge battery to 12.5 VDC Loose battery connections Check all connections and ignition Loose solenoid connections Check all connections and ignition... - Page 59 Loose ignition connections Check all connections and tighten Water present in fuel Replace with new fuel Low battery voltage Recharge battery to 12.5 VDC Kinked or plugged fuel vent line Inspect and replace Incorrect fuel Replace with recommended fuel Clogged air filter Inspect and clean or replace Reverse speed limiter malfunction See your dealer...
- Page 60 MAINTENANCE RECORD P.D.I. 1st Service Date: Date: Odometer reading: Odometer reading: Dealer stamp: Dealer stamp: 2nd Service 3rd Service Date: Date: Odometer reading: Odometer reading: Dealer stamp: Dealer stamp: 4th Service 5th Service Date: Date: Odometer reading: Odometer reading: Dealer stamp: Dealer stamp: 6th Service 7th Service...
- Page 61 8th Service 9th Service Date: Date: Odometer reading: Odometer reading: Dealer stamp: Dealer stamp: 10th Service 11th Service Date: Date: Odometer reading: Odometer reading: Dealer stamp: Dealer stamp: 12th Service 13th Service Date: Date: Odometer reading: Odometer reading: Dealer stamp: Dealer stamp: 14th Service 15th Service...
-
Page 62: Consumer Information
CONSUMER INFORMATION IDENTIFICATION NUMBER Record the key identification number, vehicle identification number and model label information in the spaces provided below for assistance when ordering spare parts from your dealer or for reference in case the ATV is stolen. KEY IDENTIFICATION NUMBER: VEHICLE IDENTIFICATION (FRAME) NUMBER: KEY IDENTIFICATION NUMBER The key identification number is stamped into the key. -
Page 63: Limited Warranty
• The ARGO was operated in a manner inconsistent with the recommended operation described in the ARGO Operator’s Manual. • The ARGO has been altered or modified in such a way so as to affect its operation, performance or durability, or has been altered or modified to change its intended use. - Page 64 The customer must cease using the ARGO upon the appearance of an anomaly. The customer must notify an authorized ARGO dealer within three (3) days of the appearance of a defect, and provide it with reasonable access to the product and reasonable opportunity to repair it.
- Page 65 • The Argo owner will not be charged for diagnostic labor that is directly associated with diagnosis of a defective, emission-related warranted part, provided that such diagnostic work is performed at a warranty station.
- Page 66 The repair or replacement of any warranted part otherwise eligible for warranty coverage may be excluded from such warranty coverage if ARGO demonstrates that the vehicle has been abused, neglected, or improperly maintained, and that such abuse, neglect, or improper maintenance was the direct cause of the need for repair or replacement of the part.
Need help?
Do you have a question about the Explorer XRT 1000 LE and is the answer not in the manual?
Questions and answers