
Related Manuals for Candy CMWA20SDLWLI


Summary of Contents for Candy CMWA20SDLWLI
- Page 1 MICROWAVE OVEN INSTRUCTION MANUAL CMWA20SDLWLI IMPORTANT SAFETY INSTRUCTIONS READ CAREFULLY AND KEEP FOR FUTURE REFERENCE...
-
Page 2: Important Safeguards
IMPORTANT SAFEGUARDS The following basic precautions should always be followed when using electrical appliance: 1. Read all instructions before using. 2. Make sure the voltage in your living area corresponding to the one shown on the rating label of the appliance. And the wall socket is properly grounded. - Page 3 order to avoid possible hazards caused by delayed eruptive boiling of liquids. c. Potatoes, sausage and chestnut should be peeled or pierced before cooking. Eggs in their shell, whole hard -boiled eggs should not be heated in microwave ovens since they may explode, even after microwave heating has ended.
- Page 4 13. When the appliance is operated in the combination mode, children should only use the oven under adult supervision due to the temperatures generated. 14. Any accessories not recommended by the manufacturer may cause injuries to persons. 15. Do not use outdoors. 16.
- Page 5 • Farm houses; • By clients in hotels, motels and other residential environ- ments; • Bed and breakfast type environments. 25. The microwave oven is intended for heating food and beverages. Drying of food or clothing and heating of warming pads, slippers, sponges, damp cloth and similar may lead to risk of injury, ignition or fire.
-
Page 6: Installation
33. The surfaces are liable to get hot during use. : CAUTION: HOT SURFACE Household use only INSTALLATION 1. Take out all the packing. If there is a safe film over the oven, tear it off before Use. Check carefully for damage. If any, immediately notify dealer or send to the manufacturer’s service center. -
Page 7: Microwave Oven Care
ensure good ventilation. So it is strongly recommended to place a cup of water in the turntable, setting at high power and operate for several times. CLEANING MICROWAVE OVEN CARE CAUTION The oven should be cleaned regularly and any food deposits removed. -
Page 8: Tips For Cleaning
6. WARNING: Only allow children to use the oven without supervision when adequate instructions have been given so that the child is able to use the oven in a safe way and understands the hazards of improper use; TIPS FOR CLEANING Details for cleaning door seals, cavity and adjacent parts: Exterior: Wipe the enclosure with a dampened soft cloth... -
Page 9: Product Instruction
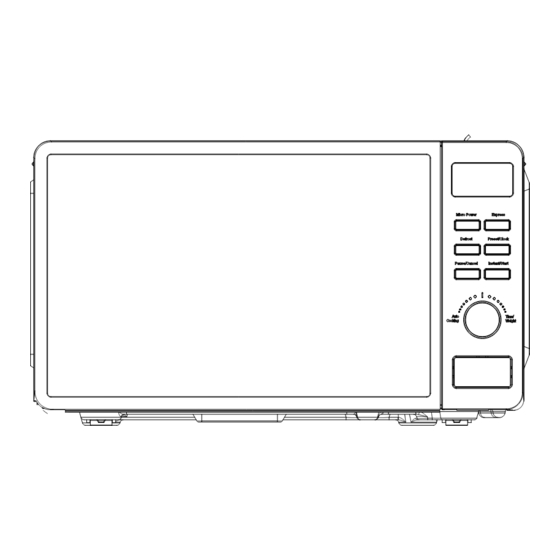
PRODUCT INSTRUCTION ⑦ ⑤ ② Waveguide cover ③ ④ ⑥ ① 1) Door lock Microwave oven door must be properly closed in order for it to operate 2) Viewing window Allow user to see the cooking status 3) Rotating axis The glass turntable sits on the axis;... -
Page 10: Operation Of Control Panel
WARNING Never remove the waveguide cover OPERATION OF CONTROL PANEL 1. BEFORE COOKING The LED flashes 3 times when plugged in power supply. Then it flashes “:”, prompting you to input the cooking menu and time. -
Page 11: Auto Reminder
2. " " You can increase or decrease cooking time, weight or select auto cooking menu during operation by turning the knob. 3. " " At the initial or input stage: press once to cancel input programs and resume initial stage. During cooking: press once to stop oven operation, press twice to cancel cooking programs. -
Page 12: Microwave Cooking
Example: to set 12:30 Steps Display After power-up, the colon flashes Press " " button once 00:00 12:00 " " Turn knob to set exact hours. Press " " button once again. 12:00 " " Turn knob to set exact minutes. 12:30 Press "... - Page 13 c. At the maximum microwave power, the oven will auto- matically lower the power after a certain time of cooking to lengthen the service life. d. If you turn the food during operation, press the " " button once and the preset cooking procedure will continue. e.
- Page 14 " " Press button consecutively to select 1:00 desired menu " " Start cooking by pressing button 9. DEFROST This function use for defrost food. Press the " " button and the LED display will cycle to show d.1-d.2-d.3. For defrosting meat, the weight range from 0.1 to 2.0 kg. For defrosting poultry, the weight range from 0.2 to 3.0kg.
-
Page 15: Auto Cooking
Press " " button to set the food kind. Turn " " knob to set the defrost weight Start cooking by pressing " " In half way during defrosting 3 beep sound will be heard two times to prompt you turn over the food. - Page 16 Heating a cup of 250 ml liquid. The Beverage liquid temperature is about 5-10℃. Use a big mouth cup and do not seal Heating a cup of 500 ml liquid. The Beverage liquid temperature is about 5-10℃. Use a big mouth cup and do not seal Cooking the potato strips, cut into 5mm width and height, length.
-
Page 17: Automatic Starting (Delayed Function)
Example: Steam 0.45kg fish Steps Display After power-up, the colon flashes Turn " " knob to set the cooking menu Start cooking by pressing " " button, and LED will count down to show running time. 11. AUTOMATIC STARTING (DELAYED FUNCTION) If you do not want the menu be started immediately, you can preset the cooking menu and time and the preset menu will be automatically started at your set time. -
Page 18: Multi-Sequence Cooking
Press " " button once or waiting for 5 12:30 seconds, and the numbers will go steady. Set the cooking menu and time Select cooking power by pressing " " 100P button 9:30 Turn " " knob to set cooking time Press and hold "... -
Page 19: Child Lock Function
Press " " button to select desired menu 9:00 Turn " " knob to set cooking time. Start cooking by pressing " " CAUTION a. When 100 microwave power cooking is finished, microwave oven will begin next operation automatically. b. Max 4 sequences can be set per time, repeat the steps 13. -
Page 20: Cooking Tips
Material of Microwave Notes container Heat-resistant Never use the ceramics which are ceramic decorated with metal rim or glazed Heat-resistant Can not be used for long time plastic microwave cooking Heat-resistant glass It should not be used when cooking meat or chops as the over- Plastic film temperature may do damage to the film... -
Page 21: Maintenance
Allow standing time After cooking times out, leave the food in the oven for an adequate length of time, this allows it to complete its cooking cycle and cooling it down in a gradual manner Whether the food is done Color and hardness of food help to determine if it is done, these include: Steam coming out from all parts of food, not just the edge... -
Page 22: Servicing Safeguards
4. Does the turntable rotate? (The turntable can rotate clockwise or counter clockwise. This is quite normal.) 5. Is the water inside the oven hot? If “NO” is the answer to any of the above questions, please check your wall socket and the fuse in your meter box. If both the wall socket and the fuse are functioning properly, CONTACT YOUR NEAREST SERVICE CENTER APPROVED. - Page 23 Correct Disposal of this product This appliance is labelled in accordance with European Directive 2012/19/EU on Waste Electrical Electronic Equipment Regulations 2013 regarding electric and electronic appliances (WEEE). The WEEE contain both polluting substances (that can have a negative effect on the environment) and base elements (that can be reused).
- Page 24 HORNO DE MICROONDAS MANUAL DE INSTRUCCIONES CMWA20SDLWLI INSTRUCCIONES DE SEGURIDAD IMPORTANTES LEER CON ATENCIÓN Y GUARDAR PARA FUTURAS CONSULTAS...
-
Page 25: Medidas De Seguridad Importantes
MEDIDAS DE SEGURIDAD IMPORTANTES Siga las siguientes precauciones básicas siempre que utilice el electrodoméstico: 1. Lea todas las instrucciones antes de usar el electrodoméstico. 2. Asegúrese de que el voltaje de su habitáculo se corresponda con el mostrado en la etiqueta de clasificación del electro- doméstico, y de que el enchufe de la pared esté... - Page 26 c. Las patatas, las salchichas y las castañas deben pelarse o perforarse antes de cocinarlas. Los huevos con cáscara y los huevos duros enteros no deben calentarse en los hornos de microondas, ya que pueden explotar, incluso después de haber terminado de calentarlos.
- Page 27 13. Cuando el horno funcione en el modo combinado, los niños solo deben usarlo bajo supervisión de un adulto debido a las temperaturas generadas. 14. Cualquier accesorio no recomendado por el fabricante puede causar lesiones. 15. No use el electrodoméstico al aire libre. 16.
- Page 28 • Pensiones y alojamientos similares. 25. El horno de microondas está diseñado para calentar alimentos y bebidas. El secado de alimentos o ropa y el calentamiento de almohadillas térmicas, pantuflas, esponjas, paños húmedos y similares pueden provocar lesiones o incendios. 26.
-
Page 29: Instalación
: PRECAUCIÓN: SUPERFICIE CALIENTE Solo uso doméstico INSTALACIÓN 1. Retire todo el embalaje. Si el horno está recubierto por una película de seguridad, retírela antes de usarlo. Compruebe cuidadosamente si hay daños. Si los hubiera, notifique inme- diatamente al distribuidor o envíe notificación al centro de servicio del fabricante. -
Page 30: Cuidado Del Horno De Microondas
buena ventilación. Por lo tanto, se recomienda encarecidamente colocar una taza de agua en el plato giratorio y poner el horno de microondas en funcionamiento a alta potencia varias veces. LIMPIEZA CUIDADO DEL HORNO DE MICROONDAS PRECAUCIÓN El horno debe limpiarse regularmente y eliminar cualquier resto de alimento. -
Page 31: Consejos Para La Limpieza
6. ADVERTENCIA: Los niños solo podrán usar el horno sin supervisión si han recibido las instrucciones adecuadas para un manejo seguro y comprenden los peligros de un uso inadecuado. CONSEJOS PARA LA LIMPIEZA Detalles para la limpieza de juntas de puerta, cavidad y piezas adyacentes: Exterior: Limpie la carcasa con un paño suave humedecido... -
Page 32: Instrucciones Del Producto
INSTRUCCIONES DEL PRODUCTO ⑦ ⑤ ② Waveguide cover ③ ④ ⑥ ① 1) Cierre de la puerta La puerta del horno de microondas debe estar bien cerrada para que el horno funcione 2) Ventana de visualización Permite al usuario ver el estado de la cocción 3) Eje de rotación La plataforma giratoria de vidrio se asienta en el eje;... -
Page 33: Funcionamiento Del Panel De Control
ADVERTENCIA Nunca retire la cubierta de la guía de ondas FUNCIONAMIENTO DEL PANEL DE CONTROL 1. ANTES DE LA COCCIÓN El LED parpadea 3 veces cuando se conecta a la alimentación eléctrica. A continuación el signo ":" parpadea para que introduzca el menú... -
Page 34: Recordatorio Automático
2. « » Puede aumentar o disminuir el tiempo de cocción y el peso, o seleccionar el menú de cocción automática durante el funcionamiento girando el mando. 3. « » En la etapa inicial o de entrada: pulse una vez para cancelar los programas de entrada y reanudar la fase inicial. -
Page 35: Cocción Por Microondas
Ejemplo: para ajustar las 12:30 Pasos Pantalla Tras el encendido, el signo ":" parpadea Pulse el botón « » una vez 00:00 Gire el mando « » para ajustar las 12:00 horas exactas. Pulse el botón « » de nuevo. 12:00 Gire el botón «... - Page 36 c. Cuando seleccione la potencia máxima de microondas, el horno reducirá automáticamente la potencia después de un cierto tiempo de cocción para prolongar su vida útil. d. Si voltea los alimentos durante el funcionamiento, pulse el botón « » una vez y el procedimiento de cocción preajustado continuará.
- Page 37 Ejemplo: Cocción con la función express durante 1 minuto Pasos Pantalla Tras el encendido, el signo ":" parpadea Pulse el botón « » consecutivamente para 1:00 seleccionar el menú deseado Comience la cocción pulsando el botón « » 9. DESCONGELACIÓN Esta función se utiliza para descongelar alimentos.
-
Page 38: Cocción Automática
Ejemplo: Para descongelar 0,4 kg de aves de corral Pasos Pantalla Tras el encendido, el signo ":" parpadea Pulse el botón « » para ajustar el tipo de alimento. Gire el mando « » para ajustar el peso a descongelar Comience la cocción pulsando «... - Page 39 Para calentar una taza de 250 ml de líquido. temperatura líquido Bebidas aproximadamente 5-10 ℃. Use un recipiente de boca grande y no lo selle Para calentar una taza de 500 ml de líquido. La temperatura del líquido es de aproxi- Bebidas madamente 5-10 ℃.
- Page 40 Ejemplo: Preparación de 0,45 kg de pescado al vapor Pasos Pantalla Tras el encendido, el signo ":" parpadea Gire el mando « » para establecer el menú de cocción Comience la cocción pulsando el botón « », y el LED iniciará la cuenta atrás para mostrar el tiempo restante.
- Page 41 Fije el menú y el tiempo de cocción Seleccione la potencia de cocción pulsando 100P el botón « » Gire el mando « » para ajustar el 9:30 tiempo de cocción Mantenga pulsado el botón « » durante 3 segundos para volver a la hora actual. Ajuste la hora a la que desee comenzar.
-
Page 42: Guía De Utensilios
Gire el mando « » para ajustar el 9:00 tiempo de cocción. Comience la cocción pulsando « » PRECAUCIÓN a. Cuando la cocción al 100 % de la potencia de microondas finalice, dará comienzo automáticamente la siguiente fase de cocción. b. -
Page 43: Consejos De Cocción
Material del Microondas Notas recipiente Cerámica Nunca utilice cerámicas decoradas con Sí cantos metálicos o vidriados resistente al calor Plástico No se puede utilizar para la cocción por Sí resistente al calor microondas prolongada Vidrio resistente Sí al calor No debe usarse cuando se cocine Película de Sí... - Page 44 Deje reposar Una vez finalizado el tiempo de cocción, deje los alimentos reposar en el horno durante un tiempo adecuado, lo que permitirá completar su ciclo de cocción y que se enfríen de forma gradual. Si los alimentos están cocinados El color y la dureza de los alimentos ayudan a determinar si están cocinados, por ejemplo: Vapor saliendo de los alimentos por todas partes, no solo por...
- Page 45 segura. La lámpara del horno debe apagarse si la puerta está cerrada correctamente. Ponga el horno a funcionar durante 1 min. 2. ¿La lámpara del horno se enciende? 3. ¿Funciona el ventilador de refrigeración? (Ponga la mano sobre las aberturas de ventilación traseras). 4.
- Page 46 Ajuste incorrecto del soporte del interruptor; La puerta, el sello de la puerta o la carcasa han sufrido daños. Eliminación correcta de este producto Este electrodoméstico está etiquetado de acuerdo con la Directiva europea 2012/19/UE sobre Residuos de electro- domésticos Eléctricos y Electrónicos 2013 sobre electrodo- mésticos eléctricos y electrónicos (RAEE).
- Page 47 FOUR À MICRO-ONDES MANUEL D’INSTRUCTIONS CMWA20SDLWLI CONSIGNES DE SÉCURITÉ IMPORTANTES LISEZ ATTENTIVEMENT ET CONSERVEZ CE MANUEL POUR POUVOIR LE CONSULTER EN CAS DE BESOIN...
-
Page 48: Consignes De Sécurité Importantes
CONSIGNES DE SÉCURITÉ IMPORTANTES Les précautions de base suivantes doivent toujours être prises lors de l’utilisation d’un appareil électrique : 1. Lisez toutes ces instructions avant d’utiliser l’appareil. 2. Assurez-vous que la tension dans votre espace de vie correspond à celle indiquée sur l’étiquette signalétique de l’appareil. Et que la prise murale est correctement mise à... - Page 49 c. Pommes de terre, saucisses et châtaignes doivent être pelées ou trouées avant la cuisson. Les œufs dans leur coquille et les œufs durs entiers ne doivent pas être chauffés dans un four à micro-ondes, car ils peuvent exploser, même après la fin du chauffage au micro-ondes.
- Page 50 14. Tout accessoire non recommandé par le fabricant peut causer des blessures aux personnes. 15. Ne pas utiliser à l’extérieur. 16. Conservez ces instructions. 17. AVERTISSEMENT : si la porte ou les joints de porte sont endommagés ou il y a un dysfonctionnement, le four ne doit pas être utilisé...
- Page 51 chiffons humides ou similaires peuvent entraîner un risque de blessure, d’ignition ou d’incendie. 26. Cet appareil peut être utilisé par des enfants à partir de 8 ans et par des personnes ayant des capacités physiques, sensorielles ou mentales réduites ou un manque d’expérience et de connaissances, s’ils sont sous surveillance ou si on leur a appris à...
- Page 52 INSTALLATION 1. Sortez tout de l’emballage. S’il y a un film de sécurité au-dessus du four, enlevez-le avant utilisation. Vérifiez soigneusement la présence de dommages. Le cas échéant, avisez immédiatement le revendeur ou envoyez-le au centre d’assistance du fabricant. 2. Les fours à micro-ondes doivent être placés dans des environne- ments secs et non corrosifs, à...
-
Page 53: Entretien Du Four À Micro-Ondes
NETTOYAGE ENTRETIEN DU FOUR À MICRO-ONDES ATTENTION Le four doit être nettoyé régulièrement et tout dépôt de nourriture doit être enlevé. AVERTISSEMENT 1. Retirez le cordon d’alimentation de la prise murale avant de le nettoyer. Ne plongez pas l’appareil dans l’eau ou dans d’autres liquides lors du nettoyage. - Page 54 Extérieur : Essuyez le boîtier à l’aide d’un chiffon doux humide Porte : À l’aide d’un chiffon doux humide, nettoyez la porte et la fenêtre Essuyez les joints de la porte et les pièces adjacentes pour éliminer tout débordement ou éclaboussure Essuyez le panneau de commande à...
- Page 55 INSTRUCTIONS SUR LE PRODUIT ⑦ ⑤ ② Waveguide cover ③ ④ ⑥ ① 1) Loquet de la porte La porte du four à micro-ondes doit être correctement fermée pour fonctionner 2) Fenêtre de visualisation Permet à l’utilisateur de voir l’état de cuisson 3) Axe de rotation Le plateau tournant en verre repose sur l’axe ;...
-
Page 56: Fonctionnement Du Panneau De Commande
AVERTISSEMENT Ne retirez jamais le couvercle du guide d’ondes FONCTIONNEMENT DU PANNEAU DE COMMANDE 1. AVANT LA CUISSON La LED clignote 3 fois lorsqu’elle est branchée sur l’alimentation. Puis « : » clignote, vous invitant à saisir le menu et le temps de cuisson. -
Page 57: Réglage De L'horloge
2. « » Vous pouvez augmenter ou diminuer le temps de cuisson, le poids ou sélectionner le menu de cuisson automatique en tournant le bouton. 3. « » Au stade initial ou en entrée : appuyez une fois pour annuler les programmes d’entrée et reprendre l’étape initiale. -
Page 58: Cuisson Aux Micro-Ondes
Exemple : pour régler 12:30 Étapes Affichage Après la mise sous tension, les deux points clignotent Appuyez une fois sur le bouton « » 00:00 « » pour régler Tournez le bouton 12:00 les heures exactes. Appuyez à nouveau sur le bouton « ». - Page 59 c. À la puissance maximale des micro-ondes, le four diminue auto- matiquement la puissance après un certain temps de cuisson pour prolonger la durée de vie. d. Si vous tournez les aliments pendant le fonctionnement, appuyez une fois sur le bouton « »...
- Page 60 « » Appuyez plusieurs fois sur le bouton 1:00 pour sélectionner le menu souhaité Commencez la cuisson en appuyant sur le « » bouton 9. DÉCONGÉLATION Cette fonction permet de décongeler des aliments. Appuyez sur le bouton « » et l’affichage à LED change pour afficher d.1-d.2-d.3.
-
Page 61: Cuisson Automatique
Appuyez sur le bouton « » pour régler le type d’aliments. Tournez le bouton « » pour régler le poids de la décongélation Commencez cuisson appuyant « » À mi-temps pendant la décongélation, 3 bips se font entendre deux fois pour vous inviter à retourner les aliments. - Page 62 Chauffer une tasse de 250 ml de liquide. La température du liquide est Boissons d’environ 5 à 10 ℃. Utilisez une grande tasse et ne l’obstruez pas Chauffer une tasse de 500 ml de liquide. La température du liquide est Boissons d’environ 5 à...
- Page 63 Exemple : cuisson à la vapeur d’un poisson de 0,45 kg Étapes Affichage Après la mise sous tension, les deux points clignotent Tournez le bouton « » pour régler le menu de cuisson Commencez la cuisson en appuyant sur le bouton «...
- Page 64 Définir le menu et l’heure de cuisson Sélectionnez la puissance de cuisson en 100P appuyant sur le bouton « » Tournez le bouton « » pour régler la 9:30 durée de cuisson. Appuyez sur le bouton « » et maintenez-le enfoncé pendant 3 secondes pour revenir à...
- Page 65 Tournez le bouton « » pour régler 9:00 la durée de cuisson. Commencez la cuisson en appuyant sur « » ATTENTION a. Lorsque la cuisson à une puissance de micro-ondes de 100 est terminée, le four à micro-ondes commence automatiquement l’opération suivante.
-
Page 66: Astuces De Cuisson
Matériau du Micro-ondes Remarques contenant Céramique N’utilisez jamais la céramique décorée résistante à la d’un rebord métallique ou émaillé chaleur Plastique Ne peut pas être utilisé lors d’une résistant à la cuisson prolongée aux micro-ondes chaleur Verre résistant à la chaleur Il ne doit pas être utilisé... -
Page 67: Entretien
Laisser un temps de repos Après la fin de la cuisson, laissez les aliments dans le four pendant une durée suffisante, pour leur permettre de terminer leur cycle de cuisson et de refroidir de manière progressive Savoir si les aliments sont prêts La couleur et la dureté... - Page 68 (Mettez votre main sur les ouvertures de ventilation à l’arrière.) 4. Le plateau tournant tourne-t-il ? (Le plateau tournant peut tourner dans le sens horaire ou antihoraire. C’est tout à fait normal.) 5. L’eau à l’intérieur du four est-elle chaude ? Si vous répondez «...
- Page 69 Mise au rebut correcte de ce produit Cet appareil est étiqueté conformément à la Directive Européenne 2012/19/UE relative aux déchets d’équipements électriques et électro- niques 2013 concernant les appareils électriques et électroniques (DEEE). Les DEEE contiennent à la fois des substances polluantes (pouvant avoir un effet négatif sur l’environnement) et des éléments de base (pouvant être réutilisés).
- Page 70 FORNO A MICROONDE MANUALE DI ISTRUZIONI CMWA20SDLWLI ISTRUZIONI IMPORTANTI PER LA SICUREZZA LEGGERE ATTENTAMENTE QUESTE ISTRUZIONI E CONSERVARLE PER FUTURI RIFERIMENTI...
-
Page 71: Avvertenze Importanti
AVVERTENZE IMPORTANTI L'uso degli elettrodomestici richiede il rispetto delle seguenti pre- cauzioni basilari: 1. Leggere tutte le istruzioni prima dell’uso. 2. Assicurarsi che la tensione della presa utilizzata corrisponda a quella fornita nell’etichetta del dispositivo. e che la presa a muro sia correttamente messa a terra. - Page 72 c. Pelare o perforare patate, salsicce e castagne prima della cottura. Non riscaldare nel microonde uova col guscio e uova sode intere perché potrebbero esplodere anche dopo la fine della cottura. d. Per evitare ustioni, mescolare e agitare il contenuto di biberon e barattoli contenenti alimenti per neonati, e controllare la tempe- ratura prima del consumo.
- Page 73 14. Eventuali accessori non raccomandati dal produttore possono causare lesioni alle persone. 15. Non utilizzare all'aperto. 16. Conservare queste istruzioni. 17. AVVERTENZA: in caso di danni allo sportello o alle guarnizioni dello sportello o se il dispositivo funziona male, utilizzare il forno solo dopo che è...
- Page 74 25. Il forno a microonde è progettato per riscaldare alimenti e bevande. L'asciugatura di alimenti o indumenti e il riscaldamento di cuscinetti scaldanti, pantofole, spugne, panni bagnati e simili può provocare lesioni o innescare incendi. 26. Questo elettrodomestico può essere utilizzato da bambini di almeno 8 anni, da persone con ridotte capacità...
-
Page 75: Installazione
INSTALLAZIONE 1. Togliere tutti i materiali di imballaggio. Se il forno è coperto da una pellicola di sicurezza, strapparla prima dell'uso. Verificare attentamente che non vi siano danni. In caso di danni, informare immediatamente il rivenditore o inviare il forno al centro di assistenza del produttore. -
Page 76: Manutenzione Del Forno A Microonde
PULIZIA MANUTENZIONE DEL FORNO A MICROONDE ATTENZIONE È indispensabile pulire regolarmente il forno e rimuovere tutti i residui di alimenti. AVVERTENZA 1. Rimuovere il cavo di alimentazione dalla presa a muro prima della pulizia. Non immergere l'elettrodomestico in acqua o altri liquidi durante la pulizia. - Page 77 SUGGERIMENTI PER LA PULIZIA Dettagli per la pulizia delle guarnizioni degli sportelli, delle cavità e delle parti adiacenti: Esterno: Pulire la struttura esterna con un panno morbido inumidito Sportello: Utilizzando un panno morbido inumidito, pulire lo sportello e la finestra Pulire le guarnizioni dello sportello e le parti adiacenti per rimuovere eventuali fuoriuscite o schizzi Pulire il pannello di controllo con un panno morbido leggermente...
- Page 78 ISTRUZIONI DEL PRODOTTO ⑦ ⑤ ② Waveguide cover ③ ④ ⑥ ① 1) Blocco sportello Lo sportello del forno a microonde deve essere chiuso corretta- mente per garantire il funzionamento 2) Finestra di visualizzazione Permette all'utente di controllare lo stato della cottura 3) Asse rotante Il piatto girevole di vetro poggia sull'asse;...
- Page 79 AVVERTENZA Non rimuovere mai la copertura della guida d'onda FUNZIONAMENTO DEL PANNELLO DI CONTROLLO 1. PRIMA DELLA COTTURA Il LED lampeggia 3 volte quando è collegato all'alimentazione. Quindi lampeggia “:”, chiedendoti di inserire il menu e il tempo di cottura.
-
Page 80: Impostazione Dell'orologio
2. " " Una volta che il microonde è in funzione, è possibile aumentare o diminuire i valori relativi al tempo di cottura e al peso degli alimenti o selezionare il menu di cottura automatica ruotando la manopola. 3. " "... - Page 81 Esempio: impostare 12:30 Passaggi Display Dopo l'accensione, i due punti lampeggiano Premere il pulsante " " una volta 00:00 " " Ruotare la manopola 12:00 impostare l’ora. Premere nuovamente il pulsante " ". 12:00 " " Ruotare la manopola 12:30 impostare i minuti.
- Page 82 d. Se si gira il cibo durante il funzionamento, premere una volta il " per far sì che la procedura di cottura pulsante " preimpostata continui. e. Se si desidera rimuovere il cibo prima dello scadere del tempo preimpostato, è necessario premere una volta il pulsante "...
- Page 83 Iniziare la cottura premendo il pulsante " " 9. SCONGELAMENTO Questa funzione viene utilizzata per scongelare gli alimenti. " e il display a LED visualizzerà in Premere il pulsante " successione le opzioni d.1-d.2-d.3. Per scongelare la carne, il peso varia da 0,1 a 2,0 kg. Per scongelare il pollame, il peso varia da 0,2 a 3,0 kg.
-
Page 84: Cottura Automatica
Ruotare la manopola " " per impostare il peso dell’alimento Iniziare la cottura premendo " " Durante la fase di scongelamento, il microonde emetterà due segnali acustici per sollecitare a girare il cibo al suo interno. Aprire la porta e girare il cibo. - Page 85 Adatto per riscaldare una tazza da 500 ml. La temperatura del liquido è di Bevande circa 5-10 ℃. Utilizzare una tazza dal bordo largo e non sigillato Adatto per cuocere patate tagliate a strisce di 5 mm di larghezza, altezza e lunghezza.
- Page 86 Premere il pulsante " " per avviare la cottura; il display mostrerà il tempo rimanente alla fine della cottura. 11. AVVIAMENTO AUTOMATICO (FUNZIONE DIFFERITA) Se non si desidera che il menu venga avviato immediatamente, è possibile preimpostare il menu di cottura e l'ora affinché il menu preimpostato venga avviato automaticamente all'ora impostata.
- Page 87 Tenere premuto " " per 3 secondi per tornare all'orario attuale. Impostare l'orario di avvio desiderato. Ripetere i passaggi 1.2, 1.3, 1.4 Premere il pulsante " " per confermare la funzione di partenza differita. Il programma è stato attivato. La cottura inizierà alle 14:20. È...
-
Page 88: Guida Agli Utensili
ATTENZIONE a. Al termine della cottura a microonde a 100P, il forno avvierà automaticamente la funzione successiva. b. È possibile impostare fino a 4 sequenze alla volta ripetendo i passaggi 13. FUNZIONE SICUREZZA BAMBINI Utilizzare questa funzione per bloccare il pannello di controllo durante la pulizia o in modo che i bambini non possano attivare il forno accidentalmente. -
Page 89: Suggerimenti Per La Cottura
Materiale del Microonde Note contenitore Ceramica Non utilizzare mai contenitori in Sì resistente al ceramica decorati con bordi in metallo o calore smaltati Plastica Non può essere utilizzata per cotture in Sì resistente al microonde prolungate calore Vetro resistente Sì al calore Evitare l’uso durante la cottura di carne Pellicola di... -
Page 90: Manutenzione
A seconda del tipo di alimento, ove applicabile, mescolare dall'esterno al centro del piatto una o due volte durante la cottura Lasciare riposare gli alimenti Trascorso il tempo di cottura, lasciare gli alimenti nel forno per un tempo adeguato; ciò permette di completare il ciclo di cottura e far raffreddare gradualmente il cibo Come verificare che il cibo sia pronto Il colore e la durezza del cibo aiutano a determinare se gli alimenti... - Page 91 2. La lampada del forno si accende? 3. La ventola di raffreddamento funziona? (Mettere la mano sopra le aperture di ventilazione posteriori.) 4. Il piatto girevole ruota? (Il piatto girevole può ruotare in senso orario o antiorario. Ciò è normale.) 5.
- Page 92 Corretto smaltimento di questo prodotto Sull'elettrodomestico è riportato simbolo conformità alla Direttiva Europea 2012/19/CE in materia di smaltimento di rifiuti di apparecchiature elettriche ed elettroniche (RAEE). I rifiuti di appa- recchiature elettriche ed elettroniche contengono sostanze inquinanti per l'ambiente e componenti basilari riutilizzabili.
Need help?
Do you have a question about the CMWA20SDLWLI and is the answer not in the manual?
Questions and answers