
Subscribe to Our Youtube Channel
Related Manuals for Eaton NetDirector TRIPP LITE Series


Summary of Contents for Eaton NetDirector TRIPP LITE Series
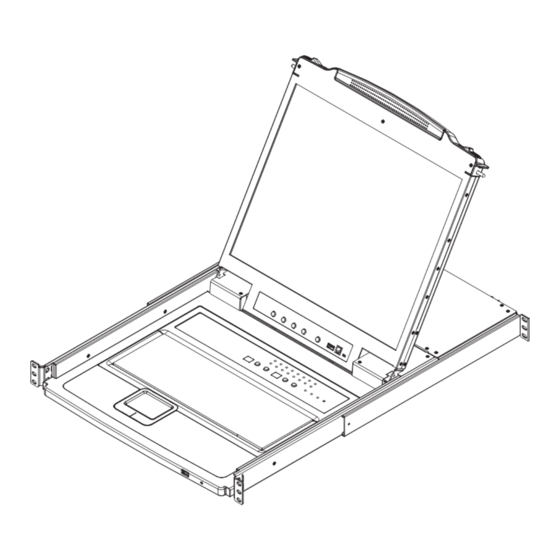
- Page 1 Owner’s Manual B020-U16-19-KG, NetDirector Console KVM Switch ® B020-U16-19-KF (16-Port) Purchased product may differ from image.
-
Page 2: Table Of Contents
Table of Contents Package Contents Hotkeys 7.1 Invoking the Hotkey Mode Features 7.2 Port ID Numbering System Requirements 7.3 Selecting the Active Port 3.1 Computer 7.4 Auto-Scanning 3.2 Console 7.5 Starting Auto-Scan 3.3 Cables 7.6 Pausing in Auto-Scan 3.4 Operating Systems 7.7 Skip Mode Introduction 7.8 Hotkey Beeper Control... -
Page 3: System Requirements
2. Features • Dual Interface supports computers with PS/2 or USB keyboards and mice. • Keyboard and mouse emulation (PS/2 and USB) allows for simultaneous booting of computers even when the console focus is elsewhere. • The B020-U16-19-KG uses a German (QWERTZ) keyboard layout and the B20-U16-19-KF uses a French (AZERTY) keyboard layout. •... -
Page 4: Introduction
4. Introduction 4.1 Front View of Console KVM Switch Handle Rackmounting Tabs Pull to slide the KVM module out; push to slide the module in The rackmounting tabs located at each corner of the unit (see item 13 in this table). secure the chassis to a system rack. -
Page 5: Rear View Of Console Kvm Switch
4. Introduction 4.2 Rear View of Console KVM Switch 1. Daisy-Chain Port 5. External Console Port When daisy-chaining units, the cable plugs in here. This port allows for the optional connection of an external keyboard, mouse and monitor. The included USB/PS2 Combo 2. -
Page 6: Rackmounting Instructions For Console Kvms
5. Installation • If the following conditions occur, unplug the device from the wall outlet and bring it to qualified service personnel for repair: o The power cord or plug has become damaged or frayed o Liquid has been spilled into the device o The device has been exposed to rain or water o The device has been dropped, or the cabinet has been damaged o The device exhibits a distinct change in performance, indicating a need for service... -
Page 7: Grounding
5. Installation 5.3 Grounding To prevent damage to your installation it is important that all devices are properly grounded. Use the included grounding wire to ground the KVM switch by connecting one end of the wire to the grounding terminal on the unit and the other end of the wire to a suitably grounded object. 5.4 Single-Station Installation 1. -
Page 8: Hot Plugging
5. Installation 5.6 Hot Plugging All KVM switches support hot plugging—components can be removed and added back into the installation by unplugging their cables from the ports without having to shut the switch down. However, in order for hot plugging to work properly, these procedures must be followed: Switching Station Positions Switch station positions by simply unplugging the daisy-chain cable from the old parent and plugging into a new one. -
Page 9: Lcd Osd (On-Screen Display) Configuration
6. Basic Operation 6.3 LCD OSD (On-Screen Display) Configuration The LCD OSD allows you to set up and configure the LCD: • To open up the LCD OSD main menu, press the button marked Menu. • Use the | and | buttons to navigate and make adjustments. After navigating Exit Menu to a setting choice, use the Menu button to bring up the adjustment screen. -
Page 10: Hotkeys
7. Hotkeys NetDirector KVM Switches can be easily operated using hotkey commands. This chapter discusses the available hotkeys and their functions. Below is a list of the various hotkeys, broken up into hotkeys for port control and hotkeys that perform other functions. Port Control Hotkeys •... -
Page 11: Auto-Scanning
7. Hotkeys 7.4 Auto-Scanning Auto-Scan allows the connected computers to be monitored automatically without having to manually toggle between ports. When in Au- to-Scan Mode, the KVM switch switches through each accessible port at fixed intervals. Only ports that the currently logged-in User has been give access to will be scanned. -
Page 12: Quick Hotkey Control
7. Hotkeys 7.10 Quick Hotkey Control The hotkey sequence to invoke Hotkey Mode can be toggled via hotkey command as well as OSD. (See page 15 for changing the Hotkey Mode invocation sequence via OSD.) To toggle the invocation sequence between [Num Lock, Minus] and [Ctrl, F12], do the following: 1. -
Page 13: Osd (On-Screen Display) Operation
8. OSD (On-Screen Display) Operation 8.1 OSD Overview The On-Screen Display (OSD) is a text-based interface that allows for control and administration of the KVM switch. When logging onto the KVM switch, the OSD Main Menu is the first screen you will see after entering your username and password. 8.2 Logging In For the First Time The KVM switch features two-level security, with one Administrator and four User accounts. -
Page 14: Osd Functions
8. OSD (On-Screen Display) Operation 8.6 OSD Functions OSD functions allow the KVM to be controlled and configured via the OSD. Using these functions you can quickly jump to a port on the installation, start an auto-scan, limit the port list that displays when you access the OSD, create/edit port names, etc. To access any of the OSD functions, simply click on their corresponding function number at the top of the OSD or hit their corresponding function number on the keyboard. - Page 15 8. OSD (On-Screen Display) Operation Setting Function SCAN/SKIP MODE Select which ports will be accessed during Auto-Scan and Skip Modes. Choices are: • ALL – All accessible ports in the installation will be accessible in Auto-Scan and Skip Modes. • POWERED ON – All ports that are accessible AND powered on will be accessible in Auto-Scan and Skip Modes. •...
- Page 16 8. OSD (On-Screen Display) Operation Setting Function CLEAR THE NAME LIST This function allows the Administrator to clear all of the port names that have been entered. As with the RESTORE DEFAULT VALUES, you will be prompted upon accessing this function. If you wish to clear the name list, type in a Y and hit the [Enter] key.
-
Page 17: Firmware Upgrade Utility
To prepare for the firmware upgrade, do the following: 1. From a computer that is not part of your KVM installation go to the support section on Tripplite.Eaton.com and choose the model name that relates to your device to get a list of available Firmware Upgrade Packages. -
Page 18: Starting The Upgrade
9. Firmware Upgrade Utility 9.2 Starting the Upgrade To upgrade your firmware: 1. Run the downloaded Firmware Upgrade Utility by double-clicking the file icon or by opening a command line and entering the full path to it. The Firmware Upgrade Utility Welcome screen appears. -
Page 19: Firmware Upgrade Recovery
9. Firmware Upgrade Utility 9.5 Firmware Upgrade Recovery A firmware upgrade recovery is required in any of the following situations: • When you invoke Firmware Upgrade Mode (see page 18), but decide not to proceed with the upgrade. • When the main board firmware upgrade fails. •... -
Page 20: Osd Factory Default Settings
10. Appendix A 10.2 OSD Factory Default Settings The factory default settings are as follows: Setting Default OSD Hotkey [Scroll Lock] [Scroll Lock]* Port ID Display Position Upper Left Corner Port ID Display Duration 3 Seconds Port ID Display Mode The Port Number plus the Port Name Scan Duration 5 Seconds... -
Page 21: Warranty
We warrant our products to be free from defects in materials and workmanship for a period of three (3) years from the date of initial purchase. Our obligation under this warranty is limited to repairing or replacing (at its sole option) any such defective products. Visit Tripplite.Eaton.com/support/ product-returns before sending any equipment back for repair.
Need help?
Do you have a question about the NetDirector TRIPP LITE Series and is the answer not in the manual?
Questions and answers