Table of Contents
Advertisement
Quick Links
INSTALLATION & OPERATING
Heat Pump
Pool & Spa
Heater
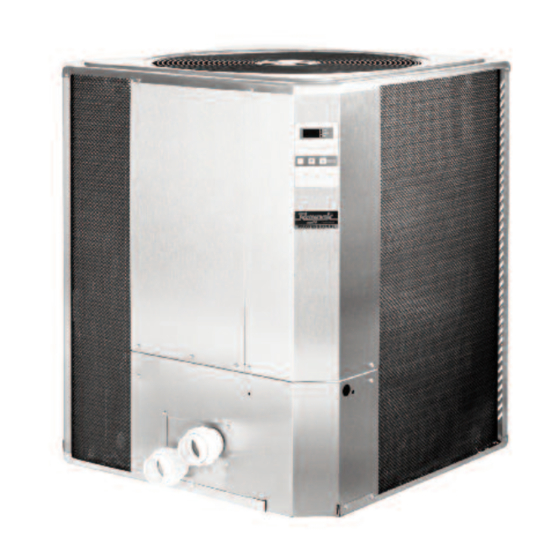
Professional Series
PS10353ti-E-HC
PS10354ti-E-HC
PS10355ti-E-HC
FOR YOUR SAFETY: Do not store or use gasoline or other flammable vapors and
liquids or other combustible materials in the vicinity of this or any other appliance. To
do so may result in an explosion or fire.
NOTE: The instructions in this manual are for the use of qualified individuals specially trained and experienced
in the installation and maintenance of this type of equipment and related system components. Installation and
service personnel are required by some states to be licensed. Persons not qualified shall not attempt to install,
service, or maintain this equipment.
This manual should be maintained in legible condition and kept adjacent to the heat pump pool heater or in a
safe place for future use.
Catalog No. 6000.554A
INSTRUCTIONS
Effective: 06-28-13
Replaces: 12-21-11
P/N 241460 Rev. 2
R
C
US
92-103778-07-02
Advertisement
Table of Contents

Related Manuals for Raypak Professional Series


Summary of Contents for Raypak Professional Series
- Page 1 INSTALLATION & OPERATING INSTRUCTIONS Heat Pump Pool & Spa Heater Professional Series PS10353ti-E-HC PS10354ti-E-HC PS10355ti-E-HC FOR YOUR SAFETY: Do not store or use gasoline or other flammable vapors and liquids or other combustible materials in the vicinity of this or any other appliance. To do so may result in an explosion or fire.
- Page 2 Rev. 2 reflects the following: Changes to: Installation Considerations on pages 6-7, Hurricane Tie Down Requirements diagram on page 8, Table C on page 14, Wiring diagrams on pages 19-21. Additions: None. Deletions: None.
-
Page 3: Water Chemistry
Water Chemistry (Corrosive water voids all warranties) For your health and the protection of your pool equipment, it is essential that your water be chemically balanced. The following levels must be used as a guide for balanced water. Recommended Level(s) Fiberglass Pools Fiberglass Spas Other Pool &... - Page 4 ONTENTS System Drain-Down Water Chemistry Continuous Pump Operation Warnings Pay Attention to These Terms Maintenance Air Coil Cleaning Introduction Cabinet Care (optional) Installation Considerations Unplug Condensation Drain Holes Electrical Connections Water Connections Troubleshooting Pressure Drop Service Call Verification Power Supply Controls Water Flow Operating Instructions...
-
Page 5: Pay Attention To These Terms
— Warnings Pay Attention to These Terms Indicates the presence of immediate hazards which will cause severe personal injury, death DANGER: or substantial property damage if ignored. Indicates the presence of hazards or unsafe practices which could cause severe personal WARNING: injury, death or substantial property damage if ignored. -
Page 6: Installation Considerations
Introduction Installation Considerations WARNING: Do not install the unit within 3 ft of WARNING: This pool/spa heat pump pool heater is fossil fuel burning heaters. Air intake along the an electromechanical machine that incorporates a sides of this heat pump pool heater could disturb pressurized refrigerant gas in a sealed system. -
Page 7: Electrical Connections
60” AIR FLOW OUT 3 FT 12” FLOW FLOW HEATER Fig. 1: Installation Clearances • Irrigation water should be directed away from the All wiring must be in accordance with the National heat pump pool heater-water spray can damage Electrical Code, NFPA No. 70, latest edition, and all the heat pump pool heater. -
Page 9: Water Connections
Minimum Circuit Maximum Breaker Model No. VAC - Phase - Hz Ampacity (A) Size (A) 10353 208/230 - 3 - 60 42.0 10354 460 - 3 - 60 26.0 10355 380 - 3 - 60 29.0 Table A: Typical System Electrical Power Requirements Water Connections CAUTION: The heat pump pool heater inlet and outlet connections are NOT interchangeable. - Page 10 Operating Instructions WARNING: Install a check valve and/or a Hartford loop AFTER the heat pump pool heater and BEFORE any chlorinating devices. Install any auto- The electronic board has the capability of memorizing matic chemical feeders AFTER the heat pump pool two different programmed temperature settings as fol- heater.
-
Page 11: System Start-Up
Heat/Cool Operation Seasonal Start-Up or Annual Check The Raypak Professional models come standard with heat/cool operation. The heat/cool model is designed NOTE: At the beginning of the heating season, or to both heat and cool the pool. To select heat or cool whenever the pool water temperature is to be raised mode, push the SET key until H/C is displayed. -
Page 12: Freeze Protection
Freeze Protection Cabinet Care (optional) The stainless steel cabinet is designed for harsh out- If the unit is installed in a location subject to freezing door use and requires little care. However, you can conditions, it is important to protect the water circuit clean it if you wish. -
Page 13: Service Call Verification
Service Call Verification • Is airflow through the unit being obstructed? NOTE: The Raypak Service number is 800-260-2758. Restrictions such as shrubbery, tall grass, dirty For units in Canada, call 800-268-6966. coils, or any other obstruction to airflow will reduce performance. -
Page 14: Time Clock Adjustment
Time Clock Adjustment Verify that the time clock is set to permit the unit to run long enough to heat properly. Fault Code Meaning of Code The desired programmed temperature point is lower than 50°F (10°C). There is a shortage of refrigerant gas in the unit or a faulty low pressure control, or the ambient air is too cold. -
Page 15: Plumbing Diagrams
Plumbing Diagrams Fig. 6: For systems with pumps of less than 2 HP (under 80 gpm), no external bypass is required. Connections are 2-inch unions. Plumb the heat pump pool heater AFTER the filter and BEFORE any chlorinators. - Page 16 Fig. 7: For systems with pumps of 2 HP or greater (over 80 gpm), an external bypass is required. Adjust the bypass valve to divert a minimum of 40 gpm through the heat pump pool heater. Connections are 2-inch unions. Plumb the heat pump pool heater AFTER the filter and BEFORE any chlorinators.
- Page 17 Fig. 8: Pool Piping for Heat Pump Pool Heater and Gas Pool Heater...
- Page 18 Fig. 9: Pool Piping for Heat Pump Pool Heaters, Multiple, Primary/Secondary...
- Page 19 Wiring Diagram 208V/230V 3Ph, 60Hz Models...
- Page 20 Wiring Diagram 460V 3Ph, 60 Hz Models...
- Page 21 Wiring Diagram 380V 3Ph, 60 Hz Models...
-
Page 22: Installing A Remote Control Device
Installing a Remote Control Device Wiring For a 2-wire control, use the TOTAL and COMMON connections on the heat pump pool heater wiring block. For a 3-wire control, use the COMMON, SPA and POOL connections on the heat pump pool heater wiring block. - Page 24 Raypak, Inc., 2151 Eastman Avenue, Oxnard, CA 93030 (805) 278-5300 Fax (805) 278-5468 Heat Pump Service 1-800-260-2758 Litho in U.S.A.
Need help?
Do you have a question about the Professional Series and is the answer not in the manual?
Questions and answers