Table of Contents
Advertisement
Quick Links
Advertisement
Table of Contents

Related Manuals for BenQ ZOWIE XL Series


Summary of Contents for BenQ ZOWIE XL Series
- Page 1 XL Series User Manual...
-
Page 2: Copyright
Further, BenQ Corporation reserves the right to revise this publication and to make changes from time to time in the contents hereof without obligation of BenQ Corporation to notify any person of such revision or changes. -
Page 3: Product Support
If you wish to repair an out-of-warranty product, you are recommended to go to a qualified service personnel and obtain repair parts from BenQ to ensure compatibility. Do not disassemble the product unless you are aware of the consequences. If you cannot find the dismantled information on your product, contact the local customer service for assistance. - Page 4 • An approved power cord greater or equal to H03VV-F or H05VV-F, 2G or 3G, 0.75mm must be used. • Use only the power cord provided by BenQ. Never use a power cord that appears to be damaged or frayed.
- Page 5 If any of the above mentioned misuse or other accident such as dropping or mishandling occurs, contact qualified service personnel for servicing. • Contact your place of purchase or visit the local website from ZOWIE.BenQ.com for more support. Caution •...
-
Page 6: Table Of Contents
Table of Contents Copyright ................................. 2 Product support ............................3 Getting started ............................... 8 Getting to know your monitor ........................10 Front view..................................10 Back view ..................................10 Connections ....................................11 How to assemble your monitor hardware ....................12 How to detach the stand and the base ..........................17 Adjusting the monitor height ..............................18 Viewing angle adjustment ...............................19 Rotating the monitor ................................20... - Page 7 Updating the startup screen ............................42 Navigating the main menu .........................44 Mode menu ....................................45 Color menu ....................................46 Picture menu ..................................48 Save menu ....................................50 Display menu ...................................51 Custom menu ..................................53 System menu ..................................56 Troubleshooting ............................59 Frequently asked questions (FAQ)..........................59 Need more help?................................60 6/10/21 Z-XL27K-EM-V0...
-
Page 8: Getting Started
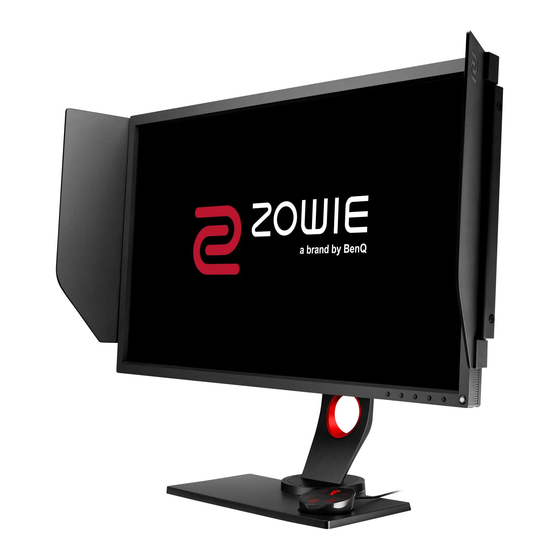
Getting started When unpacking please check you have the following items. If any are missing or damaged, please contact the place of purchase for a replacement. LCD Monitor Monitor Stand Monitor Base Quick Start Guide Safety Instructions Regulatory Statements... - Page 9 S Switch (Optional accessory for XL2731K) To find the compatible models, visit ZOWIE.BenQ.com for information on XS250. Shield (Shading hood) (XL2746K only) Power Cord (Supplied item may differ by model or region.) Video Cable: DP Dust cover (XL2746K only) • Available accessories and the pictures shown here may differ from the actual contents and the product supplied for your region.
-
Page 10: Getting To Know Your Monitor
Getting to know your monitor Front view 1. Cable management hole Back view 2. AC power input jack 3. Power button 4. 5-way controller 5. Rotation keys 6. USB port (for firmware update only) 7. Headphone jack 8. S Switch socket 9. -
Page 11: Connections
Connections The following connection illustrations are for your reference only. For cables that are not supplied with your product, you can purchase them separately. For detailed connection methods, see page 14. (Firmware update only) Headphone PC / Notebook... -
Page 12: How To Assemble Your Monitor Hardware
How to assemble your monitor hardware • If the computer is turned on you must turn it off before continuing. Do not plug-in or turn-on the power to the monitor until instructed to do so. • The following illustrations are for your reference only. Available input and output jacks may vary depending on the purchased model. - Page 13 Orient and align the stand arm with the monitor, then push them together until they click and lock into place. Carefully lift the monitor, turn it over and place it upright on its stand on a flat even surface. To move the monitor, you must hold the handle and the bottom of the stand base at the same time as illustrated.
- Page 14 2. Connect the video cable. The video cables included in your package and the socket illustrations in this document may vary depending on the product supplied for your region. • Connect the plug of the HDMI cable to the HDMI port on the monitor. Connect the other end of the cable to the HDMI port of a digital output device.
- Page 15 5. Using the headphone hook. Pull out the headphone hook found on the back of the monitor. Leave your headset on the headphone hook if needed. Excessive force on the hook is prohibited. The maximum load capacity of the headphone hook is 400g. 6.
- Page 16 Turn on the computer too. If you have multiple video sources, press the Rotation key 2 and the 5-way controller to select an input source. Follow the instructions in Getting the most from your monitor on page 25 to install the monitor software. If you are prompted by any OSD message, follow the on-screen instructions to proceed.
-
Page 17: How To Detach The Stand And The Base
How to detach the stand and the base 1. Prepare the monitor and area. Turn off the monitor and the power before unplugging the power cable. Turn off the computer before unplugging the monitor signal cable. Protect the monitor and screen by clearing a flat open area on your desk and placing a soft item like a towel on the desk for padding, before laying the screen face down on a flat clean padded surface. -
Page 18: Adjusting The Monitor Height
Adjusting the monitor height 1. To adjust the monitor height, hold both the left and the right sides of the monitor to lower the monitor or lift it up to the desired height. 2. On the monitor stand is an adjustment scale that helps keep track of your preferred monitor height. -
Page 19: Viewing Angle Adjustment
Viewing angle adjustment You may position the screen to the desired angle with the monitor tilt, swivel, and height adjustment functions. Check the product specifications on the website for details. Tilting the monitor Tilt the monitor gently. The scale on top of the column helps keep track of your preferred tilt angle. -
Page 20: Rotating The Monitor
Rotating the monitor 1. Pivot the display. Before rotating the monitor with a portrait viewing orientation, the display has to be rotated 90 degrees. Right-click the desktop and select Screen resolution from the popup menu. Select Portrait in Orientation, and apply the setting. Depending on the operating system on your PC, different procedures should be followed to adjust the screen orientation. - Page 21 4. Adjust the monitor to the desired viewing angle. See Viewing angle adjustment on page 19 for more information. If the monitor has been rotated to portrait mode and height adjustment is desired, you should be noted that the wide screen will keep the monitor from being lowered to its minimum height.
-
Page 22: Installing The Shield (Shading Hood, Xl2746K Only)
Installing the Shield (shading hood, XL2746K only) To help focusing in games, the Shield (shading hood) avoids the unwanted disturbance interfered with the peripheral vision while playing. For models that came with shading hoods, two shading hoods are inside the accessory box. Please be careful to prevent damage to the Shield and the monitor. - Page 23 4. Adjust the hoods to the desired angle. Uninstalling the Shield Please remove the hoods before moving the monitor to different places. 1. Detach the Shield. Hold the top of the monitor as illustrated to keep it stable. Lift the hoods upward and detach them carefully.
-
Page 24: Using The Monitor Wall Mounting Kit (Purchased Separately)
Use four M4 x 10 mm screws to fix a VESA standard wall mount bracket to the monitor. Make sure that all screws are tightened and secured properly. Consult a professional technician or BenQ service for wall mount installation and... -
Page 25: Getting The Most From Your Monitor
• To check the name of the purchased model, refer to the specification label on the back of the monitor. Downloading the LCD Monitor driver files from the Internet 1. Download the correct driver files from ZOWIE.BenQ.com > > > model Support Download &... -
Page 26: How To Install The Monitor On A New Computer
How to install the monitor on a new computer This instruction details the procedure for selecting and installing the LCD Monitor driver software on a new computer which has never had a monitor driver installed before. This instruction is only suitable for a computer which has never been used before, and for which the LCD Monitor is the first ever monitor to be connected to it. -
Page 27: How To Upgrade The Monitor On An Existing Computer
The LCD Monitor driver for your model may well function perfectly with other versions of Windows, however, as at the time of writing, BenQ has done no testing of this driver on other versions of Windows and cannot guarantee its operation on those systems. -
Page 28: How To Install On Windows 10 System
How to install on Windows 10 system 1. Open Display Properties Go to Start, Settings, Devices, Devices and Printers and right-click the name of your monitor from the menu. 2. Select from the menu. Properties 3. Click the tab. Hardware 4. -
Page 29: How To Install On Windows 8 (8.1) System
How to install on Windows 8 (8.1) system 1. Open Display Properties Move the cursor to the lower-right of the screen or press the Windows + C buttons on the keyboard to bring up the Charm bar. Go to Settings, Control Panel, Devices and Printers and right-click the name of your monitor from the menu. -
Page 30: How To Install On Windows 7 System
How to install on Windows 7 system 1. Open Display Properties Go to Start, Control Panel, Hardware and Sound, Devices and Printers and right-click the name of your monitor from the menu. Alternatively, right-click the desktop and select Personalize, Display, Devices and Printers, and right-click the name of your monitor from the menu. -
Page 31: How To Adjust Your Monitor
How to adjust your monitor The control panel Name Description Power key Turns the power on or off. 5-way controller Accesses the functions or menu items as instructed by the on-screen icons. See 5-way controller and basic menu operations on page 33 more information. - Page 32 Custom > S Switch Key. See S Switch Key on page 55 for more information. S Switch is designed for specific models exclusively. Do not connect it to other devices with USB ports. To find the compatible models, visit ZOWIE.BenQ.com for information on XS250.
-
Page 33: 5-Way Controller And Basic Menu Operations
5-way controller and basic menu operations The 5-way controller is located at the rear of the monitor. While sitting in front of the monitor, move the controller to the directions instructed by the on-screen icons for menu navigation and operations. Left Right Down... -
Page 34: Working With The Rotation Keys
All OSD (On Screen Display) menus can be accessed by the control keys. You can use the OSD menu to adjust all the settings on your monitor. Available menu options may vary depending on the input sources, functions and settings. Mode: FPS1 1920 x 1080 @ 240Hz Menu... -
Page 35: Working With The Quick Menu
2. Press the same key repeatedly to cycle through available options on the list. Mode Input FPS1 DisplayPort FPS2 HDMI1 Standard HDMI2 Item Description Rotation Key 1 Switches to a list of Mode options by default. To change the default settings, see Customizing the Rotation Keys on page Rotation Key 2 Switches to a list of Input options by default. - Page 36 • Go to Menu and press to access the main menu. Mode: FPS1 1920 x 1080 @ 240Hz Menu Mode DyAc Black eQualizer Color Vibrance Close Item Description System information Displays current system information, including resolution, refresh rate, and picture mode. Main menu Accesses the main menu.
-
Page 37: Adjusting Display Mode
5. After the setting is done, press to return to Quick Menu to save properly. Mode: FPS1 1920 x 1080 @ 240Hz Mode Quick Menu 1 Menu None Rotation Key 1 Color 2 Mode Mode Picture Rotation Key 2 3 Black eQualizer DyAc S Switch Key Save... -
Page 38: Working With Game Mode To Go By S Switch
S Switch to your monitor after pressing a game mode button, go to Menu > Save > Save Settings. Select YES to save the settings manually. Alternatively, download XL Setting to Share from ZOWIE.BenQ.com to share game mode settings with compatible monitors easily. See Product support on page 3 for the access to the software and its user guide. -
Page 39: Activating Vesa Standard Displayport Adaptive-Sync
Activating VESA standard DisplayPort Adaptive-Sync Monitors featuring with the VESA standard Adaptive-Sync will eliminate screen tearing, stuttering, and juddering during gaming. 1. Use a compatible graphics processing units (GPU) with the forthcoming driver. Confirm supported technologies please visit the website of your GPU manufacturer. 2. -
Page 40: Updating The Firmware
Your monitor came with a USB port reserved for firmware update respectively. Visit the local website from ZOWIE.BenQ.com for the firmware file if necessary. Note that settings on your monitor and S Switch (if connected to the monitor while updating firmware) will be erased after firmware update. If you prefer to keep the settings on S Switch, disconnect it before firmware update. - Page 41 2. Connect the USB flash drive to the USB port reserved for firmware update on the rear of the monitor. ZOWIE.BenQ.com > Support > Download & FAQ > model name > Driver Firmware file (in *.bin format) 3. Restart the monitor by powering off and on. The firmware file will be detected after the monitor is powered on.
-
Page 42: Updating The Startup Screen
Updating the startup screen You can customize the startup screen as desired. The new startup image will be aligned in center with 1:1 aspect ratio. Getting your startup image ready 1. Prepare a 640 x 480 24-bit color image in *.bmp format. The file size should be less than 2 MB. 2. - Page 43 8. Press the power key on the rear of the monitor to reboot the monitor and complete the startup screen update process.
-
Page 44: Navigating The Main Menu
Navigating the main menu You can use the OSD (On Screen Display) menu to adjust all the settings on your monitor. Press the 5-way controller to bring up the Quick Menu and select Menu to access the main menu. See 5-way controller and basic menu operations on page 33 for details. -
Page 45: Mode Menu
Mode menu Available menu options may vary depending on the input sources, functions and settings. Menu options that are not available will become grayed out. And keys that are not available will be disabled and the corresponding OSD icons will disappear. For models without certain functions, their settings and related items will not appear on the menu. -
Page 46: Color Menu
Color menu Available menu options may vary depending on the input sources, functions and settings. Menu options that are not available will become grayed out. And keys that are not available will be disabled and the corresponding OSD icons will disappear. For models without certain functions, their settings and related items will not appear on the menu. - Page 47 Item Function Range Gamma Adjusts the tone luminance. • 1 • 2 • 3 • 4 • 5 Color Normal Allows video and still photographs to be viewed Temperature with natural coloring. This is the factory default color. Bluish Applies a cool tint to the image and is factory pre-set to the PC industry standard white color.
-
Page 48: Picture Menu
Picture menu Available menu options may vary depending on the input sources, functions and settings. Menu options that are not available will become grayed out. And keys that are not available will be disabled and the corresponding OSD icons will disappear. For models without certain functions, their settings and related items will not appear on the menu. - Page 49 Item Function Range Improves the gray level response time of the LCD panel. • Premium • High Once changed and saved, the setting takes effect immediately and applies • OFF to all modes.
-
Page 50: Save Menu
Save menu Available menu options may vary depending on the input sources, functions and settings. Menu options that are not available will become grayed out. And keys that are not available will be disabled and the corresponding OSD icons will disappear. For models without certain functions, their settings and related items will not appear on the menu. -
Page 51: Display Menu
Display menu Available menu options may vary depending on the input sources, functions and settings. Menu options that are not available will become grayed out. And keys that are not available will be disabled and the corresponding OSD icons will disappear. For models without certain functions, their settings and related items will not appear on the menu. - Page 52 Item Function Range Aspect The input image is displayed without geometric distortion filling as much of the display as possible. Displays the input image in its native resolution without scaling. 17" (4:3) Displays the input image as if on a 17" monitor of 4:3 aspect ratio.
-
Page 53: Custom Menu
Custom menu Available menu options may vary depending on the input sources, functions and settings. Menu options that are not available will become grayed out. And keys that are not available will be disabled and the corresponding OSD icons will disappear. For models without certain functions, their settings and related items will not appear on the menu. - Page 54 Item Function Range Quick Sets 2 to 4 settings that could be frequently adjusted from the • None Menu Quick Menu. Do not choose the same item for 2 settings or • Mode (see page choose None for more than 2 settings. See Customizing the Quick Menu on page 36 for more information.
- Page 55 Item Function Range S Switch Sets the function to be accessed by the S Switch Key on S Switch. • Mode (see page The S Switch on page 31 for the location of the key. Select a category first, and choose up to 3 options to be accessed by this key. •...
-
Page 56: System Menu
System menu Available menu options may vary depending on the input sources, functions and settings. Menu options that are not available will become grayed out. And keys that are not available will be disabled and the corresponding OSD icons will disappear. For models without certain functions, their settings and related items will not appear on the menu. - Page 57 Item Function Range Language Sets the OSD menu language. • English Settings • Français The language options displayed on your OSD may differ • Deutsch from those shown on the right, depending on the • Italiano product supplied in your region. •...
- Page 58 Item Function Range Other Resolution Sets whether to display the resolution notice of the • ON Setting Notice recommended resolution when a new input source • OFF is detected by the monitor Buzzer Turns the tone of control keys on or off. •...
-
Page 59: Troubleshooting
Troubleshooting Frequently asked questions (FAQ) Imaging The image has a faulty coloration. It has a yellow, blue or pink appearance. • The default picture mode is FPS1 (for FPS games). If you prefer other picture modes, go to Mode and change setting. •... -
Page 60: Need More Help
• Increase the volume (volume may be muted or too low) on the external speakers. Need more help? If your problems remain after checking this manual, please contact your place of purchase or visit the local website from ZOWIE.BenQ.com for more support and local customer service.
Need help?
Do you have a question about the ZOWIE XL Series and is the answer not in the manual?
Questions and answers