Table of Contents
Advertisement
Quick Links
Advertisement
Table of Contents

Related Manuals for BenQ MOBIUZ EX240N


Summary of Contents for BenQ MOBIUZ EX240N
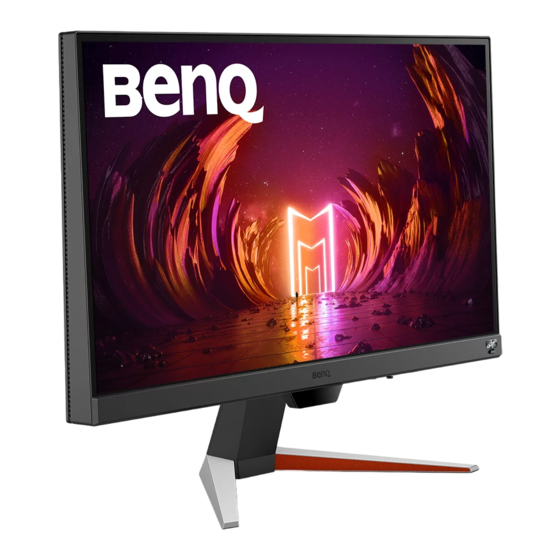
- Page 1 LCD Monitor User Manual EX Series...
-
Page 2: Copyright
Further, BenQ Corporation reserves the right to revise this publication and to make changes from time to time in the contents hereof without obligation of BenQ Corporation to notify any person of such revision or changes. -
Page 3: Product Support
If you wish to repair an out-of-warranty product, you are recommended to go to a qualified service personnel and obtain repair parts from BenQ to ensure compatibility. Do not disassemble the product unless you are aware of the consequences. If you cannot find the dismantled information on your product, contact the local customer service for assistance. -
Page 4: Q&A Index
Q&A index Start with the topics that you are interested in. Setup How to set up the monitor and turn it on? Safety precautions How to assemble your monitor hardware (for monitors with height adjustment stand) How to assemble your monitor hardware (for monitors without height adjustment stand) How to adjust the monitor viewing angle? Tilt the monitor. - Page 5 I need more support. Product support Servicing...
-
Page 6: Safety Precautions
• An approved power cord greater or equal to H03VV-F or H05VV-F, 2G or 3G, 0.75mm must be used. • Use only the power cord provided by BenQ. Never use a power cord that appears to be damaged or frayed. -
Page 7: Installation
BenQ service center for assistance. • To avoid possible electric shock, do not dissemble or repair the monitor. • If a bad smell or an abnormal sound appears to come from the monitor, contact your nearest BenQ service center for assistance immediately. -
Page 8: Safety Notice For Remote Control (Applicable If A Remote Control Is Provided)
Safety notice for remote control (applicable if a remote control is provided) • Do not put the remote control in the direct heat, humidity, and avoid fire. • Do not drop the remote control. • Do not expose the remote control to water or moisture. Failure to do so could result in malfunction. •... -
Page 9: Servicing
If any of the above mentioned misuse or other accident such as dropping or mishandling occurs, contact qualified service personnel for servicing. • Contact your place of purchase or visit the local website from Support.BenQ.com for more support. General warranty information Note that the monitor warranty may be void if any of the following conditions occurs: •... - Page 10 Typographics Icon / Symbol Item Meaning Warning Information mainly to prevent the damage to components, data, or personal injury caused by misuse and improper operation or behavior. Useful information for completing a task. Note Supplementary information. In this document, the steps needed to reach a menu may be shown in condensed form, for example: Menu >...
-
Page 11: Table Of Contents
Table of Contents Copyright ................................. 2 Product support ............................3 Q&A index ..............................4 Safety precautions ............................6 Power safety ..................................6 Installation ..................................7 Operation................................... 7 Safety notice for remote control (applicable if a remote control is provided) ..........8 Battery safety notice (applicable if a remote control is provided) ............... - Page 12 Activating FreeSync™ Premium ..........................46 Working with Video Format Support technology....................46 Initial setup for playing games at 165 Hz ........................46 Navigating the main menu .........................48 Input menu ..................................49 Quick Menu ..................................50 Color Mode menu ...............................52 Eye care menu ................................55 Audio menu ...................................57 System menu ................................58 Troubleshooting ............................61...
-
Page 13: Getting Started
Getting started When unpacking please check you have the following items. If any are missing or damaged, please contact the place of purchase for a replacement. BenQ LCD Monitor Monitor Stand (for EX240) Monitor Base (for EX240) Monitor Stand (for EX240N) - Page 14 Power Cord (Supplied item may differ by model or region.) I/O Cover (for models with height adjustment stand) Video Cable: HDMI USB Cable (Optional accessory) • Available accessories and the pictures shown here may differ from the actual contents and the product supplied for your region.
-
Page 15: Getting To Know Your Monitor
Getting to know your monitor Front view EX240 EX240N 4 5 6 1. Speakers 5. 5-way controller 2. Light sensor 6. Power button and LED indicator 3. Cable management hole 7. HDRi hot key 4. Looping key... -
Page 16: Back View
Back view EX240 EX240N 8. Headphone jack 9. USB 3.1 port (downstream; connecting to USB devices) 10. USB 3.1 port (upstream; connecting to PC) 11. HDMI socket 12. DisplayPort socket 13. Kensington lock slot 14. AC power input jack 15. Stand release button 16. -
Page 17: Connections
Connections The following connection illustrations are for your reference only. For cables that are not supplied with your product, you can purchase them separately. For detailed connection methods, see page 20. EX240 Headphone PC / Notebook / Gaming console... - Page 18 For detailed connection methods, see page 30. EX240N Headphone PC / Notebook / Gaming console...
-
Page 19: How To Assemble Your Monitor Hardware (For Monitors With Height Adjustment Stand)
How to assemble your monitor hardware (for monitors with height adjustment stand) • If the computer is turned on you must turn it off before continuing. Do not plug-in or turn-on the power to the monitor until instructed to do so. •... - Page 20 Carefully lift the monitor, turn it over and place it upright on its stand on a flat even surface. 2. Connect the power cable to the monitor. Pass the cable through the cable management hole on the stand arm first. Plug one end of the power cord into the socket labelled on the rear of the monitor.
- Page 21 4. Connect the audio cable. You may connect headphones to the headphone jack found on the back side of the monitor. 5. Connect USB devices. Connect the USB cable between the PC and the monitor (via the upstream USB port at the back). This upstream USB port transmits data between the PC and the USB devices connected to the monitor.
- Page 22 7. Install the I/O cover. Gently lift the display up and extend it to the maximum extended position. Then tilt the monitor to install/remove the I/O cover easily. Align the I/O cover with the holes on the back of the monitor, and press the sides and the bottom of the cover against the holes to lock it into place.
- Page 23 9. Tilt the monitor. You should position the monitor and angle the screen to minimize unwanted reflections from other light sources. 10.Connect-to and turn-on the power. Plug the other end of the power cord into a power outlet and turn it on. Picture may differ from product supplied for your region.
- Page 24 11.Setting up the monitor for certain scenarios. You are prompted to set the monitor to work in specified scenarios when powering on the monitor for the first time. See Setting up your monitor for different scenarios on page 38 to complete the configuration.
-
Page 25: How To Detach The Stand And The Base (For Monitors With Height Adjustment Stand)
How to detach the stand and the base (for monitors with height adjustment stand) 1. Prepare the monitor and area. Turn off the monitor and the power before unplugging the power cable. Turn off the computer before unplugging the monitor signal cable. 2. - Page 26 4. Remove the monitor base. Release the screw on the bottom of the monitor base and detach the monitor base as illustrated. In case you intend to use your monitor on the stand in the future, please keep the monitor base and monitor stand somewhere safe for future use.
-
Page 27: Using The Monitor Wall Mounting Kit (Purchased Separately) (For Models With Height Adjustment Stand)
Use four M4 x 10 mm screws to fix a VESA standard wall mount bracket to the monitor. Make sure that all screws are tightened and secured properly. Consult a professional technician or BenQ service for wall mount installation and... -
Page 28: How To Assemble Your Monitor Hardware (For Monitors Without Height Adjustment Stand)
How to assemble your monitor hardware (for monitors without height adjustment stand) • If the computer is turned on you must turn it off before continuing. Do not plug-in or turn-on the power to the monitor until instructed to do so. •... - Page 29 Orient and align the stand arm with the monitor, then push them together until they click and lock into place. Carefully lift the monitor, turn it over and place it upright on its stand on a flat even surface. 2. Remove the cover of the cable management system.
- Page 30 4. Connect the video cable. The video cables included in your package and the socket illustrations in this document may vary depending on the product supplied for your region. • Connect the plug of the HDMI cable to the HDMI port on the monitor.
- Page 31 7. Tilt the monitor. You should position the monitor and angle the screen to minimize unwanted reflections from other light sources. Your monitor is an edge-to-edge monitor and should be handled with care. Avoid finger pressure on the screen surface. Excessive force on the display is prohibited.
- Page 32 9. Setting up the monitor for certain scenarios. You are prompted to set the monitor to work in specified scenarios when powering on the monitor for the first time. See Setting up your monitor for different scenarios on page 38 to complete the configuration.
-
Page 33: How To Detach The Stand And The Base (For Monitors Without Height Adjustment Stand)
How to detach the stand and the base (for monitors without height adjustment stand) 1. Prepare the monitor and area. Turn off the monitor and the power before unplugging the power cable. Turn off the computer before unplugging the monitor signal cable. Protect the monitor and screen by clearing a flat open area on your desk and placing a soft item like a towel on the desk for padding, before laying the screen face down on a... -
Page 34: Using The Monitor Wall Mounting Kit (Purchased Separately) (For Models Without Height Adjustment Stand)
Using the monitor wall mounting kit (purchased separately) (for models without height adjustment stand) The back of your LCD monitor has a VESA standard mount with 100mm pattern, allowing the installation of a wall mount bracket. Before starting to install a monitor wall mounting kit, please read the precautions carefully. - Page 35 Use four M4 x 10 mm screws to fix a VESA standard wall mount bracket to the monitor. Make sure that all screws are tightened and secured properly. Consult a professional technician or BenQ service for wall mount installation and...
-
Page 36: How To Adjust Your Monitor
How to adjust your monitor The control panel Name Description Looping key Accesses video source selection menu. See Switching the inputs quickly with the looping key on page 39 for more information. 5-way controller Accesses the functions or menu items as instructed by the on-screen icons. -
Page 37: 5-Way Controller And Basic Menu Operations
5-way controller and basic menu operations The 5-way controller is located at the rear of the monitor. While sitting in front of the monitor, move the controller to the directions instructed by the on-screen icons for menu navigation and operations. Up (rear) Left Right... -
Page 38: Setting Up Your Monitor For Different Scenarios
5-way controller OSD icon Function operation Move down • Goes to the next menu item. • For down / decrease adjustment. Move to the left • Returns to the previous menu. • Exits OSD menu. All OSD (On Screen Display) menus can be accessed by the control keys. You can use the OSD menu to adjust all the settings on your monitor. -
Page 39: Switching The Inputs Quickly With The Looping Key
configuration on the first use of the monitor, so you can switch scenarios easily without further hasty setup. An example of monitor use in different scenarios For movie watching For PC gaming For console gaming Welcome Please select a scenario 1920 x 1080 Color Mode: Standard HDR: OFF... -
Page 40: Working With The Quick Menu
2. Press the looping key repeatedly to cycle through the available video sources. Input HDMI1: Cinema HDMI2: Game DP: Standard Working with the Quick Menu The Quick Menu is a quick access to change some monitor settings frequently adjusted by scenario. It also provides the access to the main menu. - Page 41 Item Description Main menu Accesses the main menu. See Navigating the main menu on page 48 more information. Customizing the Quick Menu By default, there are 3 settings that could be customized to go with each scenario on the Quick Menu. Change the settings if desired.
-
Page 42: Available Menu Options To Each Color Mode
Available menu options to each Color Mode Depending on the Color Mode you just set, the available options for color adjustment may vary. The list is for reference only as available options also vary by input. Menu options that are not available will become grayed out. -
Page 43: Working With The Hdri Hot Key
Items Description Black eQualizer Saved and applied by input and color mode switch. Light Tuner Color Vibrance Brightness Contrast Gamma Color Temperature Blur Reduction Sharpness B.I.+ Adjust by duration Working with the HDRi hot key The monitor takes advantage of Bright Intelligence Plus technology to balance screen brightness while playing HDR content to keep all image details. -
Page 44: Working With Hdr Technology
If you select Game HDRi or Cinema HDRi, the Bright Intelligence Plus function is enabled automatically. The performance of Bright Intelligence Plus may be impacted by the light sources and the monitor tilt angle. You can increase the light sensor sensitivity from Eye care > B.I.+ (Bright Intelligence Plus) > Sensor Sensitivity if needed. page 55 for more information. -
Page 45: Choosing An Audio Scenario
System information on Content type Selected color mode main menu Non-HDR content If a non-HDR color mode is selected. HDR: OFF Game HDRi HDR: Emulated Cinema HDRi Choosing an audio scenario Several audio equalizers are provided for audio playback in different scenarios. 1. -
Page 46: Activating Freesync™ Premium
4. Adjust the value of the filter. A stronger effect is produced as the value increases. Activating FreeSync™ Premium Monitors featuring with the FreeSync will eliminate screen tearing, stuttering, and juddering during gaming. 1. Use a compatible graphics processing units (GPU) with the forthcoming driver. Confirm supported technologies please visit www.AMD.com. - Page 47 2. Go to the setup menu in your game, and change the frame rate or screen refresh rate to 165 Hz. Refer to the Help document that came with your game for details. 3. To check if the screen refresh rate has been changed, go to the Quick Menu on your monitor and check the system information.
-
Page 48: Navigating The Main Menu
Navigating the main menu You can use the OSD (On Screen Display) menu to adjust all the settings on your monitor. Press to bring up the Quick Menu and select Menu to access the main menu. See 5-way controller and basic menu operations on page 37 for details. -
Page 49: Input Menu
Input menu Available menu options may vary depending on the input sources, functions and settings. Menu options that are not available will become grayed out. And keys that are not available will be disabled and the corresponding OSD icons will disappear. For models without certain functions, their settings and related items will not appear on the menu. -
Page 50: Quick Menu
Quick Menu Available menu options may vary depending on the input sources, functions and settings. Menu options that are not available will become grayed out. And keys that are not available will be disabled and the corresponding OSD icons will disappear. For models without certain functions, their settings and related items will not appear on the menu. - Page 51 Item Function Range Standard For basic PC application. • Scenario (cannot be Game For gaming. changed) • Color Mode Cinema For watching movies. (cannot be changed) • Light Tuner • Black eQualizer • Color Vibrance • AMA • Brightness • Contrast •...
-
Page 52: Color Mode Menu
Color Mode menu Available menu options may vary depending on the input sources, functions and settings. Menu options that are not available will become grayed out. And keys that are not available will be disabled and the corresponding OSD icons will disappear. For models without certain functions, their settings and related items will not appear on the menu. - Page 53 Item Function Range Enables HDR function. • Black eQualizer • Light Tuner Game HDRi Enables HDR and B.I.+ functions at the same time while the contrast is enhanced. • Color Vibrance • Brightness Cinema Enables HDR and B.I.+ functions together. HDRi •...
- Page 54 Item Function Range Color Normal Allows video and still photographs to be viewed Temperature with natural coloring. This is the factory default color. Bluish Applies a cool tint to the image and is factory pre-set to the PC industry standard white color. Reddish Applies a warm tint to the image and is factory pre-set to the news print standard white color.
-
Page 55: Eye Care Menu
Eye care menu Available menu options may vary depending on the input sources, functions and settings. Menu options that are not available will become grayed out. And keys that are not available will be disabled and the corresponding OSD icons will disappear. For models without certain functions, their settings and related items will not appear on the menu. - Page 56 Item Function Range Color Adjusts color matching representation for people with color vision Weakness deficiency to distinguish colors easily. Red Filter Decides the effect produced by the red filter. A 0 ~ 20 stronger effect is produced as the value increases. Green Decides the effect produced by the green filter.
-
Page 57: Audio Menu
Audio menu Available menu options may vary depending on the input sources, functions and settings. Menu options that are not available will become grayed out. And keys that are not available will be disabled and the corresponding OSD icons will disappear. For models without certain functions, their settings and related items will not appear on the menu. -
Page 58: System Menu
System menu Available menu options may vary depending on the input sources, functions and settings. Menu options that are not available will become grayed out. And keys that are not available will be disabled and the corresponding OSD icons will disappear. For models without certain functions, their settings and related items will not appear on the menu. - Page 59 Item Function Range Language Sets the OSD menu language. • English Settings • Français The language options displayed on your OSD may differ • Deutsch from those shown on the right, depending on the • Italiano product supplied in your region. •...
- Page 60 Item Function Range Display Display This feature is provided to allow aspect ratios other Mode than 16:9 to be displayed without geometric distortion. Full Scales the input image to fill the screen. Ideal for 16:9 aspect images. Aspect The input image is displayed without geometric distortion filling as much of the display as possible.
-
Page 61: Troubleshooting
Troubleshooting Frequently asked questions (FAQ) Imaging The image is blurred. Download from the website (see Product support on page 3). Refer to Resolution file . And then select the correct resolution, refresh rate and "Adjusting the Screen Resolution" make adjustments based on these instructions. Does the blurring only occur at resolutions lower than the native (maximum) resolution? Download from the website (see... - Page 62 The image is displaced in one direction. Download from the website (see Product support on page 3). Refer to Resolution file . And then select the correct resolution, refresh rate and "Adjusting the Screen Resolution" make adjustments based on these instructions. Faint shadow from the static image displayed is visible on the screen.
-
Page 63: Need More Help
Need more help? If your problems remain after checking this manual, please contact your place of purchase or visit the local website from Support.BenQ.com for more support and local customer service.
Need help?
Do you have a question about the MOBIUZ EX240N and is the answer not in the manual?
Questions and answers