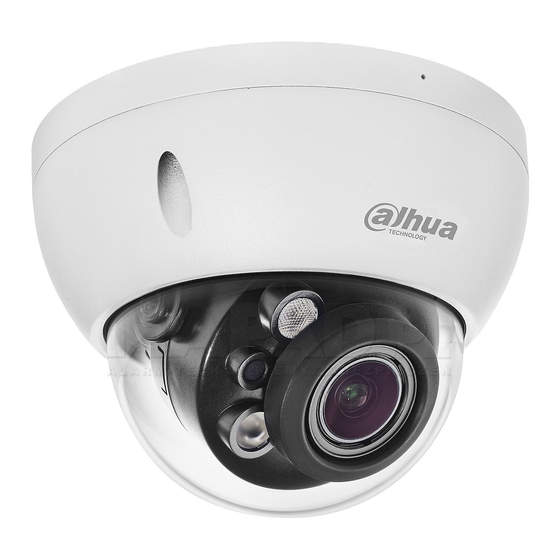
Summary of Contents for Dahua Technology IPC-HDBW2541R-ZAS-27135-S2
- Page 1 Vari-focal Dome Network Camera Quick Start Guide ZHEJIANG DAHUA VISION TECHNOLOGY CO., LTD. V1.0.2...
-
Page 2: Foreword
Quick Start Guide Foreword General This manual introduces the installation and operations of network camera. Read carefully before using the device, and keep the manual safe for future reference. Safety Instructions The following signal words might appear in the manual. Signal Words Meaning Indicates a medium or low potential hazard which, if not avoided,... - Page 3 Quick Start Guide contact customer service for the latest program and supplementary documentation. ● There might be deviations in the description of the technical data, functions and operations, or errors in the print. If there is any doubt or dispute, we reserve the right of final explanation. ●...
-
Page 4: Important Safeguards And Warnings
Quick Start Guide Important Safeguards and Warnings This section introduces content covering the proper handling of the device, hazard prevention, and prevention of property damage. Read carefully before using the device, comply with the guidelines when using it. Transportation Requirements ●... - Page 5 Quick Start Guide against lightning. For outdoor scenarios, strictly comply with the lightning protection regulations. ● Ground the function earthing portion of the device to improve its reliability (certain models are not equipped with earthing holes). The device is a class I electrical appliance. Make sure that the power supply of the device is connected to a power socket with protective earthing.
- Page 6 Quick Start Guide ● Use the accessories suggested by the manufacturer. Installation and maintenance must be performed by qualified professionals. ● Do not directly touch the photosensitive CMOS. Use an air blower to clean the dust or dirt on the lens.
-
Page 7: Table Of Contents
Quick Start Guide Table of Contents Foreword ........................................I Important Safeguards and Warnings ............................III 1 Introduction ......................................1 1.1 Cable ........................................ 1 1.2 Connecting Alarm Input/Output ............................2 2 Network Configuration ..................................4 2.1 Initializing the Camera ................................4 2.2 Changing the Device IP Address ............................5 2.3 Logging in to the Web Page .............................. -
Page 8: Introduction
Quick Start Guide 1 Introduction 1.1 Cable Waterproof all the cable joints with insulating tape and waterproof tape to avoid water damage and prevent short circuits from occurring. For details, see the FAQ manual. Figure 1-1 Cables Table 1-1 Cable information Port name Description ●... -
Page 9: Connecting Alarm Input/Output
Quick Start Guide Table 1-2 Description of alarm I/O port Port Name Description ALARM_IN Receives the switch quantity signal of external alarm sources. ALARM_OUT Outputs alarm signals to alarm devices. ALARM_GND Ground connection. 1.2 Connecting Alarm Input/Output The camera can connect to external alarm input/output devices through the digital input/output port. - Page 10 Quick Start Guide Figure 1-3 Alarm output Step 3 Log in to the web page, and then configure the alarm input and alarm output in alarm settings. ● The alarm input on the web page corresponds to the alarm input end of the I/O port. There will be high level and low level alarm signals generated by the alarm input device when an alarm occurs.
-
Page 11: Network Configuration
Quick Start Guide 2 Network Configuration Device initialization and IP configurations can all be managed with the ConfigTool or through the web page. For more information, see the web operation manual. ● Device initialization is available on select models, and is required at first-time use and after the device is reset. -
Page 12: Changing The Device Ip Address
Quick Start Guide Step 3 Set and confirm the password of the devices, enter a valid email address, and then click Next. Select Auto-check for updates as needed, and then click OK to initialize the device. Step 4 If initialization failed, click to see more information. -
Page 13: Installation
Quick Start Guide 3 Installation 3.1 Packing List ● Tools required for installation, such as the electric drill, are not included in the package. ● The operation manual and information on the tools are on the disk or the QR code. Figure 3-1 Packing list 3.2 Dimensions Figure 3-2 Dimensions: Model A (mm [inch]) -
Page 14: Installing The Camera
Quick Start Guide Figure 3-4 Dimensions: Model C (mm [inch]) 3.3 Installing the Camera 3.3.1 Installation Methods Figure 3-5 Installation methods 3.3.2 (Optional) Installing the SD Card ● SD card slot is available on select models. ● Disconnect the power before installing or removing the SD card. ●... -
Page 15: Attaching The Camera
Quick Start Guide 3.3.3 Attaching the Camera Make sure that the mounting surface is strong enough to hold at least three times the weight of the camera and bracket. Figure 3-7 Cable going through the side cable tray Figure 3-8 Cable going through the mounting surface 3.3.4 (Optional) Installing the Waterproof Connector This part is needed only when a waterproof connector comes with the camera and the camera is used outdoors. -
Page 16: Adjusting The Lens Angle
Quick Start Guide Figure 3-9 Install the waterproof connector 3.3.5 Adjusting the Lens Angle Figure 3-10 Adjust the lens angle... -
Page 17: Closing The Camera
Quick Start Guide 3.3.6 Closing the Camera Figure 3-11 Close the Camera 3.3.7 (Optional) Adjusting the Focal Length This function is available on select models. Figure 3-12 Adjust the focal length... - Page 18 Quick Start Guide...


Need help?
Do you have a question about the IPC-HDBW2541R-ZAS-27135-S2 and is the answer not in the manual?
Questions and answers