Table of Contents
Advertisement
Quick Links
Advertisement
Table of Contents

Related Manuals for DENAGO commute 2

Summary of Contents for DENAGO commute 2
- Page 2 Please read this manual very carefully before using the product. The manual contains important instructions for the safe use and longevity of your bike. If you need any type of support or warranty information for your Denago eBike, please reach out and let us know how we can help.
- Page 4 DO NOT ride under wet conditions. The electric bike may slide from under your feet causing injury. Wet conditions may damage the electronics and void the warranty. TO CONSERVE ELECTRICITY use assist mode and avoid zero starting, frequent brak- ing, driving against the wind, carrying heavy loads including other people and riding COMMUTE 2...
-
Page 5: Warning Message
2. Avoid prolonged exposure to sun or rain and avoid storage in places with high temperatures or corrosive gas. 3. Whenever you ride the DENAGO Electric Bike ,you risk severe injury or even death from loss of control, collisions, and falls. Use caution and ride at your own risk. - Page 6 FOR SAFE AND COMFORTABLE RIDING THERE SHOULD BE A CLEARANCE OF AT LEAST 1-3 INCHES BETWEEN THE CROTCH AND THE TOP TUBE OF THE BICYCLE FRAME, WHILE THE RIDER STRADDLES THE BICYCLE WITH BOTH FEET FLAT ON THE GROUND. INCHES WHEEL SIZE COMMUTE 2...
-
Page 7: Important Safety Instructions
• IMPORTANT SAFETY INSTRUCTIONS The following acc WARNING Denago eBike. To Open the accesso When using this product, basic precautions should always be followed, including the following: else that’s inside a) Read all the instructions before using the product. b) To reduce the risk of injury, close supervision is necessary when the product is used near children. -
Page 8: What's In The Box
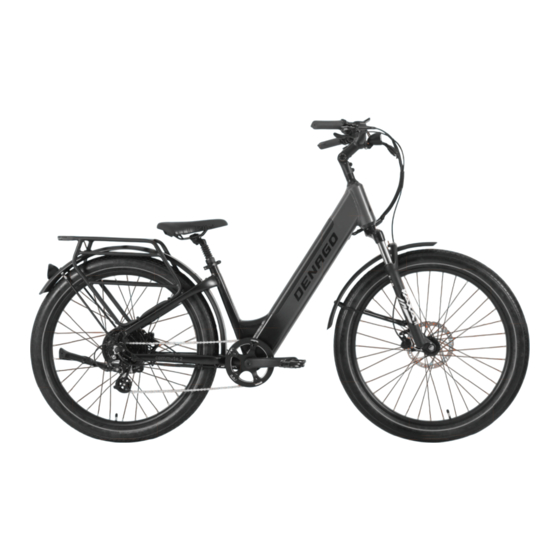
The following accessories are included with your 90% pre-assembled sories are included with your 90% pre-assembled Denago eBike. To prepare for the assembly of your Denago eBike, repare for the assembly of your Denago eBike, Open the accessory box and remove all tools, parts and everything box and remove all tools, parts and everything else that’s inside of it. - Page 9 Saddle Frame Stem Handlebar Seat clamp QR Rear rack Tire Fork Pedal Motor Battery Front disc brake Kickstand Rear disc brake Chainring Crank...
-
Page 10: Always Wear A Helmet
YOUR DENAGO BIKE IS 90% ASSEMBLED This quickstart guide will assist you in completing the assembly of your new Denago eBike. By following these directions, you will be able to get outside and start riding your new Denago eBike in less than 30 minutes. - Page 11 HANDLEBAR Multi Tool 5mm allen key Handlebar components have been pre-assembled Please tighten and secure all bolts Unscrew the bolts and remove the covers, Place the handlebar riser on the front fork, bolts and sleeves, leaving all washers in place. and the handlebar, and adjust the handlebar the stem on the front of the bicycle.
- Page 12 Reapply bolt and using the over the handlebar on the left side 4mm allen key tighten and secure. closest to the monitor, if you are sitting Adjust light angle for preference. on the seat. Tighten and secure the screw. COMMUTE 2...
-
Page 13: Throttle Assembly
THROTTLE ASSEMBLY Multi Tool 3 & 4mm hex tool Use 3mm hex socket tool to Use the 4mm hex socket tool to remove two screws on the left brake handle remove the left handle from the and remove the left brake handle. handlebar. - Page 14 Insert past MIN Insertion Marking. and close the quick release clamp. Make sure seat post is insterted to at least the minimun insertion mark. The mimimum insertion mark should be hidden inside the seat tube and be visible. COMMUTE 2...
-
Page 15: Front Wheel / Brake
FRONT WHEEL / BRAKE Multi Tool 5mm allen key Your bike has a Bolt On mechanism Tighten nuts securely to the fork dropouts Remove Packing Block from disc brake Position the front wheel so it’s centered Align the disc brake rotor so it is caliper,do throw away, save and between the front fork legs with the axle... - Page 16 Once hand tight apply pedal wrench Once hand tight apply pedal wrench to pedal and tighten and secure. to pedal and tighten and secure. Bicycle Grease Packet Apply grease to threads on both Right pedal. Apply grease to threads on both Left pedal. COMMUTE 2...
-
Page 17: Battery Removal / Installation
BATTERY REMOVAL / INSTALLATION Battery keys Turn Key Until you hear CLICK. Lifting battery out turn the forks so the Frame area is clear of battery. Move latch holder at top of the battery and frame area is clear of the battery. Check connectors toward the bottom pull top of the battery away from the frame. - Page 18 COMMUTE 2...
- Page 19 DISPLAY The monitor is connected in a number of ways to your eBike. It interfaces with the HMI to adjust your PAS levels, advises if you have a problem with your brakes and alsotracks a number of great features. Like speed, distance, MAX speed, battery level etc. The K5274(Bett) provides you with a variety of function modes, to meet your riding needs.
- Page 20 Long press the “UP” button for 2 seconds Walk Assist function can only be used as pushing the e-bike by hands. Please don’t use this function when riding. Walk Assist Mode Headlight Indicator COMMUTE 2...
- Page 21 PAS LEVEL SELECTION Short press the “UP” or “DOWN” button to switch the PAS level, the motor output power will be changed accordingly by the PAS level of E-bike. The default range of PAS level is 0-5 levels. Level 1 is the lowest output level, and the level 5 is the highest output power level of the motor.
- Page 22 The default value is 3. Long press “MODE” button to Mile/h means the unit is Imperial system. Long press “MODE” button to return to return to the setting list interface. the setting list interface. Backlight Brightness setting Display Unit setting COMMUTE 2...
-
Page 23: Appendix 1 Error Code Definition
PASSWORD MODIFY SETTING Short press “MODE” button to enter the setting option. Press “UP” and “DOWN” button to select numbers, and press “MODE” button to On this interface, press and hold the “UP”, “DOWN” and “MODE” button. At the same time to restore the initial password (0000). After restoring the initial password, it will automatically return to the main interface. -
Page 24: Battery Charging
Only use factory supplied battery and battery charger. Keep battery and charger away from children. DO NOT ever cover the battery or charger. DO NOT open the battery housing. You will void all warranties and potential for serious injury and or death could occur. COMMUTE 2... - Page 25 ALWAYS WEAR A HELMET Please make sure you read, understand and follow the instructions in the quickstart guide as eBikes are new to most riders. For more information, please visit: denago.zendesk.com...
- Page 26 Multi Tool 4 & 5mm allen key Locate Front Fork Brake Arch center hole and align front fender and insert bolt and nut thru brake arch and mounting bracket on fender. Secure and tighten. COMMUTE 2...
- Page 27 ADJUSTMENTS STEM AND FRONT WHEEL are in alignment.
- Page 28 SOME OTHER IMPORTANT THINGS Owner’s Manual and more comprehensive details are available online. Please go to DENAGO.ZENDESK.COM for content and video support Then you will be ready for a test ride. HANDLEBAR Alignment and tighten and secure all bolts on stem and handlebar.
- Page 29 TIRE INFLATION INSTRUCTIONS Your bicycle has been equipped with tires which the bike’s manufacturer felt were the best balance of performance and value for the use for which the bike was intended. The tire size and pressure rating are marked on the sidewall of the tire. CAUTION Pencil type automtive tire gauges and gas station air hose pressure settings can be inaccutate and should not be relied upon for consistent, accurate pressure readings.Instead, use a high quality dial gauge.
-
Page 30: User Maintenance Instructions
Lithium based grease Disassemble Note: The frequency of maintenance should increase with use in wet or dusty conditions. Do not over lubricate-remove excess bubricant to prevent dirt build up. Never use a degreaser to lubricate your chain (WD-40T™) COMMUTE 2... - Page 31 Schedule 2 - Service Checklist Note: Many instructions for adjustments can be found in the assembly portion of this manual. Frequency Task Before every ride Check wheel and pedal tightness Check tire pressure Check brake operation Check wheels for loose spokes, loose axle nuts or quick release Make sure all fasteners are tightened securely After every ride Quick wipe down with damp cloth...
-
Page 32: Safety Check
For your safety, please do the following inspection before and after each ride. If you discover any concerns with your bike, please seek professional service or contact us at CS@DENAGO.COM or 877-755-2453 (BIKE) to help resolve any issues. Make sure your battery is at FULL charge. - Page 33 Getting Ready for your First Ride and Each Future Ride a. Your monitor will not turn on if you are charging your battery To Turn on the display long press “MODE” button then the display will work normally, and the controller will power on at the same time. b.
- Page 34 WARRANTY INFORMATION OWNER’S MANUAL AND MORE INFO Available at denago.zendesk.com If you need any help, please give us a call 877-755-2453 (bike) or email cs@denago.com...
Need help?
Do you have a question about the commute 2 and is the answer not in the manual?
Questions and answers