Table of Contents
Advertisement
Advertisement
Table of Contents

Related Manuals for Yamaha QY-300


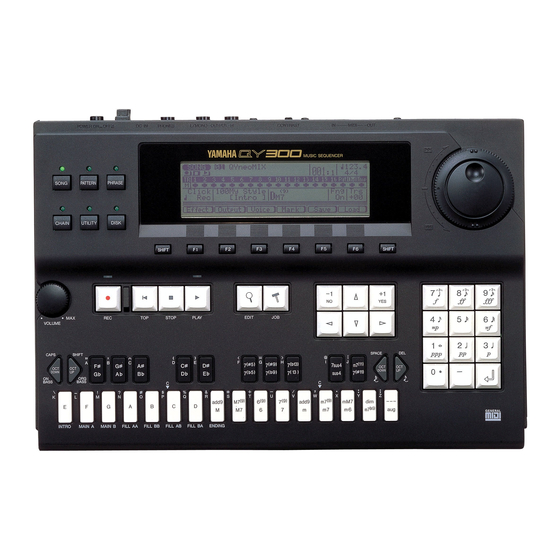
Summary of Contents for Yamaha QY-300
- Page 2 If these corrective measures do not produce satisfactory results, please contact the your local retailer authorized to distribute this type of product. If you can not locate the appropriate retailer, please contact Yamaha Corporation of America, Electronic Service Division, 6600 Orangethorpe Ave, Buena Park, CA 90620 The above statements apply ONLY to those products distributed by Yamaha Corporation of America or its subsidiaries.
- Page 3 This Product should be used only with the components supplied or; a cart, rack, or stand that is recommended by Yamaha. If a cart, etc., is used, please observe all safety markings and instruc- tions that accompany the accessory product.
-
Page 4: Table Of Contents
Contents Contents Precautions ... iv About This Manual ... vi The QY300: An Overview ... vii Sequencer Functions ... vii Accompaniment Sequencing ... vii Voice & Effects ... viii Power & Connections... 1 The Connectors ...2 Audio Connections ...3 MIDI Connections ...3 The Controls... - Page 5 Patterns — Part 1: Accompaniment Basics ... 55 Changing Chords ...59 Track Muting & Effect Bypass ... 62 Voices, Assignment & Effects ...62 Patterns — Part 2: Recording Accompaniments ... 65 “Pat” — Step Record Pattern Changes ... 69 “Chd” — Step Record Chord Changes ... 71 Phrases: Creating Patterns...
-
Page 6: Precautions
Precautions Precautions !! PLEASE READ THIS BEFORE PROCEEDING !! Location Do not expose the QY300 to the following condi- tions to avoid deformation, discoloration, or more serious damage. • Direct sunlight (e.g. near a window). • High temperatures (e.g. near a heat source, out- side, or in a car during the daytime). - Page 7 Refer all servicing to qualified YAMAHA personnel. Third-party Software • Yamaha can not take any responsibility for soft- ware produced for this product by third-party manufacturers. Please direct any questions or comments about such software to the manufac- turer or their agents.
-
Page 8: About This Manual
About This Manual About This Manual The following simple icons are used throughout this manual to draw attention to important points and information where necessary. The icons also make it easier to differentiate be- tween information that you should read immediately and information that can be skipped until later, hopefully helping you to become familiar with the QY300 in the quickest, most efficient manner possible. -
Page 9: Power & Connections
QY300 is not in use. Your QY300 comes supplied with a Yamaha PA-1207 optional AC adaptor. Plug the DC output cable from the AC adaptor into the DC IN jack on the rear panel, then plug the adaptor into a convenient wall AC power socket. It is also a good idea to clip the adaptor’s DC cable into the cable clip on the QY300... -
Page 10: The Connectors
Any pair of stereo headphones with a 1/4" stereo phone plug can be plugged in here for convenient monitoring. The PHONES output level is adjusted via the VOLUME control. 4 DC IN Jack The DC output cable from the Yamaha PA-1207 AC Power Adaptor supplied with the QY300 is plugged in here. -
Page 11: Audio Connections
Audio Connections Make sure that both the QY300 and your sound system are turned OFF when making connections. MIDI Connections The simplest way to monitor the QY300 sound is via a pair of stereo head- phones (1/4" stereo phone plug type) plugged into the PHONES jack. If want to use an external stereo sound system, however, use the L/MONO and R OUTPUT jacks. - Page 12 Power & Connections Always use high-quality MIDI cables when connecting MIDI de- vices, and avoid cables longer than about 15 meters — longer cables can pick up electrical noise that can cause data errors. QY300 Although it has a built-in tone generator, the QY300 can drive external tone generators and synthesizers just like any other MIDI sequencer or music com- puter.
-
Page 13: The Controls
The Controls The QY300 has fairly simple, consistent control interface that, once understood, makes operation fast and easy, no matter what operation you are performing. If you read through this section carefully, and try out the procedures in the Try this: sections, you should have no problem accessing and operating the QY300Õ... -
Page 14: Patterns
The Controls 3 Mode Keys These six keys select the QY300’s main operating modes: SONG The main “sequencer” mode in which the QY300’s 16 sequencer tracks can be recorded, edited, and played back. Pattern, chord, and tempo changes are also recorded in this mode to create accompaniments. - Page 15 5 Numeric Keypad & Enter Key These keys allow direct entry of numeric values where applicable. Enter the required value via the numeric keys — the entered number will flash on the display — then press the [ENTER] key to actually enter the speci- fied value.
-
Page 16: Song Mode - Part 1: Playback & Control
Song Mode — Part 1: Playback & Control Song Mode — Part 1: Playback & Control Playback in the QY300 SONG mode involves much more than simply starting and stopping playback. You have extensive control over a number of important parameters that dramati- cally affect the final sound. -
Page 17: Loop Playback
Song Mode — Part 1: Playback & Control Play the Demo Song Press the [ © ] key to start playback. The demo will automatically stop when it finishes, or you can press the [ ] key to stop playback at any time. Loop Playback For continuous “loop”... -
Page 18: The Measure/Beat Parameter
Song Mode — Part 1: Playback & Control Location The Measure/Beat Parameter The Shuttle Dial The QY300 lets you locate any measure within a song quickly and easily in three ways: The large number to the left of the colon in this parameter is the measure number and the small number to the right of the shows the number of the current quarter-note beat within the current measure during playback and re- cording. -
Page 19: The Mark/Jump Function
The Mark/Jump Function The mark/jump function lets you “mark” (memorize) up to 10 locations within the current song and “jump” to any one of the marked locations in one easy step. Marking a Location To mark the current location, press the [F4] function key (“Mark”). This calls the Mark/Jump display. -
Page 20: Tempo Control
Song Mode — Part 1: Playback & Control Tempo Control Transposition Please note that the transpose parameter does not affect the re- corded sequence data, only the pitch of playback. The QY300 allows precise tempo settings from 25 to 300 beats per minute in fine one-tenth of a quarter-note increments. -
Page 21: Track Muting
Track Muting, Effect Bypass, & Keyboard Track Settings The “Chd” (chord) and “Tmp” (tempo) tracks cannot be muted or ef- fect-bypassed. Track Muting The mute buttons are a handy way to simply turn tracks that you don’t want to hear off. When re- cording, they also make it easy to mute a “busy”... -
Page 22: Keyboard Track
Song Mode — Part 1: Playback & Control Keyboard Track Track 1 becomes the keyboard track when the cursor is located at the “Pat”, “Chd”, or “Tmp” track. Voices, Assignment & Effects • Press the [F6] function key (“Exit”) from any of the voice-mode displays to return to the normal SONG mode display. -
Page 23: The Pan Pots
The Pan Pots The pan pots actually cover a 7 range relative to their default positions, so they may not always go from full left to full right. The Faders You can switch back and forth between the SONG VOICE modes even while a song is playing, so you can adjust all VOICE... -
Page 24: Coarse & Fine Tuning
Song Mode — Part 1: Playback & Control A fast way to select the effect type parameter when the cursor is lo- cated at any fader is to move the cursor down past the fader. The reverb settings apply only to the QY300’s internal voices —... -
Page 25: Pitch Bend Range
• The voice parameters in these displays can be used to change voice assignments in the same way as in the Mixer display. • Since track 10 is only used for drums and drums are not pitched voices, no tuning fader is provided for the drum track in either the coarse or fine tuning displays. -
Page 26: Quantization
Song Mode — Part 1: Playback & Control The pitch bend range settings apply only to the QY300’s internal voices — i.e. they will not affect the sound of an external tone generator or synthesizer being driven by the QY300. Channel Assignments Playback Effects Quantization... - Page 27 The “Val” (value) parameters for each track (the rotary controls) determine to what beats the note data in the corresponding track will be aligned. If you select “d”, for example, all notes in the track will be aligned to the nearest 16th-note beat, to a degree determined by the “strength”...
-
Page 28: Swing
Song Mode — Part 1: Playback & Control Swing The Swing effect can only be used when playback quantization (above) is active. This effect produces a “swing” feel by shifting the timing of “back beats”, as specified by the quantize effect. For example, if the specified quantization value is 8th notes, then the swing effect will shift the 2nd, 4th, 6th, and 8th beats of each measure forward to create a swing feel. -
Page 29: Transpose & Clock Shift
Transpose & Clock Shift Since the Clock Shift parameters shift the timing of all notes and other events in the specified track forward or backward, they can sig- nificantly alter the “feel” of the song. You could move the notes forward (“+”... -
Page 30: Gate Time & Velocity Modify
Song Mode — Part 1: Playback & Control Gate Time & Velocity Modify • The gate time can be modified to give the entire track a more staccato or legato feel, as re- quired. • Modifying the velocity is a great way to “soften”... -
Page 31: Song Mode
Song Mode — Part 2: Basic Recording The QY300 SONG mode provides two main record modes for the 16 sequencer tracks: realtime and step record. When you use the realtime record mode the QY300 records exactly what you play as you play it. In the step record mode notes can be entered one at a time. There’s also a “multi”... - Page 32 Song Mode — Part 2: Basic Recording It’s sometimes easier to set a slow tempo for realtime recording, so you have plenty of time to enter the data. Select the Track to Record Move the cursor to the track area of the display, and then shift the cursor sideways to select the track you want to record (01 …...
- Page 33 QY300 realtime recording is “replace” recording, meaning that any previous data in the a track will be erased and replaced when new data is re- corded to that track. This is in con- trast to “overdub” recording in which new data is recorded over the existing data and the existing data remains intact.
-
Page 34: Punch-In Recording
Song Mode — Part 2: Basic Recording Punch-in Recording Click (Metronome) Settings The click mode parameter in the SONG display determines whether the metro- nome sounds only during recording, during both recording and playback, at all times, or not at all. Move the cursor to this parameter and set as required using the data dial or [–1/NO] and [+1/YES] keys. - Page 35 Select the Punch-in Record Mode For punch-in recording you must first select the punch-in mode after engaging the record ready mode (step 4 of the realtime record process, described above). Press the [F6] function key (“PUNCH”) to select the punch-in record mode. Specify the Punch-in &...
-
Page 36: Multi-Channel Recording
Song Mode — Part 2: Basic Recording Multi-channel Recording Step Recording The “Multi” recording mode allows simultaneous realtime (or punch-in) re- cording of all 16 sequencer tracks. This can be useful when you want to record complete sequences from another sequencer or music computer which is not data-compatible with the QY300. - Page 37 Press the [F6] key (“Exit”) to return to the SONG mode when done. Select the Track to Record Move the cursor to the track area of the display, and then shift the cursor sideways to select the track you want to record: 1 … 16. Move the cursor vertically to move to other areas of the screen.
- Page 38 Song Mode — Part 2: Basic Recording Current note pointer Keyboard display Set the Time Signature (new songs only) Move the cursor to the time signature parameter and set as required. The time signature cannot be changed if the song already contains data. Time signature: 1/16 …...
- Page 39 Song Mode — Part 2: Basic Recording Enter a Note Once the note parameters have been specified, the note can be entered simply by playing the appropriate key on the micro-keyboard (or on your external MIDI keyboard). A note symbol appears on the note display an the note pointer advances to the next note position.
- Page 40 Song Mode — Part 2: Basic Recording Moving Around In the Note Display You can move the cursor down to the note display (the note pointer will appear filled) and move the note pointer to any position at which you want to enter a note, or to any note that you want to delete.
-
Page 41: Drum Assignment & Used Memory Displays
See the “Editing Songs & Phrases” section, page 104, for informa- tion on how to edit recorded song data. Drum Assignment & Used Memory Displays The current pitch of the lowest key on the micro-keyboard Complete the Track Repeat steps 8 and 9 until the current track is complete, then press [ recording. -
Page 42: The Song Jobs
The Song Jobs The Song Jobs The song mode includes 24 song “jobs” that perform a variety of important functions. To access and use the song jobs, press the [JOB] key while in the SONG play mode. This calls the song job list. - Page 43 01: Quantize Aligns notes in the specified track to or close to the nearest specified beat. The “TR” parameter selects the track to be affected by the Quantize job: “01” … “16” for individual tracks, or “All” to quantize all 16 tracks simultaneously. The “M”...
- Page 44 The Song Jobs The “Strength” parameter determines how “strongly” the notes are attracted to the specified quantize value. The strength range is from 0% to 100%. At a setting of “0%” no quantization will occur, while a setting of “100%” will cause all notes to be aligned precisely to the nearest specified beat value.
- Page 45 02: Modify Velocity The “Gate Time” and “Velocity” parameters increase or decrease the gate times (length) and velocity of all notes affected by the swing parameter. The range of both parameters is from 0% to 200%. The “Gate Time” parameter sets the ratio between the shorter and longer gate time values.
- Page 46 The Song Jobs The Modify Velocity job is a great way to “soften” the sound of material that has too great a variation between the softest and loudest notes, or, conversely, to add extra punch to dull-sounding material. Experi- ment with the parameters to get a feel for what they do.
- Page 47 The Modify Gate Time job can be used to produce a more stac- cato or legato feel, as required. Experiment with the parameters to get a feel for what they do. 04: Crescendo New Gate Time = Original Gate Time rate/100 + offset (If the right side of the equation is less than 0, the New Gate Time becomes 1.) After setting the parameters as required press [ENTER] to execute the Modify Gate Time job.
- Page 48 The Song Jobs 05: Transpose Of course, you can transpose all parts as required to shift the en- tire song to a different key, but the Transpose job is actually more suited to changing the pitch of a section of a single track.
- Page 49 The Song Jobs 06: Shift Note Changes the pitch of all specified notes within the specified range of measures in the specified track. The “TR” parameter selects the track to be affected by the Shift Note job: “01” … “16”. The “M”...
- Page 50 The Song Jobs 07: Shift Clock The Shift Clock job will not shift data beyond the specified measure range. Events near the beginning and end of the specified range may therefore sound “bunched” together in some cases. Since the Move Clock job actually shifts the timing of all notes and other events in the specified...
- Page 51 The Song Jobs 08: Chord Sort Sorts all notes in the specified measure range which fall on the same beat (i.e. chords) so that the notes are arranged in order from lowest to highest or from highest to lowest. The “TR” parameter selects the track to be affected by the Chord Sort job: “01”...
- Page 52 The Song Jobs 09: Copy Event • Previous data in measures overwritten by the Copy Event job will be completely erased and replaced by the copied data. • The time signature is copied by the Copy Event job, but Voice and Play Effect data is not copied.
- Page 53 The Copy Event job makes it easy to use phrases or even com- plete sections (an entire chorus, for example) in more that one place in a song. You can copy a phrase played by one voice, and have it repeated by a different voice later in the song.
- Page 54 The Song Jobs 11: Extract Event Although you can remove events individually in the edit mode (page 104), the Extract Event job makes it simple to remove all occurences of the speci- fied event within the specified meas- ure range in one operation. This is particularly convenient when re- moving slow pitch bends or volume changes that may employ many...
- Page 55 12: Thin Out After setting the parameters as required press [ENTER] to execute the Extract Event job. The metronome icon will appear on the display while the data is being processed, then “Completed” will appear briefly when the job is done. Press the [F6] key (“Exit”) to return to the job list, or a mode key to go directly to the selected mode.
- Page 56 The Song Jobs 13: Create Measure • All existing measures after the point at which the new meas- ures are created will be moved forward to make room for the new measures. • If you use the Create Measure job with an empty song, the specified new measures will be placed in track 1 only.
- Page 57 Delete Measure is a great way to completely cut out unwanted data from the song. It’s important to remember, however, that a de- lete operation affects all tracks simultaneously, and that meas- ures following the deleted range are moved back to take the place of the deleted measures.
- Page 58 The Song Jobs 16: Mix Track NOTE If there is no data in the second track, the data from the f i r s t t r a c k i s s i m p l y c o p i e d t o t h e second track (the time signature i s n o t c o p i e d ) .
- Page 59 18: Expand Backing The “TR” parameter selects the track(s) to be cleared: “01” … “16” for the sequencer tracks, “Pat” for the accompaniment pattern track, “Chd” for the accompaniment chord track, “Tmp” for the tempo track, or “All” for all tracks. After setting the parameters as required press [ENTER] to execute the Clear Track job.
- Page 60 The Song Jobs 1 9 : I n i t P l a y E f f e c t 20: Normalize Effect Resets all playback effect settings for the specified track to their default values. The “TR” parameter selects the track(s) to be affected by the Init Play Effect job: “01”...
- Page 61 21: Copy Song 22: Clear Song Copies all data from all tracks of the specified song to any other specified song (includ- ing song name, play effect, voice assignment, and output assignment settings). The upper “Song” parameter selects the source song — i.e. the song from which the data is to be copied: “01”...
- Page 62 The Song Jobs 23: Song Name NOTE I f a s e r i e s o f a s t e r i s k s a p - pears in the song name area, the selected song contains no data and a song name cannot be as- signed.
-
Page 63: Part 1: Accompaniment Basics
Patterns — Part 1: Accompaniment Basics Using the pre-programmed style data provided with the QY300 you can easily create accom- paniments that can be used alone — to play or sing along with, for example — or as the basis for complete compositions. The pre-programmed styles are provided on disk, and must be loaded before they can be used. - Page 64 Patterns — Part 1: Accompaniment Basics Select the Disk Mode, Select “Load” & “All Data” The data disk supplied with the QY300 contains a single “All Data” format file which include 1 demo song and 100 styles the [DISK] mode key to select the DISK mode, press the [F2] function key (“Load”), then use the cursor keys, the [–1/NO] and [+1/YES] keys, or the data dial to select “All Data”.
- Page 65 Selecting & Playing Patterns Note that the “Meas” (measure) number on the display includes two numbers: e.g. “1of4”. The first number is the current measure number and the second is the to- tal number of measures in the pattern (patterns can be up to 8 measures long).
- Page 66 Patterns — Part 1: Accompaniment Basics If you move the cursor to the tempo parameter (indicated by a note symbol and a number in the up- per right corner of the display), you can use the any data entry method to set the playback tempo to anywhere from 25.0 to 300.0 beats per minute.
-
Page 67: Changing Chords
Changing Chords The QY300 features a sophisticated ABC (Auto Bass Chord) system that automatically re-harmonizes the pattern tracks to match chords you specify. This makes creating complete accompaniment tracks fast and easy … just select a pattern, then specify the required chord changes (details in the next section). - Page 68 Patterns — Part 1: Accompaniment Basics Actually, you can press the chord type key and then the root key, the order doesn’t matter. The “- - -” chord type marking is a special “THRU” or “non-ABC” type that can be used to create accompaniment patterns without the harmonic limitations of the ABC system.
- Page 69 You can specify the bass note to be used with any chord by using the left [OCT DOWN] key (note the “ON BASS” marking below the key). Enter the chord in the normal way, then while holding the [OCT DOWN/ON BASS] key press the key on the micro-keyboard corresponding to the desired bass note (the bass note will appear to the right of the chord).
-
Page 70: Track Muting & Effect Bypass
Patterns — Part 1: Accompaniment Basics Track Muting & Effect Bypass Voices, Assignment & Effects The track mute “buttons” in the PATTERN mode function in exactly the same way as they do in the SONG mode. See page 14 for details. The PATTERN mode has basically the same Voice mode Mixer and Reverb displays, the same Effect (Quantize, Swing, Shift, Gate/Velocity, Per Track) displays, and the same Output displays and functions as the SONG mode. - Page 71 Effect: Quantization display for playback quantization (Z page 18). Effect: Swing display to automatically create a “swing” feel (Z page 20). Effect: Transpose & Clock Shift display to transpose tracks and shift note timing forward or backward (Z page 21). Effect: Gate Time/Velocity display to modify gate time and velocity values (Z page 22).
- Page 72 Patterns — Part 1: Accompaniment Basics Effect: Per Track display shows all playback effect parameters for one track at a time, and allows monitoring of only the selected track (Z page 22). Output display for pattern track to MIDI channel assignments for all styles.
-
Page 73: Part 2: Recording Accompaniments
Patterns — Part 2: Recording Accompaniments The QY300 provides two ways to record an accompaniment by specifying patterns and chords: “realtime” and “step” recording. The realtime method is the fastest and easiest, letting you record pattern and chord changes “on the fly.” The step method gives you more detailed control, and is an excellent way to add the finishing touches to an accompaniment recorded in real time. - Page 74 Patterns — Part 2: Recording Accompaniments It’s sometimes easier to set a slow tempo for realtime recording, so you have plenty of time to enter pattern and chord changes. Select the Starting Style, Section, Chord, & Tempo Move the cursor to the style number, section, chord, and tempo parameters, and set as required.
- Page 75 Chord changes normally occur on quarter-note divisions, so try to press the [ENTER] key to enter each chord either exactly on the beat or a frac- tion of a section before the beat on which you want the chord change to occur.
-
Page 76: Step Accompaniment Recording
Patterns — Part 2: Recording Accompaniments Step Accompaniment Recording “Tmp” track data is entered in the Edit mode (Z page 112). The STEP record mode provides two different accompaniment-track data- entry displays: “Pat” (pattern changes) and “Chd” (chord changes). In each of these you can individually enter or delete pattern and chord changes at pre- cisely the required locations. -
Page 77: Pat" - Step Record Pattern Changes
Enter the Required Pattern or Chord Data Refer to the following sections for details on how to use the pattern and chord step-record displays. Stop Recording Press the [ SONG play mode. “Pat” — Step Record Pattern Changes Here’s how the STEP record pattern display will look if you’ve selected an empty song (the appropriate pattern data will appear if the selected song con- tains data). - Page 78 Patterns — Part 2: Recording Accompaniments • If there is no data in the pattern track (sequencer-track data only) and no Ending section or end-of-song marker is encoun- tered, playback will stop auto- matically when the end of the sequencer-track data is reached. •...
-
Page 79: Chd" - Step Record Chord Changes
Erasing Pattern Changes The [F6] function key (“Clear”) can be used to clear the style number, section, or end-of-song marker at which the cursor is located. If you clear a time signature change, the default time signature value for the current pattern will be automatically re-selected. - Page 80 Patterns — Part 2: Recording Accompaniments You can add bass notes to existing chords without having to re-enter the en- tire chord by simply moving the cur- sor to the chord and using the [OCT DOWN/ON BASS] key to specify the bass note.
- Page 81 You can add syncopation to existing chords without having to re-enter the en- tire chord by simply moving the cur- sor to the chord and pressing the right [OCT DOWN] or [OCT UP] key. Syncopation can be removed from a chord by placing the cursor at the chord and pressing the corre- sponding [OCT DOWN] or [OCT UP] key.
-
Page 82: Phrases: Creating Patterns
Phrases: Creating Patterns Phrases: Creating Patterns QY300 patterns are created by combining “phrases” — either preset or original — from the PHRASE mode. A phrase is simply an individual “part” of a pattern — e.g. a drum phrase, a bass phrase, a keyboard phrase, etc. — using a single voice. The QY300 has 2,000 preset phrases, and 100 memory locations for original creations. -
Page 83: Combining Phrases In The Pattern Mode
Phrases: Creating Patterns The category, beat, and type of the selected phrase are listed in full on the display. Category Beat Type The difference between the “General” and “Specific” types is that while the General phrases are, as their name implies, for general use, the Specific phrases are actually parts of specific patterns. - Page 84 Phrases: Creating Patterns Although the pattern length parameter can be set from 1 to 8 measures for the Intro, Main A, Main B, and Ending sections, the Fill sec- tions can only have a length of 1 measure. Set the Pattern Length & Time Signature If you’re starting with an empty pattern, move the cursor top the pattern length and time signature parameters and set as required.
- Page 85 See “The Pattern Jobs” on page 86 for details on the QY300’s pattern jobs which allow considerable versatility in creating and modi- f y i n g p a t t e r n s . Monitoring the Pattern While Patching If you press the [ ] button while patching you can hear how the pattern ©...
-
Page 86: Realtime Phrase Recording
Phrases: Creating Patterns Recording Original Phrases Realtime Phrase Recording If for some reason all 100 user phrases contain data, use the “Clear Phrase” function described on page 102 to clear a phrase for recording. The QY300 makes it easy to create original accompaniment phrases. In addi- tion to the preset phrases , the QY300 has 100 phrase memory locations (US--- 001 through US---100) which can be used to store your own creations. - Page 87 It’s sometimes easier to set a slow tempo for realtime recording, so you have plenty of time to enter t h e d a t a . You can change the voice assignment later in the same way. The “---” (thru) chord type specified as the source chord.
- Page 88 Phrases: Creating Patterns Since your original ABC phrase will be automati- cally re-harmonized as required by the QY300 ABC sys- tem, there are a few rules you should follow to ensure the best r e s u l t s : 1 : Stick to the harmonic environ- ment of your source chord.
-
Page 89: Step Phrase Recording
Step Phrase Recording If for some reason all 100 user phrases contain data, use the “Clear Phrase” job described on page 102 to clear a phrase for recording.Patterns The step phrase record mode lets you enter phrases note-by-note, with precise control over the timing, length, and loudness of each note. - Page 90 Phrases: Creating Patterns The time signature and phrase length parameters can not be changed if the selected phrase already contains d a t a . You can change the voice assignment later in the same way. The “—” chord type can not be specified as the source chord.
- Page 91 Set the Note Parameters as Required Move the cursor to the note length, velocity, and gate time parameters and set as required. When the cusor is located at the note length parameter the numeric keypad can be used to enter the note lengths marked on the keys. The dot key (the [0] key) can be used to add one or more dots to the currently selected note length.
- Page 92 Phrases: Creating Patterns The keyboard display shows the pitch(es) of the note(s) at the current note pointer position. In the example below the keyboard displays that a chord (C major) consisting of three notes exists at the current note pointer location. Moving Around In the Note Display You can move the cursor down to the note display (the note pointer will appear filled) and move the note pointer to any position at which you want to enter a...
- Page 93 • See the “Editing Songs & Phrases” section, page 104, for informa- tion on how to edit recorded phrase d a t a . • See “The Phrase Jobs” on page 92 for details on the QY300’s phrase jobs which allow con- s i d e r a b l e v e r s a t i l i t y i n c r e a t i n g and modifying phrases.
-
Page 94: The Pattern Jobs
The Pattern Jobs The Pattern Jobs The pattern mode includes 7 pattern “jobs” that perform a variety of important functions. To access and use the pattern jobs, press the [JOB] key while in the PATTERN mode. This calls the pattern job list. You can select any job on the list simply by moving the cursor to the required job (use the cursor keys or the data dial) and pressing [ENTER]. - Page 95 The last operation performed is “forgotten” UNDO whenerver the SONG or PHRASE step reocrd mode is engaged, even if the step record mode is exited without acutally recording any data. 01: Copy Pattern Press [ENTER] to execute the Undo/Redo job. The metronome icon will appear on the display while the data is being processed, then “Completed”...
- Page 96 The Pattern Jobs 02: Append Pattern • If the length of the destination plus appended pattern ex- ceeds 8 measures (the maximum pattern length), the “Illegal In- put” error message will appear and the append operation will be aborted. • This job does not copy voice or play effect data from the s o u r c e s t y l e .
- Page 97 • If more than 1 measure is split and a “Fill” is specified as the destina- tion section, an “Illegal Input” error will occur since fills can only be one measure long. • This job does not copy voice or play effect data from the s o u r c e s t y l e .
- Page 98 The Pattern Jobs 05: Clear Pattern 06: Style Name Clears all data from the specified section of the specified style. The “Style” parameter selects the style in which the specified section is to be cleared: “001” … “100”. The “Section” parameter selects the section to be cleared: “Intro”, “MainA”, “MainB”, “FillAA”, “FillBB”, “FillAB”, “FillBA”, “Ending”, or “All”...
- Page 99 NOTE I f a s e r i e s o f a s t e r i s k s a p - pears in the style name area, the selected style contains no data and a pattern name cannot be assigned.
-
Page 100: The Phrase Jobs
The Phrase Jobs The Phrase Jobs The phrase mode includes 15 phrase “jobs” that perform a variety of important functions. To access and use the phrase jobs, press the [JOB] key while in the PHRASE mode. This calls the phrase job list. You can select any job on the list simply by moving the cursor to the required job (use the cursor keys or the data dial) and pressing [ENTER]. - Page 101 The last operation performed is “forgotten” UNDO whenerver the SONG or PHRASE step reocrd mode is engaged, even if the step record mode is exited without acutally recording any data. 01: Quantize Press [ENTER] to execute the Undo/Redo job. The metronome icon will appear on the display while the data is being processed, then “Completed”...
- Page 102 The Phrase Jobs The “Sens.” parameter (sensitivity) determines the range over which notes will be quantized. This parameter can be set from “–100%” through “0%” to “+100%”. at “0%” no quantization will occur. A setting of either “–100%” or “+100%” will cause all notes to be quantized. Refer to the graph below for an idea of how the quantize range is determined by other settings.
- Page 103 02: Modify Velocity The Modify Velocity job is a great way to “soften” the sound of material that has too great a variation between the softest and loudest notes, or, con- versely, to add extra punch to dull- sounding material. Experiment with the parameters to get a feel for what they do.
- Page 104 The Phrase Jobs The Modify Gate Time job can be used to produce a more staccato or legato feel, as required. Experiment with the parameters to get a feel for what they do. 04: Crescendo The “Phrase” parameter selects the user phrase to be affected by the Modify Gate Time job: “001”...
- Page 105 05: Transpose The “Range” parameter determines the range of velocity values over which the crescendo will occur. A setting of “+24”, for example, will cause the MIDI velocity values to increase by 24 over the specified measure range (The MIDI velocity value range is from 0 to 127).
- Page 106 The Phrase Jobs 06: Shift Note 07: Shift Clock Changes the pitch of all specified notes within the specified user phrase. The “Phrase” parameter selects the user phrase to be affected by the Shift Note job: “001” … “100”. The source note parameter determines which notes in the specified phrase will be shifted, and the destination note parameter determines to what note they will be shifted to.
- Page 107 Since the Move Clock job actually shifts the timing of all notes and other events in the specified phrase forward or backward, it can significantly alter the “feel” of the phrase. You could move the notes forward (“+” settings) to create a more “laid back” feel, or backward (“–”...
- Page 108 The Phrase Jobs 09: Append Phrase 10: Split Phrase Appends the specified user phrase to the end of a second specified user phrase. The upper “Phrase” parameter selects the source phrase — i.e. the user phrase from which the data is to be copied: “001” … “100”. The lower “Phrase”...
- Page 109 11: Get Phrase The Get Phrase job is a convenient way to create new phrases by copying a few appropriate meas- ures from songs. In fact, it’s sometimes easier to create phrases in the SONG mode and then copy them to the PHRASE mode using the Get Phrase job, simply because the SONG mode’s simultaneous monitoring...
- Page 110 The Phrase Jobs 12: Put Phrase The time signature of the phrase will not affect the time signature of the song. 13: Clear Phrase Copies the data from a specified user phrase to the specified ramnge of meas- ures in the specified track of a specified song. The “Phrase”...
- Page 111 14: Phrase Name NOTE If a series of asterisks appears in the phrase name area, the selected phrase contains no data and a phrase name cannot be assigned. Allows an original name of up to 8 characters to be assigned to the specified user phrase.
-
Page 112: Editing Songs & Phrases
Editing Songs & Phrases Editing Songs & Phrases The QY300’s editing capability makes it easy to correct mistakes made when recording song or phrase data, and to generally refine your sound. The song and phrase edit “change” mode lets you individually modify the timing, pitch (note), gate time (length) and velocity (loudness) of each note. -
Page 113: Moving Around
Editing Songs & Phrases Moving Around The timing, note, gate time, and velocity values for each note are shown on a single line of the display. The notes are arranged in order from top to bottom. You can move around within the pattern by simply moving the cursor. Move below the bottom of the display and the note data will scroll up, moving towards the end of the pattern. -
Page 114: Change Mode Editing
Editing Songs & Phrases Change Mode Editing The “Change” edit mode is initially selected when the edit mode is engaged. To edit any note in the song or phrase, simply move the cursor to the appropri- ate line, and then to the required parameter within that line. For numeric values any data entry method can be used to select a new value for the selected parameter. -
Page 115: Deleting Events
Deleting Events Changing Tracks Assigning a Track Name Insert Mode Editing Velocity This parameter controls the velocity (loudness) of the note. The range is from 001 to 127. Standard velocity values can be entered via the numeric keypad: place the cursor at the volume symbol to the right of the velocity value and use the numeric keypad to directly enter the desired volume symbol. - Page 116 Editing Songs & Phrases Select the Type of Event to be Inserted Move the cursor to the event type parameter and use the [–1/NO] and [+1/YES] keys or the data dial to select the type of event you want to enter. Insert location (Measure-Beat-Clock).
- Page 117 Pitch Bend Pitch bend events can be used to produce pitch bend effects. The amount of pitch bend produced by each event can be set from “–8192” through “+00” to “+8191”. Each increment corresponds to a fraction of a semitone. To produce smooth pitch bends you’ll need to insert several small pitch bend events, appropriate spaced, to create smooth pitch bend effects.
- Page 118 Editing Songs & Phrases “CC”: Control Change Control change events can be used to apply modulation, sustain, volume, and other types of control according to the standard MIDI control change control- ler assignments (see list on page 6 of the separate “VOICE LISTS AND MIDI DATA”...
- Page 119 In the normal edit mode only the first 8 bytes of the exclusive data will appear on the display, and the data cannot be edited (only in- s e r t e d o r d e l e t e d ) . A pitch bend event as it appears in the change edit mode.
- Page 120 Editing Songs & Phrases Editing the Tempo Track (SONG mode) The QY300 tempo track makes it easy to program sudden or gradual tempo changes to control the “flow” of your music. To edit the tempo track either select the “Tmp” track in the SONG mode and then press the [EDIT] key, or use the “ChngTr”...
-
Page 121: The Chain Mode
The Chain Mode The QY300 CHAIN mode makes it possible to specify a sequence of up to 10 songs to be played back automatically. Each song within the chain can be repeated up to 99 times. Press the [CHAIN] mode key to go to the CHAIN mode. The CHAIN mode display shows the “chain”... -
Page 122: Deleting Songs From The Chain
The Chain Mode Deleting Songs From the Chain Inserting New Songs In the Chain To delete a song from the chain and move all subsequent songs up to fill the gap, place the cursor at the song to be deleted and press the [F2] function key (“Delete”). -
Page 123: The Utility Mode
The Utility Mode The QY300 utility mode includes a number of functions that are important for general operation — e.g. MIDI data handling, interfacing with external equipment, ABC system operation, and more. Press the [UTILITY] mode key to go to the UTILITY mode, then use the [F1], [F2], and [F3] function keys to select the system, input filter, or fingered zone param- eters described below. -
Page 124: Midi Control
The Utility Mode MIDI Control Echo Back Interval Time Input Filters This parameter simply turns MIDI control of the QY300 on or off. “On” is the normal setting, and with this setting the QY300 receives note, program change, control change, and exclusive data from an external MIDI keyboard or other controlling device. -
Page 125: Fingered Chord Zone Assignment
Fingered Chord Zone Assignment ABC chord changes will be ignored during step or realtime recording of any track other than the chord track, and in the edit or job modes. Note Note data filter. This filter should normally be turned off to allow reception of all note data. - Page 126 The Utility Mode Use then “Fingered” parameter to turn the QY300 ABC system “On” or “Off” as required. The “Low” and “High” parameters at the top of the display set the ABC range. The maximum range is from C-2 to G8 (the “High” parameter cannot be set lower than the “Low”...
-
Page 127: Disk Operations
Disk Operations The QY300’s built-in floppy disk drive makes high-volume data storage and retrieval easy. It also facilitates data management, allowing you to create a well-organized personal floppy-disk data library. Direct Save & Load From the Song, Pattern, Phrase, & Chain Modes The main SONG, PATTERN, PHRASE, and CHAIN mode displays all pro- vide direct access to the disk save and load functions via the [F5] and [F6] keys. -
Page 128: Direct Save
Disk Operations Direct Save The disk write-protect slide must be in the write-enable position to perform a save operation. If it is not, the “Write Protected!” error message will appear when you attempt to execute the save op- eration. You can use the [F6] function key (“Exit”) to exit from the disk dis- play at any time except during... -
Page 129: Direct Load
Direct Load also be used to specify the file number. File names appear in alphabetical order. You can use the [F6] function key (“Exit”) to exit from the DISK mode at any time except during the actual disk operation. The Disk Mode Press the [F6] function key (“Load”) from the SONG, PATTERN, PHRASE, or CHAIN mode to go directly to the corresponding disk load display. - Page 130 Disk Operations Notice Regarding SMF (Standard MIDI File) Format #1 Data Loads When replaying SMF Format #1 data, you may find that the QY300 does not reproduce some specific data on the origi- nally intended tracks. The prob- lem, which is related to the char- acteristics of format #1, is most likely to occur with respect to GM-type data, where the QY300...
-
Page 131: Save & Load
Save & Load The disk write-protect slide must be in the write-enable position to perform a save operation. If it is not, the “Write Protected!” error message will appear when you attempt to execute the save op- eration. • File names can be up to 8 characters in length. -
Page 132: Delete
Disk Operations Delete The disk write-protect slide must be in the write-enable position to perform a delete operation. If it is not, the “Write Protected!” er- ror message will appear when you attempt to execute the de- lete operation. Rename The disk write-protect slide must be in the write-enable position to... -
Page 133: Format
Format The format operation erases all data from the disk! The disk write-protect slide must be in the write-enable position to perform a format operation. If it is not, the “Write Protected!” er- ror message will appear when you attempt to execute the for- mat operation. -
Page 134: Appendix
Appendix Appendix Troubleshooting Problem No power No sound Keys do not produce correct pitch. Sound is choppy and interrupted. [PLAY] button fails to start playback. Can’t set the time signature. Can’t change phrase length. Song playback stops midway. Chord changes within a measure fall to produce new sound. -
Page 135: Error Messages
Error Messages Monitor Illegal Input Preset Phrase No Data MIDI MIDI Data Error Checksum Error Buffer Full Now Running Data Exists Bulk Ignored DISK No Disk Illegal Format Bad Disk File Not Found Write Protected Disk Full Illegal File Can’t Change File Name System Memory Full Battery Low... -
Page 136: Specifications
Appendix Specifications Sequencer No. of Trackes Song mode: Pattern mode: 8 tracks (TR1 … TR8) Phrase mode: 1track Data Capacity Approximately 53,000 notes 10 songs 100 styles 8 sections (800 patterns) 100 user phrases Preset Phrases 3093 phrases Record Modes Realtime, Step, Punch-in Recording, Edit Insert Preset Chords 28 types (including “thru”) - Page 137 Index [–1/NO] & [+1/YES] keys ... 6 Accompaniment sequencing, overview ... vii Append pattern, pattern job ... 88 Append phrase, phrase job ... 100 Audio connections ... 3 Bass phrase chord type, pattern mode ... 61 Bass phrase chord type, chord step record ... 72 Beat-clock parameter, edit mode ...
- Page 138 Appendix Gate time & velocity modify, playback ... 22 Gate time parameter, edit mode ... 106 Get phrase, phrase job ... 101 Icons ...vi Initialize play effect, pattern job ... 89 Initialize play effect, song job ... 52 Input filters ... 116 Interval time ...
- Page 139 Quantization, playback ... 18 Quantize, phrase job ... 93 Quantize, song job ... 35 Realtime recording ... 23 Realtime recording, accompaniment ... 65 Record ready mode ... 24 Rename disk file ... 124 Retrigger parameter ... 80 Reverb ... 15 Save &...
- Page 140 M E M O...
Need help?
Do you have a question about the QY-300 and is the answer not in the manual?
Questions and answers