
Related Manuals for Cameo AZOR W2


Summary of Contents for Cameo AZOR W2
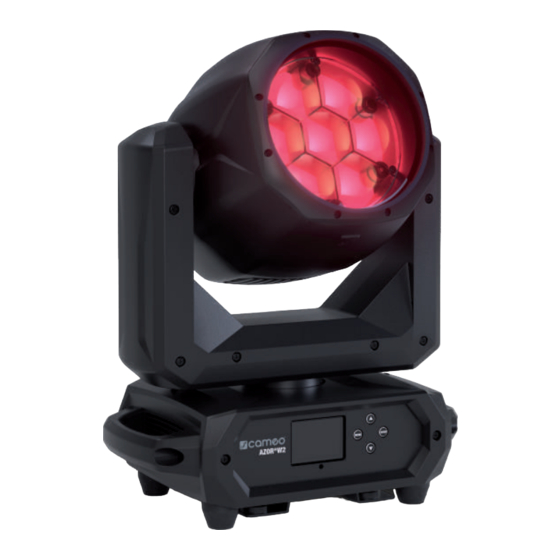
- Page 1 USER´S MANUAL BEDIENUNGSANLEITUNG MANUEL D`UTILISATION MANUAL DE USUARIO INSTRUKCJA OBSŁUGI MANUALE D‘ USO AZOR ® LED WASH MOVING HEAD CLAZORW2...
-
Page 2: Table Of Contents
CONTENTS / INHALTSVERZEICHNIS / CONTENU / CONTENIDO / TREŚĆ / CONTENUTO ENGLISH INFORMATION ON THIS USER MANUAL INTENDED USE DEFINITIONS AND SYMBOL EXPLANATIONS SAFETY INSTRUCTIONS NOTES ON PORTABLE INDOOR DEVICES PACKAGING CONTENT INTRODUCTION CONNECTIONS, OPERATING AND DISPLAY ELEMENTS OPERATION SETUP AND INSTALLATION CARE, MAINTENANCE AND REPAIR DIMENSIONS TECHNICAL SPECIFICATIONS... - Page 3 FRANÇAIS INFORMATIONS SUR CE MANUEL D'UTILISATION UTILISATION PRÉVUE DÉFINITIONS ET EXPLICATION DES PICTOGRAMMES CONSIGNES DE SÉCURITÉ NOTES SUR LES APPAREILS PORTABLES POUR INTÉRIEUR CONTENU DU CARTON INTRODUCTION CONNECTEURS, UTILISATION ET INDICATEURS UTILISATION MONTAGE ET INSTALLATION ENTRETIEN, MAINTENANCE ET RÉPARATION DIMENSIONS CARACTÉRISTIQUES TECHNIQUES DISTANCE MINIMALE PAR RAPPORT À...
- Page 4 CONTENTS / INHALTSVERZEICHNIS / CONTENU / CONTENIDO / TREŚĆ / CONTENUTO DEFINICJE I OBJAŚNIENIA SYMBOLI INSTRUKCJE BEZPIECZEŃSTWA UWAGI DOTYCZĄCE URZĄDZEŃ PRZENOŚNYCH DO UŻYTKU W POMIESZCZENIACH ZAWARTOŚĆ OPAKOWANIA WPROWADZENIE PRZYŁĄCZA, ELEMENTY OBSŁUGI I WSKAŹNIKI OBSŁUGA KONFIGURACJA I INSTALACJA PIELĘGNACJA, KONSERWACJA I NAPRAWA WYMIARY SPECYFIKACJE TECHNICZNE MINIMALNA ODLEGŁOŚĆ...
-
Page 5: Information On This User Manual
This device has been developed and manufactured to the highest quality standards to ensure many years of trouble-free operation. Please read this user manual carefully to be able to quickly put your new Cameo Light product to optimum use. Further information about Cameo Light is available on our website CAMEOLIGHT.COM. -
Page 6: Safety Instructions
This symbol identifies hazards that can cause electric shock. This symbol identifies hazardous areas or hazardous situations. This symbol indicates hazards caused by hot surfaces. This symbol indicates hazards caused by intense light sources. This symbol indicates a device in which there are no user-replaceable parts. This symbol indicates additional information on the operation of the product. - Page 7 2. Make sure that the voltage and frequency of the mains supply correspond to the values indicated on the device. If the device has a voltage selector switch, do not turn the device on until it has been set correctly. Use only suitable power cables. 3.
- Page 8 ATTENTION: 1. Do not install and operate the device in the vicinity of radiators, heat accumulators, ovens, or other heat sources. Ensure that the device is always installed in such a way that it is sufficiently cooled and cannot overheat. 2.
- Page 9 The operation of radio systems is subject to official regulations. These may vary from region to region and must be checked by the operator before use (e.g. radio frequency and transmission power). WARNING: Wireless transmitting devices are not suitable for use in sensitive areas in which radio operation can lead to potential detrimental effects.
-
Page 10: Notes On Portable Indoor Devices
RDM standard (Remote Device Management). Remote device management allows the user to monitor the status and configuration of RDM devices using an RDM-capable controller, such as the optionally available Cameo UNICON (item number CLIREMOTE). The Cameo UNICON also allows access to the entire spotlight menu. -
Page 11: Connections, Operating And Display Elements
TRUE1-compatible mains input socket. Operating voltage 100 - 240 V AC / 50 - 60 Hz. Use the included power cable. POWER OUT TRUE1-compatible mains output socket. Enables power supply to other CAMEO spotlights. Ensure that the total power consumption of all connected devices does not exceed the value specified on the device in amperes (A). -
Page 12: Operation
Upon switching on the spotlight, the message "Update Wait" is displayed momentarily, followed by "Welcome to Cameo", the model name and the software version. Thereafter, the motors are reset (Motor Reset Please Wait). After this process, the spotlight is ready for operation and the... - Page 13 MAIN SCREEN IN DMX OPERATING MODE In DMX mode, the main screen shows the currently set DMX start address (see illustration). Flas- hing characters indicate that no DMX signal is present. SET DMX START ADDRESS (DMX Address) Starting from the main screen, press MENU to enter the main menu. Now use ⏶ or ⏷ to select the menu item DMX Address and confirm with ENTER.
- Page 14 A delay can be set for slave units for the time-delayed output of the control signal of the stand-alone operating modes. Activate one of the eight available scenes (Scene 1 - 8) or one of the eight available loops (Loop 1 - 8). The settings are made individually for each scene and each loop and are retained even after the device is restarted.
- Page 15 SLAVE MODE Standard slave operation: Starting from the main screen, press MENU to enter the main menu. Use the ⏶ or ⏷ buttons to select the Slave menu item, confirm with ENTER, then select slave group 0 and confirm again. Connect the slave and master units (same model, same software version) using a DMX cable and activate the control signal output (Stand Alone ->...
- Page 16 SYSTEM SETTINGS (Settings) Starting from the main screen, press MENU to enter the main menu. Use the ⏶ or ⏷ buttons to select the menu item Settings and confirm with ENTER. This takes you to the submenu (see table). Select submenu items with ⏶ or ⏷, confirm with ENTER, change value or status with ⏶...
- Page 17 Dimmer Light intensity can be finely adjusted Settings at lower and higher DMX values and (Dim- broadly adjusted at medium DMX mer curve) values Select LED PWM frequency The spotlight responds immediately to changes of the DMX value The spotlight behaves in a similar way (Dimmer to a halogen spotlight with gradual response)
- Page 18 Operational status Last command is retained in case the DMX The last selected stand-alone operating mode is signal is inter- activated rupted 10 second fade to blackout Activates blackout Full On Mirror pixels Function disabled Mirror pixels horizontally Flip pixels vertically Flip pixels horizontally and vertically Save settings in 3 Save all current settings as user preset A...
- Page 19 Pre-programmed sequence to test all components Pre-programmed sequence to test all components under maxi- mum load Activate all motors individually with values of 000 to 255 Do not reset service operation time Reset service operation time SYSTEM INFORMATION (System Info) Starting from the main screen, press MENU to enter the main menu.
-
Page 20: Setup And Installation
QUICKLIGHT Set up a scene quickly and easily using the basic Moving Head functions without an external controller. Starting from the main screen, press MENU to access the main menu. Use ⏶ or ⏷ to select Quicklight and confirm with ENTER. Now select the desired submenu item, confirm, set the value as required and confirm again. -
Page 21: Care, Maintenance And Repair
CARE, MAINTENANCE AND REPAIR In order to ensure the long-term, proper functioning of the device, it must be regularly cleaned and, if necessary, serviced. The maintenance requirement depends on the intensity of use and the environment in which it is used. We recommend a visual inspection before each operation. -
Page 22: Dimensions
DIMENSIONS (mm) TECHNICAL SPECIFICATIONS Product number: CLAZORW2 Product type: LED moving light Type: Wash light Colour spectrum (Centre LEDs): RGBL Number of centre LEDs: LED type (Centre LEDs): 40 W CCT (Centre LEDs): 2200 K - 8000 K Luminous flux (Centre LEDs): 3000 lm Light intensity: 4100 lx @ 10 m, narrow zoom... - Page 23 Control: DMX512, RDM, iDMX stick compatible 19-CH Effect,18-channel HSI, 18-channel RGBL, 23-channel DMX mode: RGBL, 34-channel HSI, 36-channel RGB, 43-channel RGBL, 44-channel RGBL, 54-channel Full Access Pan (fine); Tilt (fine); Dimmer (fine); Strobe Functions; Red (fine); Green (fine); Blue (fine); Lime (fine); Hue (fine); Sat- uration;...
-
Page 24: Minimum Distance To Illuminated Surface
RDM UID: 0x08A40057XXXX Power cable (1 m) with True1-compatible plug and Additional features: 2 x Omega mounting brackets included MINIMUM DISTANCE TO ILLUMINATED SURFACE This symbol with the distance stated in metres (m) indicates the minimum dis- tance of the light fixture to the illuminated surface. In this example, the distance 0.5 m is 0.5 m. -
Page 25: Manufacturer's Declarations
MANUFACTURER’S DECLARATIONS Manufacturer's warranty & limitation of liability Adam Hall GmbH | Adam-Hall-Str.1 | 61267 Neu-Anspach | Germany E-mail: Info@adamhall.com / +49 (0)6081 / 9419-0 Our current warranty conditions and limitation of liability can be found at: https://cdn-shop.adamhall.com/media/pdf/Manufacturers-Declarations-CAMEO_DE_EN_ES_FR.pdf For service requests, please contact your distribution partner. CE conformity Adam Hall GmbH hereby confirms that this product meets the following guidelines (where applicable):... -
Page 26: Deutsch
Dieses Gerät wurde unter hohen Qualitätsanforderungen entwickelt und gefertigt, um viele Jahre einen reibungslosen Betrieb zu gewährleisten. Bitte lesen Sie diese Bedienungsanleitung sorgfäl- tig, damit Sie Ihr neues Produkt von Cameo Light schnell und optimal einsetzen können. Weitere Informationen über Cameo Light erhalten Sie auf unserer Website CAMEOLIGHT.COM. -
Page 27: Sicherheitshinweise
Dieses Symbol kennzeichnet Gefahren, die einen elektrischen Schlag verursachen können. Dieses Symbol kennzeichnet Gefahrenstellen oder gefährliche Situationen. Dieses Symbol kennzeichnet Gefahren durch heiße Oberflächen. Dieses Symbol kennzeichnet Gefahren durch intensive Lichtquellen. Dieses Symbol kennzeichnet ein Gerät, in dem sich keine vom Benutzer austauschba- ren Teile befinden. - Page 28 ACHTUNG: 1. Nehmen Sie das Gerät nicht in Betrieb, wenn es starken Temperaturschwankungen ausgesetzt war (beispielsweise nach dem Transport). Feuchtigkeit und Kondensat könnten das Gerät beschädigen. Schalten Sie das Gerät erst ein, wenn es Umge- bungstemperatur erreicht hat. 2. Stellen Sie sicher, dass die Spannung und die Frequenz des Stromnetzes mit den auf dem Gerät angegebenen Werten übereinstimmen.
- Page 29 VORSICHT: 1. Bei beweglichen Bauteilen wie Montagebügeln, oder sonstigen beweglichen Bau- teilen besteht die Möglichkeit sich zu klemmen. 2. Bei Geräten mit motorisch angetriebenen Bauteilen besteht Verletzungsgefahr durch die Bewegung des Gerätes. Plötzliche Gerätebewegungen können zu Schreckreaktionen führen. 3. Die Gehäuseoberfläche des Geräts kann sich im regulären Betrieb stark erwärmen. Stellen Sie sicher, dass ein versehentliches Berühren des Gehäuses ausgeschlos- sen ist.
- Page 30 4. In diesen Leuchten sind fest installierte Leuchtmittel verbaut, welche nicht durch den Benutzer zu tauschen sind. Die in dieser Leuchte enthaltene Lichtquelle darf nur vom Hersteller oder seinem Servicepartner oder einer ähnlich qualifizierten Person ausgetauscht werden. SIGNALÜBERTRAGUNG PER FUNK (z.B. W-DMX oder Audio-Funksysteme): Die Qualität und Leistungsfähigkeit kabelloser Signalübertragungen ist generell abhängig von den Umgebungsbedingungen.
-
Page 31: Hinweise Für Ortsveränderliche Indoor-Geräte
Ihren Vertriebspartner bitte unverzüglich nach dem Kauf, falls die Lieferung nicht komplett oder beschädigt ist. Im Lieferumfang des Produkts sind enthalten: X 1 x AZOR W2 LED Moving Head X 1 x Netzkabel X 2 x Omega-Bügel X 1 x Bedienungsanleitung EINFÜHRUNG... -
Page 32: Anschlüsse, Bedien- Und Anzeigeelemente
Der Scheinwerfer verfügt über den RDM-Standard (Remote Device Management). Diese Gerätefern- verwaltung ermöglicht die Statusabfrage und Konfiguration von RDM-Endgeräten über einen RDM-fähigen Controller, wie den optional erhältlichen Cameo UNICON (Artikelnummer CLIREMOTE). Das Cameo UNICON ermöglicht darüber hinaus den Zugriff auf das gesamte Scheinwerfermenü. ANSCHLÜSSE, BEDIEN- UND ANZEIGEELEMENTE... - Page 33 TRUE1 kompatible Netzeingangsbuchse. Betriebsspannung 100 - 240V AC / 50 - 60Hz. Anschluss mit Hilfe des mitgelieferten Netzkabels. POWER OUT TRUE1 kompatible Netzausgangsbuchse. Dient der Netzversorgung weiterer CAMEO Scheinwerfer. Achten Sie darauf, dass die gesamte Stromaufnahme aller angeschlossenen Geräte den auf dem Gerät in Ampere (A) angegebenen Wert nicht überschreitet.
-
Page 34: Bedienung
ANMERKUNGEN Beim Startvorgang des Scheinwerfers wird für kurze Zeit „Update Wait“, dann „Welcome to Cameo“, die Modellbezeichnung und die Softwareversion im Display angezeigt. Danach werden die Motoren zurückgesetzt (Motor Reset Please Wait). Nach diesem Vorgang ist der Scheinwerfer betriebsbereit und die Betriebsart, die zuvor aktiviert war, wird gestartet. - Page 35 DMX-BETRIEBSART EINSTELLEN (DMX Mode) Ausgehend von der Hauptanzeige gelangen Sie durch Drücken auf MENU in das Hauptmenü. Mit Hilfe der Taster ⏶ bzw. ⏷ wählen Sie nun den Menüpunkt DMX Mode aus und bestätigen mit ENTER. Wählen Sie wiederum mit Hilfe von ⏶ bzw. ⏷ die gewünschte DMX-Betriebsart aus und bestätigen mit ENTER.
- Page 36 Steuersignal via DMX OUT weiterleiten und Delay für Master/ Master Delay Slave-Einheiten einstellen: Off, 0.1s - 2.0s Alone Alone Steuersignal nicht weiterleiten User Scene Scene Auswahl und Aktivierung der gewünschten Szene Play Scene/ 1 - 8 Loop Loop 1 Loop Auswahl und Aktivierung des gewünschten Loops User Tilt...
- Page 37 Steuersignals (Stand Alone -> Master/Alone -> Master) und eine der Stand-Alone-Betriebsarten (Play Scene/Loop). Nun folgt die Slave-Einheit exakt der Master-Einheit. Erweiterter Slave-Betrieb: Wenn Sie beim Master / Slave-Betrieb die Steuerung der Sla- ve-Einheiten durch eine der Stand-Alone-Betriebsarten Play Scene oder Play Loop durchführen möchten, kann das Steuersignal in bis zu 24 Stufen zeitlich verzögert wiedergegeben werden, die Verzögerung wird im Stand Alone Menü...
- Page 38 Daraufhin gelangen Sie in das Untermenü zum Einstellen der Untermenüpunkte (siehe Tabelle, Auswahl mit ⏶ bzw. ⏷, bestätigen mit ENTER, Wert bzw. Status ändern mit ⏶ bzw. ⏷, bestäti- gen mit ENTER). Settings (Fettdruck = Werkseinstellung) Drahtlossteuerung deaktiviert iDMX State Drahtlossteuerung aktiviert Send to Drahtlos...
- Page 39 Die Lichtintensität lässt sich im Dimmer unteren und oberen DMX-Wertbereich Curve (Dim- S-Curve fein und im mittleren DMX-Wertbere- merkurve) ich grob einstellen 650Hz, 1530Hz, 3600Hz, Auswählen der LED PWM Frequenz Dimmer Frequency 12kHz, Dimmer Einstellungen 18.9kHz, 25kHz Der Scheinwerfer reagiert abrupt auf Dimmer Änderungen des DMX-Werts Response...
- Page 40 Auto Automatische Lüftersteuerung Fan Off Deaktivierter Lüfter bei stark reduzierter Helligkeit Konstant niedrige Lüftergeschwindigkeit bei Constant Low Lüfter- reduzierter Helligkeit, falls notwendig einstellungen Konstant mittlere Lüftergeschwindigkeit bei reduz- Constant Mid ierter Helligkeit, falls notwendig Constant Konstant hohe Lüftergeschwindigkeit High Hold Letzter Befehl wird gehalten Last Stand Die zuletzt ausgewählte Stand Alone Betriebsart...
- Page 41 Factory Zurücksetzen auf Werkseinstellung Default Zurücksetzen auf User A Werte (User Werte speichern: User Default A Settings -> Store Default) Load Default Zurücksetzen auf User B Werte (User Werte speichern: User Default B Settings -> Store Default) Zurücksetzen auf User C Werte (User Werte speichern: User Default C Settings ->...
- Page 42 xxx °C/°F Anzeige der Temperatur der entsprechenden Base xxx °C/°F Komponente Temperature FX LED xxx °C/°F °C (Celsius) Temperature Einstellen der Temperatureinheit Unit °F (Fahrenheit) xxxx RPM Anzeige der Drehzahl der entsprechenden Fan Speed Lüfter Base xxxx RPM Total xxxx h : xx m Gesamtbetriebszeit Operation xxxx h : xx m...
-
Page 43: Aufstellung Und Montage
AUFSTELLUNG UND MONTAGE GEFAHR: Überkopfmontage erfordert umfassende Erfahrung, einschließlich der Berech- nung der Grenzwerte für die Arbeitslast, des verwendeten Installationsmaterials und der regelmäßigen Sicherheitsüberprüfung aller Installationsmaterialien und Scheinwerfer. Wenn Sie diese Qualifikationen nicht haben, versuchen Sie nicht, eine Installation selbst durchzuführen, sondern nutzen Sie die Hilfe von professionellen Unternehmen. - Page 44 PFLEGE (vom Anwender durchführbar) WARNUNG! Vor jeglichen Pflegemaßnahmen müssen die Spannungsversorgung und sofern möglich sämtliche Geräteverbindungen getrennt werden. HINWEIS! Unsachgemäße Pflege kann zu Beeinträchtigung des Gerätes führen bis hin zur Zerstörung. 1. Gehäuseoberflächen müssen mit einem sauberen, feuchten Tuch gereinigt werden. Dabei ist darauf zu achten, dass keine Feuchtigkeit in das Gerät eindringen kann.
-
Page 45: Abmessungen
ABMESSUNGEN (mm) TECHNISCHE DATEN Artikelnummer: CLAZORW2 Produktart: LED Moving Light Typ: Wash light Farbspektrum Center LEDs: RGBL LED Anzahl Center LEDs: LED Typ Center LEDs: 40 W CCT Center LEDs: 2200 K - 8000 K Lichtstrom Center LEDs: 3000 lm Beleuchtungsstärke: 4100 lx @ 10 m, Zoom narrow CRI Center LEDs:... - Page 46 19-CH Effect,18-Kanal HSI, 18-Kanal RGBL, 23-Kanal RGBL, DMX-Modus: 34-Kanal HSI, 36-Kanal RGB, 43-Kanal RGBL, 44-Kanal RGBL, 54-Kanal Full Access Pan (fine); Tilt (fine); Dimmer (fine); Strobe Functions; Red (fine); Green (fine); Blue (fine); Lime (fine); Hue (fine); Satura- tion; Color Temperature; Tint; Color Presets; Dimmer FX 1-4; FX Strobe;...
-
Page 47: Mindestabstand Zur Beleuchteten Fläche
MINDESTABSTAND ZUR BELEUCHTETEN FLÄCHE Dieses Symbol mit Entfernungsangabe in Metern (m) gibt den Mindestabstand des Leuchtkörpers zur beleuchteten Fläche an. In diesem Beispiel beträgt der Abstand 0,5 m 0,5 m. Den für dieses Gerät gültigen Wert entnehmen Sie bitte den technischen Daten in dieser Anleitung und dem Aufdruck auf dem Gerätegehäuse! MINDESTABSTAND ZU NORMAL ENTFLAMMBAREN MATERIALIEN Dieses Symbol mit Entfernungsangabe in Metern (m) gibt den Mindestabstand... - Page 48 CE-Konformität Hiermit erklärt die Adam Hall GmbH, dass dieses Produkt folgender Richtlinie entspricht (soweit zutreffend): Niederspannungsrichtlinie (2014/35/EU) EMV-Richtlinie (2014/30/EU) RoHS (2011/65/EU) RED (2014/53/EU) CE-Konformitätserklärung Konformitätserklärungen für Produkte, die der LVD, EMC, RoHS-Richtlinie unterliegen, können unter info@adamhall.com angefragt werden. Konformitätserklärungen für Produkte, die der RED-Richtlinie unterliegen, können unter www. adamhall.com/compliance/ heruntergeladen werden.
-
Page 49: Français
Veuillez lire attentivement ce manuel d'utilisation afin de pouvoir utiliser rapidement et de manière optimale votre nouveau produit Cameo Light. De plus amples informations sur Cameo Light sont disponibles sur notre site web CAMEOLIGHT.COM. -
Page 50: Consignes De Sécurité
Ce pictogramme identifie les dangers qui peuvent causer un choc électrique. Ce pictogramme identifie les zones ou les situations dangereuses. Ce pictogramme indique les dangers occasionnés par les surfaces portées à haute température. Ce pictogramme indique les dangers occasionnés par des sources lumineuses intenses. - Page 51 AVIS : 1. Ne mettez pas immédiatement l’appareil en service s’il a été exposé à d’impor- tantes variations de température (par exemple, juste après le transport). L'humidité et la condensation internes peuvent endommager l'appareil. N'allumez l'appareil qu'une fois qu'il a atteint la température ambiante. 2.
- Page 52 ATTENTION : 1. Les éléments mobiles, tels que les supports de montage, présentent un risque de coincement. 2. Dans le cas d'appareils comportant des composants motorisés, il existe un risque de blessure dû au mouvement de l'appareil. Un mouvement brusque de l'appareil peut provoquer des réactions de choc.
- Page 53 3. Les effets stroboscopiques peuvent provoquer des crises d'épilepsie chez les personnes sensibles. 4. Ces projecteurs sont équipés de lampes installées de manière permanente. Elles ne peuvent pas être remplacées par l'utilisateur. Les lampes contenues dans ce projecteur ne peuvent être remplacées que par le fabricant, son partenaire de service après-vente ou une personne de qualification similaire.
-
Page 54: Notes Sur Les Appareils Portables Pour Intérieur
TRANSMISSION VIA W-DMX AVERTISSEMENT : En général, la transmission DMX sans fil ne doit pas être utilisée pour des applications impliquant des facteurs liés à la sécurité qui pourraient entraî- ner des blessures ou des dommages matériels en cas de défaillance. Cela s'applique en particulier aux scènes et structures mobiles, aux moteurs/ascen- seurs ou dispositifs de levage commandés par DMX pour contrôle de plates-formes élévatrices, de systèmes hydrauliques ou de dispositifs mobiles similaires. -
Page 55: Contenu Du Carton
Le projecteur est compatible avec la norme RDM (Remote Device Management). La gestion à dis- tance des appareils permet à l'utilisateur de contrôler l'état et la configuration des appareils RDM à l'aide d'un contrôleur compatible RDM, tel que le Cameo UNICON disponible en option (référence article CLIREMOTE). -
Page 56: Connecteurs, Utilisation Et Indicateurs
Prise d'entrée secteur compatible TRUE1. Tension secteur : 100-240 V, 50-60 Hz. Utilisez le câble secteur fourni. POWER OUT Renvoi secteur compatible TRUE1. Permet d'alimenter d'autres projecteurs CAMEO. Assurez-vous que la consommation totale de tous les appareils connectés ne dépasse pas la valeur indiquée sur l'appareil en ampères (A). -
Page 57: Utilisation
Lorsque vous allumez le projecteur, le message "Update Wait" s'affiche quelques instants, suivi de "Welcome to Cameo", du nom du modèle et de la version du logiciel. Ensuite, les moteurs sont réinitialisés (Motor Reset Please Wait). Le projecteur est ensuite prêt à fonctionner, dans le dernier mode activé... - Page 58 RÉGLAGE DE L'ADRESSE DE DÉPART DMX (DMX Address) À partir de l'écran principal, appuyez sur MENU pour accéder au menu principal. Appuyez ensuite sur ⏶ ou ⏷ pour sélectionner l'élément de menu DMX Address puis confirmez avec ENTER. Utilisez les touches ⏶ ou ⏷ pour configurer l'adresse de départ DMX souhaitée et appuyez sur ENTER pour confirmer (la valeur la plus élevée accessible dépend du mode DMX sélectionné).
- Page 59 conservés même après le redémarrage de l'appareil. À partir de l'écran principal, appuyez sur MENU pour accéder au menu principal. Appuyez ensuite sur ⏶ ou ⏷ pour sélectionner l'élément de menu Stand Alone puis confirmez avec ENTER. Sélectionnez ensuite l'élément de sous-menu souhaité, confirmez et procédez aux réglages nécessaires (voir tableau).
- Page 60 MODE ESCLAVE (Slave) Fonctionnement standard en mode esclave : À partir de l'écran principal, appuyez sur MENU pour accéder au menu principal. Utilisez les touches ⏶ ou ⏷ pour sélectionner l'élément de menu Slave, confirmez avec ENTER, puis sélectionnez le Slave Group 0 et confirmez à nouveau. Connectez les projecteurs esclave et maître (même modèle, même version du logiciel) à...
- Page 61 PARAMÈTRES SYSTÈME (Settings) À partir de l'écran principal, appuyez sur MENU pour accéder au menu principal. Utilisez les touches ⏶ ou ⏷ pour sélectionner l'élément de menu Settings puis confirmez avec ENTER. Vous accédez alors au sous-menu (voir tableau). Sélectionnez les éléments du sous-menu avec ⏶...
- Page 62 Paramètres de L’intensité lumineuse augmente gradateur linéairement avec la valeur DMX L’intensité lumineuse varie finement pour les valeurs DMX basses, et plus grossièrement pour les valeurs DMX élevées (Dim- L’intensité lumineuse varie grossière- mer curve) ment pour les valeurs DMX basses et finement pour les valeurs DMX élevées L'intensité...
- Page 63 Réglage des Pas de noir lorsque la lyre bouge mouvements de Noir lorsque la lyre bouge la lyre Fonction désactivée Ralentissement des mouvements du moteur pour un fonctionnement plus silencieux Réglages Contrôle automatique du ventilateur du ventilateur Ventilateur désactivé et luminosité fortement réduite Vitesse du ventilateur constante et faible, luminos- ité...
- Page 64 Vous trouverez dans le tableau ci-dessous des informations sur les éléments de sous-menus du menu Service avec les options correspondantes (sélectionnez avec ⏶ ou ⏷, confirmez avec ENTER, modifiez la valeur ou l'état avec ⏶ ou ⏷, confirmez avec ENTER). Charge les réglages d'usine Charge les valeurs du préréglage User A (pour enregistrer les valeurs utilisateur :...
- Page 65 Affichage de la version du micrologiciel de l'appareil Affichage de la température de l'appareil (Celsius) Réglage de l'unité de température (Fahrenheit) Affichage de la vitesse des ventilateurs corre- spondants Durée totale de fonctionnement Durée d'utilisation Durée de fonctionnement de la lampe/LED Temps de fonctionnement depuis la dernière réinitialisation de la durée de fonctionnement (identifiant unique)
-
Page 66: Montage Et Installation
MONTAGE ET INSTALLATION DANGER : Le montage au plafond nécessite une grande expérience, notamment pour calculer les valeurs limites de charge du matériel d’installation et vérifier régulièrement la sécurité de tous les matériaux d’installation et des projecteurs. Si vous ne possédez pas ces qualifications, n'essayez pas d'effectuer l'installation vous- même. - Page 67 ENTRETIEN (peut être effectué par l'utilisateur) AVERTISSEMENT ! Avant d'effectuer toute opération d'entretien ou de maintenance, il faut débrancher l'alimentation électrique et, si possible, toutes les connexions de l'appareil. À NOTER : Un entretien inadéquat peut entraîner une dégradation de l'appareil pou- vant aller jusqu'à...
-
Page 68: Dimensions
DIMENSIONS (mm) CARACTÉRISTIQUES TECHNIQUES Référence produit : CLAZORW2 Type de produit : Lyre asservie à LED Type : Projecteur Wash Spectre de couleurs RGBL (LED centrales) : Nombre de LED centrales : Type de LED (LED centrales) : 40 W CCT (LED centrales) : 2200 K - 8000 K Flux lumineux (LED centrales) : 3000 lm Intensité... - Page 69 Fréquence de la modulation de la 650 Hz ; 1 530 Hz ; 3 600 Hz ; 12 kHz ; 18.9 kHz / 25 kHz largeur d'impulsion (PWM) Entrée DMX : XLR mâle à 5 broches Sortie DMX : XLR femelle à 5 broches Contrôle : Compatible DMX512, RDM et émetteur-clé USB iDMX 19-CH Effect,18-channel HSI, 18-channel RGBL, 23-channel Mode DMX : RGBL, 34-channel HSI, 36-channel RGB, 43-channel RGBL, 44-channel RGBL, 54-channel Full Access...
-
Page 70: Distance Minimale Par Rapport À La Surface Éclairée
Distance minimale par rapport aux matériaux 0,5 m inflammables ordinaires : Matériau du boîtier : Métal, ABS Couleur du boîtier : Noir Refroidissement du boîtier : Ventilateur thermocontrôlé Dimensions (L x H x P, sans sup- 308 x 414 x 193 mm port de montage) : Poids : 8,6 kg UID RDM : 0x08A40057XXXX... -
Page 71: Déclarations Du Fabricant
2. Respectez toutes les lois relatives à l'élimination des déchets en vigueur dans votre pays. 3. En tant que particulier, vous pouvez obtenir des informations sur les possibilités d'élimination respectueuse de l'environnement auprès du vendeur du produit ou des autorités régionales compétentes. DÉCLARATIONS DU FABRICANT GARANTIE DU FABRICANT ET LIMITATION DE RESPONSABILITÉ... -
Page 72: Español
Este equipo está diseñado y fabricado con los estándares de calidad más exigentes, para garan- tizar un correcto funcionamiento durante muchos años. Lea atentamente este manual de usuario para poder aprovechar rápidamente toda la funcionalidad de su nuevo producto de Cameo Light. Más información sobre Cameo Light en la web CAMEOLIGHT.COM. -
Page 73: Instrucciones De Seguridad
Este símbolo indica peligro de descarga eléctrica. Este símbolo identifica las zonas o situaciones peligrosas. Este símbolo indica peligro por superficie a alta temperatura. Este símbolo indica peligro debido a fuente de luz intensa. Este símbolo indica que en el equipo no hay piezas que pueda sustituir el usuario. Este símbolo indica información complementaria sobre el uso del producto. - Page 74 ATENCIÓN: 1. Si el equipo ha estado expuesto a un cambio brusco de temperatura (por ejemplo, después del transporte), no lo encienda inmediatamente. La condensación o la humedad podrían dañar el equipo. No encienda el equipo hasta que haya alcanza- do la temperatura ambiente.
- Page 75 PRECAUCIÓN: 1. En el caso de los componentes móviles, como los soportes de montaje u otros elementos móviles, existe la posibilidad de que se atasquen. 2. En el caso de los equipos con componentes accionados por motor, existe riesgo de lesiones por el movimiento del equipo.
- Page 76 4. Estos focos cuentan con una lámpara fija que no debe ser sustituida por el usuario. La lámpara incluida en este foco solo puede ser sustituida por el fabricante o uno de sus socios de servicio técnico, o por una persona cualificada. TRANSMISIÓN DE SEÑALES POR RADIO (como W-DMX o sistemas de audio por radio): La calidad y las prestaciones de las transmisiones de señales inalámbricas suelen...
-
Page 77: Indicaciones Para Equipos Portátiles De Interior
Compruebe que ha recibido en perfecto estado todos los componentes del equipo e informe al dis- tribuidor inmediatamente después de la compra si nota algún daño o la falta de algún componente. El producto se suministra con: X 1 x Cabeza móvil LED AZOR W2 X 1 x Cable de alimentación X 2 x Soportes en omega X 1 x Manual de usuario INTRODUCCIÓN... -
Page 78: Conexiones, Controles E Indicadores
El foco es compatible con el protocolo RDM (Remote Device Management) de gestión remota de dispositivos. Esta característica de gestión remota permite consultar el estado y la configuración de equipos RDM mediante un controlador compatible con RDM, como el Cameo UNICON, disponible como accesorio opcional (ref. CLIREMOTE). - Page 79 50/60 Hz. Para enchufar el cable eléctrico suministrado. POWER OUT Toma de salida eléctrica compatible con TRUE1. Sirve para alimentar otros focos CAMEO. Asegúrese de que el consumo total de todos los equipos conectados no supere los amperios especificados del equipo.
-
Page 80: Operación
Al encender el foco, durante unos instantes se mostrará en pantalla el mensaje «Update Wait», seguido de «Welcome to Cameo», el nombre del modelo y la versión del software. A continuación, se reinician los motores («Motor Reset Please Wait»). Al terminar el proceso, el equipo ya está listo para funcionar y se activará... - Page 81 AJUSTE DEL MODO DMX (DMX Mode) Desde la pantalla principal, pulse MENU para ir al menú principal. Ahora, utilice los botones ⏶ o ⏷ para seleccionar la opción DMX Mode del menú y confirme con ENTER. Seleccione de nuevo el modo DMX deseado con ⏶ o ⏷ y confirme con ENTER. Consulte la asignación de canales de los distintos modos DMX en las tablas de la sección CONTROL DMX de este manual.
- Page 82 Seleccionar y activar el bucle deseado Configurar cada escena por separado. Las escenas se activan al seleccionarlas. Seleccionar escena 1-8 Ajustar la duración de paso Ajustar el tiempo de fundido " Seleccionar escena 1-8 / saltar paso Ajustar la duración de paso Ajustar el tiempo de fundido "...
- Page 83 Grupo esclavo para Grupo 0-24 ajustar el retardo de la señal Asigne los focos a uno de los 24 grupos (más grupo 0) según desee. También es posible asignar varios focos a un mismo grupo. El número de grupo es a su vez el factor por el que se multiplica el tiempo de retardo en el equipo maestro.
- Page 84 Configuración inalámbrica (llave Solo recepción W-DMX iDMX opcional) Configuración Girar la pantalla 180° (p. ej., para de pantalla montaje suspendido) No girar la pantalla Siempre encendida Se apaga al cabo de 20 segundos de inactividad Bloqueo automático desactivado Controles bloqueados tras unos 60 segundos sin actividad (LOCKED).
- Page 85 Calibración R, G, B y L con un valor máximo de del color Calibración individual de colores. Ajuste de la Intensidad de R, G, B y L con valores de 0 a 255 Calibración de fábrica Combinación de la calibración de fábrica y RAW Ajustar los No invertir el sentido de giro horizontal...
- Page 86 Píxel espejo Función desactivada Reflejar píxeles horizontalmente Reflejar píxeles verticalmente Reflejar píxeles horizontal y verticalmente Guardar los ajust- Guarda todos los ajustes actuales como preajuste es en 3 preajustes de usuario A distintos Guarda todos los ajustes actuales como preajuste de usuario B Guarda todos los ajustes actuales como preajuste de usuario C MENÚ...
- Page 87 Secuencia preprogramada para probar todos los componentes Secuencia preprogramada para probar todos los componentes a máxima potencia Accionar individualmente todos los motores con valores de 000 a 255 No restablecer el tiempo de funcionamiento de servicio Restablecer el tiempo de funcionamiento de servicio INFORMACIÓN DEL SISTEMA (System Info) Desde la pantalla principal, pulse MENU para ir al menú...
-
Page 88: Instalación Y Montaje
QUICKLIGHT Ajuste una escena de manera fácil y rápida con las funciones básicas de la cabeza móvil sin un controlador externo. Desde la pantalla principal, pulse MENU para acceder al menú principal. Utilice ⏶ o ⏷ para seleccionar Quicklight y confirme con ENTER. Seleccione ahora la opción del submenú... -
Page 89: Cuidado, Mantenimiento Y Reparación
CUIDADO, MANTENIMIENTO Y REPARACIÓN Para garantizar el buen funcionamiento del equipo a largo plazo, hay que limpiarlo con regularidad y, si es necesario, hacerle las revisiones necesarias. Los requisitos de mantenimiento dependen de la intensidad de uso y del entorno en el que se utilice. Por lo general, recomendamos una inspección visual antes de cada puesta en marcha. -
Page 90: Dimensiones
DIMENSIONES (mm) CARACTERÍSTICAS TÉCNICAS Referencia CLAZORW2 Tipo de producto Cabeza móvil LED Tipo Foco wash Espectro cromático de los RGBL LED centrales Número de LED centrales Tipo de LED centrales 40 W LED centrales CCT 2.200 K-8.000 K Flujo luminoso de LED centrales 3.000 lm Iluminancia 4.100 lx a 10 m, zoom estrecho... - Page 91 Entrada DMX XLR macho de 5 pines Salida DMX XLR hembra de 5 pines Control Compatible con DMX512, RDM, llave iDMX 19 canales de efectos, 18 canales HSI, 18 canales RGBL, 23 canales RGBL, 34 canales HSI, 36 canales RGB, 43 ca- Modos DMX nales RGBL, 44 canales RGBL, 54 canales RGBL de acceso completo Pan (fino), Tilt (fine), Dimmer (fino), Strobe Functions, Red (fino), Green (fino), Blue (fino), Lime (fino), Hue (fino), Satura-...
-
Page 92: Distancia Mínima A La Superficie Iluminada
RDM UID: 0x08A40057XXXX Cable de alimentación de 1 m con enchufe compatible True1 Otras características y 2 soportes de montaje en omega suministrados DISTANCIA MÍNIMA A LA SUPERFICIE ILUMINADA Este símbolo con información de distancia en metros (m) indica la distancia mínima de la lámpara con respecto a la superficie iluminada. En este ejemplo, la 0,5 m distancia es de 0,5 m. -
Page 93: Declaración Del Fabricante
DECLARACIÓN DEL FABRICANTE Garantía del fabricante y limitación de responsabilidad Adam Hall GmbH, Adam-Hall-Str. 1, D-61267 Neu Anspach Correo electrónico: Info@adamhall.com / +49 (0)6081 / 9419-0 Consulte nuestras condiciones de garantía y limitaciones de responsabilidad en: https://cdn-shop.adamhall.com/media/pdf/Manufacturers-Declarations-CAMEO_DE_EN_ES_FR.pdf Para reparaciones, póngase en contacto con su distribuidor. Conformidad CE Adam Hall GmbH declara que este producto es conforme con las siguientes directivas (en la medi- da en que sean pertinentes):... -
Page 94: Polski
Urządzenie to zostało opracowane i wyprodukowane zgodnie z najwyższymi standardami jakości, aby zapewnić wiele lat bezawaryjnej pracy. Proszę uważnie przeczytać niniejszą instrukcję obsłu- gi, aby móc szybko optymalnie wykorzystać swój nowy produkt Cameo Light. Więcej informacji na temat Cameo Light znajdą Państwo na naszej stronie internetowej CAMEOLIGHT.COM. -
Page 95: Instrukcje Bezpieczeństwa
Ten symbol wskazuje na zagrożenia, które mogą spowodować porażenie prądem. Ten symbol oznacza niebezpieczne obszary lub niebezpieczne sytuacje. Ten symbol oznacza zagrożenia spowodowane gorącymi powierzchniami. Ten symbol oznacza zagrożenia powodowane przez intensywne źródła światła. Ten symbol oznacza urządzenie, w którym nie ma części wymienianych przez użyt- kownika. - Page 96 UWAGA: 1. Proszę nie włączać urządzenia, jeśli było ono narażone na ekstremalne wahania temperatury (na przykład podczas transportu). Wilgoć i kondensacja mogą uszko- dzić urządzenie. Urządzenie należy włączyć dopiero po osiągnięciu temperatury otoczenia. 2. Proszę upewnić się, że napięcie i częstotliwość sieci zasilającej odpowiadają wartościom podanym na urządzeniu.
- Page 97 PRZESTROGA! 1. Ruchome elementy, takie jak wsporniki montażowe, stwarzają ryzyko zakleszczenia. 2. W przypadku urządzeń z elementami napędzanymi silnikiem istnieje ryzyko obra- żeń spowodowanych ruchem urządzenia. Nagły ruch urządzenia może spowodo- wać reakcje wstrząsowe. 3. Zewnętrzna powierzchnia urządzenia może stać się bardzo gorąca podczas regu- larnej pracy.
- Page 98 4. Lampy zainstalowane na stałe są zintegrowane w swoich jednostkach oświetlenio- wych. Nie mogą one zostać wymieniane przez użytkownika. Lampy zawarte w tej jednostce oświetleniowej mogą być wymieniane wyłącznie przez producenta, jego partnera serwisowego lub podobnie wykwalifikowaną osobę. TRANSMISJA SYGNAŁU DROGĄ RADIOWĄ np. W-DMX lub bezprzewodowe systemy audio: Jakość...
-
Page 99: Uwagi Dotyczące Urządzeń Przenośnych Do Użytku Wpomieszczeniach
TRANSMISJA PRZEZ W-DMX PRZESTROGA: Ogólnie rzecz biorąc, bezprzewodowa transmisja DMX nie może być używana do zastosowań związanych z czynnikami bezpieczeństwa, które mogą skut- kować obrażeniami ciała lub uszkodzeniem mienia w przypadku awarii. Dotyczy to w szczególności ruchomych konstrukcji scen lub trawersów, silników/pod- nośników sterowanych przez DMX lub urządzeń... -
Page 100: Zawartość Opakowania
Reflektor obsługuje standard RDM (Remote Device Management). Zdalne zarządzanie urządzeniami pozwala użytkownikowi monitorować stan i konfigurację urządzeń RDM za pomocą kontrolera ob- sługującego RDM, takiego jak opcjonalnie dostępny Cameo UNICON (numer artykułu CLIREMOTE). Cameo UNICON umożliwia również dostęp do całego menu reflektora. -
Page 101: Przyłącza, Elementy Obsługi I Wskaźniki
Gniazdo wejściowe sieciowe zgodne z TRUE1. Napięcie robocze 100 - 240 V AC / 50 - 60 Hz. Proszę użyć dołączonego kabla zasilającego. POWER OUT Gniazdo wyjścia sieciowego zgodne z TRUE1. Umożliwia zasilanie innych reflektorów CAMEO. Należy upewnić się, że całkowity pobór mocy wszystkich podłączonych urządzeń nie przekracza wartości podanej na urządzeniu w amperach (A). -
Page 102: Obsługa
UWAGI Po włączeniu reflektora przez chwilę wyświetlany jest komunikat "Update Wait", a następnie "Welcome to Cameo", nazwa modelu i wersja oprogramowania. Następnie silniki są resetowane (proszę czekać na reset silnika). Po zakończeniu tego procesu reflektor jest gotowy do pracy i uruchamiany jest wcześniej aktywowany tryb pracy. - Page 103 USTAWIANIE ADRESU POCZĄTKOWEGO DMX (DMX Address) Zaczynając od ekranu głównego, proszę nacisnąć MENU, aby wejść do menu głównego. Teraz proszę użyć ⏶ lub ⏷, aby wybrać pozycję menu DMX Address i potwierdzić przyciskiem EN- TER. Za pomocą przycisków ⏶ lub ⏷ skonfigurować żądany adres początkowy DMX i nacisnąć ENTER, aby potwierdzić...
- Page 104 pętli (Loop 1 - 8). Ustawienia są wprowadzane indywidualnie dla każdej sceny i każdej pętli i są zachowywane nawet po ponownym uruchomieniu urządzenia. Zaczynając od ekranu głównego, proszę nacisnąć MENU, aby wejść do menu głównego. Za po- mocą przycisków ⏶ lub ⏷ proszę wybrać pozycję menu Stand Alone i potwierdzić przyciskiem ENTER.
- Page 105 TRYB SLAVE Standardowa obsługa urządzenia podrzędnego: Zaczynając od ekranu głównego, proszę nacisnąć MENU, aby wejść do menu głównego. Za pomocą przycisków ⏶ lub ⏷ wybrać pozycję menu Slave, potwierdzić przyciskiem ENTER, a następnie wybrać grupę slave 0 i ponownie potwierdzić. Połączyć urządzenia podrzędne i nadrzędne (ten sam model, ta sama wersja oprogra- mowania) za pomocą...
- Page 106 USTAWIENIA SYSTEMOWE (Settings) Zaczynając od ekranu głównego, proszę nacisnąć MENU, aby wejść do menu głównego. Proszę użyć przycisków ⏶ lub ⏷, aby wybrać pozycję menu Settings i potwierdzić przyciskiem ENTER. Spowoduje to przejście do podmenu (patrz tabela). Wybrać pozycje podmenu za pomocą ⏶ lub ⏷, potwierdzić...
- Page 107 Dimmer Intensywność światła wzrasta liniowo Ustawienia wraz z wartością DMX Intensywność światła może być precyzyjnie regulowana przy niższych wartościach DMX i szeroko regulowa- na przy wyższych wartościach DMX Intensywność światła można regulow- Krzywa ać w szerokim zakresie przy niższych ścieniania wartościach DMX i precyzyjnie przy wyższych wartościach DMX Intensywność...
- Page 108 Ustawianie Brak zaciemnienia podczas ruchu ruchów głowy głowy Zaciemnienie podczas ruchu głowy Funkcja wyłączona Spowolnione ruchy silnika zapewniają cichszą pracę Wentylator Automatyczne sterowanie wentylatorem Ustawienia Dezaktywowany wentylator ze znacznie zmnie- jszoną jasnością Stała niska prędkość wentylatora ze zmniejszoną jasnością, jeśli to konieczne Stała średnia prędkość...
- Page 109 Informacje o pozycjach podmenu w menu serwisowym i odpowiadających im opcjach można znaleźć w poniższej tabeli (proszę wybrać za pomocą ⏶ lub ⏷, potwierdzić za pomocą ENTER, zmienić wartość lub status za pomocą ⏶ lub ⏷, potwierdzić za pomocą ENTER). Reset do ustawień...
- Page 110 Wyświetla wersję oprogramowania sprzętowe- go odpowiedniego komponentu Wyświetla temperaturę odpowiedniego kom- ponentu (Celsjusz) Ustawienie jednostki temperatury (Fahrenheit) Wyświetlenie prędkości odpowiednich wentyl- atorów Całkowity czas pracy Czas użytkowania Czas pracy lampy Czas pracy od ostatniego serwisowego zrese- towania czasu pracy (unikalny identyfikator) Wyświetlanie błędów w przypadku awarii QUICKLIGHT Ustawienie sceny szybko i łatwo przy użyciu podstawowych funkcji urządzenia bez zewnętrzne-...
-
Page 111: Konfiguracja I Instalacja
KONFIGURACJA I INSTALACJA NIEBEZPIECZEŃSTWO: Montaż podwieszany wymaga dużego doświadczenia, w tym obliczania wartości granicznych obciążenia sprzętu montażowego i regularnej kontroli bezpieczeństwa wszystkich materiałów instalacyjnych i reflektorów. Jeśli nie posia- dają Państwo takich kwalifikacji, proszę nie podejmować prób samodzielnej instalacji. Należy zwrócić się do wykwalifikowanego specjalisty. Istnieje ryzyko, że nieprawidło- wo zamontowane i zabezpieczone urządzenia mogą... - Page 112 PIELĘGNACJA (może być wykonana przez użytkownika) OSTRZEŻENIE! Przed przystąpieniem do jakichkolwiek czynności konserwacyjnych należy odłączyć zasilanie i, jeśli to możliwe, wszystkie połączenia urządzenia. UWAGA! Niewłaściwa pielęgnacja może doprowadzić do uszkodzenia lub nawet zniszczenia urządzenia. 1. Powierzchnie obudowy należy czyścić czystą, wilgotną szmatką. Proszę upewnić się, że do urządzenia nie przedostanie się...
-
Page 113: Wymiary
WYMIARY (mm) SPECYFIKACJE TECHNICZNE Numer produktu CLAZORW2 Typ produktu: Ruchome światło LED Typ: Oświetlenie typu Wash Spektrum kolorów (środkowe RGBL diody LED): Liczba środkowych diod LED: Typ diody LED (środkowe diody 40 W LED): CCT (środkowe diody LED): 2200 K - 8000 K Strumień... - Page 114 Typ diody LED (FX LED): Częstotliwość PWM 650 Hz; 1530 Hz; 3600 Hz; 12 kHz; 18,9 kHz; 25 kHz Wejście DMX: 5-pinowy męski XLR Wyjście DMX: 5-pinowy żeński XLR Kontrola: Kompatybilność z DMX512, RDM, odbiornik iDMX stick Efekt 19-CH, 18-kanałowy HSI, 18-kanałowy RGBL, 23-kanałowy RGBL, 34-kanałowy HSI, 36-kanałowy RGB, Tryby DMX 43-kanałowy RGBL, 44-kanałowy RGBL, 54-kanałowy pełny...
-
Page 115: Minimalna Odległość Od Oświetlanej Powierzchni
Minimalna odległość od normal- 0,5 m nie łatwopalnych materiałów: Materiał obudowy: Metal, ABS Kolor obudowy: Czarny Chłodzenie obudowy: Wentylator sterowany temperaturowo Wymiary (szer. x wys. x gł., bez wspornika 308 x 414 x 193 mm montażowego): Waga: 8,6 kg RDM UID 0x08A40057XXXX Kabel zasilający (1 m) z wtyczką... -
Page 116: Deklaracje Producenta
2. Należy przestrzegać wszystkich przepisów dotyczących utylizacji obowiązujących w Państwa kraju. 3. Jako klient prywatny mogą Państwo uzyskać informacje na temat przyjaznych dla środowiska opcji utylizacji od sprzedawcy produktu lub odpowiednich władz regionalnych. DEKLARACJE PRODUCENTA GWARANCJA PRODUCENTA I OGRANICZENIE ODPOWIEDZIALNOŚCI Adam Hall GmbH | Adam-Hall-Str.1 | 61267 Neu-Anspach | Niemcy E-mail: Info@adamhall.com / +49 (0)6081 / 9419-0 Nasze aktualne warunki gwarancji i ograniczenia odpowiedzialności można znaleźć... -
Page 117: Italiano
Questo dispositivo è stato sviluppato e prodotto in conformità con elevati standard qualitativi che ne garantiscono il regolare funzionamento per molti anni. Leggere attentamente questo manuale d’istruzioni per utilizzare subito al meglio il nuovo prodotto Cameo Light. Per maggiori informazio- ni su Cameo Light, consultare il nostro sito web CAMEOLIGHT.COM. -
Page 118: Indicazioni Sulla Sicurezza
Questo simbolo indica pericoli che possono causare scosse elettriche. Questo simbolo indica punti di pericolo o situazioni pericolose. Questo simbolo indica pericoli dovuti a superfici calde. Questo simbolo indica pericoli dovuti a sorgenti luminose intense. Questo simbolo indica un dispositivo che non contiene parti sostituibili dall’utente. Questo simbolo indica informazioni complementari sull’utilizzo del prodotto. - Page 119 ATTENZIONE: 1. Non mettere in funzione il dispositivo se ha subito forti sbalzi di temperatura (ad esempio dopo il trasporto). Umidità e condensa potrebbero danneggiare il dispositi- vo. Accendere il dispositivo solo dopo che ha raggiunto la temperatura ambiente. 2. Verificare che la tensione e la frequenza della rete elettrica corrispondano ai valori indicati sul dispositivo.
- Page 120 CAUTELA 1. I componenti mobili, come le staffe di montaggio o componenti mobili di altro tipo, comportano il rischio di schiacciamento. 2. Nei dispositivi con componenti azionati a motore sussiste il pericolo di lesioni pro- vocate dal movimento del dispositivo stesso. Movimenti improvvisi del dispositivo possono causare reazioni da shock.
- Page 121 4. In queste lampade sono installate lampadine fisse che non devono essere sostituite dall’utente. La sorgente luminosa contenuta in questa lampada può essere sostituita solo dal produttore, da un suo partner di assistenza o da una persona con qualifica analoga. TRASMISSIONE DEL SEGNALE VIA RADIO (ad es.
-
Page 122: Avvertenze Per Dispositivi Portatili Per Interni
La trasmissione wireless DMX, inoltre, non deve essere utilizzata per attivare dispo- sitivi a fiamma o pirotecnici, per effetti indotti da esplosione, o per controllare gli effetti di gas o liquidi. Rientrano nei dispositivi di questa categoria i cannoni CO2, gli sparacoriandoli, gli effetti ad acqua e simili. -
Page 123: Introduzione
RDM tramite un controller com- patibile con RDM, come il Cameo UNICON acquistabile come optional (codice articolo CLIREMOTE). Cameo UNICON consente inoltre di accedere al tutto il menu del faro. -
Page 124: Connessioni, Elementi Di Comando E Indicatori
POWER OUT Presa di uscita compatibile con TRUE1. Serve per l’alimentazione elettrica di altri fari CAMEO. Assicurarsi che il totale della potenza assorbita di tutti i dispositivi collegati all’apparecchio non superi il valore indicato in ampere (A). -
Page 125: Utilizzo
Durante la procedura di avvio del faro, sul display appaiono in successione il messaggio “Update Wait”, “Welcome to Cameo”, l’indicazione del modello e la versione del software. I motori vengono quindi ripristinati (Motor Reset Please Wait). Al termine della procedura, il faro è pronto per essere utilizzato e si avvia la modalità... - Page 126 IMPOSTAZIONE DELL’INDIRIZZO DI AVVIO (DMX Address) Premendo MENU nella schermata principale si accede al menu principale. Usare i tasti ⏶ e ⏶ per selezionare la voce di menu DMX Address e confermare con ENTER. Impostare l’indirizzo di avvio DMX desiderato con ⏶ e ⏶ e confermare l’inserimento con ENTER (il valore più alto dipende dalla modalità...
- Page 127 Attivare una delle otto scene disponibili (Scene 1-8) oppure uno degli otto loop disponibili (Loop 1-8). Le impostazioni vengono effettuate separatamente per ogni scena e per ogni loop e permangono anche dopo il riavvio del dispositivo. Premendo MENU nella schermata principale si accede al menu principale. Usare i tasti ⏶ e ⏶ per selezionare la voce di menu Stand Alone e confermare con ENTER.
- Page 128 MODALITÀ SLAVE Modalità Slave standard: premere MENU dalla schermata principale per accedere al menu principale. Con i tasti ⏶ e ⏶ selezionare la voce di menu Slave e confermare con ENTER. Sele- zionare quindi il gruppo Slave 0 (Slave Group 0) e confermare di nuovo. Collegare le unità Slave e Master (stesso modello, stessa versione software) per mezzo di un cavo DMX e sull’unità...
- Page 129 IMPOSTAZIONI DI SISTEMA (Settings) Premendo MENU nella schermata principale si accede al menu principale. Usare i tasti ⏶ e ⏶ per selezionare la voce di menu Settings e confermare con ENTER. Si accede quindi al sottomenu per impostare le voci di sottomenu (v. tabella. Selezionare con ⏶ oppure con ⏶, confermare con ENTER, modificare il valore o lo stato con ⏶...
- Page 130 Impostazioni Con il valore DMX, l’intensità luminosa del dimmer aumenta in maniera lineare. L’intensità luminosa può essere impostata con maggior precisione ai livelli DMX inferiori e con minor preci- sione ai livelli DMX superiori. L’intensità luminosa può essere im- (Curva postata con minor precisione ai livelli dimmer) DMX inferiori e con maggior precisione...
- Page 131 Impostare i movi- Correzione della posizione automatica menti della testa disattivata Correzione della posizione automatica attivata Nessun oscuramento con movimento della testa Oscuramento con movimento della testa Funzione disattivata Movimenti del motore rallentati per un funzionamento più silenzioso Impostazioni Controllo automatico della ventola della ventola Ventola disattivata se la luminosità...
- Page 132 MENU ASSISTENZA (Service) Premendo MENU nella schermata principale si accede al menu principale. Usare i tasti ⏶ e ⏶ per selezionare la voce di menu Service e confermare con ENTER. Le informazioni sulle voci di sottomenu del menu Service e le opzioni corrispondenti sono ripor- tate nella tabella sotto (selezionare con ⏶...
- Page 133 Si accede quindi al sottomenu per aprire le voci di sottomenu (v. tabella. Selezionare con ⏶ oppure con ⏶, confermare con ENTER, aprire l’informazione oppure modificare lo stato con ⏶ o con ⏶, confermare con ENTER). Mostra la versione del firmware del componen- te corrispondente Mostra la temperatura del componente corris- pondente...
-
Page 134: Installazione E Montaggio
Se si attiva la modalità operativa Quicklight, il display non passa automaticamente alla schermata principale. La modalità Quicklight si chiude automaticamente quando si esce dal menu Quicklight. Le impostazioni del menu Quicklight vengono mantenute fino al successivo riavvio del proiettore. Se il faro rimane acceso, quindi, Quicklight può... -
Page 135: Cura, Manutenzione E Riparazione
CURA, MANUTENZIONE E RIPARAZIONE Per garantire il corretto funzionamento del dispositivo nel tempo, è necessario sottoporlo a una pulizia regolare e, se necessario, a manutenzione. La necessità di cura e manutenzione dipende dall’intensità e dall’ambiente di utilizzo. In generale si consiglia di effettuare un’ispezione visiva prima di ogni utilizzo. Si consiglia inoltre di eseguire tutti gli interventi di pulizia applicabili menzionati di seguito ogni 500 ore di funziona- mento o, in caso di minore intensità... -
Page 136: Dimensioni
DIMENSIONI (mm) DATI TECNICI Codice articolo: CLAZORW2 Tipo di prodotto: Testa mobile LED Tipo: Washlight Spettro colori LED centrali: RGBL Numero di LED centrali: Tipo di LED centrali: 40 W LED centrali CCT: 2200 K - 8000 K Flusso luminoso LED centrali: 3000 lm Potenza di illuminazione: 4100 lx a 10 m, zoom stretto LED centrali CRI:... - Page 137 Uscita DMX: XLR femmina a 5 poli Controllo: Compatibile con DMX512, RDM, chiavetta iDMX 19 - Canale Effect, 18 - Canale HSI, 18 - Canale RGBL, 23 - Modalità DMX: Canale RGBL, 34 - Canale HSI, 36 - Canale RGB, 43 - Canale RGBL, 44 - Canale RGBL, 54 - Canale Full Access Pan (fine);...
-
Page 138: Distanza Minima Dalla Superficie Illuminata
Peso: 8,6 kg UID RDM: 0x08A40057XXXX Cavo di alimentazione da 1 m con spina compatibile True1 e Altre caratteristiche: 2 staffe di montaggio Omega forniti in dotazione DISTANZA MINIMA DALLA SUPERFICIE ILLUMINATA Questo simbolo con l’indicazione della distanza in metri (m) indica quale dev’es- sere la distanza minima tra il corpo della lampada e la superficie illuminata. -
Page 139: Dichiarazioni Del Fabbricante
DICHIARAZIONI DEL FABBRICANTE Garanzia del produttore e limitazione di responsabilità Adam Hall GmbH, Adam Hall-Str. 1, D-61267 Neu-Anspach E-mail info@adamhall.com / +49 (0)6081 / 9419-0 Le nostre condizioni di garanzia aggiornate e la limitazione di responsabilità sono consultabili alla pagina: https://cdn-shop.adamhall.com/media/pdf/Manufacturers-Declarations-CAMEO_DE_EN_ES_FR.pdf Per assistenza, rivolgersi al proprio distributore di fiducia. Conformità... -
Page 140: Dmx Control / Dmx Steuerung / Pilotage Dmx
DMX CONTROL / DMX STEUERUNG / PILOTAGE DMX / CONTROL DMX / STEROWANIE DMX / CONTROLLO DMX 19CH RGBL Effect Function Values Sub- Group Channel group 000 - 255 0% to 100% Pan fine 000 - 255 Move- Tilt 000 - 255 ment 0% to 100% Tilt... - Page 141 057 - 068 Ramp down slow to fast 069 - 079 Ramp down random slow to fast 080 - 102 Random Strobe effect slow to fast Multi- FX Strobe functional Strobe Break effect 5s to 1s (Short 103 - 127 Strobe burst with break) 128 - 250 Strobe slow to fast (<1Hz to 20Hz)
- Page 142 000 - 005 Effect Pattern Speed Stop Pattern 006 - 127 Effect Pattern Speed slow to fast Position & Effect Pattern Speed fast to slow Speed 128 - 255 (backwards) Zoom 000 - 255 Narrow to Wide Zoom Beam 000 - 005 No function 006 - 007 Blackout while P/T moving On Blackout 008 - 009 Blackout while P/T moving Off...
- Page 143 120 - 121 PWM 1 (650 Hz) 122 - 123 PWM 2 (1530 Hz) 124 - 125 PWM 3 (3600 Hz) PWM Fre- quency 126 - 127 PWM 4 (12000 Hz) 128 - 129 PWM 5 (18900 Hz) 130 - 131 PWM 6 (25000 Hz) 132 - 133 RAW 134 - 135 Factory Calibration Color Cal-...
- Page 144 Dimmer 000 - 255 0% to 100% Dimmer Intensity Dimmer 000 - 255 fine 000 - 005 Open 006 - 010 Closed Ramp up/down slow 011 - 022 to fast Ramp up/down ran- 023 - 033 dom slow to fast 034 - 045 Ramp up slow to fast Ramp up random slow 046 - 056...
- Page 145 006 - 006 Warm white 007 - 046 Warm white to 2700K 047 - 047 Bulb White (2700K) 048 - 087 2700K to 3200K Color 088 - 088 Halogen White (3200K) Tem- 089 - 128 3200K to 4000K perature 129 - 129 Neutral White (4000K) (affects 130 - 169 4000K to 5600K Color...
- Page 146 Dimmer 000 - 255 0% to 100% FX All 000 - 005 Open 006 - 010 Closed Ramp up/down slow 011 - 022 to fast Ramp up/down ran- 023 - 033 dom slow to fast 034 - 045 Ramp up slow to fast Ramp up random slow 046 - 056 to fast...
- Page 147 044 - 045 Invert Pan Off 046 - 047 Invert Tilt On Move- ment 048 - 049 Invert Tilt Off 050 - 057 No Function 058 - 059 Pixel Mirroring Off Pixel Mirroring Hori- 060 - 061 zontal Pixel Mirroring 062 - 063 Pixel Mirroring Vertical Pixel Mirroring Hori- zontal + Vertical...
- Page 148 Dimmer Curve Dimmer 170 - 171 S-Curve Curve 172 - 221 No function 222 - 223 Reset Pan / Tilt 224 - 233 No function Reset 234 - 235 Reset Head 236 - 237 Reset All 238 - 239 No function Control 240 - 241 Load Factory Defaults 242 - 243 No function...
- Page 149 Strobe Break effect 5s to 1s 103 - 127 (Short burst with break) Multi- Strobe Strobe slow to fast (<1Hz to functional Strobe Functions 128 - 250 20Hz) Strobe 251 - 255 Open 000 - 255 0% to 100% Red fine 000 - 255 Green 000 - 255...
- Page 150 000 - 005 No function 006 - 013 Red 014 - 021 Amber 022 - 029 Orange 030 - 037 Yellow 038 - 045 Green 046 - 053 Turquoise Color Color 054 - 061 Cyan Mixing 062 - 069 Blue 070 - 077 Lavender 078 - 085 Mauve 086 - 093 Magenta...
- Page 151 Strobe slow to fast (<1Hz to Multi- 128 - 250 20Hz) FX Strobe functional Strobe 251 - 255 Open 000 - 005 Off 006 - 026 1 027 - 047 2 048 - 068 3 069 - 089 4 090 - 110 5 Pattern 111 - 131 6 Selection...
- Page 152 000 - 005 Effect Pattern Speed Stop Pattern Effect Pattern Speed slow to 006 - 127 Position fast & Speed Effect Pattern Speed fast to 128 - 255 slow (backwards) Pattern 000 - 005 0s (Off) Pattern Transition 006 - 255 0,1s to 5s Pattern 000 - 005 off Fade/...
- Page 153 Back- ground 000 - 255 Green Back- 0% to 100% ground 000 - 255 Green fine Back- ground 000 - 255 Blue 0% to 100% Back- ground 000 - 255 Blue fine Back- ground 000 - 255 Lime 0% to 100% Back- ground 000 - 255...
- Page 154 252 - 255 Cold white 000 - 000 Off 001 - 127 Magenta -> Neutral 128 - 128 neutral 129 - 255 Neutral -> Green Back- Back- ground ground Color 000 - 005 No function Functions Mixing 006 - 013 Red 014 - 021 Amber 022 - 029 Yellow warm 030 - 037 Yellow...
- Page 155 Zoom 000 - 255 Narrow to Wide Zoom Beam Zoom 000 - 255 fine 000 - 005 No function 006 - 007 Blackout while P/T moving On Blackout 008 - 009 Blackout while P/T moving Off 010 - 024 No function 025 - 025 Record User Scene 1 026 - 026 Record User Scene 2 027 - 027 Record User Scene 3...
- Page 156 120 - 121 PWM 1 (650 Hz) 122 - 123 PWM 2 (1530 Hz) 124 - 125 PWM 3 (3600 Hz) PWM Fre- quency 126 - 127 PWM 4 (12000 Hz) 128 - 129 PWM 5 (18900 Hz) 130 - 131 PWM 6 (25000 Hz) 132 - 133 RAW 134 - 135 Factory Calibration Color Cal-...
- Page 157 Dimmer 000 - 255 0% to 100% Dimmer Intensity Dimmer 000 - 255 fine 000 - 005 Open 006 - 010 Closed 011 - 022 Ramp up/down slow to fast Ramp up/down random slow 023 - 033 to fast 034 - 045 Ramp up slow to fast 046 - 056 Ramp up random slow to fast 057 - 068 Ramp down slow to fast Strobe...
- Page 158 Strobe slow to fast (<1Hz to Multi- 128 - 250 20Hz) FX Strobe functional Control Strobe 251 - 255 Open Zoom 000 - 255 Narrow to Wide Zoom Beam Zoom fine 000 - 255 000 - 005 No function 006 - 007 Blackout while P/T moving On Blackout 008 - 009 Blackout while P/T moving Off 010 - 024 No function...
- Page 159 120 - 121 PWM 1 (650 Hz) 122 - 123 PWM 2 (1530 Hz) 124 - 125 PWM 3 (3600 Hz) PWM Fre- quency 126 - 127 PWM 4 (12000 Hz) 128 - 129 PWM 5 (18900 Hz) 130 - 131 PWM 6 (25000 Hz) 132 - 133 RAW 134 - 135 Factory Calibration Color Cal-...
- Page 160 Green 3 000 - 255 0% to 100% Color Blue 3 000 - 255 0% to 100% Mixing Pixel 3 Lime 3 000 - 255 0% to 100% Red 4 000 - 255 0% to 100% Color Green 4 000 - 255 0% to 100% Mixing Blue 4 000 - 255 0% to 100%...
- Page 161 Random Strobe effect slow to 080 - 102 fast Strobe Break effect 5s to 1s Multi- 103 - 127 Strobe (Short burst with break) functional Strobe Functions Strobe Strobe slow to fast (<1Hz to 128 - 250 20Hz) 251 - 255 Open 000 - 255 0% to 100% Red fine...
- Page 162 006 - 013 Red 014 - 021 Amber 022 - 029 Orange 030 - 037 Yellow 038 - 045 Green 046 - 053 Turquoise 054 - 061 Cyan 062 - 069 Blue 070 - 077 Lavender Color 078 - 085 Mauve Color Mixing 086 - 093 Magenta...
- Page 163 000 - 005 No function 006 - 007 Blackout while P/T moving On Blackout 008 - 009 Blackout while P/T moving Off 010 - 024 No function 025 - 025 Record User Scene 1 026 - 026 Record User Scene 2 027 - 027 Record User Scene 3 User 028 - 028 Record User Scene 4...
- Page 164 132 - 133 RAW 134 - 135 Factory Calibration Color Cal- ibration 136 - 137 User Calibration 138 - 139 Smart Calibration 140 - 141 Display Always On Display Functions 142 - 143 Display Off after 20s 144 - 163 No function 164 - 165 Dimmer Curve Linear 166 - 167 Dimmer Curve Exponential Dimmer...
- Page 165 Red 5 000 - 255 0% to 100% Color Green 5 000 - 255 0% to 100% Mixing Blue 5 000 - 255 0% to 100% Pixel 5 Lime 5 000 - 255 0% to 100% Red 6 000 - 255 0% to 100% Color Single Green 6...
- Page 168 CAMEOLIGHT.COM Adam Hall GmbH Adam-Hall-Str. 1 | 61267 Neu-Anspach | Germany Phone: +49 6081 9419-0 | adamhall.com Adam Hall Ltd. | The Seedbed Business Centre | SS3 9QY Essex | United Kingdom REV: 01...
Need help?
Do you have a question about the AZOR W2 and is the answer not in the manual?
Questions and answers