
Related Manuals for Cameo OTOS W12


Summary of Contents for Cameo OTOS W12
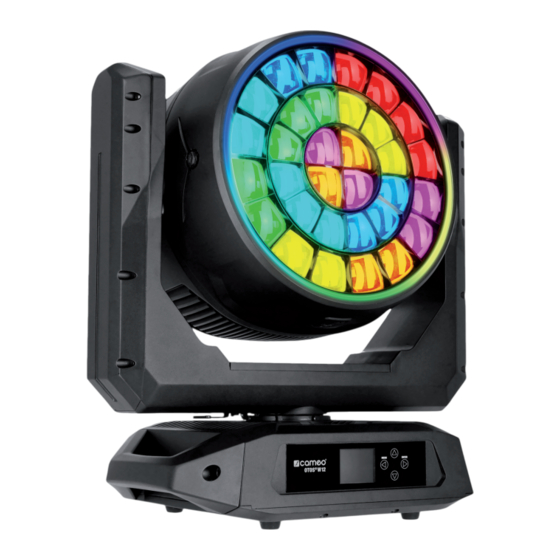
- Page 1 USER´S MANUAL BEDIENUNGSANLEITUNG MANUEL D`UTILISATION MANUAL DE USUARIO INSTRUKCJA OBSŁUGI MANUALE D‘ USO OTOS ® IP65 WASH MOVING HEAD CLOTOSW12...
-
Page 3: Table Of Contents
CONTENTS / INHALTSVERZEICHNIS / CONTENU / CONTENIDO / TREŚĆ / CONTENUTO ENGLISH INFORMATION ON THIS USER MANUAL INTENDED USE EXPLANATIONS OF TERMS AND SYMBOLS SAFETY INSTRUCTIONS NOTES ON PORTABLE OUTDOOR DEVICES PACKAGING CONTENT INTRODUCTION CONNECTIONS AND OPERATING/DISPLAY ELEMENTS OPERATION SET-UP AND INSTALLATION CARE, MAINTENANCE AND REPAIR DIMENSIONS TECHNICAL DATA... - Page 4 FRANÇAIS INFORMATIONS SUR CE MANUEL D'UTILISATION UTILISATION PRÉVUE EXPLICATION DES TERMES ET PICTOGRAMMES CONSIGNES DE SÉCURITÉ REMARQUES À PROPOS DES APPAREILS PORTABLES POUR EXTÉRIEUR CONTENU DU CARTON INTRODUCTION CONNECTEURS, CONTRÔLES ET INDICATEURS UTILISATION MONTAGE ET INSTALLATION ENTRETIEN, MAINTENANCE ET RÉPARATION DIMENSIONS CARACTÉRISTIQUES TECHNIQUES EXPLICATION DE LA CLASSE DE PROTECTION IP...
- Page 5 POLSKI INFORMACJE NA TEMAT NINIEJSZEJ INSTRUKCJI OBSŁUGI PRZEZNACZENIE OBJAŚNIENIA TERMINÓW I SYMBOLI INSTRUKCJE BEZPIECZEŃSTWA UWAGI DOTYCZĄCE PRZENOŚNYCH URZĄDZEŃ DO ZASTOSOWAŃ ZEWNĘTRZNYCH ZAWARTOŚĆ OPAKOWANIA WPROWADZENIE PRZYŁĄCZA, ELEMENTY OBSŁUGI I WSKAŹNIKI OBSŁUGA KONFIGURACJA I INSTALACJA PIELĘGNACJA, KONSERWACJA I NAPRAWA WYMIARY DANE TECHNICZNE WYJAŚNIENIE KLASY OCHRONY IP MINIMALNA ODLEGŁOŚĆ...
-
Page 6: Information On This User Manual
This device has been developed and manufactured to the highest quality standards to ensure many years of trouble-free operation. Please read this user manual carefully to be able to quickly put your new Cameo Light product to optimum use. Further information about Cameo Light is available on our website CAMEOLIGHT.COM INFORMATION ON THIS USER MANUAL •... -
Page 7: Safety Instructions
This symbol identifies hazards that can cause electric shock. This symbol indicates hazardous areas or hazardous situations. This symbol indicates hazards caused by hot surfaces. This symbol indicates that you must avoid looking or staring at the light source. This symbol indicates a device in which there are no user-serviceable parts. This symbol indicates additional information on the operation of the product. - Page 8 2. Make sure that the voltage and frequency of the mains correspond to the values specified on the device. If the device has a voltage selector switch, do not connect the device until it has been set correctly. Use only suitable mains cables. 3.
- Page 9 ATTENTION: 1. Do not install or operate the device near any radiators, heat registers, stoves, or other heat sources. Ensure that the device is always installed in such a way that it is sufficiently cooled and cannot overheat. 2. Do not place ignition sources such as burning candles near the device. 3.
- Page 10 WARNING: Devices with wireless signal transmission are not suitable for use in sen- sitive areas in which radio operation can lead to potentially detrimental interactions. These include: • Hospitals, health centres, or other healthcare facilities that provide patient treatment with qualified personnel and equipment. •...
-
Page 11: Notes On Portable Outdoor Devices
Operating voltage: 100–240 V AC. The lights feature the remote device management (RDM) standard. Remote device management allows the user to monitor the status and configuration of RDM devices using an RDM-capable controller, such as the optionally available Cameo UNICON (item number CLIREMOTE). -
Page 12: Connections And Operating/Display Elements
CONNECTIONS AND OPERATING/DISPLAY ELEMENTS POWER IN IP65 mains input socket with rubber sealing cap. Operating voltage 100–240 V AC / 50–60 Hz. Connection via supplied mains cable (when not in use, always close with the rubber sealing cap). DMX IN Male IP65 5-pin XLR socket for connecting a DMX control device (for example, DMX console;... -
Page 13: Touch-Sensitive Controls
LC DISPLAY The illuminated display shows the currently activated operating mode (main display), the menu items in the main menu and sub-menus, and the numerical value or status in certain menu items. If there is no control signal to the device, the characters in the centre of the display start flashing; the flashing stops as soon as a control signal is available (W-DMX, DMX, and slave operation). - Page 14 The battery-powered display can be activated even if the device is disconnected from the mains. To do this, press and hold MENU for approximately 10 seconds. You can now access device information and change and save system settings without mains connection. The external control of the light is not activated in this case. For this reason, the display shows that there is no control signal even if the device has a control signal.
-
Page 15: Operation
• When the light is correctly connected to the mains, “Software update ... please wait”, the soft- ware version, “Welcome to Cameo”, and “... RESET” are shown on the display during start-up and motor reset. After this process, the light is ready for operation, and the previously activated operating mode is launched. -
Page 16: Wireless Dmx
Art-Net + DMX operating mode sACN + DMX operating mode LED temperature Bluetooth activated LED temperature Bluetooth deactivated W-DMX status W-DMX status Operating Operating mode mode Error message Error message DMX operating mode, DMX address, IP address, DMX operating mode, DMX address, IP address, subnet mask, and universe subnet mask, and universe Stand-alone operating modes... - Page 17 WIRELESS DMX STATUS W-DMX W-DMX W-DMX W-DMX W-DMX W-DMX activated as activated activated as activated as activated as deactivated receiver; not as receiver receiver and receiver and transmitter paired and paired; paired; no paired; DMX transmitter DMX signal signal present switched off or out of range CONTROL MENU (Control)
-
Page 18: Network (Network)
NETWORK (Network) Starting from the main display, press MENU to access the main menu. Use and to select the Control menu and press ENTER. Now select the Network menu item and confirm again. Information on the sub-menu items in the “Network” menu and the corresponding setting options can be found in the table below (select with ... - Page 19 Setting of the IP address: Set first block, confirm, set second block, confirm. Setting of the subnet mask: Set first block, confirm, set second block, confirm. Setting of the pixel start address from 001 to 4xx Pixel via network Pixel control via network Pixel via DMX Pixel control via DMX Relaying of the control signal to XLR Out...
- Page 20 Selection of Step 1–8 Setting of the step time Setting of the fade time Selection of Scene 1–8 Skip step: No/Yes SLAVE MODE (Slave) Starting from the main display, press MENU to access the main menu. Use and to select the Control menu item and confirm with ENTER.
- Page 21 Wireless module = transmitter with G3 transmitter standard Wireless module = transmitter with G4s transmitter standard Pairing with compatible, ready-to-pair wireless devices Disconnect wireless DMX connections and place in pairing standby mode Setting of the connection key Receiver standard = CRMX (only available when in...
- Page 22 180° display rotation (for example, for overhead installation) No display rotation Automatic position detection (upright/over- head mounting) Permanently on Display settings Deactivation after approximately 20 sec- onds of inactivity Controls locked after approximately 60 seconds without input (LOCKED). Unlock: Press UP and DOWN simultaneously for approximately 5 seconds.
- Page 23 Custom colour calibration. Red, green, blue, and lime Colour Colour brightness setting with values ranging from 0 to 255 Calibra- calibra- tion tion Factory setting Pan direction reversed Pan direction not reversed Tilt direction reversed Tilt direction not reversed Pan angle 540° Pan angle 630°...
- Page 24 SERVICE MENU (Service) Starting from the main display, press MENU to access the main menu. Use and to select Service and confirm with ENTER. Information on the sub-menu items in the “Service” menu and the corresponding options can be found in the table below (select with ...
- Page 25 SYSTEM INFORMATION (System Info) Starting from the main display, press MENU to access the main menu. Use and to select System Info and confirm with ENTER. Information on the sub-menu items in the “System Info” menu and the corresponding options can be found in the table below (select with ...
-
Page 26: Set-Up And Installation
MAC address RDM unique identifier Display of the DMX values present Error display in case of malfunction Display of DMX mode tables QUICKLIGHT (Quicklight) Set up a scene quickly and easily using the basic moving head functions without an external con- troller. - Page 27 USE POSITION...
-
Page 28: Care, Maintenance And Repair
CARE (carried out by user) WARNING! Before carrying out any care or maintenance, the power supply – and, if possible, all device connections – must be disconnected. Improper care can lead to impairment or even destruction of the PLEASE NOTE! device. -
Page 29: Dimensions
DIMENSIONS (mm) TECHNICAL DATA Item no. CLOTOSW12 Product category LED wash moving light Type Moving head Light source centre LED 32 × 50 W LED Colour mixing centre LEDs RGBL Number of ring segments Colour mixing ring LEDs Pan angle Adjustable: 630°... - Page 30 Dimmer resolution 16-bit Dimmer curves Linear, exponential, logarithmic, S-curve Calibration >85 Luminous flux 19500 lm Illuminance 16,200 lx (10 m, narrow) Beam angle / field angle 4–45° / 10–60° 1800–10,000 K Control protocols DMX, RDM, W-DMX, CRMX Data connections 5-pin XLR male + female; 2× RJ45 24CH RGBL Effect 23CH HSI Wash 24CH RGBL Wash 8bit...
-
Page 31: Explanation Of Ip Protection Class
Cooling system Temperature-controlled fans Operation voltage 100–240 V AC / 50–60Hz Max. power consumption 1400 W Fuse T 16 A / 250 V Power connection Seetronic IP65 Power link No power link Max. power out (110 V) n.a. Max. power out (230 V) n.a. -
Page 32: Minimum Distance To Illuminated Surface
MINIMUM DISTANCE TO ILLUMINATED SURFACE This symbol with the distance stated in metres (m) indicates the minimum distance of the light fixture to the illuminated surface. The value valid for this device can be found in the technical data in this manual and is printed on the device! MINIMUM DISTANCE TO NORMALLY FLAMMABLE MATERIALS This symbol with the distance stated in metres (m) indicates the minimum... - Page 33 CE conformity Adam Hall GmbH hereby confirms that this product meets the following guidelines (where applicable): Low-Voltage Directive (2014/35/EU) EMC Directive (2014/30/EU) RoHS (2011/65/EU) RED (2014/53/EU) EC Declaration of Conformity Declarations of conformity for products subject to the LVD, EMC, and RoHS Directives can be requested from info@adamhall.com Declarations of conformity for products subject to RED can be downloaded from www.adamhall.
-
Page 34: Deutsch
Dieses Gerät wurde unter hohen Qualitätsanforderungen entwickelt und gefertigt, um viele Jahre einen reibungslosen Betrieb zu gewährleisten. Bitte lesen Sie diese Bedienungsanleitung sorgfäl- tig, damit Sie Ihr neues Produkt von Cameo Light schnell und optimal einsetzen können. Weitere Informationen über Cameo Light erhalten Sie auf unserer Website CAMEOLIGHT.COM. -
Page 35: Sicherheitshinweise
Dieses Symbol kennzeichnet Gefahren, die einen elektrischen Schlag verursachen können. Dieses Symbol kennzeichnet Gefahrenstellen oder gefährliche Situationen. Dieses Symbol kennzeichnet Gefahren durch heiße Oberflächen. Dieses Symbol weist darauf hin, dass es vermieden werden muss, in die Lichtquelle zu schauen oder zu starren. Dieses Symbol kennzeichnet ein Gerät, in dem sich keine vom Benutzer austauschba- ren Teile befinden. - Page 36 ACHTUNG: 1. Nehmen Sie das Gerät nicht in Betrieb, wenn es starken Temperaturschwankungen ausgesetzt war (beispielsweise nach dem Transport). Feuchtigkeit und Kondensat könnten das Gerät beschädigen. Schalten Sie das Gerät erst ein, wenn es Umge- bungstemperatur erreicht hat. 2. Stellen Sie sicher, dass die Spannung und die Frequenz des Stromnetzes mit den auf dem Gerät angegebenen Werten übereinstimmen.
- Page 37 VORSICHT: 1. Bei beweglichen Bauteilen wie Montagebügeln, oder sonstigen beweglichen Bau- teilen besteht die Möglichkeit sich zu klemmen. 2. Bei Geräten mit motorisch angetriebenen Bauteilen besteht Verletzungsgefahr durch die Bewegung des Gerätes. Plötzliche Gerätebewegungen können zu Schreckreaktionen führen. 3. Die Gehäuseoberfläche des Geräts kann sich im regulären Betrieb stark erwärmen. Stellen Sie sicher, dass ein versehentliches Berühren des Gehäuses ausgeschlos- sen ist.
- Page 38 SIGNALÜBERTRAGUNG PER FUNK (z.B. W-DMX oder Audio-Funksysteme): Die Qualität und Leistungsfähigkeit kabelloser Signalübertragungen ist generell abhängig von den Umgebungsbedingungen. Einfluss auf die Reichweite und Signalstabilität haben z.B.: Abschirmung (z.B. Mauerwerk, Metallbauten, Wasser) Hohes Funkaufkommen (z.B. starke W-LAN Netze) Interferenzen Elektromagnetische Strahlung (z.B. LED-Videowände, Dimmer) Alle Reichweitenangaben beziehen sich auf Freifeldanwendung mit Sichtkontakt ohne Störeinflüsse! Der Betrieb von Sendeanlagen unterliegt behördlichen Bestimmungen.
-
Page 39: Hinweise Für Ortsveränderliche Outdoor-Geräte
Ihren Vertriebspartner bitte unverzüglich nach dem Kauf, falls die Lieferung nicht komplett oder beschädigt ist. Im Lieferumfang des Produkts sind enthalten: X 1 × OTOS W12 Wash Moving Head X 1 × Netzkabel X 2 × Omega-Bügel X Safety- und Complianceinformationen (Bedienungsanleitung als Download per QR-Code) -
Page 40: Einführung
DMX. Artnet und sACN. 5-Pol DMX-Anschlüsse. Zoom-Funktion. 2 x Omega-Montagebügel inklusive. Betriebsspannung 100 - 240 V AC. Die Scheinwerfer verfügen über den RDM-Standard (Remote Device Management). Diese Geräte- fernverwaltung ermöglicht die Statusabfrage und Konfiguration von RDM-Endgeräten über einen RDM-fähigen Controller, wie den optional erhältlichen Cameo UNICON (Artikelnummer CLIREMOTE). -
Page 41: Anschlüsse, Bedien- Und Anzeigeelemente
ANSCHLÜSSE, BEDIEN- UND ANZEIGEELEMENTE POWER IN IP65 Netzeingangsbuchse mit Gummidichtkappe. Betriebsspannung 100 - 240V AC / 50 - 60Hz. Anschluss mit Hilfe des mitgelieferten Netzkabels (bei Nichtgebrauch stets mit der Gummidicht- kappe verschließen). DMX IN Männliche IP65 5-Pol XLR-Buchse zum Anschließen eines DMX-Kontrollgeräts (z.B. DMX-Pult, bei Nichtgebrauch stets mit der Gummidichtkappe verschließen). - Page 42 LC-DISPLAY Das beleuchtete Display zeigt die aktuell aktivierte Betriebsart an (Hauptanzeige), die Menüpunkte im Haupt- und den Untermenüs und den Zahlenwert bzw. Status in bestimmten Menüpunkten. Liegt kein Steuersignal am Gerät an, fangen die Zeichen in der Mitte des Displays an zu blinken, das Blinken stoppt, sobald ein Steuersignal anliegt (W-DMX, DMX- und Slave-Betrieb).
- Page 43 ACHTUNG! Um den Spritzwasserschutz nach Schutzart IP65 bei den DMX- und Netzwerkbuchsen zu gewährleisten, müssen die speziellen Eingangs- und Ausgangs- buchsen korrekt mit den IP65 Spezialsteckern verschlossen sein, bzw. die Gummi- dichtkappen zum Verschließen verwendet werden. Die Netzbuchsen POWER IN und POWER OUT sind in korrekt gestecktem Zustand spritzwassergeschützt nach IP65, ebenso bei korrekter Verwendung der Gummidichtkappen.
-
Page 44: Bedienung
• Sobald der Scheinwerfer korrekt am Stromnetz angeschlossen ist, wird während des Start- vorgangs und des Motoren-Resets „Software Update ...please wait“, die Software-Version, „Welcome to Cameo“ und „...RESET“ im Display angezeigt. Nach diesem Vorgang ist der Scheinwerfer betriebsbereit und die Betriebsart, die zuvor aktiviert war, wird gestartet. -
Page 45: Wireless Dmx
Betriebsart Artnet + DMX Betriebsart sACN + DMX LED-Temperatur Bluetooth aktiviert LED-Temperatur Bluetooth deaktiviert W-DMX Status W-DMX Status Betriebsart Betriebsart Fehlermeldung Fehlermeldung DMX-Betriebsart, DMX-Adresse, IP-Adresse, DMX-Betriebsart, DMX-Adresse, IP-Adresse, Subnetzmaske und Universum Subnetzmaske und Universum Stand-Alone-Betriebsarten Betriebsart Slave LED-Temperatur Bluetooth deaktiviert LED-Temperatur Bluetooth aktiviert W-DMX Status... - Page 46 werden (z.B. für den Master/Slave-Betrieb). Eine Wireless DMX-Verbindung bleibt grundsätzlich so lange erhalten, bis die Verbindung durch den Reset-Befehl im Receiver oder den Unlink-Befehl im Transmitter getrennt wird, unabhängig davon, ob ein Gerät zwischenzeitlich von der Spannungs- versorgung getrennt wird. WIRELESS DMX STATUS W-DMX W-DMX als...
- Page 47 NETZWERK (Network) Ausgehend von der Hauptanzeige gelangen Sie durch Drücken auf MENU in das Hauptmenü (Main Menu). Wählen Sie mit Hilfe von und das Kontrollmenü Control aus und drücken auf ENTER. Wählen Sie nun den Menüpunkt Network aus und bestätigen abermals. Informationen zu den Untermenüpunkten im Netzwerkmenü...
- Page 48 Send to XLR Weiterleiten des Steuersignals an XLR Out Signal Backup by Ansteuerung per XLR bei Netzwerk Signalunterbrechung Routing Receive only Keine Verbindung zwischen Netzwerksignal und XLR-Anschlüssen Network sACN Artnet Steuerung per Artnet Protocol sACN Steuerung per sACN Absolute Universe Einstellen des sACN Universums Univ.
- Page 49 Informationen zu den Untermenüpunkten im Stand-Alone-Menü und den entsprechenden Einstel- loptionen finden Sie in untenstehender Tabelle (Auswahl mit und , bestätigen mit ENTER, Wert bzw. Status ändern mit und , bestätigen mit ENTER). Stand Alone Master Steuersignal wird via DMX OUT weitergeleitet Master/Alone Alone Steuersignal wird nicht weitergeleitet...
- Page 50 SYSTEMEINSTELLUNGEN (Settings) Ausgehend von der Hauptanzeige gelangen Sie durch Drücken auf MENU in das Hauptmenü (Main Menu). Wählen Sie mit Hilfe von und Settings aus und bestätigen mit ENTER. Informationen zu den Untermenüpunkten im Settings-Menü und den entsprechenden Einstellop- tionen finden Sie in untenstehender Tabelle (Auswahl mit ...
- Page 51 Red, Orange, Yellow, Green, RGB-Code zur farblichen Dar- Colour Cyan, stellung des Universums Code Universe Blue, Metadata Purple, White Eine 16-stellige Zeichenkette mit einem Universe individuell einstellbaren Namen, der das Name Drahtlo- Universum identifiziert Wireless seinstel- Bluetooth eingeschaltet State lungen Bluetooth ausgeschaltet Bluetooth PIN-Abfrage eingeschaltet...
- Page 52 Die Lichtintensität lässt sich im unteren Logarith- DMX-Wertbereich grob und im oberen DMX-Wertbereich fein einstellen Curve (Dimmerkurve) Die Lichtintensität lässt sich im unteren S-Curve und oberen DMX-Wertbereich fein und im mittleren DMX-Wertbereich grob einstellen 650Hz, 1530Hz, 3600Hz, PWM Frequency Auswählen der LED PWM Frequenz 12kHz, 18.9kHz, Dim-...
- Page 53 Verlangsamte Motorbewegungen für Kopf- leiseren Betrieb Move- bewe- Silent Movement ment gungen Funktion deaktiviert einstellen Auto Automatische Lüftersteuerung Deaktivierter Lüfter bei stark reduzierter Helligkeit Lüfterein- Konstant niedrige Lüftergeschwindigkeit bei reduziert- Constant Low stellun- er Helligkeit, falls notwendig Konstant mittlere Lüftergeschwindigkeit bei reduziert- Constant Mid er Helligkeit, falls notwendig Constant High...
- Page 54 SERVICE-MENÜ (Service) Ausgehend von der Hauptanzeige gelangen Sie durch Drücken auf MENU in das Hauptmenü (Main Menu). Wählen Sie mit Hilfe von und Service aus und bestätigen mit ENTER. Informationen zu den Untermenüpunkten im Service-Menü und den entsprechenden Optionen finden Sie in untenstehender Tabelle (Auswahl mit ...
- Page 55 Informationen zu den Untermenüpunkten im System-Info-Menü und den entsprechenden Optio- nen finden Sie in untenstehender Tabelle (Auswahl mit und , bestätigen mit ENTER). System Info DISP Vx.x.x Vx.x.x Anzeige der Firmware-Version der ent- Firmware sprechenden Komponente LED1 Vx.x.x … Vx.x.x Module TimoTwo...
-
Page 56: Aufstellung Und Montage
Error Info Fehleranzeige im Fehlerfall DMX Table Anzeige der Tabellen der DMX-Modi QUICKLIGHT (Quicklight) Stellen Sie eine Szene mit den Basisfunktionen des Moving Heads ohne externen Controller schnell und unkompliziert ein. Ausgehend von der Hauptanzeige gelangen Sie durch Drücken auf MENU in das Hauptmenü (Main Menu). Wählen Sie mit Hilfe von und Quicklight aus und bestätigen mit ENTER. - Page 57 GEBRAUCHSLAGE...
-
Page 58: Pflege, Wartung Und Reparatur
PFLEGE (vom Anwender durchführbar) WARNUNG! Vor jeglichen Pflegemaßnahmen müssen die Spannungsversorgung und sofern möglich sämtliche Geräteverbindungen getrennt werden. Unsachgemäße Pflege kann zu Beeinträchtigung des Gerätes führen bis HINWEIS! hin zur Zerstörung. 1. Gehäuseoberflächen müssen mit einem sauberen, feuchten Tuch gereinigt werden. Dabei ist darauf zu achten, dass keine Feuchtigkeit in das Gerät eindringen kann. -
Page 59: Abmessungen
ABMESSUNGEN (mm) TECHNISCHE DATEN Artikel-Nr. CLOTOSW12 Produktkategorie LED Wash Moving Light Moving Head Lichtquelle Center-LED 32 × 50 W LED Farbmischung Center-LEDs RGBL Anzahl der Ringsegmente Farbmischung Ring-LEDs Pan-Winkel Einstellbar: 630° / 540° Neigungswinkel 650 Hz, 1530 Hz, 3600 Hz, 12 kHz, 18,9 kHz, LED PWM 25 kHz... - Page 60 Dimmer-Auflösung 16-Bit Dimmer-Kurven Linear, Exponentiell, Logarithmisch, S-Kurve Kalibrierung > 85 Lichtstrom 19500 lm Beleuchtungsstärke 16,200 lx (10 m, schmal) Abstrahlwinkel/Feldwinkel 4–45° / 10–60° 1800–10,000 K Steuerungsprotokolle DMX, RDM, W-DMX, CRMX Datenverbindungen 5-poliger XLR-Stecker + Buchse; 2 x RJ45 24CH RGBL Effect 23CH HSI Wash 24CH RGBL Wash 8bit 28CH RGBL Wash...
-
Page 61: Erläuterungen Zur Ip-Schutzart
Kühlungssystem Temperaturgesteuerte Lüfter Betriebsspannung 100–240 V AC / 50–60Hz Max. Leistungsaufnahme 1400 W Sicherung T 16 A / 250 V Stromversorgung Seetronic IP65 Powerlink Kein Powerlink Max. Ausgangsleistung (110 V) k. A. Max. Ausgangsleistung (230 V) k. A. Gehäuse Metall Risikogruppe Mindestabstand zur beleuchteten Fläche Mindestabstand zu normal entflammbaren... -
Page 62: Mindestabstand Zur Beleuchteten Fläche
Die IP-Schutzart des Produkts finden Sie in den technischen Daten und als Aufdruck auf dem Gerät. MINDESTABSTAND ZUR BELEUCHTETEN FLÄCHE Dieses Symbol mit Entfernungsangabe in Metern (m) gibt den Mindestabstand des Leuchtkörpers zur beleuchteten Fläche an. Den für dieses Gerät gültigen Wert entnehmen Sie bitte den technischen Daten in dieser Anleitung und dem Aufdruck auf dem Gerätegehäuse! MINDESTABSTAND ZU NORMAL ENTFLAMMBAREN MATERIALIEN... - Page 63 CE-Konformität Hiermit erklärt die Adam Hall GmbH, dass dieses Produkt folgender Richtlinie entspricht (soweit zutreffend): Niederspannungsrichtlinie (2014/35/EU) EMV-Richtlinie (2014/30/EU) RoHS (2011/65/EU) RED (2014/53/EU) CE-Konformitätserklärung Konformitätserklärungen für Produkte, die der LVD, EMC, RoHS-Richtlinie unterliegen, können unter info@adamhall.com angefragt werden. Konformitätserklärungen für Produkte, die der RED-Richtlinie unterliegen, können unter www. adamhall.com/compliance/ heruntergeladen werden.
-
Page 64: Français
Veuillez lire attentivement ce manuel d'utilisation afin de pouvoir utiliser rapidement et de manière optimale votre nouveau produit Cameo Light. De plus amples informations sur Cameo Light sont disponibles sur notre site web CAMEOLIGHT.COM INFORMATIONS SUR CE MANUEL D'UTILISATION •... -
Page 65: Consignes De Sécurité
à des situations ou à des conditions qui peuvent entraîner des dommages matériels et/ou environnementaux. Ce pictogramme identifie les dangers qui peuvent causer un choc électrique. Ce pictogramme identifie les zones ou les situations dangereuses. Ce pictogramme indique les dangers occasionnés par les surfaces portées à haute température. - Page 66 ATTENTION : 1. Ne mettez pas immédiatement l’appareil en service s’il a été exposé à d’impor- tantes variations de température (par exemple, juste après le transport). L'humidité et la condensation internes peuvent endommager l'appareil. Ne mettez l'appareil en marche que lorsqu'il a atteint la température ambiante. 2.
- Page 67 MISE EN GARDE : 1. Les composants mobiles tels que les supports de montage ou d’autres composants mobiles peuvent se coincer. 2. Dans le cas d'appareils comportant des composants motorisés, il existe un risque de blessure dû au mouvement de l'appareil. Un mouvement brusque de l'appareil peut provoquer des réactions de choc.
- Page 68 3. Ce projecteur est équipé de sources lumineuses installées de manière permanente. Elles ne peuvent pas être remplacées par l'utilisateur. Les sources lumineuses contenues dans ce projecteur ne peuvent être remplacées que par le fabricant, son partenaire de service ou une personne de qualification similaire. TRANSMISSION DE SIGNAUX PAR RADIO (par exemple, W-DMX ou systèmes audio sans fil) : La qualité...
-
Page 69: Remarques À Propos Des Appareils Portables Pour Extérieur
En outre, la transmission DMX sans fil ne doit pas être utilisée pour déclencher des dispositifs générateurs de flammes ou pyrotechniques, des effets à explosion ou pour contrôler des effets de gaz ou de liquides. Ces dispositifs peuvent être des canons à CO2, des canons à... -
Page 70: Contenu Du Carton
Le projecteur est compatible avec le protocole RDM (Remote Device Management). La gestion à distance des appareils permet à l'utilisateur de contrôler l'état et la configuration des appareils RDM à l'aide d'un contrôleur compatible RDM, tel que le Cameo UNICON disponible en option (référence article CLIREMOTE). -
Page 71: Connecteurs, Contrôles Et Indicateurs
CONNECTEURS, CONTRÔLES ET INDICATEURS POWER IN Embase secteur IP65 avec capuchon d'étanchéité en caoutchouc. Tension secteur : 100 à 240 V, 50-60 Hz. Utilisez le câble secteur fourni pour le branchement (lorsque l'appareil n'est pas utilisé, il faut toujours protéger l'embase avec le capuchon d'étanchéité en caoutchouc). ENTRÉE DMX Connecteur XLR mâle IP65 à... -
Page 72: Écran À Cristaux Liquides
ÉCRAN À CRISTAUX LIQUIDES L'écran à cristaux liquides rétro-éclairé indique le mode actuellement activé (écran principal), les éléments du menu principal et des sous-menus, ainsi que la valeur numérique ou l'état dans certains éléments du menu. Si aucun signal de contrôle n'est envoyé à l'appareil, les caractères au centre de l'écran se mettent à... - Page 73 ANTENNE DMX SANS FIL L'antenne pour le contrôle DMX sans fil est située à l'intérieur de la base de l'appareil. ATTENTION ! Pour garantir la protection IP65 des connecteurs DMX et réseau contre les éclaboussures, les embases d'entrée et de sortie spéciales doivent être correcte- ment scellées avec les connecteurs spéciaux IP65 ou par les capuchons d'étanchéité...
-
Page 74: Utilisation
• Lorsque le projecteur est correctement branché sur le secteur, les mentions "Software update ... please wait", la version du logiciel, "Welcome to Cameo", et "... RESET" s'affichent à l'écran pendant le démarrage et la réinitialisation du moteur. Le projecteur est ensuite prêt à fonction- ner, dans le dernier mode activé... -
Page 75: Écran Principal
ÉCRAN PRINCIPAL Selon le mode de fonctionnement activé, l'écran principal affiche des informations différentes, pertinentes dans le mode de fonctionnement en cours. Modes de fonctionnement DMX et W-DMX Modes de fonctionnement Art-Net et sACN Température des LED Bluetooth désactivé Température des LED Bluetooth activé... - Page 76 Note sur l'écran principal dans les modes de fonctionnement avec contrôle externe : en cas d'interruption du signal de contrôle, les caractères au centre de l'écran se mettent à cligno- ter ; le clignotement s'arrête dès le retour du signal de contrôle. Message d'erreur : si le symbole d'avertissement (triangle avec point d'exclamation) apparaît à...
- Page 77 RÉGLAGE DU MODE DE FONCTIONNEMENT DMX (DMX Mode) En partant de l'écran principal, appuyez sur MENU pour accéder au menu principal. En utilisant et , sélectionnez le menu Control et appuyez sur ENTER. Sélectionnez ensuite l'élément de menu DMX Mode et confirmez à nouveau. Utilisez et pour régler le mode de fonctionne- ment DMX souhaité...
- Page 78 Configuration de Dépend du réseau, du sous-réseau et de l'univers absolu l'univers Art-Net Configuration du réseau Art-Net Configuration du sous-réseau Dépend de l'univers absolu Art-Net Configuration de l'univers Art-Net Réglage de l'adresse IP : réglez le premier bloc, confirmez, réglez le deuxième bloc, confirmez. Réglage du masque de sous-réseau : réglez le premier bloc, confirmez, réglez le deuxième bloc, confirmez.
- Page 79 MENU FONCTIONNEMENT AUTONOME (Stand Alone) Dans les modes de fonctionnement autonomes "Play Scene" et "Play Loop", le signal de contrôle du mode correspondant peut être transmis aux projecteurs esclaves via la sortie XLR (Master/ Alone -> Master). Si vous ne souhaitez pas renvoyer le signal de contrôle, désactivez la sortie (Master/Alone ->...
- Page 80 signal de commande dans l'appareil maître (Control -> Stand Alone -> Master/Alone -> Master). Connectez le projecteur esclave et le projecteur maître (même modèle, même version de logiciel) à l'aide d'un câble DMX ou via W-DMX et activez le mode autonome "Play Scene" ou "Play Loop" sur le projecteur maître.
- Page 81 Standard récepteur = CRMX Standard récepteur = CRMX2 Sélection de l'univers CRMX A à H Code RGB pour l'affichage des Colour couleurs de l'univers Universal Code Metadata Chaîne de 16 caractères avec un nom personnalisable identifiant l'univers Bluetooth activé Bluetooth désactivé Demande de code PIN activée (réglage d'usine 081569) Demande de code PIN désac-...
- Page 82 Allumé en permanence Désactivation après environ 20 secondes d'inactivité Les contrôles sont verrouillés après en- viron 60 secondes sans saisie (LOCKED). Pour déverrouiller : appuyez simultané- ment sur les touches UP et DOWN pendant environ 5 secondes Fonction Autolock désactivée L’intensité lumineuse augmente linéaire- ment avec la valeur DMX L’intensité...
- Page 83 Étalonnage personnalisé des couleurs. Réglage de la Colour Calibra- luminosité rouge, vert, bleu et lime avec des valeurs Calibra- tion des comprises entre 0 et 255 tion couleurs Réglages d'usine Inversion du sens de panoramique Pas d'inversion du sens de panoramique Inversion du sens d'inclinaison Pas d'inversion du sens d'inclinaison Angle panoramique 540°...
- Page 84 Sauvegarde de tous les réglages actuels en tant que préréglage utilisateur A Sauvegarde de tous les réglages actuels en tant que préréglage utilisateur B Sauvegarde de tous les réglages actuels en tant que préréglage utilisateur C MENU SERVICE (Service) En partant de l'écran principal, appuyez sur MENU pour accéder au menu principal. Sélectionnez Service à...
- Page 85 Activation individuelle de tous les moteurs avec des valeurs de 000 à 255 Pas de réinitialisation de la valeur de la durée de fonctionnement Réinitialisation de la valeur de la durée de fonctionnement Pour technicien de service uniquement INFORMATIONS SYSTÈME (System Info) En partant de l'écran principal, appuyez sur MENU pour accéder au menu principal.
-
Page 86: Montage Et Installation
Réglage de l'unité d'affichage de la température (appuyez sur ENTER pour modifier) Affichage de la vitesse du ventilateur correspondant Durée totale de fonctionnement Durée d'utilisation Durée de fonctionnement de la lampe/LED Temps de fonctionnement depuis la dernière réinitialisation de la durée de fonctionnement Adresse MAC Identifiant unique en mode RDM... - Page 87 Grâce à ses pieds en caoutchouc intégrés, le projecteur peut être placé à un endroit approprié sur une surface plane. Il peut être monté sur une structure métallique à l'aide de deux supports en oméga, qui sont fixés à la base du projecteur (A). Si nécessaire, les deux supports en oméga peuvent également être montés sur la base de l'appareil et tournés de 90°.
-
Page 88: Entretien, Maintenance Et Réparation
ENTRETIEN (effectué par l'utilisateur) AVERTISSEMENT ! Avant d'effectuer toute opération d'entretien ou de maintenance, il faut débrancher l'alimentation électrique et, si possible, toutes les connexions de l'appareil. Un entretien inadéquat peut entraîner une dégradation de l’appareil À NOTER pouvant aller jusqu’à sa destruction. 1. -
Page 89: Dimensions
DIMENSIONS (mm) CARACTÉRISTIQUES TECHNIQUES Référence CLOTOSW12 Catégorie de produit Lyre asservie type Wash à LED Type Lyre asservie Nombre de LED de la source lumineuse centrale 32 LED, puissance 50 W Mélange de couleurs des LED centrales RGBL Nombre de segments de l'anneau LED de l'anneau de mélange de couleurs Angle de panoramique Réglable : 630°... - Page 90 Angle d'inclinaison Fréquence de modulation de largeur d'impul- 650 Hz / 1 530 Hz / 3 600 Hz / 12 kHz / sion (PWM) des LED 18,9 kHz / 25 kHz Résolution du gradateur 16 bits Linéaire, exponentielle, logarithmique, courbe Courbes de gradateur en S Calibration >85 Flux lumineux 19500 lm Intensité lumineuse 16 200 lx (à 10 m, faisceau étroit) Angle de faisceau/angle de champ 4 - 45°...
-
Page 91: Explication De La Classe De Protection Ip
Stand Alone Scène ; Boucle Affichage ; gradateur ; étalonnage des couleurs ; Paramètres système mouvement ; ventilateur ; défaillance du signal ; miroir de pixels Affichage et indicateurs Écran cristaux liquides Indice IP IP65 pour une utilisation temporaire à l'extérieur Température ambiante minimale -10 à... -
Page 92: Distance Minimale Par Rapport À La Surface Éclairée
IPX3 Protection contre la chute d'eau pulvérisée jusqu'à 60° par rapport à la verticale IPX4 Protection contre les projections d’eau sur tous les côtés IPX5 Protection contre les jets d’eau (émis par une buse) sous tous les angles IPX6 Protection contre les jets d'eau puissants IPX7 Protection contre l’immersion temporaire 4. -
Page 93: Déclarations Du Fabricant
2. Respectez toutes les lois relatives à l'élimination des déchets en vigueur dans votre pays. 3. En tant que particulier, vous pouvez obtenir des informations sur les possibilités d'élimination respectueuse de l'environnement auprès du vendeur du produit ou des autorités régionales compétentes. DÉCLARATIONS DU FABRICANT Garantie et limitation de responsabilité... -
Page 94: Español
Este aparato ha sido desarrollado y fabricado siguiendo las normas de calidad más exigentes para garantizarle muchos años de funcionamiento sin problemas. Lea atentamente este manual de usuario para poder utilizar su nuevo producto Cameo Light de forma rápida y óptima. Encontrará más información sobre Cameo Light en nuestra página web CAMEOLIGHT.COM INFORMACIÓN SOBRE ESTE MANUAL DE USUARIO... -
Page 95: Instrucciones De Seguridad
Este símbolo indica peligro de descarga eléctrica. Este símbolo indica las zonas o situaciones peligrosas. Este símbolo indica peligro por superficie a alta temperatura. Este símbolo indica que debe evitarse mirar o fijar la vista en la fuente de luz. Este símbolo indica que el equipo no contiene piezas que el usuario pueda sustituir. - Page 96 2. Asegúrese de que la tensión y la frecuencia de la red eléctrica coinciden con los valores indicados en el equipo. Si el equipo dispone de un selector de tensión, antes de enchufarlo a la red eléctrica, asegúrese de que el valor seleccionado es correcto.
- Page 97 3. La superficie exterior del equipo puede calentarse mucho durante el funciona- miento regular. Asegúrese de que no sea posible tocar accidentalmente la carcasa. Deje siempre que el equipo se enfríe lo suficiente antes de desmontarlo, realizar trabajos de mantenimiento, recarga, etc. ATENCIÓN: 1.
- Page 98 TRANSMISIÓN DE SEÑALES POR RADIO (como W-DMX o sistemas inalámbricos de audio): La calidad y las prestaciones de las transmisiones de señales inalámbricas suelen depender de las condiciones ambientales. Por ejemplo, los siguientes factores pueden influir en el alcance y la estabilidad de la señal: Apantallamiento (como muros, estructuras metálicas, agua).
-
Page 99: Notas Sobre Los Dispositivos Portátiles De Exterior
Compruebe que la entrega está completa e intacta y notifique a su distribuidor inmediatamente después de la compra si la entrega no está completa o está dañada. Contenido del embalaje del producto: X 1 × Cabeza móvil wash OTOS W12 X 1 × Cable eléctrico X 2 × Soportes en omega... -
Page 100: Introducción
El foco es compatible con el estándar RDM (Remote Device Management). La gestión remota de dispositivos permite consultar el estado y la configuración de los dispositivos RDM conectados me- diante un controlador compatible RDM, como el Cameo UNICON, disponible como opción (ref.: CLI- REMOTE). -
Page 101: Conexiones, Mandos E Indicadores
CONEXIONES, MANDOS E INDICADORES POWER IN Entrada de alimentación eléctrica IP65 con tapón protector de goma. Tensión operativa: 100- 240 Vca, 50/60 Hz. Cable de alimentación suministrado (cuando no se utilice, cierre siempre el conector con su tapón protector de goma). DMX IN XLR macho IP65 de 5 pines para conectar un controlador DMX (como una mesa DMX). -
Page 102: Pantalla Lcd
PANTALLA LCD La pantalla iluminada muestra el modo operativo activado actual (pantalla principal), los elemen- tos del menú principal y de los submenús, así como el valor numérico o el estado en determi- nados elementos del menú. Si no hay señal de control conectada al equipo, los caracteres del centro de la pantalla parpadearán;... - Page 103 ¡ATENCIÓN! Para garantizar la protección IP65 contra salpicaduras en los conectores DMX y de red, los conectores especiales de entrada y salida deben estar correcta- mente sellados con los conectores especiales IP65 o deben utilizarse los tapones protectores de goma. Cuando se conectan correctamente o cuando se cierran bien con los tapones protectores de goma, los conectores POWER IN y POWER OUT están protegidos de las salpicaduras de agua según la norma IP65.
-
Page 104: Funcionamiento
• Cuando el foco está correctamente conectado a la red eléctrica, en la pantalla se mostrará «Software update ... please wait», la versión del software, «Welcome to Cameo», y «... RESET» durante el encendido del equipo y el reinicio de motores. Tras este proceso, el foco está listo para funcionar y se activa el último modo operativo que estuviera activado. - Page 105 Modo operativo Art-Net + DMX Modo operativo sACN + DMX Temperatura del LED Bluetooth activado Temperatura del LED Bluetooth desactivado Estado W-DMX Estado W-DMX Modo Modo op- operativo erativo Mensaje Mensaje de error de error Modo operativo DMX, dirección DMX, dirección IP, Modo operativo DMX, dirección DMX, dirección IP, máscara de subred y universo máscara de subred y universo...
- Page 106 un funcionamiento Maestro/Esclavo). Una conexión DMX inalámbrica se mantiene activa hasta que se desconecta mediante un comando «Reset» en el receptor o «Unlink» en el transmisor, sin importar si el equipo se ha desenchufado de la red eléctrica. ESTADO DEL DMX INALÁMBRICO W-DMX W-DMX W-DMX...
- Page 107 RED (Network) Desde la pantalla principal, pulse MENU para entrar en el menú principal. Con y , seleccione el menú Control y pulse ENTER. Seleccione ahora la opción de menú Network y confirme de nuevo. En la siguiente tabla encontrará información sobre los submenús del menú «Network» y las opcio- nes de ajuste correspondientes (seleccione con ...
- Page 108 Reenviar la señal de control por la salida XLR Signal Control por XLR si se corta la señal de red Routing Sin conexión entre la señal de red y los conectores XLR Control por Art-Net Control por sACN Configurar el universo sACN Configurar la dirección IP: ajustar 1.er bloque, confirmar, ajustar 2.º...
- Page 109 En la siguiente tabla encontrará información sobre los submenús del menú «Stand Alone» y las opciones de ajuste correspondientes (seleccione con y , confirme con ENTER, cambie el valor o el estado con y , y confirme con ENTER). La señal de control se envía por DMX OUT La señal de control no se reenvía Selección y activación de la escena...
- Page 110 AJUSTES DEL SISTEMA (Settings) Desde la pantalla principal, pulse MENU para entrar en el menú principal. Utilice y para seleccionar Settings y confirme con ENTER. En la siguiente tabla encontrará información sobre los submenús del menú «Settings» y las opcio- nes de ajuste correspondientes (seleccione con ...
- Page 111 Código RGB para representa- Colour ción cromática del universo Universe Code Metadata Cadena de 16 caracteres con nombre personalizable que identifica el universo Ajustes Bluetooth activado inalám- Bluetooth desactivado bricos Solicitud de PIN activada (por defecto, 081569) Solicitud de PIN desactivada Reenviar la señal de control por XLR (DMX OUT) Utilizar la señal de control del conector...
- Page 112 Ajustar la intensidad luminosa de forma más brusca en los valores DMX bajos y con precisión en los valores DMX altos (curva de Ajustar la intensidad luminosa con preci- atenuación) sión en los valores DMX altos y bajos, y de forma más amplia en los valores DMX intermedios Ajustes Seleccionar la frecuencia PWM de LED...
- Page 113 Ajustes Movimiento más lento del motor para un de los funcionamiento más silencioso movi- mientos Función desactivada de la cabeza Control automático del ventilador Ventilador apagado con brillo muy reducido Ajustes Velocidad baja y constante del ventilador con brillo del venti- reducido, si fuese necesario lador Velocidad intermedia y constante del ventilador con...
- Page 114 MENÚ DE MANTENIMIENTO (Service) Desde la pantalla principal, pulse MENU para entrar en el menú principal. Utilice y para seleccionar Service y confirme con ENTER. En la siguiente tabla encontrará información sobre los submenús del menú «Service» y las opcio- nes correspondientes (seleccione con ...
- Page 115 En la siguiente tabla encontrará información sobre los elementos del submenú del menú «System Info» y las opciones correspondientes (seleccione con y , y confirme con ENTER). Mostrar la versión de firmware del equipo Modelo del módulo inalámbrico Nombre del equipo Número de versión del hardware Número de versión del software Calidad de la conexión (en porcentaje)
-
Page 116: Instalación Y Montaje
Indicación de los valores DMX presentes Indicar el error en caso de avería Mostrar las tablas de los modos DMX QUICKLIGHT (Quicklight) Configure una escena de forma rápida y sencilla utilizando las funciones básicas de la cabeza móvil sin necesidad de un controlador externo. Desde la pantalla principal, pulse MENU para entrar en el menú... - Page 117 POSICIÓN DE USO...
-
Page 118: Limpieza, Mantenimiento Y Reparación
LIMPIEZA (llevada a cabo por el usuario) ¡ADVERTENCIA! Antes de realizar cualquier trabajo de limpieza y mantenimiento, debe desenchufarse del suministro eléctrico y, si es posible, quitar todas las cone- xiones del equipo. NOTA: Un cuidado inadecuado puede deteriorar el equipo e incluso destruirlo. 1. -
Page 119: Dimensiones
DIMENSIONES (mm) CARACTERÍSTICAS TÉCNICAS Ref. CLOTOSW12 Categoría de producto Cabeza móvil LED wash Tipo Cabeza móvil LED centrales 32 LED de 50 W Colores LED centrales RGBL Número de segmentos del anillo Mezcla de colores en los LED del anillo Giro horizontal Ajustable: 630°/540°... - Page 120 650 Hz, 1.530 Hz, 3.600 Hz, 12 kHz, 18,9 kHz, PWM del LED 25 kHz Resolución del atenuador 16 bits Curvas de atenuación Lineal, exponencial, logarítmica, curva en S Calibración Sí >85 Flujo luminoso 19500 lm Iluminancia 16.200 lx (10 m, estrecho) Ángulo de haz / ángulo de campo 4°-45°...
-
Page 121: Explicación De La Clase De Protección Ip
Temperatura ambiente −10 °C-+40 °C Refrigeración del sistema Ventiladores controladores por temperatura Tensión de funcionamiento 100-240 Vca, 50/60 Hz Consumo máximo 1.400 W Fusible T 16 A / 250 V Conector eléctrico Seetronic IP65 Conexión eléctrica en cadena Sin conector eléctrico para conexión en cadena Corriente máx. -
Page 122: Distancia Mínima A La Superficie Iluminada
El grado de protección IP del producto figura en las características técnicas y está impreso en el equipo. DISTANCIA MÍNIMA A LA SUPERFICIE ILUMINADA Este símbolo con la especificación de la distancia en metros (m) indica la distancia mínima entre el foco y la superficie iluminada. ¡El valor correcto para este equipo se encuentra en la sección de características técnicas de este manual y está... -
Page 123: Declaración Del Fabricante
DECLARACIÓN DEL FABRICANTE Garantía del fabricante y limitación de responsabilidad Adam Hall GmbH | Adam-Hall-Str.1 | 61267 Neu-Anspach | Alemania Correo electrónico: info@adamhall.com / +49 (0)6081 9419 0 Puede consultar nuestras condiciones de garantía y la limitación de responsabilidad vigentes en: https://cdn-shop.adamhall.com/media/pdf/Manufacturers-Declarations-CAMEO_DE_EN_ES_FR.pdf Para cualquier tarea de mantenimiento o reparación, póngase en contacto con su distribuidor. -
Page 124: Polski
Urządzenie to zostało opracowane i wyprodukowane zgodnie z najwyższymi standardami jakości, aby zapewnić wiele lat bezawaryjnej pracy. Proszę uważnie przeczytać niniejszą instrukcję obsłu- gi, aby móc szybko optymalnie wykorzystać swój nowy produkt Cameo Light. Więcej informacji na temat Cameo Light znajdą Państwo na naszej stronie internetowej CAMEOLIGHT.COM. -
Page 125: Instrukcje Bezpieczeństwa
Ten symbol wskazuje na zagrożenia, które mogą spowodować porażenie prądem. Ten symbol oznacza obszary lub sytuacje niebezpieczne. Ten symbol oznacza zagrożenia spowodowane gorącymi powierzchniami. Ten symbol oznacza, że należy unikać patrzenia lub wpatrywania się w źródło światła. Ten symbol oznacza urządzenie, w którym nie ma części wymienianych przez użyt- kownika. - Page 126 UWAGA: 1. Nie należy używać urządzenia, jeśli było ono narażone na duże wahania tempera- tury (na przykład po transporcie). Wilgoć i kondensacja mogą uszkodzić urządzenie. Urządzenie można włączać dopiero po tym, jak osiągnie temperaturę otoczenia. 2. Upewnić się, że napięcie i częstotliwość sieci zasilającej odpowiadają wartościom podanym na urządzeniu.
- Page 127 PRZESTROGA: 1. Ruchome elementy, takie jak wsporniki montażowe lub inne ruchome elementy mogą ulec zakleszczeniu. 2. W przypadku urządzeń z elementami napędzanymi silnikiem istnieje ryzyko obra- żeń spowodowanych ruchem urządzenia. Nagły ruch urządzenia może spowodo- wać reakcje wstrząsowe. 3. Zewnętrzna powierzchnia urządzenia może stać się bardzo gorąca podczas regu- larnej pracy.
- Page 128 TRANSMISJA SYGNAŁU DROGĄ RADIOWĄ np. W-DMX lub bezprzewodowe systemy audio: Jakość i wydajność transmisji sygnału bezprzewodowego zasadniczo zależy od warunków otoczenia. Na zasięg i stabilność sygnału mogą wpływać następujące czynniki: Ekranowanie (np. mur, konstrukcje metalowe, woda) duże natężenie ruchu radiowego (np. silne bezprzewodowe sieci LAN) zakłócenia promieniowanie elektromagnetyczne (np.
-
Page 129: Uwagi Dotyczące Przenośnych Urządzeń Do Zastosowań Zewnętrznych
Należy sprawdzić kompletność i integralności dostawy oraz powiadomić sprzedawcę natych- miast po zakupie, jeśli dostawa nie jest kompletna lub jest uszkodzona. Zawartość opakowania produktu obejmuje: X 1 × OTOS W12 ruchoma głowica typu wash X 1 × Kabel sieciowy X 2 × Uchwyt omega X Informacje dotyczące bezpieczeństwa i zgodności (instrukcja obsługi do pobrania po zeska-... -
Page 130: Wprowadzenie
żowe Omega w zestawie. Napięcie robocze: 100-240 V AC. Reflektor jest zgodny ze standardem RDM (Remote Device Management). Zdalne zarządzanie urządzeniami pozwala użytkownikowi monitorować stan i konfigurację urządzeń RDM za pomocą kontrolera obsługującego RDM, takiego jak opcjonalnie dostępny Cameo UNICON (numer artykułu CLIREMOTE). -
Page 131: Przyłącza, Elementy Obsługi I Wskaźniki
PRZYŁĄCZA, ELEMENTY OBSŁUGI I WSKAŹNIKI POWER IN Gniazdo wejściowe IP65 z gumową zaślepką. Napięcie robocze 100-240 V AC / 50-60 Hz. Podłą- czenie za pomocą dostarczonego kabla zasilającego (gdy urządzenie nie jest używane, gniazdo należy zawsze zabezpieczać gumową zaślepką). DMX IN Męskie 5-pinowe gniazdo XLR IP65 do podłączenia urządzenia sterującego DMX (np. -
Page 132: Ważna Uwaga
LC DISPLAY Wyświetlacz z podświetleniem wskazuje aktualnie włączony tryb (wyświetlacz główny), pozycje menu w menu głównym i podmenu oraz wartość liczbową lub status w niektórych pozycjach menu. Jeśli do urządzenia nie dociera sygnał sterujący, znaki na środku wyświetlacza zaczynają migać; miganie ustaje, gdy tylko dostępny jest sygnał sterujący (W-DMX, DMX i tryb slave). DOTYKOWE ELEMENTY STERUJĄCE MENU - Proszę... - Page 133 UWAGA! Aby zapewnić odporność na zachlapanie IP65 dla gniazd DMX i sieciowych, specjalne gniazda wejściowe i wyjściowe muszą być prawidłowo uszczelnione spe- cjalnymi zaślepkami IP65 lub należy użyć gumowych zaślepek do uszczelnienia. Po prawidłowym podłączeniu lub po prawidłowym uszczelnieniu gumowymi zaślepkami gniazda POWER IN i POWER OUT są...
-
Page 134: Obsługa
• Po prawidłowym podłączeniu reflektora do źródła zasilania, na wyświetlaczu pojawią się komunikaty „Software update ... please wait” (Aktualizacja oprogramowania ... proszę czekać), wersja oprogramowania, „Welcome to Cameo” (Witamy w Cameo) i „..RESET” podczas uru- chamiania i resetowania silnika. Po zakończeniu tego procesu reflektor jest gotowy do pracy i uruchamiany jest wcześniej aktywowany tryb pracy. - Page 135 Tryb pracy Art-Net + DMX Tryb pracy sACN + DMX Temperatura barwowa LED Bluetooth aktywowany Temperatura barwowa LED Bluetooth wyłączony Status W-DMX Status W-DMX Tryb pracy Tryb pracy Komunikat Komunikat o błędzie o błędzie Tryb pracy DMX, adres DMX, adres IP, maska Tryb pracy DMX, adres DMX, adres IP, maska podsieci i uniwersum podsieci i uniwersum...
- Page 136 połączenie DMX jest zawsze utrzymywane do momentu jego rozłączenia za pomocą komendy reset w odbiorniku lub komendy unlink w nadajniku, niezależnie od tego, czy urządzenie zostało w międzyczasie odłączone od zasilania. WIRELESS DMX STATUS W-DMX W-DMX akty- W-DMX W-DMX W-DMX W-DMX akty- wyłączony wowany jako...
- Page 137 USTAWIENIA SIECIOWE (Network) Zaczynając od ekranu głównego, proszę nacisnąć MENU, aby uzyskać dostęp do menu głównego. Za pomocą przycisków i należy wybrać menu Control i nacisnąć ENTER. Teraz wybrać menu Network i ponownie potwierdzić. Informacje o pozycjach podmenu dostępnych w menu „Network” i odpowiadających im opcjach ustawień...
- Page 138 Ustawienie adresu początkowego piksela od 001 do 4xx Pixel przez sieć Kontrola piksel przez sieć Pixel via DMX Kontrola piksel przez DMX Przekazywanie sygnału sterującego do wyjścia XLR Signal Sterowanie przez XLR z przerwaniem sygnału sieciowego Routing Brak połączenia między sygnałem sieci a złączami XLR Sterowanie przez Art-Net Sterowanie przez sACN Ustawianie obszaru sACN universe...
- Page 139 Informacje o pozycjach podmenu dostępnych w menu „Stand-alone” i odpowiadających im opcjach ustawień można znaleźć w poniższej tabeli (do wyboru za pomocą przycisków i , potwierdź za pomocą ENTER, zmień wartość lub stan za pomocą przycisków i , potwierdź za pomocą...
- Page 140 USTAWIENIA SYSTEMOWE (Settings) Zaczynając od ekranu głównego, proszę nacisnąć MENU, aby uzyskać dostęp do menu głównego. Korzystając z and proszę wybrać menu Settings i potwierdzić przyciskiem ENTER. Informacje o pozycjach podmenu dostępnych w menu ustawień i odpowiadających im opcjach ustawień...
- Page 141 Kod RGB do wyświetlania Colour kolorów uniwersum Universe Code Metadata 16-znakowy ciąg znaków z konfigurowal- Usta- ną nazwą identyfikującą uniwersum wienia Bluetooth włączony bezprze- Bluetooth wyłączony wodowe Żądanie kodu PIN włączone (ustawienie fabryczne 081569) Żądanie kodu PIN wyłączone Przekazywanie sygnału sterującego na XLR (DMX OUT) Sterowanie poprzez XLR (DMX IN) z prze- rwaniem sygnału bezprzewodowego...
- Page 142 Natężenie światła można regulować w szerokim zakresie przy niższych warto- ściach DMX i precyzyjnie przy wyższych wartościach DMX (krzywa ściemniacza) Natężenie światła można regulować precyzyjnie przy niższych i wyższych war- tościach DMX oraz regulować w szerokim zakresie przy średnich wartościach DMX Wybór częstotliwości PWM diod LED Usta- wienia...
- Page 143 Spowolnione ruchy silnika zapewniają Usta- cichszą pracę wienia ruchów Funkcja nieaktywna głowy Automatyczne sterowanie wentylatorem Dezaktywowany wentylator ze znacznie zmniejszoną jasnością Usta- wienie Stała niska prędkość wentylatora ze zmniejszoną wentyla- jasnością, jeśli to konieczne tora Stała średnia prędkość wentylatora ze zmniejszoną jasnością, jeśli to konieczne Stała wysoka prędkość...
- Page 144 MENU SERWISOWE (Service) Zaczynając od ekranu głównego, proszę nacisnąć MENU, aby uzyskać dostęp do menu głównego. Za pomocą przycisków i należy wybrać menu Service i potwierdzić za pomocą ENTER. Informacje o pozycjach podmenu dostępnych w menu „Service” i odpowiadających im opcjach można znaleźć...
- Page 145 Informacje o pozycjach podmenu dostępnych w menu „System Info” i odpowiadających im opcjach można znaleźć w poniższej tabeli (do wyboru za pomocą przycisków i , potwierdze- nie za pomocą ENTER. Wyświetla wersję oprogramowania sprzę- towego odpowiedniego komponentu Model modułu bezprzewodowego Nazwa urządzenia Numer wersji sprzętu Numer wersji oprogramowania...
-
Page 146: Konfiguracja I Instalacja
Wyświetlanie obecnych wartości DMX Wyświetlanie błędów w przypadku awarii Wyświetlanie tabel trybów DMX QUICKLIGHT(Quicklight) Ustawienie sceny szybko i łatwo przy użyciu podstawowych funkcji urządzenia bez zewnętrznego kontrolera. Zaczynając od ekranu głównego, proszę nacisnąć MENU, aby uzyskać dostęp do menu głównego. Użyj i , aby wybrać Quicklight i potwierdź przyciskiem ENTER. Proszę wybrać żądaną... - Page 147 POZYCJA UŻYTKOWANIA...
-
Page 148: Pielęgnacja, Konserwacja I Naprawa
PIELĘGNACJA (przeprowadzana przez użytkownika) Przed przystąpieniem do jakichkolwiek czynności konserwa- OSTRZEŻENIE! cyjnych należy odłączyć zasilanie i, jeśli to możliwe, wszystkie połączenia urządzenia. Niewłaściwa pielęgnacja może doprowadzić do uszkodzenia lub nawet UWAGA! zniszczenia urządzenia. 1. Powierzchnie obudowy należy czyścić czystą, wilgotną szmatką. Upewnić się, że do urządzenia nie przedostanie się... -
Page 149: Wymiary
WYMIARY(mm) DANE TECHNICZNE Nr art. CLOTOSW12 Kategoria produktu Ruchome światło LED wash Głowica ruchoma Źródło światła - centrala dioda LED 32 × 50 W LED Tryb mieszania kolorów dla centralnych LED RGBL Liczba segmentów pierścienia Tryb mieszania kolorów dla pierścienia LED... - Page 150 Kąt obrotu PAN Regulowany: 630°/540° Kąt pochylenia TILT 650 Hz, 1530 Hz, 3600 Hz, 12 kHz, 18.9 kHz, LED PWM 25 kHz Rozdzielczość ściemniania 16-bitowy Krzywe ściemniania Liniowa; wykładnicza; logarytmiczna; krzywa-S Kalibracja > 85 Strumień świetlny 19500 lm Natężenie oświetlenia 16.200 lx (10 m, wąski) Kąt wiązki / kąt pola 4–45°...
-
Page 151: Wyjaśnienie Klasy Ochrony Ip
Wyświetlacz / wskaźniki Wyświetlacz LC Stopień ochrony IP IP65 do tymczasowego użytku na zewnątrz Znamionowa temperatura otoczenia –10–40° C System chłodzenia Wentylatory kontrolowane temperaturowo Napięcie robocze 100–240 V AC / 50–60Hz Maks. pobór mocy 1400 W Bezpiecznik T 16 A / 250 V Podłączenie zasilania Seetronic IP65 Łączenie zasilania... -
Page 152: Minimalna Odległość Od Oswietlanej Powierzchni
Stopień ochrony IP produktu można znaleźć w specyfikacji technicznej i jest wydru- kowany na urządzeniu. MINIMALNA ODLEGŁOŚĆ OD OSWIETLANEJ POWIERZCHNI Ten symbol z odległością podaną w metrach (m) oznacza minimalną odległość oprawy oświetleniowej od oświetlanej powierzchni. Wartość obowiązująca dla tego urządzenia znajduje się w danych technicznych w niniejszej instrukcji i jest wydrukowana na urządzeniu! MINIMALNA ODLEGŁOŚĆ... -
Page 153: Deklaracje Producenta
DEKLARACJE PRODUCENTA GWARANCJA PRODUCENTA I OGRANICZENIE ODPOWIEDZIALNOŚCI Adam Hall GmbH | Adam-Hall-Str.1 | 61267 Neu-Anspach | Niemcy E-mail: Info@adamhall.com / +49 (0)6081 / 9419-0 Nasze aktualne warunki gwarancji i ograniczenia odpowiedzialności można znaleźć na stronie: https://cdn-shop.adamhall.com/media/pdf/Manufacturers-Declarations-CAMEO_DE_EN_ES_FR.pdf W sprawie zgłoszeń serwisowych prosimy kontaktować się ze sprzedawcą. Zgodność... -
Page 154: Italiano
Questo dispositivo è stato sviluppato e prodotto secondo i più alti standard di qualità, per garantire molti anni di funzionamento senza problemi. Leggere attentamente questo Manuale di istruzioni per iniziare rapidamente a utilizzare al meglio il prodotto Cameo Light. Ulteriori informazioni su Cameo Light sono disponibili sul nostro sito web CAMEOLIGHT.COM INFORMAZIONI SU QUESTO MANUALE DI ISTRUZIONI •... -
Page 155: Istruzioni Di Sicurezza
Questo simbolo identifica pericoli che possono causare scosse elettriche. Questo simbolo indica aree o situazioni pericolose. Questo simbolo indica pericoli causati da superfici calde. Questo simbolo indica che non si deve guardare o fissare la sorgente luminosa. Questo simbolo denota un dispositivo che non contiene parti soggette a manutenzio- ne da parte dell’utente. - Page 156 2. Verificare che la tensione e la frequenza dell’alimentazione di rete corrispondano ai valori indicati sul dispositivo. Se il dispositivo è dotato di un selettore di tensione, non collegare il dispositivo finché non è impostato correttamente. Usare solo cavi di alimentazione adatti.
- Page 157 3. La superficie esterna del dispositivo può diventare molto calda durante il normale funzionamento. Accertarsi che non sia possibile toccare l’alloggiamento acciden- talmente. Attendere sempre che il dispositivo si sia raffreddato a sufficienza prima di rimuoverlo, sottoporlo a manutenzione, ricaricarlo ecc. ATTENZIONE 1.
- Page 158 Volume di traffico radio elevato (come reti LAN wireless potenti) Interferenza Radiazioni elettromagnetiche (come schermi video a LED, dimmer) Tutte le specifiche della portata si riferiscono ad applicazioni in campo libero con visuale in linea retta senza interferenze. Il funzionamento dei sistemi di trasmissione radio è soggetto a regolamenti ufficiali. Tali regolamenti possono variare da una regione all’altra e devono essere verificati dall’operatore prima dell’uso (per es.
-
Page 159: Note Sui Dispositivi Portatili Per Esterni
NOTE SUI DISPOSITIVI PORTATILI PER ESTERNI 1. Funzionamento temporaneo! Le attrezzature per eventi sono generalmente proget- tate solo per il funzionamento temporaneo. 2. Il funzionamento continuo o l’installazione strutturale permanente (soprattutto all’aperto) possono pregiudicare il funzionamento, le superfici e le guarnizioni, e causare il precoce affaticamento del materiale. - Page 160 Il faro è conforme allo standard RDM (Remote Device Management, gestione remota dei dispositivi). La funzione RDM consente di monitorare lo stato e la configurazione dei dispositivi RDM median- te un controller compatibile con RDM, per esempio il Cameo UNICON, disponibile come optional (codice articolo CLIREMOTE).
-
Page 161: Connessioni, Elementi Di Comando E Di Visualizzazione
CONNESSIONI, ELEMENTI DI COMANDO E DI VISUALIZZAZIONE POWER IN Presa di ingresso di rete IP65 con coperchio ermetico in gomma. Tensione di esercizio 100- 240 V CA/50-60 Hz. Collegamento con cavo di rete in dotazione (chiudere sempre con il tappo in gomma quando non si usa). DMX IN Presa XLR maschio IP65 a 5 poli per il collegamento di un dispositivo di comando DMX (come una console DMX. -
Page 162: Display Lcd
DISPLAY LCD Il display illuminato mostra la modalità operativa in uso (display principale), le voci del menu principale e dei sottomenu e il valore numerico o lo stato di alcune voci di menu. In assenza del segnale di comando al dispositivo, i caratteri al centro del display iniziano a lampeggiare; il lampeggiamento si interrompe non appena il segnale di comando è... - Page 163 ATTENZIONE! Per assicurare la protezione IP65 delle prese DMX e di rete contro gli spruzzi, le speciali prese di ingresso e di uscita devono essere correttamente chiuse con gli appositi tappi IP65 oppure con coperchi ermetici in gomma. Quando sono collegate correttamente oppure chiuse correttamente con i coperchi ermetici in gomma, le prese di rete POWER IN e POWER OUT sono protette dagli spruzzi d’acqua in conformità...
-
Page 164: Funzionamento
“Software Update ... please wait”, la versione del software e i messaggi “Welcome to Cameo” e “...RESET”. Al termine della pro- cedura, il faro è pronto per essere usato e si avvia la modalità operativa attivata in precedenza. - Page 165 Modalità operativa Art-Net e DMX Modalità operativa sACN e DMX Temperatura del LED Bluetooth attivato Temperatura del LED Bluetooth disattivato Stato W-DMX Stato W-DMX Modalità Modalità operativa operativa Messaggio Messaggio d’errore d’errore Modalità operativa DMX, indirizzo DMX, indirizzo Modalità operativa DMX, indirizzo DMX, indirizzo IP, maschera di sottorete e universo IP, maschera di sottorete e universo Modalità...
- Page 166 con il comando “Reset” nel ricevitore o con il comando “Unlink” nel trasmettitore, anche se nel frattempo un dispositivo è stato scollegato dall’alimentatore. STATO DEL DMX WIRELESS W-DMX W-DMX W-DMX W-DMX W-DMX W-DMX disattivato attivato come attivato come attivato come attivato come attivato come ricevitore;...
- Page 167 RETE (Network) Iniziando dal display principale, premere MENU per accedere al menu principale. Utilizzando e , selezionare il menu Control e premere ENTER. Ora selezionare l’elemento del menu Network e confermare di nuovo. Le informazioni sulle voci di sottomenu del menu “Network” e le corrispondenti opzioni di impo- stazione sono riportate nella tabella seguente (selezionare con ...
- Page 168 Impostazione dell’indirizzo iniziale pixel da 001 a 4xx Pixel tramite rete Controllo pixel tramite rete Pixel tramite Controllo pixel tramite DMX Reinvio del segnale di comando a XLR Out Signal Comando tramite XLR in caso di interruzione del segnale di rete Routen Nessun collegamento tra segnale di rete e connettori XLR Controllo tramite Art-Net...
- Page 169 Le informazioni sulle voci di sottomenu del menu “Stand Alone” e le corrispondenti opzioni di im- postazione sono riportate nella tabella seguente (selezionare con e , confermare con ENTER, modificare il valore o lo stato con e , confermare con ENTER). Il segnale di comando viene reinviato tramite DMX OUT Il segnale di comando non viene reinviato Selezione e attivazione della scena desiderata...
- Page 170 IMPOSTAZIONI DI SISTEMA (Settings) Iniziando dal display principale, premere MENU per accedere al menu principale. Utilizzando e , selezionare Settings e confermare con ENTER. Le informazioni sulle voci di sottomenu del menu “Settings” e le corrispondenti opzioni di impo- stazione sono riportate nella tabella seguente (selezionare con ...
- Page 171 Codice RGB per la visualizza- Colour zione dei colori dell’universo Universe Code Metadata Una stringa di 16 caratteri con un nome personalizzabile che identifica l’universo Impo- Bluetooth acceso stazioni Bluetooth spento wireless Richiesta PIN attivata (impo- stazioni di fabbrica 081569) Richiesta PIN disattivata Reinvio del segnale di comando a XLR (DMX OUT) Comando tramite XLR (DMX IN) con inter-...
- Page 172 L’intensità della luce può essere regolata in modo approssimativo nell’intervallo di valori DMX inferiori e con precisione nell’intervallo di valori DMX superiori L’intensità della luce può essere regolata (curva dimmer) può essere regolato con precisione nell’in- tervallo di valori DMX inferiori e superiori e in modo approssimativo nell’intervallo di valori DMX medi Selezione della frequenza PWM del LED...
- Page 173 Oscuramento durante il movimento della testa Imposta- Nessun oscuramento durante il movimen- zioni dei to della testa movi- Movimenti del motore rallentati per un menti funzionamento più silenzioso della testa Funzione disattivata Controllo automatico della ventola Ventola disattivata a luminosità molto ridotta Impo- Bassa velocità...
- Page 174 MENU SERVICE (Service) Iniziando dal display principale, premere MENU per accedere al menu principale. Utilizzando e , selezionare Service e confermare con ENTER. Le informazioni sulle voci di sottomenu del menu “Service” e le corrispondenti opzioni di impo- stazione sono riportate nella tabella seguente (selezionare con e , confermare con ENTER, modificare il valore o lo stato con ...
- Page 175 Le informazioni sulle voci di sottomenu del menu “System Info” e le corrispondenti opzioni di impostazione sono riportate nella tabella seguente (selezionare con e , confermare con ENTER). Visualizzazione della versione del firmware del componente corrispondente Modello di modulo wireless Nome del dispositivo Numero di versione hardware Numero di versione software...
-
Page 176: Installazione E Montaggio
Visualizzazione dei valori DMX presenti Visualizzazione degli errori in caso di malfunzionamento Visualizzazione delle tabelle delle modalità DMX QUICKLIGHT (Quicklight) Configurare una scena in modo rapido e semplice con le funzioni base della testa mobile senza controller esterno. Iniziando dal display principale, premere MENU per accedere al menu princi- pale. - Page 177 POSIZIONE DI UTILIZZO...
-
Page 178: Cura, Manutenzione E Riparazione
CURA (effettuata dall’utente) AVVERTENZA! Prima di effettuare qualsiasi intervento di cura o manutenzione, è necessario scollegare l’alimentatore e, se possibile, staccare tutti i collegamenti del dispositivo. Una cura inadeguata può causare il danneggiamento o addirittura la distru- NOTA! zione del dispositivo. 1. -
Page 179: Dimensioni
DIMENSIONI (mm) DATI TECNICI Cod. articolo CLOTOSW12 Categoria di prodotto Testa mobile wash a LED Tipo Testa mobile Centrali LED 32 LED da 50 W Colori LED centrali RGBL Numero di segmenti dell’anello Mix colori nei LED dell’anello... - Page 180 Giro orizzontale Regolabile: 630°/540° Giro verticale 650 Hz, 1530 Hz, 3600 Hz, 12 kHz, 18,9 kHz, PWM del LED 25 kHz Risoluzione dimmer 16 bit Curve dimmer Lineare, esponenziale, logaritmica, curva a S Calibrazione Sì > 85 Flusso luminoso 19500 lm Luminanza 16.200 lx (10 m, stretto) Angolo del fascio/angolo di campo 4-45°/10-60°...
-
Page 181: Spiegazione Della Classe Di Protezione Ip
Display, Dimmer, Colour Calibration, Movement, Impostazioni di sistema Fan, Signal Fail, Pixel Mirror Display/spie Display LCD Classificazione IP IP65 per uso temporaneo in esterni Temperatura ambiente nominale Da −10 °C a 40 °C Sistema di raffreddamento Ventole a temperatura controllata Tensione di esercizio 100-240 V CA, 50-60 Hz Consumo energetico max 1400 W... -
Page 182: Distanza Minima Dalla Superficie Illuminata
il dispositivo, come coperchi e tappi ermetici (per esempio, tappi di protezione da applicare sui connettori non in uso). Il grado di protezione IP del prodotto è riportato nei dati tecnici ed è stampato sul dispositivo. DISTANZA MINIMA DALLA SUPERFICIE ILLUMINATA Questo simbolo con l’indicazione della distanza in metri (m) mostra la distanza minima del faro dalla superficie illuminata. -
Page 183: Dichiarazioni Del Produttore
DICHIARAZIONI DEL PRODUTTORE Garanzia del produttore e limitazione di responsabilità Adam Hall GmbH | Adam-Hall-Str. 1 | 61267 Neu-Anspach | Germania Email: Info@adamhall.com / +49 (0)6081 9419-0 Le nostre attuali condizioni di garanzia e la limitazione di responsabilità sono reperibili all’indirizzo: https://cdn-shop.adamhall.com/media/pdf/Manufacturers-Declarations-CAMEO_DE_EN_ES_FR.pdf Per l’assistenza, contattare il proprio partner di distribuzione. -
Page 184: Dmx Control / Dmx Steuerung / Pilotage Dmx / Control Dmx / Sterowanie Dmx / Controllo Dmx
DMX CONTROL / DMX STEUERUNG / PILOTAGE DMX / CONTROL DMX / STEROWANIE DMX / CONTROLLO DMX Pixel Order 13CH 23CH Dual Dual Channel Channel Function Values 000 - 255 0% to 100% Pan fine 000 - 255 Tilt 000 - 255 0% to 100% Tilt fine 000 - 255... - Page 185 088 - 088 Halogen White (3200K) 089 - 128 3200K to 4000K 129 - 129 Neutral White (4000K) 130 - 169 4000K to 5600K Colour Temper- ature (affects 170 - 170 Studio White (5600K) Colour Mixing) 171 - 210 5600K to 6500K 211 - 211 Daylight White (6500K) 212 - 251 6500K to Cold white 252 - 255 Cold white...
- Page 186 000 - 005 No function 006 - 007 Blackout while P/T moving On 008 - 009 Blackout while P/T moving Off 010 - 017 No function 018 - 019 Sleep Mode On 020 - 021 Sleep Mode Off/Wake Up 022 - 024 No function 025 - 025 Record User Scene 1 026 - 026 Record User Scene 2 027 - 027 Record User Scene 3...
- Page 187 108 - 119 No function 120 - 121 PWM 1 (650 Hz) 122 - 123 PWM 2 (1530 Hz) 124 - 125 PWM 3 (3600 Hz) 126 - 127 PWM 4 (12000 Hz) 128 - 129 PWM 5 (18900 Hz) 130 - 131 PWM 6 (25000 Hz) 132 - 133 RAW 134 - 135 Factory Calibration...
- Page 188 Blue 3 000 - 255 0% to 100% Lime 3 000 - 255 0% to 100% Red 4 000 - 255 0% to 100% Green 4 000 - 255 0% to 100% Blue 4 000 - 255 0% to 100% Lime 4 000 - 255 0% to 100% Red 5...
- Page 189 Lime 13 000 - 255 0% to 100% Red 14 000 - 255 0% to 100% Green 14 000 - 255 0% to 100% Blue 14 000 - 255 0% to 100% Lime 14 000 - 255 0% to 100% Red 15 000 - 255 0% to 100% Green 15...
- Page 190 Red 24 000 - 255 0% to 100% Green 24 000 - 255 0% to 100% Blue 24 000 - 255 0% to 100% Lime 24 000 - 255 0% to 100% Red 25 000 - 255 0% to 100% Green 25 000 - 255 0% to 100% Blue 25...
- Page 191 Ring Blue 2 000 - 255 0% to 100% Ring Red 3 000 - 255 0% to 100% Ring Green 3 000 - 255 0% to 100% Ring Blue 3 000 - 255 0% to 100% Ring Red 4 000 - 255 0% to 100% Ring Green 4 000 - 255 0% to 100% Ring Blue 4...
- Page 192 Ring Green 16 000 - 255 0% to 100% Ring Blue 16 000 - 255 0% to 100% Ring Red 17 000 - 255 0% to 100% Ring Green 17 000 - 255 0% to 100% Ring Blue 17 000 - 255 0% to 100% Ring Red 18 000 - 255 0% to 100% Ring Green 18...
- Page 193 Ring Red 30 000 - 255 0% to 100% Ring Green 30 000 - 255 0% to 100% Ring Blue 30 000 - 255 0% to 100% Ring Red 31 000 - 255 0% to 100% Ring Green 31 000 - 255 0% to 100% Ring Blue 31 000 - 255 0% to 100% Ring Red 32...
- Page 194 Ring Blue 43 000 - 255 0% to 100% Ring Red 44 000 - 255 0% to 100% Ring Green 44 000 - 255 0% to 100% Ring Blue 44 000 - 255 0% to 100% Ring Red 45 000 - 255 0% to 100% Ring Green 45 000 - 255 0% to 100% Ring Blue 45...
- Page 195 Ring Green 57 000 - 255 0% to 100% Ring Blue 57 000 - 255 0% to 100% Ring Red 58 000 - 255 0% to 100% Ring Green 58 000 - 255 0% to 100% Ring Blue 58 000 - 255 0% to 100% Ring Red 59 000 - 255 0% to 100% Ring Green 59...
- Page 196 Ring Red 71 000 - 255 0% to 100% Ring Green 71 000 - 255 0% to 100% Ring Blue 71 000 - 255 0% to 100% Ring Red 72 000 - 255 0% to 100% Ring Green 72 000 - 255 0% to 100% Ring Blue 72 000 - 255 0% to 100% Ring Red 73...
- Page 197 Ring Blue 84 000 - 255 0% to 100% Ring Red 85 000 - 255 0% to 100% Ring Green 85 000 - 255 0% to 100% Ring Blue 85 000 - 255 0% to 100% Ring Red 86 000 - 255 0% to 100% Ring Green 86 000 - 255 0% to 100% Ring Blue 86...
- Page 198 Ring Green 98 000 - 255 0% to 100% Ring Blue 98 000 - 255 0% to 100% 24CH 23CH 28CH RGBL RGBL Wash Wash Wash 8Bit Channel Channel Channel Function Values 000 - 255 0% to 100% Pan fine 000 - 255 Tilt 000 - 255...
- Page 199 Lime fine 000 - 255 0% to 100% 000 - 255 0° (Red) to 360° Hue Fine 000 - 255 Saturation 000 - 255 0% (White) to 100% (Colour) 000 - 005 Off 006 - 006 Warm white 007 - 046 Warm white to 2700K 047 - 047 Bulb White (2700K) 048 - 087 2700K to 3200K 088 - 088 Halogen White (3200K)
- Page 200 078 - 081 768 Egg Yolk Yellow 082 - 085 15 Deep Straw 086 - 089 767 Nectarine 090 - 093 101 Yellow 094 - 097 100 Spring Yellow 098 - 101 88 Lime Green 102 - 105 121 LEE Green 106 - 109 738 Jas Green 110 - 113 89 Moss Green 114 - 117 139 Primary Green...
- Page 201 000 - 005 0s (Off) Colour Crossfade 006 - 105 0,1s - 10s (0,1s Steps) (affects HSI, 106 - 214 11s - 119s (1s Steps) CCT and Colour 215 - 244 2m - 4m50s (10s Steps) Presets) 245 - 255 5m - 15m (1m Steps) Ring Dimmer 000 - 255 0% to 100% Ring Red...
- Page 202 025 - 025 Record User Scene 1 026 - 026 Record User Scene 2 027 - 027 Record User Scene 3 028 - 028 Record User Scene 4 029 - 029 Record User Scene 5 030 - 030 Record User Scene 6 031 - 031 Record User Scene 7 032 - 032 Record User Scene 8 033 - 041 No function...
- Page 203 130 - 131 PWM 6 (25000 Hz) 132 - 133 RAW 134 - 135 Factory Calibration 136 - 137 User Calibration 138 - 139 Smart Calibration 140 - 141 Display Always On 142 - 143 Display Off after 20s 144 - 163 No function 164 - 165 Dimmer Curve Linear 166 - 167 Dimmer Curve Exponential Device settings...
- Page 204 000 - 005 Open 006 - 010 Closed 011 - 022 Ramp up/down slow to fast 023 - 033 Ramp up/down random slow to fast 034 - 045 Ramp up slow to fast Strobe Functions 046 - 056 Ramp up random slow to fast (Segment 1, 2 057 - 068 Ramp down slow to fast &...
- Page 205 153 - 173 8 174 - 194 9 Ring Pattern 195 - 215 10 Selection 216 - 236 11 237 - 255 12 000 - 005 Ring Pattern Speed Stop 006 - 063 Ring Pattern Speed slow to fast (Chase) Ring Pattern Ring Pattern Speed fast to slow (Chase) 064 - 127...
- Page 206 027 - 027 Record User Scene 3 028 - 028 Record User Scene 4 029 - 029 Record User Scene 5 030 - 030 Record User Scene 6 031 - 031 Record User Scene 7 032 - 032 Record User Scene 8 033 - 041 No function 042 - 043 Invert Pan On 044 - 045 Invert Pan Off...
- Page 207 136 - 137 User Calibration 138 - 139 Smart Calibration 140 - 141 Display Always On 142 - 143 Display Off after 20s 144 - 163 No function 164 - 165 Dimmer Curve Linear 166 - 167 Dimmer Curve Exponential 168 - 169 Dimmer Curve Logarithmic Device settings 170 - 171 Dimmer Curve S-Curve...
- Page 208 Dimmer 000 - 255 0% to 100% (Segment 3) fine 000 - 005 Open 006 - 010 Closed 011 - 022 Ramp up/down slow to fast 023 - 033 Ramp up/down random slow to fast 034 - 045 Ramp up slow to fast 046 - 056 Ramp up random slow to fast Strobe Functions 057 - 068 Ramp down slow to fast...
- Page 209 000 - 255 0% to 100% Green 000 - 255 0% to 100% Blue 000 - 255 0% to 100% Lime 000 - 255 0% to 100% 000 - 005 Off 006 - 006 Warm white 007 - 046 Warm white to 2700K Colour Temper- 047 - 047 Bulb White (2700K) ature (affects...
- Page 210 Zoom 000 - 255 Narrow to Wide (Segment 2) Zoom 000 - 255 Narrow to Wide (Segment 3) 000 - 005 Pixel controlled by channels 14 to 17 and 21 to 23 LED Control 006 - 249 Linear Crossfade to second input Crossfade 250 - 255 Pixel controlled by second protocol 000 - 005 No function...
- Page 211 094 - 095 Silent movement On 096 - 097 Silent movement Off 098 - 099 Fan Auto 100 - 101 Fan Off 102 - 103 Fan Constant Low 104 - 105 Fan Constant Medium 106 - 107 Fan Constant High 108 - 119 No function 120 - 121 PWM 1 (650 Hz) 122 - 123 PWM 2 (1530 Hz)
- Page 212 Lime 1 000 - 255 0% to 100% Red 2 000 - 255 0% to 100% Green 2 000 - 255 0% to 100% Blue 2 000 - 255 0% to 100% Lime 2 000 - 255 0% to 100% Red 3 000 - 255 0% to 100% Green 3...
- Page 213 Red 12 000 - 255 0% to 100% Green 12 000 - 255 0% to 100% Blue 12 000 - 255 0% to 100% Lime 12 000 - 255 0% to 100% Red 13 000 - 255 0% to 100% Green 13 000 - 255 0% to 100% Blue 13...
- Page 214 Green 22 000 - 255 0% to 100% Blue 22 000 - 255 0% to 100% Lime 22 000 - 255 0% to 100% Red 23 000 - 255 0% to 100% Green 23 000 - 255 0% to 100% Blue 23 000 - 255 0% to 100% Lime 23...
- Page 215 Blue 32 000 - 255 0% to 100% Lime 32 000 - 255 0% to 100% Ring Red 1 000 - 255 0% to 100% Ring Green 1 000 - 255 0% to 100% Ring Blue 1 000 - 255 0% to 100% Ring Red 2 000 - 255 0% to 100% Ring Green 2...
- Page 216 Ring Red 14 000 - 255 0% to 100% Ring Green 14 000 - 255 0% to 100% Ring Blue 14 000 - 255 0% to 100% Ring Red 15 000 - 255 0% to 100% Ring Green 15 000 - 255 0% to 100% Ring Blue 15 000 - 255 0% to 100% Ring Red 16...
- Page 217 Ring Blue 27 000 - 255 0% to 100% Ring Red 28 000 - 255 0% to 100% Ring Green 28 000 - 255 0% to 100% Ring Blue 28 000 - 255 0% to 100% Ring Red 29 000 - 255 0% to 100% Ring Green 29 000 - 255 0% to 100% Ring Blue 29...
- Page 218 Ring Green 41 000 - 255 0% to 100% Ring Blue 41 000 - 255 0% to 100% Ring Red 42 000 - 255 0% to 100% Ring Green 42 000 - 255 0% to 100% Ring Blue 42 000 - 255 0% to 100% Ring Red 43 000 - 255 0% to 100% Ring Green 43...
- Page 219 Ring Red 55 000 - 255 0% to 100% Ring Green 55 000 - 255 0% to 100% Ring Blue 55 000 - 255 0% to 100% Ring Red 56 000 - 255 0% to 100% Ring Green 56 000 - 255 0% to 100% Ring Blue 56 000 - 255 0% to 100% Ring Red 57...
- Page 220 Ring Blue 68 000 - 255 0% to 100% Ring Red 69 000 - 255 0% to 100% Ring Green 69 000 - 255 0% to 100% Ring Blue 69 000 - 255 0% to 100% Ring Red 70 000 - 255 0% to 100% Ring Green 70 000 - 255 0% to 100% Ring Blue 70...
- Page 221 Ring Green 82 000 - 255 0% to 100% Ring Blue 82 000 - 255 0% to 100% Ring Red 83 000 - 255 0% to 100% Ring Green 83 000 - 255 0% to 100% Ring Blue 83 000 - 255 0% to 100% Ring Red 84 000 - 255 0% to 100% Ring Green 84...
- Page 222 Ring Red 96 000 - 255 0% to 100% Ring Green 96 000 - 255 0% to 100% Ring Blue 96 000 - 255 0% to 100% Ring Red 97 000 - 255 0% to 100% Ring Green 97 000 - 255 0% to 100% Ring Blue 97 000 - 255 0% to 100% Ring Red 98...
- Page 223 Blue fine 000 - 255 0% to 100% Lime 000 - 255 0% to 100% Lime fine 000 - 255 000 - 255 0° (Red) to 360° Hue Fine 000 - 255 Saturation 000 - 255 0% (White) to 100% (Colour) 000 - 005 Off 006 - 006 Warm white 007 - 046 Warm white to 2700K...
- Page 224 070 - 073 105 Orange 074 - 077 20 Medium Amber 078 - 081 768 Egg Yolk Yellow 082 - 085 15 Deep Straw 086 - 089 767 Nectarine 090 - 093 101 Yellow 094 - 097 100 Spring Yellow 098 - 101 88 Lime Green 102 - 105 121 LEE Green 106 - 109 738 Jas Green...
- Page 225 000 - 005 0s (Off) Colour Crossfade 006 - 105 0,1s - 10s (0,1s Steps) (affects HSI, 106 - 214 11s - 119s (1s Steps) CCT and Colour 215 - 244 2m - 4m50s (10s Steps) Presets) 245 - 255 5m - 15m (1m Steps) Ring Dimmer 000 - 255 0% to 100% Ring Red...
- Page 226 Ring Pattern Ring Pattern Speed fast to slow (Fade) 192 - 255 Speed (backwards) 000 - 005 Off 006 - 064 Static Pattern 1 Pattern Folder 065 - 128 Static Pattern 2 129 - 192 Effect Pattern 1 193 - 255 Effect Pattern 2 000 - 005 Off 006 - 009 1 010 - 013 2...
- Page 227 080 - 102 Random Strobe effect slow to fast Strobe Break effect 5s to 1s 103 - 127 Background (Short burst with break) Strobe 128 - 250 Strobe slow to fast (<1Hz to 20Hz) 251 - 255 Open Background Red 000 - 255 0% to 100% Background Red 000 - 255...
- Page 228 000 - 005 No function 006 - 009 46 Dark Magenta 010 - 013 29 Plasa Red 014 - 017 26 Bright Red 018 - 021 127 Smokey Pink 022 - 025 36 Medium Pink 026 - 029 19 Fire 030 - 033 135 Deep Golden Amber 034 - 037 778 Millennium Gold 038 - 041 21 Gold Amber...
- Page 229 166 - 169 343 Special Medium Lavender 170 - 173 798 Chrysalis Pink 174 - 177 701 Provence 178 - 181 797 Deep Purple 182 - 185 48 Rose Purple 186 - 189 345 Fuchsia Pink 190 - 193 795 Magical Magenta Background 194 - 197 128 Bright Pink Colour Presets...
- Page 230 025 - 025 Record User Scene 1 026 - 026 Record User Scene 2 027 - 027 Record User Scene 3 028 - 028 Record User Scene 4 029 - 029 Record User Scene 5 030 - 030 Record User Scene 6 031 - 031 Record User Scene 7 032 - 032 Record User Scene 8 033 - 041 No function...
- Page 231 132 - 133 RAW 134 - 135 Factory Calibration 136 - 137 User Calibration 138 - 139 Smart Calibration 140 - 141 Display Always On 142 - 143 Display Off after 20s 144 - 163 No function 164 - 165 Dimmer Curve Linear 166 - 167 Dimmer Curve Exponential Device settings 168 - 169 Dimmer Curve Logarithmic...
- Page 232 Dimmer 000 - 255 (Segment 3) 0% to 100% Dimmer fine 000 - 255 (Segment 3) 000 - 005 Open 006 - 010 Closed 011 - 022 Ramp up/down slow to fast 023 - 033 Ramp up/down random slow to fast 034 - 045 Ramp up slow to fast 046 - 056 Ramp up random slow to fast Strobe Functions...
- Page 233 128 - 250 Strobe slow to fast (<1Hz to 20Hz) Strobe Functions (Segment 3) 251 - 255 Open 000 - 005 Off 006 - 006 Warm white 007 - 046 Warm white to 2700K 047 - 047 Bulb White (2700K) 048 - 087 2700K to 3200K 088 - 088 Halogen White (3200K) Colour Temper-...
- Page 234 000 - 005 No function 006 - 007 Blackout while P/T moving On 008 - 009 Blackout while P/T moving Off 010 - 017 No function 018 - 019 Sleep Mode On 020 - 021 Sleep Mode Off/Wake Up 022 - 024 No function 025 - 025 Record User Scene 1 026 - 026 Record User Scene 2 027 - 027 Record User Scene 3...
- Page 235 108 - 119 No function 120 - 121 PWM 1 (650 Hz) 122 - 123 PWM 2 (1530 Hz) 124 - 125 PWM 3 (3600 Hz) 126 - 127 PWM 4 (12000 Hz) 128 - 129 PWM 5 (18900 Hz) 130 - 131 PWM 6 (25000 Hz) 132 - 133 RAW 134 - 135 Factory Calibration...
- Page 236 Lime 000 - 255 0% to 100% (Segment 2) Red (Segment 3) 000 - 255 0% to 100% Green 000 - 255 0% to 100% (Segment 3) Blue (Segment 3) 000 - 255 0% to 100% Lime 000 - 255 0% to 100% (Segment 3) Ring Red 000 - 255 0% to 100%...
- Page 237 Ring Blue 000 - 255 0% to 100% (Segment 6) Ring Red 000 - 255 0% to 100% (Segment 7) Ring Green 000 - 255 0% to 100% (Segment 7) Ring Blue 000 - 255 0% to 100% (Segment 7) Ring Red 000 - 255 0% to 100% (Segment 8)
- Page 238 Ring Dimmer 000 - 255 0% to 100% 000 - 005 Open 006 - 010 Closed 011 - 022 Ramp up/down slow to fast 023 - 033 Ramp up/down random slow to fast 034 - 045 Ramp up slow to fast 046 - 056 Ramp up random slow to fast Ring Strobe 057 - 068 Ramp down slow to fast...
- Page 239 052 - 053 Pan Angle 630° 054 - 057 No Function 058 - 059 Pixel Mirroring Off 060 - 061 Pixel Mirroring Horizontal 062 - 063 Pixel Mirroring Vertical 064 - 065 Pixel Mirroring Horizontal + Vertical 066 - 073 No function 074 - 075 Dimmer Response LED 076 - 077 Dimmer Response Halogen 078 - 081 No function...
- Page 240 234 - 235 Reset Head 236 - 237 Reset All Device settings 238 - 239 No function (all settings are 240 - 241 Load Factory Defaults executed after Load Factory Defaults holding value for 242 - 243 (without User Scenes & Loops) 3 seconds) 244 - 245 Load User Default A (please read...
- Page 241 Lime 8 000 - 255 0% to 100% Red 9 000 - 255 0% to 100% Green 9 000 - 255 0% to 100% Blue 9 000 - 255 0% to 100% Lime 9 000 - 255 0% to 100% Red 10 000 - 255 0% to 100% Green 10...
- Page 242 Red 19 000 - 255 0% to 100% Green 19 000 - 255 0% to 100% Blue 19 000 - 255 0% to 100% Lime 19 000 - 255 0% to 100% Red 20 000 - 255 0% to 100% Green 20 000 - 255 0% to 100% Blue 20...
- Page 243 Green 29 000 - 255 0% to 100% Blue 29 000 - 255 0% to 100% Lime 29 000 - 255 0% to 100% Red 30 000 - 255 0% to 100% Green 30 000 - 255 0% to 100% Blue 30 000 - 255 0% to 100% Lime 30...
- Page 244 Ring Green 000 - 255 0% to 100% (Segment 5) Ring Blue 000 - 255 0% to 100% (Segment 5) Ring Red 000 - 255 0% to 100% (Segment 6) Ring Green 000 - 255 0% to 100% (Segment 6) Ring Blue 000 - 255 0% to 100% (Segment 6)
- Page 245 046 - 056 Ramp up random slow to fast 057 - 068 Ramp down slow to fast 069 - 079 Ramp down random slow to fast Strobe Functions 080 - 102 Random Strobe effect slow to fast (Segment 1, 2 Strobe Break effect 5s to 1s &...
- Page 246 057 - 068 Ramp down slow to fast 069 - 079 Ramp down random slow to fast 080 - 102 Random Strobe effect slow to fast Ring Strobe Strobe Break effect 5s to 1s 103 - 127 (Short burst with break) 128 - 250 Strobe slow to fast (<1Hz to 20Hz) 251 - 255 Open Zoom...
- Page 247 074 - 075 Dimmer Response LED 076 - 077 Dimmer Response Halogen 078 - 081 No function 082 - 083 DTW (Redshift) On 084 - 085 DTW (Redshift) Off 086 - 093 No function 094 - 095 Silent movement On 096 - 097 Silent movement Off 098 - 099 Fan Auto 100 - 101 Fan Off...
- Page 248 Device settings 244 - 245 Load User Default A (all settings are 246 - 247 Load User Default B executed after 248 - 249 Load User Default C holding value for 3 seconds) 250 - 255 No function (please read remark 1*) Red 1 000 - 255 0% to 100%...
- Page 249 Blue 9 000 - 255 0% to 100% Lime 9 000 - 255 0% to 100% Red 10 000 - 255 0% to 100% Green 10 000 - 255 0% to 100% Blue 10 000 - 255 0% to 100% Lime 10 000 - 255 0% to 100% Red 11...
- Page 250 Lime 19 000 - 255 0% to 100% Red 20 000 - 255 0% to 100% Green 20 000 - 255 0% to 100% Blue 20 000 - 255 0% to 100% Lime 20 000 - 255 0% to 100% Red 21 000 - 255 0% to 100% Green 21...
- Page 251 Red 30 000 - 255 0% to 100% Green 30 000 - 255 0% to 100% Blue 30 000 - 255 0% to 100% Lime 30 000 - 255 0% to 100% Red 31 000 - 255 0% to 100% Green 31 000 - 255 0% to 100% Blue 31...
- Page 252 Ring Blue 10 000 - 255 0% to 100% Ring Red 11 000 - 255 0% to 100% Ring Green 11 000 - 255 0% to 100% Ring Blue 11 000 - 255 0% to 100% Ring Red 12 000 - 255 0% to 100% Ring Green 12 000 - 255 0% to 100% Ring Blue 12...
- Page 253 Ring Green 24 000 - 255 0% to 100% Ring Blue 24 000 - 255 0% to 100% Ring Red 25 000 - 255 0% to 100% Ring Green 25 000 - 255 0% to 100% Ring Blue 25 000 - 255 0% to 100% Ring Red 26 000 - 255 0% to 100% Ring Green 26...
- Page 254 Ring Red 38 000 - 255 0% to 100% Ring Green 38 000 - 255 0% to 100% Ring Blue 38 000 - 255 0% to 100% Ring Red 39 000 - 255 0% to 100% Ring Green 39 000 - 255 0% to 100% Ring Blue 39 000 - 255 0% to 100% Ring Red 40...
- Page 255 Ring Blue 51 000 - 255 0% to 100% Ring Red 52 000 - 255 0% to 100% Ring Green 52 000 - 255 0% to 100% Ring Blue 52 000 - 255 0% to 100% Ring Red 53 000 - 255 0% to 100% Ring Green 53 000 - 255 0% to 100% Ring Blue 53...
- Page 256 Ring Green 65 000 - 255 0% to 100% Ring Blue 65 000 - 255 0% to 100% Ring Red 66 000 - 255 0% to 100% Ring Green 66 000 - 255 0% to 100% Ring Blue 66 000 - 255 0% to 100% Ring Red 67 000 - 255 0% to 100% Ring Green 67...
- Page 257 Ring Red 79 000 - 255 0% to 100% Ring Green 79 000 - 255 0% to 100% Ring Blue 79 000 - 255 0% to 100% Ring Red 80 000 - 255 0% to 100% Ring Green 80 000 - 255 0% to 100% Ring Blue 80 000 - 255 0% to 100% Ring Red 81...
- Page 258 Ring Blue 92 000 - 255 0% to 100% Ring Red 93 000 - 255 0% to 100% Ring Green 93 000 - 255 0% to 100% Ring Blue 93 000 - 255 0% to 100% Ring Red 94 000 - 255 0% to 100% Ring Green 94 000 - 255 0% to 100% Ring Blue 94...
- Page 260 CAMEOLIGHT.COM Adam Hall GmbH Adam-Hall-Str. 1 | 61267 Neu-Anspach | Germany Phone: +49 6081 9419-0 | adamhall.com Adam Hall Ltd. | The Seedbed Business Centre | SS3 9QY Essex | United Kingdom REV: 01...
Need help?
Do you have a question about the OTOS W12 and is the answer not in the manual?
Questions and answers