Table of Contents
Advertisement
Quick Links
Advertisement
Table of Contents

Related Manuals for Octave HP 700 SE


Summary of Contents for Octave HP 700 SE
- Page 1 HP 700 SE Owner's Manual English...
-
Page 2: Introduction
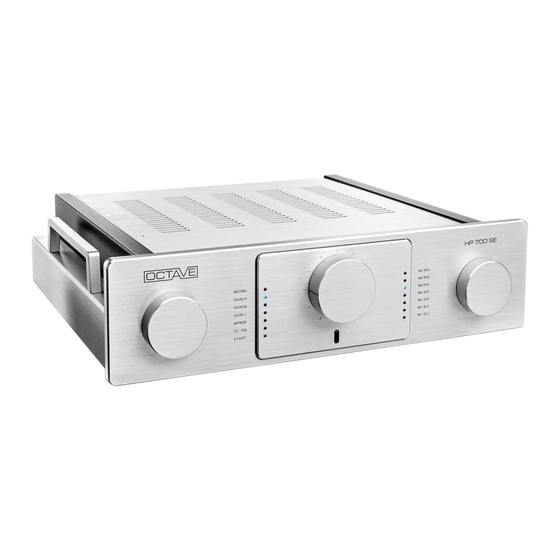
HP 700 SE You are about to enjoy the benefits of one of the world’s most innovative and reliable preamplifiers, the HP 700 SE. Take care of it, and your preamplifier will provide you with many years of listening pleasure. -
Page 4: Table Of Contents
CONTENTS Introduction ......................... OCTAVE technology 1.1. OCTAVE amps in contrast to other tube amplifiers ............ 1.2. Description HP 700 SE ....................Safety instructions 2.1. Before you begin ......................2.2. Placement ........................2.3. Warranty ........................Setting up 3.1. Checking the delivery contents ................... - Page 5 Troubleshooting ......................Technical data 12.1. In- and outputs ......................12.2. Dimensions ......................... 12.2.1. HP 700 SE preamplifier (dimensions in mm) .............. 12.2.2. External power supply (dimensions in mm) ..............12.3. Diagrams ........................12.3.1. HP 700 SE line frequency response ................
-
Page 6: Octave Technology
Thanks to their unique output stage design, they will maintain their optimum sound quality with virtually any power amplifier, irrespective of the cables. OCTAVE employs the latest electronic circuit designs to create the best possible Control + monitoring operating conditions for the tubes, and thus for the amplifier itself. -
Page 7: Description Hp 700 Se
- an innovation in the market. Now it was time to push the innovative HP 700 even further in terms of sound and technology. The new HP 700 SE is a tube preamplifier that features both new precision technology and tonal refinements of the output stage. Like its predecessor, its modular freedom meets the listener's individual wishes for its high-end setup. - Page 8 TONE CONTROL PRECISON TONE CONTROL The innovative optional tone control rounds off the HP 700 SE equipment. The precision valve-based tone control unit guarantees consistency of the sound, even at low volume. Precision adjustment of bass and treble, with a 0.3 dB channel separation, allows the tone to be adjusted without impairing the spatial reproduction.
-
Page 9: Safety Instructions
Defective fuses should also only be replaced by a qualified technician. Always replace fuses with ones of the same type and rating. If your amplifier requires servicing, please ship or take your equipment directly to OCTAVE or to one of our authorized service centers. -
Page 10: Placement
2.2. Placement Location OCTAVE equipment is designed strictly for use in a dry domestic environment. Do not use it in open air or in damp environments! Never place plants or liquid-filled containers on your amplifier. Take care that objects do not fall ... -
Page 11: Setting Up
5. Check that the volume control is not set at maximum before playing music through the preamplifier and that the function switch (1) is set to the setting Gain Med. 6. Switch on the HP 700 SE using the power witch on the power supply (see chapter 6). Power switch... -
Page 12: Operation
In this setting, the preamplifier outputs are short-circuited and music cannot be played. This switch position should be activated while connecting source devices to the HP 700 SE. Gain Low, Med, and High The gain setting can be selected according to the efficiency of the other components. -
Page 13: Connections
5. CONNECTIONS 5.1. HP 700 SE rear panel Legend GND connection Ground connection for phono IN 1 SL1 Slot for a phono or line input module IN 2 SL2 Slot for a phono or line input module IN 5 RCA input Line-level input for CD, tuner, etc. - Page 14 5. CONNECTIONS 5.1. HP 700 SE rear panel Legend (12) IN 4 XLR input Balanced line-level input for CD, DAC, in bypass setting IN 4 can be used as alternative home theater input. (13) RCA bypass Inputs Home theater input for multi-channel receiver.
-
Page 15: External Power Supply
6. EXTERNAL POWER SUPPLY 6.1. Front of power supply The HP 700 SE is switched on and off using a switch on the power supply. Legend (20) Power (switch) The LED on the power supply illuminates when the power supply power supply is on. -
Page 16: The Hp 700 Se In Multi-Channel Mode
For this reason, both the front channels (right and left) on the multi-channel source are connected to the bypass input (13) on the HP 700 SE if the multi-channel device only has RCA outputs. If the multi- channel receiver also has balanced outputs for the two main channels, the bypass multi-channel input on the HP 700 SE can be switched to the balanced input IN 4 (12). - Page 17 For the RCA outputs and the balanced XLR output, the volume control for the HP 700 SE is then disabled. In this mode, the amplification factor of the HP 700 SE is 0 dB for RCA and XLR.
-
Page 18: Remote Control For Volume
8. REMOTE CONTROL FOR VOLUME 8.1. Remote control operating elements Legend Volume up Volume down 8.2. Battery replacement Remove the bottom plate (three screws size 3 x 8 Phillips countersunk head screw) with screwdriver Phillips 1 Change the batteries (2 x type AAA 1.5 V alkali-manganese / alkaline) Make sure not to press the buttons while inserting the batteries! If the remote control does not work after the batteries are replaced, remove the new batteries and wait at least 30 minutes. -
Page 19: Tubes
9. TUBES 9.1. Line tube layout WARNING Electric shock! Parts carrying dangerous voltages may be exposed when opening the cover and injury through electric shock. Before opening the cover, switch the device off and unplug the power cord. Tube layout line board Tube layout: line board ECC82 (12 AU 7) V 2, 3... -
Page 20: Phono Tube Layout
9. TUBES 9.2. Phono-tube-layout Tube layout: phono board German designation International designation ECC 83 12 AX 7 ECC 81 12 AT 7 ECC 88 6922 SV (= 6N23P SV) alternatively: 6 DJ 8... -
Page 21: Control Unit Tube Layout
9. TUBES 9.3. Control unit tube layout Tube layout: control unit German designation International designation ECC 88 6922, 6 DJ 8 Replacing the V 7 tube Note The control unit cannot be disassembled during tube replacement, as it is physically connected to the front. -
Page 22: Replacing Tubes
9. TUBES 9.4. Replacing tubes Attention Improper disassembly Damage to the tubes due to improper disassembly or assembly. Changing tubes is a job for qualified technicians! Switch off the preamplifier, unplug the power cord from the wall socket, and allow the unit 10 minutes to cool down. -
Page 23: Options
Remove the front panel on slot 1 or 2 on the rear front of the HP 700 SE (4 pc M3 screws). Make sure that the screws on the connector are all loose. Do not unscrew them completely. -
Page 24: Available Line-Level Input Modules
Guide the line-level input module through the opening at slot 1 or 2 so to insert the pins on the pin strip into the terminal screw strip. Secure the module to the rear front side of the HP 700 SE first using screws from the empty front panel. -
Page 25: Option Hp 700 Se With Phono
Equalization accuracy must be within 0.7 dB over the entire frequency range, with channel matching of at least 0.3 dB. The phono RIAA amplifier of the HP 700 SE must always be supplemented with an input module. A maximum of two phono input modules can be installed. The input modules function in the same way as an input amplifier that raises the different signals of the pickup cartridge to a constant, high level, which the RIAA amplifier can optimally process. -
Page 26: Subsonic Filter
10. OPTIONS 10.2.2. Subsonic filter Warped records and unfavorable cartridge/pickup arm combinations can cause low-frequency interference that impairs bass reproduction. These low-frequency levels can be attenuated with the switchable subsonic filter. The roll cutoff frequency is outside of the audible range at 15 Hz. Condition on delivery: Subsonic filter on. -
Page 27: Assembling The Phono Input Modules
10. OPTIONS 10.2.3. Assembling the phono input modules The phono input modules are assembled in the same way as the line input modules, though their assembly is simpler due to an absence of cables to be connected. Note: If your system is not equipped with a phono main circuit board (phono RIAA), you can theoretically also insert the phono inputs, but no sound can be produced! The RIAA board is the basis and prerequisite for listening with phono. -
Page 28: Option: Hp 700 Se With Control Unit
One scale mark corresponds to +/- 3 dB. controls The control unit is a special feature of the HP 700 SE. The combination of level adjustment and the tone control allows for a more precise correction of reproduction under unfavorable conditions, be it due to the room acoustics or the sound carrier. - Page 29 10. OPTIONS The components used, low-noise conductive plastic controls with minimal channel tolerance, and low- tolerance polypropylene capacitors, in conjunction with the latest optimized tube stage advance the sound properties of the classic tone control to an unprecedented level. Precise adjustment allows for tonal corrections in the bass or treble ranges.
-
Page 30: Option: Hp 700 Se With Stepped Attenuator
– as in the balance controls – is frequency-compensated. Equipped with this unique switching layout, the OCTAVE stepped attenuator functions as an ideal control. The sound characteristics are constant across the entire control range, while the center position also remains stable across the entire range thanks to the negligible channel tolerance. -
Page 31: Troubleshooting
The HP 700 SE is not grounded and therefore cannot cause ground loops. Solution The XLR output on the HP 700 SE can be connected without ground connection to interrupt a ground loop in the power amplifier with a grounded source device. -
Page 32: Technical Data
12. TECHNICAL DATA 12.1. In- and outputs In- and outputs Inputs 3 x RCA, 2 x XLR, 2 x additional Input Modules 1 x RCA bypass (can be switched to IN4-XLR) Outputs 2 x RCA, 2 x XLR, 1 x Monitor/Tape Record (RCA) XLR ratio 0 dB XLR pin assignment... - Page 33 12. TECHNICAL DATA Phono RIAA equalization tolerance 0.3 dB / 15 Hz – 20 kHz Cutoff frequency – subsonic filter 15 Hz / -3 dB Signal-to-noise ratio -75 / -84 dB/with IN 2 MC input Input sensitivity 250 µV / 600 µV / with IN 2 MC input Input sensitivity, gain and input resistance depend on input module Overall Gain: MC Gain Low - Pre Out RCA/XLR...
-
Page 34: Dimensions
12. TECHNICAL DATA 12.2. Dimensions 12.2.1. HP 700 SE preamplifier (dimensions in mm) 12.2.2. External power supply (dimensions in mm) -
Page 35: Diagrams
12. TECHNICAL DATA 12.3. Diagrams 12.3.1. HP 700 SE line frequency response Frequency response and gain of line stage in Gain Low (12 dB), Med (18 dB), and High (25.5 dB) settings. 12.3.2. FFT interference spectrum Comparison of the RCA and XLR interference spectrum. No mains interference on either of the inputs;... -
Page 36: Control Range And Balance Control Frequency Response
12. TECHNICAL DATA 12.3.3. Control range and balance control frequency response The compensated balance pre-control exhibits virtually the same frequency response with all settings. 12.3.4. Line stage hum and noise level No mains interference can be detected during noise level measurement either; the noise level decreases linearly by 6 dB for each gain setting. - Page 38 We reserve the right to alter and improve the specifications in pursuit of better. OCTAVE logo is a registered trade mark of Andreas Hofmann. Copyright by Andreas Hofmann OCTAVE AUDIO T. +49 (0) 7248 3278 ANDREAS HOFMANN F. +49 (0) 7248 3279 REUTAECKERSTR.
Need help?
Do you have a question about the HP 700 SE and is the answer not in the manual?
Questions and answers