Table of Contents
Advertisement
Quick Links
ITEM
QUANTITY
1
2
2
1
3
2
4
2
5
2
6
2
7
4
8
4
ANTI-SEIZE LUBRICANT MUST BE USED ON ALL STAINLESS STEEL FASTENERS TO PREVENT THREAD DAMAGE AND GALLING
CAUTION:
Check with state and local authorities
for laws governing usage and proper
mounting of auxiliary lamps.
Keep heat sink clean and exposed to
maintain air-flow.
1. Remove contents from box, verify if all parts listed are present and free from damage.
Carefully read and understand all instructions before attempting installation.
Failure to identify damage before installation could lead to a rejection of any claim.
2. Start installation by loosely securing the HYPERQ bracket with (1) M8 hex socket head cap screw, (1) M8 hex nut, (1) M8
spring lock washer, (1) M8 flat washer. See Figure 1.
3. Align the holes of the bracket with the LED light then insert (1) M6 hex lock nut into light slot. See Figure 2. Note: Make
sure to have the rubber end of the M6 hex lock nut point away from hole on the side of the light. Loosely secure light
bracket to LED light using (1) M6 hex socket head cap screw. See Figure 3. Repeat for other side of the light.
Figure 1
Westin Automotive Products, Inc.
320 W. Covina Blvd
San Dimas, Ca. 91773
ECO #: W18-0041
P.N.: 75-0912200APR-RevB
INSTALLATION INSTRUCTIONS
APPLICATION:
Universal Fit
PART NUMBER:
09-12200A-PR, 09-12205A-PR, 09-12200B-PR, 09-12205B-PR
DESCRIPTION
HYPER Q LED LIGHT
LED WIRING HARNESS
M8 HEX SOCKET HEAD CAP SCREW
M8 HEX NUT
M8 FLAT WASHER
M8 SPRING LOCK WASHER
M6 HEX LOCK NUT
M6 HEX SOCKET HEAD CAP SCREW
ITEM 1
PROCEDURE
Figure 2
Insert M6 nut
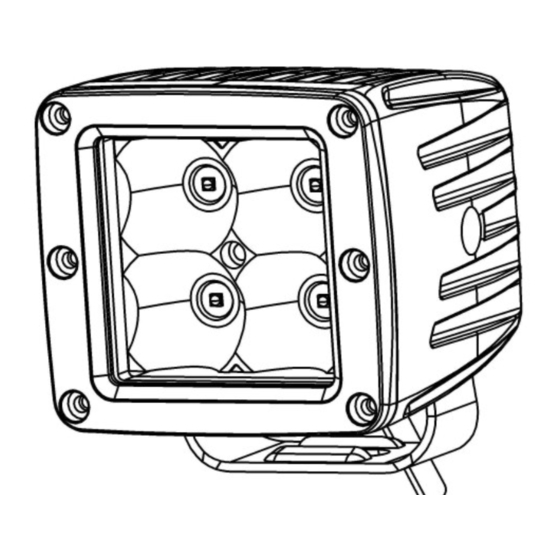
HYPERQ LED LIGHT
Part number 09-12200A-PR
shown. Other lights are similar.
Thank you for choosing Westin products
for additional installation assistance please call
1
TOOLS NEEDED
HEX KEY
Customer Service (800) 793-7846
www.westinautomotive.com
DATE: 4/4/18
Figure 3
Advertisement
Table of Contents

Related Manuals for Westin 09-12200A-PR


Summary of Contents for Westin 09-12200A-PR
- Page 1 LED light using (1) M6 hex socket head cap screw. See Figure 3. Repeat for other side of the light. Figure 1 Figure 2 Insert M6 nut Figure 3 Westin Automotive Products, Inc. Thank you for choosing Westin products 320 W. Covina Blvd for additional installation assistance please call San Dimas, Ca. 91773 Customer Service (800) 793-7846 www.westinautomotive.com ECO #: W18-0041 P.N.: 75-0912200APR-RevB...
- Page 2 4. This light becomes hot under continuous use. Do not remove or touch the casting for at least 30 minutes after the lamp has been turned off. WESTIN recommends using a professional for this installation. Refer to Figure 5 on page 3.
- Page 3 STAINLESS STEEL PRODUCTS CAN BE CLEANED WITH MILD SOAP AND WATER. STAINLESS STEEL POLISH SHOULD BE USED TO POLISH SMALL SCRATCHES. GLOSS BLACK FINISHES SHOULD BE CLEANED WITH MILD SOAP AND WATER. Westin Automotive Products, Inc. Thank you for choosing Westin products 320 W. Covina Blvd for additional installation assistance please call San Dimas, Ca. 91773 Customer Service (800) 793-7846 www.westinautomotive.com...
- Page 4 AVOID PERSONAL INJURY. MAXIMUM TOWING/CARRYING CAPACITY: The Westin Receiver Hitches will have a visible tow rating label affixed directly on the product. Us- er should never exceed the vehicle manufacturers maximum tow and weight rating regardless of the capacity of the hitch. FAILURE TO FOLLOW THESE GUIDELINES WILL VOID THE WESTIN WARRANTY AND MAY RESULT IN PERSONAL INJURY AND/OR INJURY TO OTHERS AS WELL AS VEHICLE DAMAGE.
Need help?
Do you have a question about the 09-12200A-PR and is the answer not in the manual?
Questions and answers