Advertisement
Table of Contents
- 1 Table of Contents
- 2 Safety Instructions
- 3 Profile of this Unit
- 4 Speaker System Setup
- 5 Connections
- 6 Turning On/Off the Power of this Unit
- 7 Table of Functions
- 8 Adjustments before Operation
- 9 Playing an AC-3 Source
- 10 Adjusting Output Levels
- 11 Adjusting Delays and Dynamic Range
- 12 Specifications
- 13 Troubleshooting
- 14 Block Diagram
- Download this manual
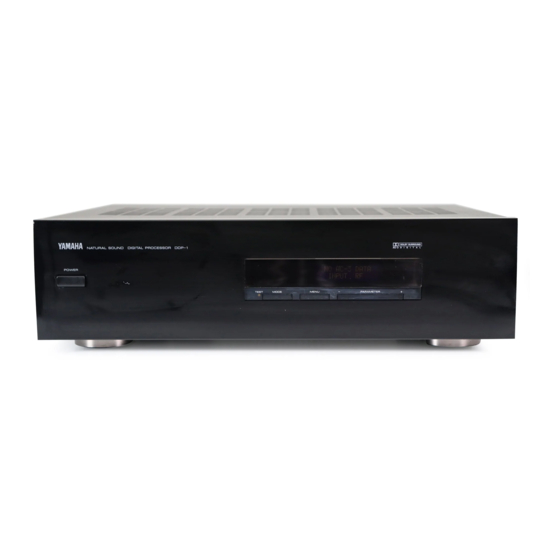
NATURAL SOUND DIGITAL PROCESSOR DDP-1
OWNER'S MANUAL
IMPORTANT!
Please record the serial number of this unit in the
space below.
Serial No.:
The serial number is located on the rear of the unit.
Retain this Owner's Manual in a safe place for future
reference.
DDP- 1
NATURAL SOUND DIGITAL PROCESSOR
TEST
MODE
MENU
PARAMETER
CONTENTS
Safety Instructions ......................................... 2
Profile of This Unit ......................................... 4
Speaker System Setup .................................. 5
Connections ................................................... 6
Turning On/Off the Power of This Unit ........... 8
Table of Functions ......................................... 9
Adjustments Before Operation .................... 10
Playing an AC-3 Source .............................. 14
Adjusting Output Levels ............................... 14
Adjusting Delays and Dynamic Range ........ 16
Specifications .............................................. 18
Troubleshooting ........................................... 18
Block Diagram ............................................. 19
Advertisement
Table of Contents

Related Manuals for Yamaha DDP-1


Summary of Contents for Yamaha DDP-1
-
Page 1: Table Of Contents
DDP- 1 NATURAL SOUND DIGITAL PROCESSOR NATURAL SOUND DIGITAL PROCESSOR DDP–1 OWNER’S MANUAL IMPORTANT! Please record the serial number of this unit in the space below. Serial No.: The serial number is located on the rear of the unit. Retain this Owner’s Manual in a safe place for future reference. -
Page 2: Safety Instructions
SAFETY INSTRUCTIONS CAUTION RISK OF ELECTRIC SHOCK DO NOT OPEN CAUTION: TO REDUCE THE RISK OF ELECTRIC SHOCK, DO NOT REMOVE COVER (OR BACK). NO USER-SERVICEABLE PARTS INSIDE. REFER SERVICING TO QUALIFIED SERVICE PERSONNEL. • Explanation of Graphical Symbols The lightning flash with arrowhead symbol, within an equilateral triangle, is intended to alert you to the presence of uninsulated “dangerous... - Page 3 This product, when installed as indicated in the instructions contained in this manual, meets FCC requirements. Modifications not expressly approved by Yamaha may void your authority, granted by the FCC, to use the product. 2. IMPORTANT : When connecting this product to accessories and/or another product use only high quality shielded cables.
-
Page 4: Profile Of This Unit
The audio amplifier or receiver must have “discrete” input terminals to receive the signals from the DDP-1. The use of Yamaha RX-V2090, a multi-channel audio/video receiver equipped with discrete input terminals combined with this unit is an ideal choice for the purpose of experiencing AC-3 sound, and this is the best system we recommend. -
Page 5: Speaker System Setup
SPEAKER SYSTEM SETUP As described on page 4, we recommend you to use this unit connecting with the Yamaha RX-V2090. If you have already set up a speaker system for the RX-V2090, you do not need to prepare a new speaker system for this unit. Some functions on this unit have been already preset to be suitable when this unit is used with a speaker system for the RX-V2090. -
Page 6: Connections
• Before attempting to make any connections to or from this unit, be sure to first switch OFF the power to this unit and to any other components to which connections are being made. AC-3 RF OUT Audio cord (not included) (U.S.A. - Page 7 AC-3 DIGITAL OPTICAL/COAXIAL terminals AC–3 DIGITAL OPTICAL COAXIAL These terminals input AC-3 signals in digital signal format. They are provided for future use. * Do not remove the cover of the OPTICAL terminal unless you will use this terminal in order to protect the terminal from dust.
-
Page 8: Turning On/Off The Power Of This Unit
TURNING ON/OFF THE POWER OF THIS UNIT Turn on the power of this unit when you will play an AC-3 source (an AC-3 laserdisc etc.), or if you desire to make some adjustments or mode setting changes to this unit. To turn on the power Press the POWER switch. -
Page 9: Table Of Functions
The following 15 functions on this unit allows you to change several adjustments and mode settings for enhancing the performance of your audio system including this unit. For adjustment or mode setting change on each menu function, refer to page 10–17. MODE MENU (Function) (Category) -
Page 10: Adjustments Before Operation
ADJUSTMENTS BEFORE OPERATION SELECTING THE INPUT AND OUTPUT MODES SUITABLE FOR YOUR SPEAKER SYSTEM This unit provides you the following five functions to determine the modes of input and distribution of output signals to speakers suitable for your audio system. C4 and C5 have been already preset in the position suitable for using this unit with the RX-V2090. Description of each function C1. - Page 11 Method of changing selections Turn the power on. Press once or more until “C” MODE appears on the left side of the display. C 1 . I N P U Press once or more until the MENU title of function on which you will change the selection appears on the display.
- Page 12 OUTPUT BALANCE ADJUSTMENT Adjusting the output level balance among all the channels are very important to maximize the performance of your system including this unit. This unit lets you adjust the sound output level balance between the left and right surround channels using the built-in test tone generator.
- Page 13 Press once or more until the following message appears MENU on the display. B 2 . L E F T S U R . L V L ..Adjust the sound level of the test tone from the left PARAMETER surround speaker to be at...
-
Page 14: Playing An Ac-3 Source
PLAYING AN AC-3 SOURCE Turn down the volume to minimum on the amplifier. Turn the power on to the AC-3 unit, this unit, the amplifier, the monitor etc. TEST MODE ADJUSTING OUTPUT LEVELS The following output level adjustments are possible on this unit. Adjust them as you prefer, monitoring source sound. Description of each function B2. - Page 15 Method of adjusting levels Press once or more until “B” MODE appears on the left side of the display. B 1 . T E S T : Press once or more until the MENU title of function whose level you will change appears on the display.
-
Page 16: Adjusting Delays And Dynamic Range
ADJUSTING DELAYS AND DYNAMIC RANGE This unit provides you with the following functions to make the AC-3 sound field suitable for the conditions of your listening room. Description of each function A1. CENTER DELAY Control range: 0 ms to 5 ms (in 1 ms step) Preset value: 0 ms Adjusts the delay between the main sounds (at the main channels) and dialog etc. - Page 17 Method of changing the level (or the selection) Press once or more until “A” MODE appears on the left side of the display. A 1 . C E N T Press once or more until the MENU title of function whose level (or selection) you will change appears on the display.
-
Page 18: Specifications
If the unit fails to operate normally, check the following points to determine whether the fault can be corrected by the simple measures suggested. If it cannot be corrected, or if the fault is not listed in the SYMPTOM column, disconnect the power cord and contact your authorized YAMAHA dealer or service center for help. SYMPTOM The unit fails to turn on when the POWER switch is pressed. -
Page 19: Block Diagram
BLOCK DIAGRAM LEVEL LEVEL LEFT RIGHT TRIM OUTPUT INPUT... - Page 20 YAMAHA ELECTRONICS (UK) LTD. YAMAHA HOUSE, 200 RICKMANSWORTH ROAD WATFORD, HERTS WD1 7JS, ENGLAND YAMAHA SCANDINAVIA A.B. J A WETTERGRENS GATA 1, BOX 30053, 400 43 VÄSTRA FRÖLUNDA, SWEDEN YAMAHA MUSIC AUSTRALIA PTY, LTD. 17-33 MARKET ST., SOUTH MELBOURNE, 3205 VIC., AUSTRALIA...
Need help?
Do you have a question about the DDP-1 and is the answer not in the manual?
Questions and answers