Table of Contents
Advertisement
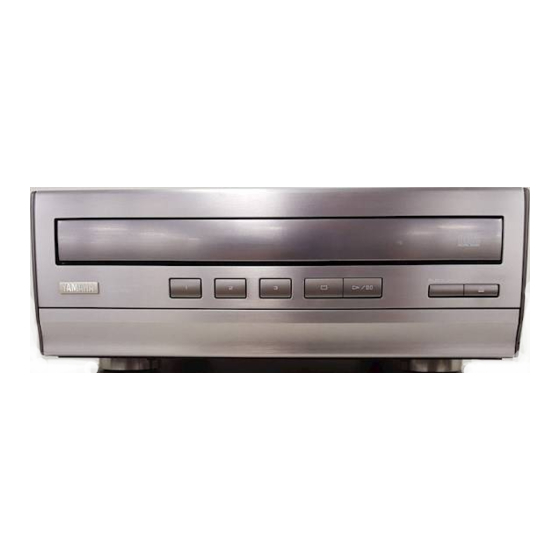
Natural Sound Mini Component System
CC-90 is composed of CTX-S90, MX-S90, CDC-S90,
KX-S90 and NX-S90.
OWNER'S MANUAL
CONTENTS
SAFETY INSTRUCTIONS.......................Inside Front Cover-1
FEATURES ............................................................................2
SUPPLIED ACCESSORIES...................................................2
PRECAUTIONS .....................................................................3
REAR PANEL PARTS.........................................................4-6
REMOTE CONTROL TRANSMITTER ................................7-9
(for Speaker System NX-S90 only).........................................9
PREPARATION FOR USE..............................................10-12
OPEN/CLOSE THE CONTROL DOOR................................13
TURNING THE POWER ON/OFF TO THIS SYSTEM .........13
SETTING THE CLOCK.........................................................14
CC-90
Page
EMPTY
IMPORTANT!
Please record the serial number of this unit in the
space below.
Model:
Serial No.:
The serial number is located on the rear of the
unit.
Retain this Owner's Manual in a safe place for
future reference.
SOUND CONTROL ..............................................................15
COMPACT DISC PLAYER OPERATION........................15-22
TUNING OPERATION.....................................................23-25
TAPE DECK OPERATION .............................................26-28
RECORDING COMPACT DISCS....................................29-34
OTHER RECORDINGS...................................................35-36
HOW TO USE THE BUILT-IN TIMER .............................37-40
USING EXTERNAL UNITS .............................................41-42
MAINTENANCE....................................................................42
SPECIFICATIONS................................................................43
TROUBLESHOOTING..........................................................44
(for Speaker System NX-S90 only).......................................45
Active Servo
Technology
Page
Advertisement
Table of Contents

Related Manuals for Yamaha CC-90


Summary of Contents for Yamaha CC-90
-
Page 1: Table Of Contents
CC-90 Natural Sound Mini Component System CC-90 is composed of CTX-S90, MX-S90, CDC-S90, KX-S90 and NX-S90. OWNER’S MANUAL CONTENTS SAFETY INSTRUCTIONS...Inside Front Cover-1 INTRODUCTION...2 FEATURES ...2 SUPPLIED ACCESSORIES...2 PRECAUTIONS ...3 NAMES OF CONTROLS, INDICATORS AND REAR PANEL PARTS...4-6 REMOTE CONTROL TRANSMITTER ...7-9 REMOVING THE FRONT GRILLE (for Speaker System NX-S90 only)...9... -
Page 2: Safety Instructions
SAFETY INSTRUCTIONS CAUTION RISK OF ELECTRIC SHOCK DO NOT OPEN CAUTION: TO REDUCE THE RISK OF ELECTRIC SHOCK, DO NOT REMOVE COVER (OR BACK). NO USER-SERVICEABLE PARTS INSIDE. REFER SERVICING TO QUALIFIED SERVICE PERSONNEL. • Explanation of Graphical Symbols The lightning flash with arrowhead symbol, within an equilateral triangle, is intended to alert you to the presence of uninsulated “dangerous... - Page 3 This product, when installed as indicated in the instructions contained in this manual, meets FCC requirements. Modifications not expressly approved by Yamaha may void your authority, granted by the FCC, to use the product. 2. IMPORTANT : When connecting this product to accessories and/or another product use only high quality shielded cables.
-
Page 4: Features
INTRODUCTION Thank you for purchasing this YAMAHA product. We hope it will give you many years of trouble-free enjoyment. For the best performance, read this manual carefully. It will guide you in operating your YAMAHA product. FEATURES • 70W + 70W (6Ω) RMS Output Power, 0.04 THD, 20–20,000 Hz... -
Page 5: Precautions
Using this product with a higher voltage than that which is specified is dangerous and may result in a fire or other type of accident causing damage. YAMAHA will not be held responsible for any damage resulting from use of this unit with a voltage other than that which is specified. -
Page 6: Names Of Controls, Indicators And Rear Panel Parts
NAMES OF CONTROLS, INDICATORS AND REAR PANEL PARTS 5 6 7 8 For CD Player 12 13 14 TRACK TOTAL REMAIN ED I T For Preamplifier/Tuner PRESET T I M ER S LEE P M EM O RY AUTO TUNING CD Player (CDC-S90) 1. - Page 7 NAMES OF CONTROLS, INDICATORS AND REAR PANEL PARTS Power Amplifier (MX-S90) 48. POWER Indicator 49. CLIPPING Indicator 50. POWER Switch Cassette Tape Deck (KX-S90) 52 53 54 55 56 57 58 59 51. Fast Wind Button: 52. Cassette Compartment 53. Play Button and Play Direction Indicator: 54.
-
Page 8: Rear Panel Parts
13. VOLTAGE SELECTOR (General model only) 14. AC Supply Lead SPEAKERS SELECTOR switch If you connect YAMAHA NX-S90 speaker system to this unit, set this switch to “NX-S90”. If you connect a speaker system other than NX-S90 to this unit, set this switch to “CONVENTIONAL”. - Page 9 REMOTE CONTROL TRANSMITTER TUNER DIRECT TIME PROG TAPE EDIT SEARCH STOP PLAY/PAUSE SKIP DISC SKIP RANDOM REPEAT PRESET A/B/C/D/E DOWN TUNER PLAY STOP PLAY TAPE REC/PAUSE DECK PHONO/AUX POWER SLEEP DISPLAY VOLUME TUNER DIRECT TIME PROG TAPE EDIT SEARCH STOP PLAY/PAUSE SKIP DISC SKIP...
-
Page 10: Remote Control Transmitter
REMOTE CONTROL TRANSMITTER 22 23 24 25 26 PLAY STOP PLAY TAPE REC/PAUSE DECK PHONO/AUX POWER SLEEP DISPLAY VOLUME Tape Deck Control Buttons 22. Play Button: 23. Stop Button: 24. Play Button: 25. Fast Wind Button: 26. (This button is unnecessary for this system.) 27. -
Page 11: Removing The Front Grille (For Speaker System Nx-S90 Only)
REMOTE CONTROL TRANSMITTER Remote control sensor EMPTY REMOVING THE FRONT GRILLE (for Speaker System NX-S90 only) Proper use of the remote control transmitter Aim (within the range of 60° with no obstacles) the remote control transmitter at the remote control sensor and operate as shown. -
Page 12: Preparation For Use
PREPARATION FOR USE Placing example MX-S90 CTX-S90 EMPTY KX-S90 CDC-S90 15 m (49 feet) 7.5 m (25 feet) Earth rod UNBAL. * For Europe model, “AM” is replaced by “MW LW”. Placing the system This system can be placed any way you like, however, be sure not to place another unit or any object on top of the power amplifier (MX-S90) to prevent the ventilation holes on the top panel of it from being obstructed. - Page 13 PREPARATION FOR USE CTX-S90 KX-S90 PRE OUT CTX-S90 MX-S90 System connection • Connect the red connector on the rear of CDC-S90 to the red socket on the rear of CTX-S90. • Connect the black connector on the rear of KX-S90 to the black socket.
-
Page 14: Preparation For Use
Set the SPEAKERS SELECTOR switch on the rear panel of MX-S90 to the proper position before connections. If you use YAMAHA Active Servo Processing Speaker System NX-S90, set this switch to “NX-S90”. If you use a speaker system other than NX-S90, set this switch to “CONVENTIONAL”. -
Page 15: Open/Close The Control Door
OPEN/CLOSE THE CONTROL DOOR TURNING THE POWER ON/OFF TO THIS SYSTEM PLAY STOP PLAY TAPE REC/PAUSE DECK POWER SLEEP DISPLAY VOLUME When it is not necessary to operate controls inside the control door, close the door. To open or close the door, press the right edge until it clicks. If the AC supply lead of CTX-S90 is connected to the AC outlet, this system can be turned ON and OFF (STANDBY mode) by pressing the POWER switch on the front panel of... -
Page 16: Setting The Clock
SETTING THE CLOCK DISPLAY TUNING MEMORY DOWN TIME ADJ HOUR MINUTE TUNING MEMORY DOWN TIME ADJ HOUR MINUTE While the power is on, press the DISPLAY button to display the time. If the power is off, you can proceed to the next step. -
Page 17: Sound Control
SOUND CONTROL VOLUME POWER POWER BASS TREBLE – – COMPACT DISC PLAYER OPERATION Volume Front panel operation Rotate the VOLUME control towards 10 to increase the volume, and towards 0 to decrease the volume. Remote control operation VOLUME Press the VOLUME + button to increase the volume and the VOLUME –... - Page 18 COMPACT DISC PLAYER OPERATION Preamplifier/Tuner POWER CD Player Disc select buttons TUNER DIRECT TIME PROG TAPE EDIT SEARCH STOP PLAY/PAUSE SKIP DISC SKIP RANDOM REPEAT PRESET A/B/C/D/E DOWN TUNER PLAY STOP PLAY TAPE REC/PAUSE DECK PHONO/AUX POWER POWER SLEEP DISPLAY VOLUME CD playback Press the CD input selector button.
- Page 19 COMPACT DISC PLAYER OPERATION TUNER DIRECT TIME PROG TAPE EDIT SEARCH STOP PLAY/PAUSE SKIP DISC SKIP RANDOM REPEAT PRESET A/B/C/D/E DOWN TUNER PLAY STOP PLAY TAPE REC/PAUSE DECK PHONO/AUX POWER SLEEP DISPLAY VOLUME Direct operation Even when an input source other than CD player is selected, pressing the play/pause button, a disc select button, a track number input button or the RANDOM play button, or pressing the front edge of the disc table gently will start playback...
-
Page 20: Skip Search
COMPACT DISC PLAYER OPERATION CD Player TUNER DIRECT TIME PROG TAPE EDIT SEARCH STOP PLAY/PAUSE SKIP DISC SKIP RANDOM REPEAT PRESET A/B/C/D/E DOWN TUNER PLAY STOP PLAY TAPE REC/PAUSE DECK PHONO/AUX POWER SLEEP DISPLAY VOLUME “Skip search” and “Manual search” are performed using the same buttons. - Page 21 COMPACT DISC PLAYER OPERATION CD Player TUNER DIRECT TIME PROG TAPE EDIT SEARCH STOP PLAY/PAUSE SKIP DISC SKIP RANDOM REPEAT PRESET A/B/C/D/E DOWN TUNER PLAY STOP PLAY TAPE REC/PAUSE DECK PHONO/AUX POWER SLEEP DISPLAY VOLUME Display information during programming TRACK Playback order Selected track number Selected disc...
- Page 22 COMPACT DISC PLAYER OPERATION CD Player PROG TUNER DIRECT TIME PROG TAPE EDIT SEARCH STOP PLAY/PAUSE SKIP DISC SKIP RANDOM REPEAT PRESET A/B/C/D/E DOWN TUNER PLAY STOP PLAY TAPE REC/PAUSE DECK PHONO/AUX POWER SLEEP DISPLAY VOLUME To stop program play •...
- Page 23 COMPACT DISC PLAYER OPERATION CD Player TUNER DIRECT TIME PROG TAPE EDIT SEARCH STOP PLAY/PAUSE SKIP DISC SKIP RANDOM REPEAT PRESET A/B/C/D/E DOWN TUNER PLAY STOP PLAY TAPE REC/PAUSE DECK PHONO/AUX POWER SLEEP DISPLAY VOLUME S REP A REP F REP Repeat play All discs, an entire disc, a single track or a programmed sequence can be continuously repeated.
- Page 24 COMPACT DISC PLAYER OPERATION CD Player TUNER DIRECT TIME PROG TAPE EDIT SEARCH STOP PLAY/PAUSE SKIP DISC SKIP RANDOM REPEAT PRESET A/B/C/D/E DOWN TUNER PLAY STOP PLAY TAPE REC/PAUSE DECK PHONO/AUX POWER SLEEP DISPLAY VOLUME TIME TRACK TUNER DIRECT TRACK TIME PROG TAPE...
-
Page 25: Tuning Operation
TUNING OPERATION Preamplifier/Tuner “AM” is for U.S.A., Canada and General models. “MW/LW” is for Europe model. Normally, if station signals are strong and there is no interference, quick automatic-search tuning (Automatic tuning) is possible. However, if signals of the station you want to select are weak, you must tune to it manually (Manual tuning). - Page 26 TUNING OPERATION Preamplifier/Tuner 2, 5 TUNER DIRECT TIME PROG TAPE EDIT SEARCH STOP PLAY/PAUSE SKIP DISC SKIP RANDOM REPEAT PRESET A/B/C/D/E DOWN TUNER PLAY STOP PLAY TAPE REC/PAUSE DECK PHONO/AUX POWER SLEEP DISPLAY VOLUME Preset tuning This unit can store station frequencies selected by tuning operation.
- Page 27 TUNING OPERATION Preamplifier/Tuner Fundamental rules of internal automatic preset tuning operation Basically, FM stations are programmed onto area A, B and C, and AM stations are programmed onto area D and E (MW stations are onto D and LW stations are onto E) in that order automatically.
-
Page 28: Tape Deck Operation
TAPE DECK OPERATION Detection hole Preamplifier/Tuner Side A upward. Tape Deck EMPTY 6 4 5 General information • Do not use C-120 tapes, tapes with internal reels or poor- quality tapes, since they can cause malfunctions. • Before loading a tape into the cassette compartment, tighten the slack tape with a pen or pencil. - Page 29 TAPE DECK OPERATION LINEAR COUNTER RESET EMPTY Dolby B and C Type Noise Reduction With cassette tapes, the most noticeable form of noise is high frequency hiss. To reduce this hiss noise, this unit has been equipped with a newly developed Dolby C noise reduction system in addition to its conventional Dolby B NR.
- Page 30 TAPE DECK OPERATION Tape Deck EMPTY TUNER DIRECT TIME PROG TAPE EDIT SEARCH STOP PLAY/PAUSE SKIP DISC SKIP RANDOM REPEAT PRESET A/B/C/D/E DOWN TUNER PLAY STOP PLAY TAPE REC/PAUSE DECK PHONO/AUX POWER SLEEP DISPLAY VOLUME Winding the tape If during playback, first press the stop Next press the fast wind wind the tape.
-
Page 31: Recording Compact Discs
RECORDING COMPACT DISCS Preamplifier/Tuner CD Player Tape Deck EMPTY TUNER DIRECT TIME PROG TAPE EDIT SEARCH STOP PLAY/PAUSE SKIP DISC SKIP RANDOM REPEAT PRESET A/B/C/D/E DOWN TUNER PLAY STOP PLAY TAPE REC/PAUSE DECK PHONO/AUX POWER SLEEP DISPLAY VOLUME • When recording important selections, be sure to make a preliminary test to ensure that the desired source material is being properly recorded with good sound quality. - Page 32 RECORDING COMPACT DISCS CD Player Tape Deck EMPTY TUNER DIRECT TIME PROG TAPE EDIT SEARCH STOP PLAY/PAUSE SKIP DISC SKIP RANDOM REPEAT PRESET A/B/C/D/E DOWN TUNER PLAY STOP PLAY TAPE REC/PAUSE DECK PHONO/AUX POWER SLEEP DISPLAY VOLUME To stop recording temporarily Press the stop Choose the selection to be recorded next by using the SKIP...
- Page 33 RECORDING COMPACT DISCS Preamplifier/Tuner CD Player Tape Deck EMPTY TUNER DIRECT TIME PROG TAPE EDIT SEARCH STOP PLAY/PAUSE SKIP DISC SKIP RANDOM REPEAT PRESET A/B/C/D/E DOWN TUNER PLAY STOP PLAY TAPE REC/PAUSE DECK PHONO/AUX POWER SLEEP DISPLAY VOLUME Recording CD(s) on both sides of a tape automatically Press the CD input selector button and load the disc to be recorded.
- Page 34 RECORDING COMPACT DISCS Preamplifier/Tuner CD Player Tape Deck EMPTY TUNER DIRECT TIME PROG TAPE EDIT SEARCH STOP PLAY/PAUSE SKIP DISC SKIP RANDOM REPEAT PRESET A/B/C/D/E DOWN TUNER PLAY STOP PLAY TAPE REC/PAUSE DECK PHONO/AUX POWER SLEEP DISPLAY VOLUME Automatic tape-editing This convenient feature can be used to program tracks on a disc (or discs) for recording to tape.
- Page 35 RECORDING COMPACT DISCS CD player Tape Deck EMPTY TUNER DIRECT TIME PROG TAPE EDIT SEARCH STOP PLAY/PAUSE SKIP DISC SKIP RANDOM REPEAT PRESET A/B/C/D/E DOWN TUNER PLAY STOP PLAY TAPE REC/PAUSE DECK PHONO/AUX POWER SLEEP DISPLAY VOLUME Notes • If the tape’s total possible recording time is longer than the total playing time of the selected disc, tracks on another disc are recorded automatically.
- Page 36 RECORDING COMPACT DISCS Preamplifier/Tuner CD Player TUNER DIRECT TIME PROG TAPE EDIT SEARCH STOP PLAY/PAUSE SKIP DISC SKIP RANDOM REPEAT PRESET A/B/C/D/E DOWN TUNER PLAY STOP PLAY TAPE REC/PAUSE DECK PHONO/AUX POWER SLEEP DISPLAY VOLUME Display information during programming Selected disc Side of the tape TRACK Total remaining time on...
-
Page 37: Other Recordings
OTHER RECORDINGS Preamplifier/Tuner Tape Deck EMPTY TUNER DIRECT TIME PROG TAPE EDIT SEARCH STOP PLAY/PAUSE SKIP DISC SKIP RANDOM REPEAT PRESET A/B/C/D/E DOWN TUNER PLAY STOP PLAY TAPE REC/PAUSE DECK PHONO/AUX POWER SLEEP DISPLAY VOLUME Recording from the built-in tuner Press the TUNER input selector button. -
Page 38: Other Recordings
OTHER RECORDINGS Preamplifier/Tuner Tape Deck EMPTY TUNER DIRECT TIME PROG TAPE EDIT SEARCH STOP PLAY/PAUSE SKIP DISC SKIP RANDOM REPEAT PRESET A/B/C/D/E DOWN TUNER PLAY STOP PLAY TAPE REC/PAUSE DECK PHONO/AUX POWER SLEEP DISPLAY VOLUME Erasing recorded tapes Load the tape to be erased into the cassette compartment. -
Page 39: How To Use The Built-In Timer
HOW TO USE THE BUILT-IN TIMER Preamplifier/Tuner Timer play By using the built-in timer, you can set the time when the unit turns on and a source begins playing automatically, and the time when the unit turns off automatically. Prepare the source to be played. For tuner: Tune in to the station you will listen to. - Page 40 HOW TO USE THE BUILT-IN TIMER POWER TIME ADJ Preamplifier/Tuner 2- , DISPLAY TIMER At ON TIME/time setting mode [“ON TIME” appears on the display, and soon it is changed to a time setting mode.] Set to the time when the timer play begins by using the HOUR button and the MINUTE button.
- Page 41 HOW TO USE THE BUILT-IN TIMER Preamplifier/Tuner DISPLAY TIMER TAPE POWER Tape Deck EMPTY Timer recording (To record a tuner program) Load a blank tape into the cassette compartment. Tune to the station of which program you want to record. Follow step 2 of the “Timer play”...
-
Page 42: How To Use The Built-In Timer
HOW TO USE THE BUILT-IN TIMER POWER Preamplifier/Tuner DISPLAY AUTO MEMO TUNER DIRECT TIME PROG TAPE EDIT SEARCH STOP PLAY/PAUSE SKIP DISC SKIP RANDOM REPEAT PRESET A/B/C/D/E DOWN TUNER PLAY STOP PLAY TAPE REC/PAUSE DECK PHONO/AUX POWER POWER SLEEP DISPLAY VOLUME SLEEP Sleep timer operation... -
Page 43: Using External Units
USING EXTERNAL UNITS INPUT PHONO INPUT PHONO Auxiliary (AUX) Connect the output lead of a video cassette player, video disc player, etc. to the AUX inputs of this unit. (red right channel, white Press the AUX input selector button. Operate the unit connected to the AUX inputs. Start recording with this unit, if so desired. -
Page 44: Maintenance
USING EXTERNAL UNITS PHONES MAINTENANCE Head/pinch roller cleaning tape Headphones • Be sure that your headphones have a 3.5 mm (1/8”) diameter plug and are between 16 ohms and 50 ohms impedance. Recommended impedance is 32 ohms. • When listening with headphones privately, press the POWER switch of the power amplifier to turn it off. -
Page 45: Specifications
SPECIFICATIONS As a part of policy of continuous improvement, YAMAHA reserves the right to make design and specification changes for product improvement without prior notice. The performance specification figures indicated are nominal values of production units. Preamplifier/Tuner (CTX-S90) Input Sensitivity/Impedance PHONO MM ... -
Page 46: Troubleshooting
If it cannot, or if the fault is not listed in the SYMPTOM column, disconnect the power cord and contact your authorized YAMAHA dealer or service center for help. Should be service required, the servicer will need all four pieces (CTX-S90, MX-S90, CDC-S90, KX-S90). -
Page 47: Active Servo Technology (For Speaker System Nx-S90 Only)
ACTIVE SERVO TECHNOLOGY (for Speaker System NX-S90 only) High- amplitude bass sound Port Signals of low amplitude The theory of the Active Servo Technology is based upon two major factors, the Helmholtz resonator and negative- impedance drive. Active Servo Processing speakers reproduce the bass frequencies through an “air woofer”, which is a small port or opening in the speaker’s cabinet. - Page 48 YAMAHA ELECTRONICS (UK) LTD. YAMAHA HOUSE, 200 RICKMANSWORTH ROAD WATFORD, HERTS WD1 7JS, ENGLAND YAMAHA SCANDINAVIA A.B. J A WETTERGRENS GATA 1, BOX 30053, 400 43 VÄSTRA FRÖLUNDA, SWEDEN YAMAHA MUSIC AUSTRALIA PTY, LTD. 17-33 MARKET ST., SOUTH MELBOURNE, 3205 VIC., AUSTRALIA...
Need help?
Do you have a question about the CC-90 and is the answer not in the manual?
Questions and answers