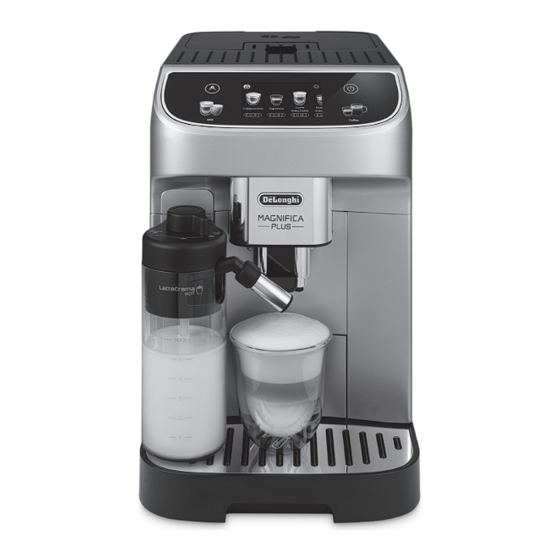
DeLonghi MAGNIFICA PLUS Manual
Hide thumbs Also See for MAGNIFICA PLUS:
Table of Contents

Advertisement

Quick Links

ECAM32X.6Y - 32X.7Y
BEAN TO CUP ESPRESSO AND
CAPPUCCINO MACHINE
Instructions for use

Advertisement

Table of Contents
loading

Summary of Contents for DeLonghi MAGNIFICA PLUS

  • Page 1 ECAM32X.6Y - 32X.7Y BEAN TO CUP ESPRESSO AND CAPPUCCINO MACHINE Instructions for use...
  • Page 2 A1 A1 A2 A2...
  • Page 3 C2 C3 C4 C5 Espresso Americano Coffee Coffee Milk Co ee Decalci cante per macchine da ca è Descaler for co ee machines Détartrant pour machines à café Entkalker für Ka eemaschinen De’Longhi Appliances s.r.l. Via L. Seitz, 47 31100 Treviso - ITALY Tel.
  • Page 4: Table Of Contents

    CONTENTS 9.4 Adjusting the amount of froth .....14 9.5 Making milk-based drinks ......14 1. INTRODUCTION ..........5 9.6 Cleaning the milk carafe after use ....14 1.1 Letters in brackets .........5 10. PREPARING HOT WATER ......15 1.2 Troubleshooting and repairs ......5 11.
  • Page 5: Introduction

    De’Longhi website. D4. Water softener filter If repairs are required, contact De’Longhi customer services only. D5. Hot water spout Addresses can be found on www.delonghi.com. 2.5 Description of milk carafe (E) 2. DESCRIPTION 2.1 Description of the appliance A1.
  • Page 6 Filling the water circuit and rinsing 7. Position a container of at least 200 ml capacity under the coffee spout (A16) and the hot water spout (fig. 6); Now follow the instructions indicated on the display of the appliance: Select the language 8.
  • Page 7: Turning The Machine On

    Setting water hardness 14. Select the water hardness level on the display according to the result of the measurement procedure described above, and press “Ok”; 15. The water hardness selected will be saved in the machine settings. Please note: The water hardness can be changed directly from the settings menu (see “6.12 Water hardness”).
  • Page 8: Turning The Appliance Off

    2. Once preheated to a preset temperature, a rinse cycle takes 2. Select the item "Rinse"; place and hot water flows from the coffee spouts (A16); in 3. Press "Yes" to start the rinse cycle: after a few seconds, hot addition to heating the boiler, this has the effect of heating water is delivered to clean and heat the internal circuit of the internal circuits by circulating hot water through them.
  • Page 9: Auto-Off

    6.5 Auto-off 1. Press the settings menu (C6) (fig. 14); Auto-off can be set so that if the appliance is not being used, it 2. Scroll through the pages until the item “Statistics” is dis- will switch off after 15 or 30 minutes or after 1 or 3 hours have played along with the main statistical data: to view more elapsed.
  • Page 10: Empty Circuit

    6. Press “<” to go back to the settings menu; 2. Scroll through the menu pages until the item “Default val- 7. Press “X” to go back to the homepage (C). ues” is displayed; 3. Press “Read more”: 6.13 Empty circuit 4.
  • Page 11: Preparation Of Coffee Drinks

    8. PREPARATION OF COFFEE DRINKS 8.1 Prepare the machine to make coffee drinks Important! Do not use green, caramelized or candied coffee beans as they could stick to the coffee grinder and render it unusable. 1. Place 1 or 2 cups under the coffee spout (A16); 2.
  • Page 12: Making Drinks Using Pre-Ground Coffee

    proceeding with preparation: place the recommended 5. The machine proceeds with preparation and a description number of ice cubes in the glass (fig. 18), and press of each single step (water heating, delivery of coffee) ap- “Deliver”. pears on the display. •...
  • Page 13: General Indications For Making Coffee-Based Drinks

    Please note: • the brand used; • If saved, the new settings will be stored ONLY in the se- • ingredients and nutritional values. lected profile. • If Extra Shot has been selected, it will not be possible to change the quantity setting or use pre-ground coffee. Cow's milk •...
  • Page 14: Adjusting The Amount Of Froth

    5. Lower the flap, then attach the carafe to the connector (A17) and push fully home (fig. 24): the machine emits a beep (if the function is enabled); 6. Place a sufficiently large cup under the coffee spouts (A16) and under the milk spout (E5). It is possible to extend the milk spout only by adjusting the extension(E6);...
  • Page 15: Preparing Hot Water

    10. PREPARING HOT WATER • To disable the function and prepare the drink using other parameters, press the customization bar relative to the 1. Attach the hot water spout (D5) to the machine (fig. 4); drink: press on the page to disable the function ( 2.
  • Page 16: Cleaning

    dishwasher safe hand wash only 2. Press on the profile to be edited. 3. Press “Change” to change the image and colour of the profile; water tank (A9) 4. To rename the profile, press on the existing name at the bottom of the profile: the keypad will pop up.
  • Page 17: Cleaning The Drip Tray And Drip Tray Grille

    Important! not dirty. If necessary, remove coffee deposits with a brush and a sponge. • When removing the drip tray, the coffee grounds container must always be emptied, even if it has not filled up notice- 2. Remove all residues with a vacuum cleaner (fig. 29). ably.
  • Page 18: Cleaning The Coffee Spouts

    Important! 6. Do not use detergents when cleaning the infuser, as they After cleaning, make sure that no object or accessory has been could damage it. left in the funnel: the presence of foreign matter in the funnel 7. Use a brush to remove any coffee residues left in the infuser during operation could cause damage to the machine.
  • Page 19: Descaling

    Please note: 3. Turn the froth adjustment dial (E3) clockwise to the The machine will periodically remind you of the need for position (fig. 37) and pull; thorough cleaning of the milk carafe, indicating the correct 4. Turn the milk carafe connector (E4) anticlockwise and pull procedure.
  • Page 20: Replacing Or Removing The Filter

    15. Take out the water tank and reposition the water softener filter, if removed previously. Press "Next" to continue; 16. Fill the tank with cold water up to the MAX level, return it to the machine and press "Yes" to continue; 17.
  • Page 21: Water Softener Filter

    16. TECHNICAL DATA show the corresponding symbol as a reminder that the filter Voltage: 220-240 V~ 50-60 Hz max. 10 A needs replacing. To replace, proceed as follows: Power: 1450 W 1. Press the settings menu (C6); Pressure: 1.5 MPa (15 bars) 2.
  • Page 22 DISPLAYED MESSAGE MEANING REMEDY Have you added pre-ground Preparation of a drink using pre-ground Ensure the funnel (A3) is not blocked, then add coffee? Add it now One measure coffee has been selected, but the amount of one level measure (D2) of pre-ground coffee, only! pre-ground coffee inserted is not sufficient press "Ok"...
  • Page 23 DISPLAYED MESSAGE MEANING REMEDY Remember to put the milk carafe A milk-based drink has been prepared and Remove the milk carafe and put it in the in the refrigerator the milk carafe (E) is still on the machine refrigerator. Descaling is required. Indicates that the machine needs descaling.
  • Page 24: Troubleshooting

    18. TROUBLESHOOTING Possible malfunctions of the machine are listed below. If the problem cannot be resolved as described, contact Customer Service. PROBLEM POSSIBLE CAUSE REMEDY The appliance does not come on The cord is not plugged into the mains Plug into the mains socket (fig. 1). socket.
  • Page 25 PROBLEM POSSIBLE CAUSE REMEDY The infuser (A6) cannot be removed. The appliance has not been turned off Turn the machine off by pressing the correctly button (B1) (see section “5. Turning the appli- ance off”). On completion of the descale cycle, During the two rinse cycles, the water Follow the procedure indicated by the ma- the machine calls for a third rinse.
  • Page 26 De’Longhi Appliances via Seitz 47 - 31100 Treviso, Italy delonghi.com...

This manual is also suitable for:

Ecam320.60.bEcam320.60.wEcam322.70.sbEcam320.70.tb

Table of Contents