Table of Contents
Advertisement
Available languages
Available languages
Advertisement
Chapters
Table of Contents

Related Manuals for Reolink RLC-810WA


Summary of Contents for Reolink RLC-810WA
- Page 1 E N/D E /FR /I T/E S Operational Instruction Apply to: RLC-810WA, RLC-811WA...
-
Page 2: Table Of Contents
Contents What's in the Box What's in the Box · · · · · · · · · · · · · · · · · · · · · · · · · · · · · · · · · · · · · · · · · · · · · · · · · · · 2 Camera Introduction ·... -
Page 3: Camera Introduction
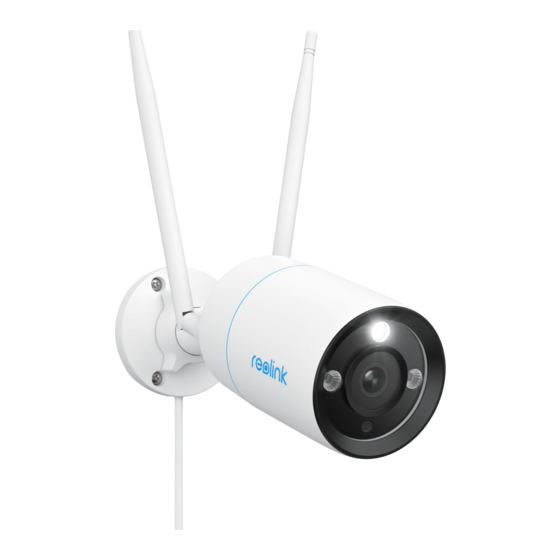
Camera Introduction Model: RLC-811WA Model: RLC-810WA microSD Card Slot microSD Card Slot *Loosen the screws *Loosen the screws with a screwdriver (not with a screwdriver (not included) to access the included) to access the microSD card slot. microSD card slot. -
Page 4: Connection Diagram
• On PC Router Power Cable Download path of the Reolink Client: Go to reolink > Support > App & Client. NOTE: If you are connecting the camera to a Reolink PoE NVR, please set up the camera via the NVR interface. -
Page 5: Mount The Camera
Mount the Camera NOTE: There are two different types of mounts for bullet cameras. Please check out the mount included in the package and follow the corresponding instruction to install the camera properly. Installation Tips Install the Camera • Do not face the camera towards any light sources. •... -
Page 6: Troubleshooting
If the Infrared LEDs of your camera stop working, please try the following solutions: • Enable infrared lights on Device Settings page via Reolink App/Client. • Check if the Day/Night mode is enabled and set up auto infrared lights at night on Live View page via Reolink App/Client. -
Page 7: Specifications
• Make sure that your PC is working on a stable network. Note: This equipment has been tested and found to comply with the limits If these won’t work, contact Reolink Support . for a Class B digital device, pursuant to Part 15 of the FCC Rules. These... - Page 8 (1) This device may not cause interference. (2) This device must accept any interference, including interference that Reolink declares that this device is in compliance with the essential may cause undesired operation of the device. requirements and other relevant provisions of Directive 2014/53/EU and L’...
- Page 9 Use of the product is subject to your agreement to the Terms of Service Area Networks(WAS/RLANs) within the band 5150-5350 MHz for and Privacy Policy at reolink.com. Keep out of reach of children. this device are restricted to indoor use only within all European...
- Page 10 Katalog Lieferumfang Lieferumfang · · · · · · · · · · · · · · · · · · · · · · · · · · · · · · · · · · · · · · · · · · · · · · · · · · · · · 18 Über die Kamera ·...
-
Page 11: Über Die Kamera
Über die Kamera Modell: RLC-811WA Modell: RLC-810WA microSD-Kartenslot microSD-Kartenslot *Die Schrauben mit dem *Die Schrauben mit dem Schraubendreher (nicht Schraubendreher (nicht inklusive) lösen, um den inklusive) lösen, um den microSD-Kartenslot zu microSD-Kartenslot zu erreichen. erreichen. Antenne Antenne Halterung Halterung Metall-Aluminiumgehäuse Metall-Aluminiumgehäuse... -
Page 12: Verbindungsdiagramm
WLAN IP Kamera Netzadapter Netzwerkkabel • Auf PC Router Stromkabel Download-Pfad von Reolink Client: > Support > App & Client. HINWEIS: Wenn Sie die Kamera an einen Reolink PoE NVR anschließen, richten Sie die Kamera bitte über die NVR-Schnittstelle ein. Deutsch Deutsch... -
Page 13: Montage Der Kamera
Montage der Kamera HINWEIS: Es gibt zwei verschiedene Arten von Halterungen für Bul- let-Kameras. Bitte sehen Sie sich die mitgelieferte Halterung an und befolgen Sie die entsprechenden Anweisungen, um die Kamera richtig zu Montagetipps installieren. Die Kamera montieren • Richten Sie die Kamera nicht auf eine Lichtquelle. •... -
Page 14: Fehlersuche
Sie den Netzadapter und prüfen Sie, ob die Kamera mit ihm funktionieren kann. Verriegeln Sie den Einstellknopf, um die Kamera zu fixieren. Bleibt es ungelöst, kontaktieren Sie bitte Reolink Support. Infrarot-LEDs funktionieren nicht mehr Wenn die Infrarot-LEDs Ihrer Kamera nicht mehr funktionieren, versuchen Sie bitte die folgende Lösungen: •... -
Page 15: Spezifikationen
Spezifikationen Auto-Infrarot-Lichter bei Nacht auf der Live-Ansicht Seite über Reolink App/Client. • Aktualisieren Sie die Firmware Ihrer Kamera auf die neueste Version. Das Allgemeine • Setzen Sie die Kamera auf die Werkseinstellungen zurück und überprüfen Sie die Infrarotlichter Einstellungen erneut. - Page 16 ISED-Konformitätserklärung Grenzwerte sind so ausgelegt, dass sie angemessenen Schutz gegen schädliche Störungen bei der Montage in Wohngebieten bieten. Dieses Dieses Gerät enthält lizenzbefreite(n) Sender/Empfänger, die den Gerät erzeugt und verwendet Hochfrequenzenergie und kann diese lizenzbefreiten RSS-Standard(s) von Innovation, Science and Economic ausstrahlen.
- Page 17 O/CH/IS/LI/UK(NI) CE-Konformitätserklärung Richtige Entsorgung des Produktes Reolink erklärt, dass dieses Gerät mit den grundlegenden Anforderungen Das Zeichen bedeutet, dass das Produkt in der ganzen EU nicht und anderen relevanten Bestimmungen der Richtlinien 2014/53/EU und mit anderen Haushaltsabfällen entsorgt werden darf. Um mögliche 2014/30/EU übereinstimmt.
- Page 18 Contenu Contenu de la boîte Contenu de la boîte · · · · · · · · · · · · · · · · · · · · · · · · · · · · · · · · · · · · · · · · · · · · · · · 34 Introduction de la caméra ·...
-
Page 19: Introduction De La Caméra
Introduction de la caméra Modèle : RLC-811WA Modèle : RLC-810WA Emplacement pour carte Emplacement pour carte microSD microSD *Desserrez les vis à l’aide *Desserrez les vis à l’aide d’un tournevis (non fourni) d’un tournevis (non fourni) pour accéder à la fente de pour accéder à... -
Page 20: Diagramme De Connexion
Configuration de la caméra Diagramme de connexion Téléchargez et lancez l’application Reolink ou le logiciel client, et suivez les Avant la configuration initiale, suivez les étapes ci-dessous pour connecter instructions à l’écran pour terminer la configuration initiale. votre caméra. 1. Connectez la caméra à un port LAN de votre routeur à l’aide d’un câble REMARQUE : Vous pouvez désormais utiliser le Wi-Fi au lieu du câble Ethernet... -
Page 21: Montage De La Caméra
Montage de la caméra REMARQUE : Il existe deux types de supports différents pour les caméras bullet. Veuillez utiliser le support inclus dans l’emballage et suivre les instructions correspondantes pour installer correctement la caméra. Conseils d’installation Installation de la caméra • Ne placez pas la caméra directement en face d’une source de lumière. •... -
Page 22: Dépannage
Client Reolink. • Vérifiez que le mode jour/nuit est activé et configurez les voyants infrarouges automatiques la nuit sur la page Affichage Live via l’Application/le Client Reolink. • Mettez à niveau le micrologiciel de votre caméra vers la dernière version. -
Page 23: Spécifications
Si cela ne fonctionne pas, contactez l’assistance Reolink. Remarque : cet équipement a été testé et déclaré conforme aux limites applicables aux appareils numériques de classe B, conformément à la section 15 des règles de la FCC. - Page 24 (1) L’appareil ne doit pas produire de brouillage; (2) L’appareil doit accepter tout brouillage radioélectrique subi, même si Reolink déclare que cet appareil est conforme aux exigences essentielles le brouillage est susceptible d’en compromettre le fonctionnement. et aux autres dispositions pertinentes de la Directive 2014/53/UE et de la L’...
- Page 25 Garantie limitée FRÉQUENCE DE FONCTIONNEMENT : Ce produit bénéficie d’une garantie limitée de 2 ans qui n’est valable que s’il PIRE 2,4 GHz < 20 dBm a été acheté dans la boutique officielle de Reolink ou chez un revendeur PIRE 5 GHz < 23 dBm agréé Reolink. PIRE 5,8 GHz < 14 dBm Conditions générales et confidentialité...
- Page 26 Contenuti Contenuto della confezione Contenuto della confezione · · · · · · · · · · · · · · · · · · · · · · · · · · · · · · · · · · · · · · · · 50 Presentazione della videocamera ·...
-
Page 27: Presentazione Della Videocamera
Presentazione della videocamera Modello: RLC-811WA Modello: RLC-810WA Slot scheda microSD Slot scheda microSD *Allentare le viti con un *Allentare le viti con un cacciavite (non incluso) cacciavite (non incluso) per accedere allo slot per accedere allo slot della scheda microSD. -
Page 28: Schema Di Connessione
Configurazione della videocamera Schema di connessione Scarica e avvia l'app Reolink o il software Client e segui le istruzioni Prima della configurazione iniziale, attenersi alla procedura seguente per sullo schermo per completare la configurazione iniziale. collegare la videocamera. 1. Collegare la videocamera a una porta LAN del router con un cavo NOTA: ora puoi utilizzare il Wi-Fi invece del cavo Ethernet per la Ethernet. -
Page 29: Montaggio Della Videocamera
Montaggio della videocamera NOTA: Esistono due diversi tipi di supporti per le videocamere bullet. Controllare il supporto incluso nella confezione e seguire le istruzioni corrispondenti per installare correttamente la videocamera. Suggerimenti per l'installazione Installazione della videocamera • Non rivolgere la videocamera verso fonti di luce. •... -
Page 30: Risoluzione Dei Problemi
• Attiva le luci a infrarossi nella pagina Impostazioni dispositivo tramite l'App/Client Reolink. • Controlla se la modalità Giorno/Notte è abilitata e imposta le luci a infrarossi automatiche di notte sulla pagina Live View tramite Reolink App/Client. • Aggiorna il firmware della videocamera all'ultima versione. -
Page 31: Specifiche
Se non funzionano, contatta il supporto Reolink . Nota: questo dispositivo è stato testato e trovato conforme ai limiti per un dispositivo digitale di Classe B, ai sensi della Parte 15 delle Norme Specifiche FCC. - Page 32 (1) Questo dispositivo non può causare interferenze. (2) Questo dispositivo deve accettare qualsiasi interferenza, comprese le interferenze che potrebbero causare un funzionamento indesiderato del Reolink dichiara che questo dispositivo è conforme ai requisiti essenziali e dispositivo. ad altre disposizioni pertinenti della Direttiva 2014/53/UE e della Direttiva L’émetteur/récepteur exempt de licence contenu dans le présent...
- Page 33 Garanzia limitata FREQUENZA OPERATIVA: Questo prodotto viene fornito con una garanzia limitata di 2 anni 2.4 GHz EIRP < 20dBm valida solo se acquistato da Reolink Official Store o da un rivenditore 5 GHz EIRP < 23dBm autorizzato Reolink. 5.8GHz EIRP < 14dBm Le funzioni dei sistemi di accesso wireless, incluse le reti radio...
- Page 34 Contenido Contenido de la caja Contenido de la caja · · · · · · · · · · · · · · · · · · · · · · · · · · · · · · · · · · · · · · · · · · · · · · 66 Introducción a la cámara ·...
-
Page 35: Introducción A La Cámara
Introducción a la cámara Modelo: RLC-811WA Modelo: RLC-810WA Ranura para tarjeta Ranura para tarjeta microSD microSD *Afloje los tornillos con un *Afloje los tornillos con un destornillador (no incluido) destornillador (no incluido) para acceder a la ranura para acceder a la ranura para tarjeta microSD. -
Page 36: Diagrama De Conexión
Cable de Ruta de descarga de Reolink Client: > Soporte > App & Client. alimentación NOTA: Si va a conectar la cámara a un NVR PoE de Reolink, configure la cámara a través de la interfaz del NVR. Español Español... -
Page 37: Montar La Cámara
Montar la cámara NOTA: Existen dos tipos diferentes de soportes para las cámaras tipo bala. Compruebe el soporte incluido en el paquete y siga las instrucciones correspondientes para instalar la cámara correctamente. Consejos de instalación Instalar la cámara • No oriente la cámara hacia ninguna fuente de luz. •... -
Page 38: Resolución De Problemas
12 V de CC que funcione, utilice otro adaptador de corriente y compruebe si funciona. Si no funciona, póngase en contacto con servicio de asistencia de Reolink. Los LED infrarrojos dejan de funcionar Apriete la tuerca de ajuste para fijar la cámara. -
Page 39: Especificaciones
Si no funciona, póngase en contacto con servicio de asistencia de Reolink. Nota: Este equipo se ha probado y cumple los límites establecidos para los dispositivos digitales de Clase B, de conformidad con el artículo 15 del Especificaciones reglamento de la FCC. - Page 40 Canada applicables aux appareils radio exempts de licence. L’exploitation est autorisée aux deux conditions suivantes : Reolink declara que este producto cumple con el Reglamento de equipos (1) L’appareil ne doit pas produire de brouillage; radioeléctricos 2017 y el Reglamento de compatibilidad electromagnética (2) L’appareil doit accepter tout brouillage radioélectrique subi, même si le...
- Page 41 Garantía limitada FRECUENCIA DE FUNCIONAMIENTO: Este producto tiene una garantía limitada de 2 años que solo es válida si se 2,4 GHz EIRP < 20 dBm adquiere en la tienda oficial de Reolink o en un distribuidor autorizado de 5 GHz EIRP < 23 dBm Reolink. 5,8 GHz EIRP < 14 dBm Condiciones y privacidad Las funciones de los sistemas de acceso inalámbrico, incluidas las...
Need help?
Do you have a question about the RLC-810WA and is the answer not in the manual?
Questions and answers