Advertisement
Quick Links
Advertisement

Related Manuals for Spypoint FLEX Series


Summary of Contents for Spypoint FLEX Series
- Page 1 F L E X S E R I E S Quick Start Guide v1.0...
-
Page 2: Charging Cable
IN THE BOX FLEX SERIES Camera ANTENNA & GASKET CHARGING CABLE FLEX-S only 2 SIM CARDS Preactivated and inserted (do not remove) INSTALLATION STRAP... -
Page 3: Memory Card
REQUIRED (sold separately) MEMORY CARD 2 to 512 GB class 10 ultra-high speed new microSD card 8 AA LIT-22 Lithium non-rechargeable Rechargeable lithium recommended battery pack (Optional for the FLEX-S) (Optional for the FLEX-S) FLEX-PLUS 8 or 16 AA FLEX PLUS 1x or 2x LIT-22... - Page 4 While the camera is off, plug the 12Vdc connector (charging cable) to the camera. The status light will illuminate red while charging and turn off when fully charged. It is recommended to charge the battery fully (approximately 12 hours). Create an account on spypoint.com/activate...
- Page 5 Download the SPYPOINT app and sign in. In the Cameras tab, press the button. Follow the instructions on the screen to add your camera.
- Page 6 Screw in antenna & insert memory card, batteries. Insert the tray(s) following the arrow orientation.
- Page 7 Turn your camera ON. All LEDs will begin to blink. Format your memory card. Immediately hold down the format button until the FORMAT LED blinks green. Format is complete when LED stops blinking.
- Page 8 Press the TEST button to receive a photo. Turn your camera OFF until you’re ready to install it in field.
- Page 9 IN THE FIELD flex-s only Install your camera in a location where the solar panel will receive at least 4 hours of direct sunlight. Tips Use: Installation strap 25 ft Orientation: North or South (7.5 m) Height: Subject’s mid-body Lens sight: No leaves, branches or tall grass in front Turn your camera ON &...
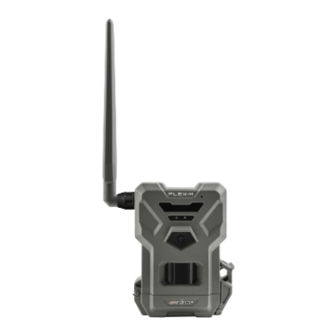
- Page 10 COMPONENTS Microphone Antenna gasket IR LED Antenna O-Ring Light sensor 12 V jack Delay light Cable lock hole Photo lens Locking latch Detection lens Slots for installation strap Battery level Screw-thread for standard ¼"-20 tripod mount Signal level Battery door...
- Page 14 flex-plus only...
- Page 16 F L E X S E R I E S More information available in the certification guide.
Need help?
Do you have a question about the FLEX Series and is the answer not in the manual?
Questions and answers
How do you restart the free 100 picture transmission after the first time ?