Table of Contents
Advertisement
Quick Links
EVK-F10N
Evaluation kit
User guide
Abstract
This document describes the structure and use of the EVK-F10N
evaluation kit and provides information for evaluating u-blox F10
dual-band positioning technology.
www.u-blox.com
UBXDOC-963802114-12252 - R03
C1-Public
Note! GPS L5 signals are pre-operational
and not used by default. Refer to the
Overview section for more information.
Advertisement
Table of Contents

Related Manuals for u-blox EVK-F10N


Summary of Contents for u-blox EVK-F10N
- Page 1 EVK-F10N Evaluation kit User guide Abstract This document describes the structure and use of the EVK-F10N evaluation kit and provides information for evaluating u-blox F10 dual-band positioning technology. Note! GPS L5 signals are pre-operational and not used by default. Refer to the Overview section for more information.
- Page 2 fitness for a particular purpose of the information. This document may be revised by u-blox at any time without notice. For the most recent documents, visit www.u-blox.com.
-
Page 3: Table Of Contents
EVK-F10N - User guide Contents 1 Product description......................5 1.1 Overview..............................5 1.2 Kit contents..............................5 1.3 System requirements..........................5 2 Specifications......................... 6 2.1 Safety precautions..........................6 3 Getting started........................7 3.1 Installing u-center 2 software......................7 3.2 Installing hardware..........................7 3.3 Default interface configuration......................7 4 Device description.........................8 4.1 Interface connection..........................8... - Page 4 11 Troubleshooting........................ 28 12 Common evaluation pitfalls..................30 Related documents........................ 31 Revision history........................32...
-
Page 5: Product Description
1 Product description 1.1 Overview The EVK-F10N evaluation kit makes it simple to evaluate the high performance and low-power u- blox F10 L1/L5 dual-band GNSS technology. At the time of writing, the GPS L5 signals remain pre-operational and are set as unhealthy until sufficient monitoring capability is established. -
Page 6: Specifications
62368-1:2018 [5] for more information on the PS1 class. In addition to a limited power source, only ES1 class circuits are to be connected to the EVK-F10N, including interfaces and antennas. See section 5.2.1.1 of IEC 62368-1:2018 [5] for more information on the ES1 class. -
Page 7: Getting Started
2, the u-blox interactive evaluation software is required for configuration, testing, visualization and data analysis of u-blox GNSS receivers as well as EVKs. The EVK user guide together with the u-center 2 evaluation tool provide useful assistance during all phases of a system integration project. -
Page 8: Device Description
Figure 4.1 Interface connection The EVK-F10N supports a UART communication interface. To connect the EVK to a PC, use a standard SUBD-9 cable or the included USB cable. The EVK includes an on-board USB-to-Serial converter for USB-to-UART communication with the receiver. For current measurements and to evaluate the available digital interfaces, additional measurement equipment and devices can be connected to the 14-pin connector on the front side of the EVK unit. -
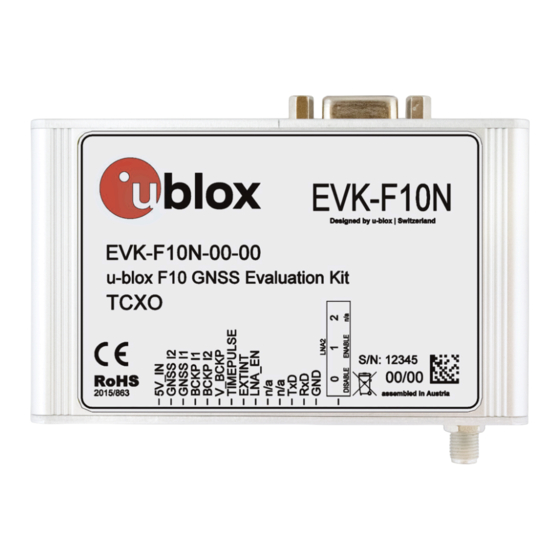
Page 9: 14-Pin Connector
Figure 4.1.2 14-pin connector The EVK-F10N front side has a 14-pin connector that provides programmable input/output signals, communication interfaces and supply options. All these pins are ESD protected. The 14-pin connector can be used for communicating with the receiver through the UART interface. In addition, the 14-pin connector provides flexibility for evaluating other advanced scenarios. -
Page 10: Usb
The USB connector in the evaluation kit can be used for both power supply and communication. The easiest way to evaluate the EVK-F10N operation is to connect the EVK to a PC with the USB cable and use the u-center 2 tool to configure and monitor the GNSS functions. The USB connector is internally connected to a USB-to-Serial converter that connects to the UART interface of the NEO- F10N module on the EVK. -
Page 11: Gnss Input Signal
The time pulse signal from the 14-pin connector has 50 ohms output and thus, no fast slope output signal is possible. 4.5 Reset button The RST button on the front side resets the u-blox F10 receiver. This includes any data or configuration stored in the RAM and BBR layers. 4.6 Safe boot button This button is used to set the receiver into safeboot mode. -
Page 12: Led
The evaluation kit board includes a 1.0 F super capacitor to supply the backup power domain of the EVK-F10N and is charged whenever there is a power supply available, either via USB or through the 14-pin connector. The super capacitor provides backup power directly to the EVK-F10N V_BCKP power input of the GNSS receiver in case no other V_BCKP power supply is provided. -
Page 13: Measuring Current
™ Online service. On EVK-F10N, the main supply voltage for the u-blox F10 GNSS receiver is 3.3 V. To measure the total GNSS supply current with EVK-F10N, follow these steps: Before starting the test, make sure you have good signals and clear sky view to ensure that the receiver can acquire the satellite signals. -
Page 14: Measuring Backup Current
EVK board. The test point are connected to the I2C current sensors on the EVK board. 5.3 Measuring backup current To measure the backup current (I ) with EVK-F10N, follow these steps: BCKP Connect a true RMS voltmeter across BCKP I1 (pin 11) and BCKP I2 (pin 10) of the 14-pin connector. -
Page 15: Block Diagram
EVK-F10N - User guide 6 Block diagram EVK-F10N block diagram provides an overview on supply voltages, current measurement and communication interfaces as shown in Figure Figure 6: EVK-F10N block diagram UBXDOC-963802114-12252 - R03 6 Block diagram Page 15 of 33 C1-Public... -
Page 16: Board Layout
EVK-F10N - User guide 7 Board layout Figure 7: EVK-F10N board layout Figure 8: EVK-F10N PCB UBXDOC-963802114-12252 - R03 7 Board layout Page 16 of 33 C1-Public... -
Page 17: Updating Firmware
EVK-F10N - User guide 8 Updating firmware EVK-F10N is delivered with the latest firmware version. However, as newer images may become available during the product life cycle, you may need to update the firmware. During start-up, EVK- F10N executes the firmware image that is loaded from the flash memory. This section shows how to upload the firmware image on the external flash memory. - Page 18 EVK-F10N - User guide From the Tools section in the left ribbon, select Tools and Services > Firmware update as shown in Figure Figure 10: Tools and Services section in u-center 2 The firmware update window appears, as shown in Figure Figure 11: Firmware update window in u-center 2 Select the firmware image by clicking the Select button.
- Page 19 EVK-F10N - User guide Poll UBX-MON-VER again to verify the updated firmware or check the Device info panel as shown in Figure Figure 12: The firmware version displayed in the Device info panel in u-center 2 UBXDOC-963802114-12252 - R03 8 Updating firmware Page 19 of 33 ...
-
Page 20: Configuring The Device
EVK-F10N - User guide 9 Configuring the device This chapter shows how to configure and evaluate the EVK-F10N key features related to power modes, GNSS constellations, and navigation rate of the receiver. The receiver can be configured with the configuration keys using the u-center 2 evaluation tool in the Device configuration -> Advanced configuration view, as shown in... -
Page 21: Configuring Uart Baud Rate
• u-blox EVK-F10N current sensors: Do not use this COM port. • u-blox EVK-F10N Port B: Do not use this COM port. • u-blox EVK-F10N UART: Use this COM port for UART communication with the receiver via the FTDI USB-to-UART interface. -
Page 22: Configuring Gnss Constellations
QZSS. The receiver GNSS configuration can be updated by selecting the constellations in the Device configuration -> Quick configuration -> Constellation configuration view as shown in Figure u-blox receivers do not use GPS L5 signals by default. Refer to Using GPS L5 signals for evaluation to evaluate the GPS L5 signals. -
Page 23: Using Gps L5 Signals For Evaluation
Figure 16: EVK-F10N receiver GNSS configuration 9.3 Using GPS L5 signals for evaluation EVK-F10N supports both GPS L1 C/A and L5 signals. Broadcasting of Civil Navigation (CNAV) messages on the L5 signal began in April 2014. At the time of writing, GPS L5 signals remain pre- operational. - Page 24 To apply the configuration stored in the BBR and flash layers, send the UBX-CFG-RST message with resetMode 0x01 as shown in Figure Figure 18: EVK-F10N UBX-CFG-RST message view with reset mode 0x01 To revert to the default configuration, send the configuration string given in Table 8 by navigating to Tools and Services ->...
-
Page 25: Configuring Navigation Update Rate
Figure 19: EVK-F10N receiver navigation update rate configuration 9.5 Configuring power modes EVK-F10N supports continuous power mode only. This is the full power mode and the default mode of the receiver. 9.5.1 Configuring backup modes EVK-F10N supports two backup modes: hardware backup mode and software standby mode. - Page 26 • Hardware backup mode: In this mode, only the the backup supply (V_BCKP) is turned on. All other supplies are turned off. To turn on the hardware backup mode on EVK-F10N, remove the EVK main power supply either by disconnecting the USB cable from the PC or the 5.0 V supply from the 14-pin connector.
-
Page 27: Approvals
EVK-F10N complies with the essential requirements and other relevant provisions of the Radio Equipment Directive (RED) 2014/53/EU. EVK-F10N complies with the Directive 2011/65/EU (EU RoHS 2) and its amendment Directive (EU) 2015/863 (EU RoHS 3). The Declaration of Conformity (DoC) is available at u-blox website. -
Page 28: Troubleshooting
My application (e.g. u-center 2) does not receive all messages If the baud rate is insufficient, the GNSS receivers based on u-blox F10 GNSS technology skip excessive messages. When using UART, check that the baud rate is high enough or reduce the number of enabled messages. - Page 29 EVK-F10N does not work properly when connected to a GNSS simulator When using EVK-F10N together with a GNSS simulator, pay attention to proper handling of the EVK. A GNSS receiver is designed for real-life use (i.e. time is always moving forward). When using a GNSS simulator scenario, the scenario time can be in the past causing the receiver to jump backwards in time.
-
Page 30: Common Evaluation Pitfalls
(DOP), less position drift, and lower power consumption. • When doing reacquisition tests, cover the antenna to block the sky view. Do not unplug the antenna since the u-blox F10 positioning technology continuously performs a noise calibration on idle channels. -
Page 31: Related Documents
F10 SPG 6.00 Interface description, UBX-23002975 Information technology equipment - Safety Standard IEC 62368-1:2018 For regular updates to u-blox documentation and to receive product change notifications please register on our homepage https://www.u-blox.com. UBXDOC-963802114-12252 - R03 Related documents Page 31 of 33 ... -
Page 32: Revision History
EVK-F10N - User guide Revision history Revision Date Status / comments 01-Nov-2023 Initial release 28-Nov-2023 Added chapter Firmware update using u-center 2 Added section Using GPS L5 signals for evaluation Updated sections: • Overview with information related to GPS L5 • Measuring current with u-center 2... - Page 33 EVK-F10N - User guide Contact u-blox AG Address: Zürcherstrasse 68 8800 Thalwil Switzerland For further support and contact information, visit us at www.u-blox.com/support. UBXDOC-963802114-12252 - R03 Page 33 of 33 C1-Public...
Need help?
Do you have a question about the EVK-F10N and is the answer not in the manual?
Questions and answers