Table of Contents
Advertisement
Available languages
Available languages
Quick Links
Advertisement
Table of Contents

Subscribe to Our Youtube Channel
Related Manuals for MT Helmets KRE + S


Summary of Contents for MT Helmets KRE + S
- Page 1 MT-FF103B PLUS mthelmets.com USER GUIDE...
-
Page 2: Table Of Contents
KRE+ S Español English Especificaciones Product Details Seguridad Safety Ventilaciones Ventilations Pantalla Shield/Visor Alerón Spoiler Mantenimiento Maintenance y garantía & Warranty... - Page 3 KRE+ S...
- Page 4 KRE+ S...
-
Page 5: Especificaciones
KRE+ S MT-FF103B PLUS Calota Desarrollada por MT HELMETS en base a la nueva y revolucionaria tecnología de fibra carbono. Tres tallas de calota para optimizar el peso, el ajuste y el confort. Sistema de ventilación Tres entradas de aire en la parte frontal del casco fuerzan la entrada de aire frío y el Spoi- ler trasero permite una excelente evacuación del aire caliente. - Page 6 Ajuste Para una seguridad máxima, es vital que su casco MT HELMETS encaje en su cabeza, estando la correa de retención correctamente y firmemente ajustada. Con la barbilla firmemente sujetada, agarre la parte posterior del casco con ambas manos e intente rodar el casco hacia adelante.
- Page 7 Español KRE+ S Pantallas Las pantallas de los cascos MT proporcionan protección contra el clima, pequeños obje- tos voladores y el viento. Las pantallas tintadas están disponibles para proteger sus ojos de la luz solar excesiva. Además, la pantalla solar interna del casco le permite un ajuste inmediato de la intensidad de la luz.
-
Page 8: Seguridad
KRE+ S Español Sistema de retención Una vez que la correa de la barbilla está abierta, usted tiene que coger las dos secciones de la correa y mantenerlas ligeramente separadas con el fin de facilitar el paso de su cabeza. Al llevar a cabo este movimiento, se aconseja mantener las dos secciones de la correa apartadas de los pulgares para que estén correctamente colocadas. - Page 9 Español KRE+ S Como ajustar el sistema de retención doble “D” El cierre de doble D permite un fácil y preciso ajuste de la longitud de la correa. Pase el extremo de la correa a través de los anillos del cierre. Ajuste la correa y páse- la por el primer anillo.
- Page 10 KRE+ S Español Desmontaje de las almohadillas laterales Hay 3 broches de presión que sostienen las almohadillas laterales en el lugar. Levante suavemente la almohadilla lateral, separándola de la calota, con el fin de soltar los broches de presión. Sujete la almohadilla lateral por su centro y tire suavemente de la correa de la barbilla.
- Page 11 Español KRE+ S Desmontaje del protector cubrebarbilla Estire del protector cubrebarbilla hasta que la lengüeta se libere de sus correspondien- te ranura. Instalación de las almohadillas laterales Pase la correa por la abertura de la almohadilla al nivel de la mejilla. Alinee y deslice completamente la placa de plástico de la almohadilla entre la calota y el EPS.
-
Page 12: Ventilaciones
KRE+ S Español Funcionamiento de las entradas de aire frontales Deslizar suavemente hacia abajo la pestaña del mecanismo de bloqueo de entrada de aire para activar el flujo de aire entrante. Deslizar suavemente hacia arriba, hasta escu- char un clic, la pestaña del mecanismo de bloqueo de entrada de aire para desactivar el flujo de aire entrante. -
Page 13: Pantalla
Español KRE+ S Funcionamiento de la pantalla La visera tiene la característica de cerrarse con un sellado anti entrada de aire óptimo. Pulsa el botón frontal para desbloquear la visera del sellado óptimo y así poder subir la visera. Baje la visera hasta escuchar un clic que confirme que ha quedado nuevamente sellada. - Page 14 KRE+ S Español Desmontar la pantalla Levante la pantalla hasta su posición elevada máxima y desatornille el sistema con una llave Allen del número 2.5. Retire la pantalla del casco. Montar la pantalla Alinee la pantalla con la posición de montaje. Atornille el sistema con una llave Allen del número 2.5 hasta que la pantalla quede correctamente fijada.
-
Page 15: Alerón
Español KRE+ S Desmontar el alerón Desatornille los pequeños tornillos con una llave Allen del número 3, responsables de mantener la pieza anclada en el casco. Retire el spoiler con cuidado. Montar el alerón Para anclar nuevamente el spoiler, atornille ligéramente el tornillo central y seguida- mente los tornillos laterales. -
Page 16: Mantenimiento Y Garantía
Español Mantenimiento Ningún componente de su casco MT HELMETS puede ser dañado por el agua. Lávelo con un detergente suave en agua tibia y déjelo secar al aire libre. Se recomienda lavar a mano. No coloque piezas de revestimiento en la secadora: el exceso de calor puede da- ñar la espuma y los revestimientos. -
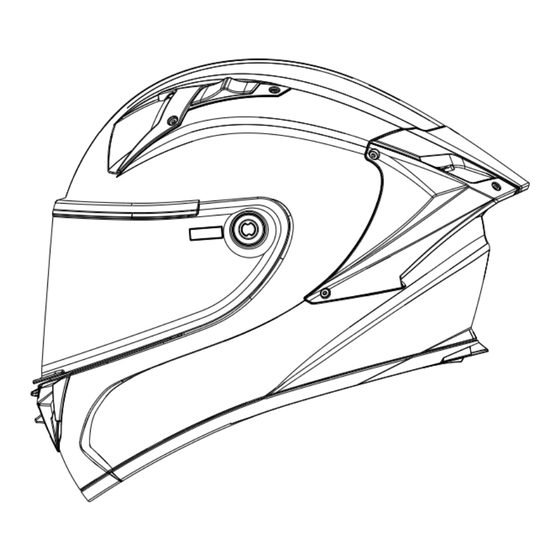
Page 17: Product Details
KRE+ S MT-FF103B PLUS Shell Developed by MT HELMETS using the new and revolutionary carbon fiber technology. Three shell sizes to optimize weight, fit, and comfort. Ventilation System The helmet features three air intakes located at the front, which enable the influx of cool air, while the rear spoiler allows excellent evacuation of hot air. - Page 18 For maximum safety, it is vital that your MT HELMETS helmet fits properly on your head, with the retention strap correctly and securely fastened. Keep your chin firmly in place, grasp the back of the helmet with both hands and try to roll the helmet forward.
- Page 19 Not only is it unsafe, it is also illegal in many countries. Never use a shield/visor that is scratched or wet with condensation. MT Helmets shields are supplied with an anti-scratch treatment. Ventilation System Ventilation systems are designed and engineered to maximize your comfort in a wide range of temperatures.
-
Page 20: Safety
KRE+ S English Retention System Once the chinstrap is opened, you need to take both sections of the strap and keep them slightly separated in order to facilitate the passage of your head. When performing this movement, it is recommended to keep the two sections of the strap away from your thumbs so that they are properly positioned. - Page 21 English KRE+ S How to adjust the Doble D closure system The double D closure allows for easy and precise adjustment of the strap length. Pass the end of the strap through the closure rings. Adjust the strap and pass it through the first ring.
- Page 22 KRE+ S English Removing the side pads There are 3 snaps that hold the side pads in place. Gently lift the side pad away from the shell in order to release the snaps. Grasp the side pad from its centre and gently pull on the chinstrap. Liner Removal Pull on the rear part of the liner until the two snaps holding it are released.
- Page 23 English KRE+ S Chin Guard Removal Pull on the chin guard protector until the flap is released from its slot. Installing the side pads Pass the strap through the opening of the pad at cheek level. Align and slide the plastic cheek pad plate into place between the shell and the EPS.
-
Page 24: Ventilations
KRE+ S English Operation of the front air inlets Slide down the air intake lock mechanism to activate the incoming airflow. Slide it upwards until you hear a click, to deactivate the incoming airflow. Operation of the upper air inlets Slide backwards the air intake lock mechanism to activate the incoming airflow. -
Page 25: Shield/Visor
English KRE+ S Shield/Visor operation The shield closes with an optimal airtight seal. Push the front button to release the shield from its sealed position allowing it to be raised. Lower the shield until you hear a click, confirming that it is sealed again. Shield/Visor |... - Page 26 KRE+ S English Disassembling the Shield/Visor Lift the shield to its highest raised position and unscrew the fastening mechanism using an Allen key No. 2.5. Carefully remove the shield. Assembling the Shield/Visor Align the shield with the mounting position. Screw the shield in using an Allen key No.
-
Page 27: Spoiler
English KRE+ S Disassembling the Spoiler Unscrew the small screws with Allen key No. 3, which are responsible for keeping the piece anchored to the helmet. Carefully remove the spoiler. Assembling the Spoiler To assemble the spoiler, start screwing gently the central screw and then the lateral ones. -
Page 28: Maintenance & Warranty
KRE+ S English Maintenance No component of your helmet can be damaged by water. Wash it with a mild detergent in lukewarm water and let it air dry. It is recommended to wash by hand. Do not place liner parts in the dryer: excess heat can damage the foam and liners. The shield can be cleaned with mild soap and water. - Page 29 mthelmets.com...
Need help?
Do you have a question about the KRE + S and is the answer not in the manual?
Questions and answers