Table of Contents
Advertisement
Available languages
Available languages
Quick Links
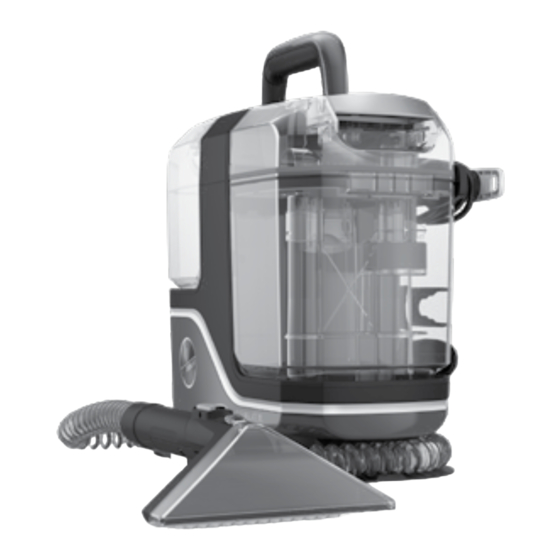
CARPET & UPHOLSTERY SPOT CLEANER
USER MANUAL
IMPORTANT: READ ALL INSTRUCTIONS CAREFULLY BEFORE ASSEMBLY AND USE.
This product is intended for Household use only.
If used Commercially warranty is VOID.
Versión en español: Puede encontrar la versión en español de este manual
en Hoover.com en esta página de productos.
IMPORTANT SAFETY INSTRUCTIONS
SAVE THESE INSTRUCTIONS
READ ALL SAFETY WARNINGS AND INSTRUCTIONS BEFORE USING THIS PRODUCT.
WARNING:
When using an
electrical product, basic precautions
should always be followed to avoid
electric shock, fire, and/or serious injury,
including the following:
Fully assemble product prior to use.
•
Operate cleaner only at voltage specified on
•
data plate on bottom of cleaner.
Do not leave appliance when plugged in. Un-
•
plug from outlet when not in use and before
cleaning or servicing.
Do not expose to rain, store indoors.
•
Do not immerse. Use only on surfaces
•
moistened by cleaning process.
To Reduce the Risk of Fire and Electric Shock
•
due to internal component damage, use only
HOOVER® Cleaning Fluids intended for use
with this appliance. See the Cleaning Fluid
section of this manual.
Do not allow to be used as a toy. Not intended
•
for use by children age 12 and under. Close
supervision is necessary when used by or
near children. To avoid injury or damage, keep
children away from product, and do not allow
children to place fingers or other objects into
any openings.
Use only as described in this manual. Use
•
only manufacturer's recommended attach-
ments and products.
Do not use product with damaged cord or
•
plug. If product is not working as it should,
has been dropped, damaged, left outdoors, or
dropped into water, call customer service at
1-800-944-9200 prior to continuing use.
Do not pull or carry by cord, use cord as a
•
©2023 Techtronic Floor Care Technology Limited. Distributed by, Royal Appliance Mfg. Co. Charlotte, NC 28262
XL
™
handle, close a door on cord, or pull cord
around sharp edges or corners. Do not place
product on cord. Do not run appliance over
cord. Keep cord away from heated surfaces.
Do not unplug by pulling on cord. To unplug,
•
grasp the plug, not the cord.
Do not handle plug or appliance with wet
•
hands.
Do not put any object into openings. Do not
•
use with any opening blocked; keep free of
dust, lint, hair, and anything that may reduce
air flow.
Keep hair, loose clothing, fingers, and all
•
parts of body away from openings and
moving parts.
Turn off all controls before unplugging.
•
Do not use to pick up flammable or combus-
•
tible liquids, such as gasoline, or fine wood
sandings, or use in areas where they may be
present.
Connect to a properly grounded outlet only.
•
See Grounding Instructions.
Do not pick up anything that is burning or
•
smoking, such as cigarettes, matches, or
hot ashes.
Do not use without filters and tanks in place.
•
Do not clean over floor electrical outlets.
•
Put product away after use to prevent
•
tripping accidents.
Use extra care when cleaning on stairs. To avoid
•
personal injury or damage, and to prevent the
cleaner from falling, always place cleaner at
bottom of stairs or on floor. Do not place cleaner on
stairs or furniture.
CAUTION:
TO REDUCE THE RISK OF DAMAGE:
Avoid picking up hard, sharp objects with this
•
product, as they may cause damage.
Store appropriately indoors in a dry place. Do
•
not expose machine to freezing tempera-
tures.
Do not use sharp objects to clean out hose as
•
they can cause damage.
To assist in reducing drying time, be certain
•
the area is well ventilated when using deter-
gents and other cleaners with this machine.
To help prevent matting and resoiling, avoid
•
contact with carpets until they are dry. Keep
children and pets away from carpets until
they are completely dry.
Do not store extractor with solution in tanks.
•
DO NOT USE THIS EXTRACTOR ON HARD
•
FLOORS UNLESS YOU HAVE THE PROPER HARD
FLOOR ATTACHMENT. USING THIS PRODUCT
ON HARD FLOORS MAY SCRATCH OR DAMAGE
YOUR FLOOR.
Water will drip from the tool after use and
•
may puddle. To avoid damage to wood and
laminate flooring and to avoid potential
slip hazard, after use (a) do not leave the
product on wood and laminate surfaces and
remove to a hard surface and (b) place unit
on absorbent material (such as a towel) to
soak up drips.
GROUNDING
INSTRUCTIONS
This appliance must be grounded. If it should
malfunction or breakdown, grounding provides
a path of least resistance for electric current
to reduce the risk of electric shock. This
appliance is equipped with a cord having
an equipment-grounding conductor (C) and
grounding plug (A). The plug must be inserted
into an appropriate outlet (B) that is properly
installed and grounded in accordance with all
local codes and ordinances.
WARNING:
Improper connection of the equipment-
grounding conductor can result in the risk
of electric shock. Check with a qualified
electrician or service person if you are in
doubt as to whether the outlet is properly
grounded. Do not modify the plug provided
with the appliance - if it will not fit the outlet,
have a proper outlet installed by a qualified
electrician.
This appliance is for use on a nominal 120-volt
circuit and has a grounding plug that looks like
the plug (A) illustrated in Fig. 1. A temporary
adapter (D) may be used to connect this plug to
a 2-pole receptacle (E) if a properly grounded
outlet is not available (Fig. 2). The temporary
adapter should be used only until a properly
grounded outlet (B) can be installed by a
1
B
A
C
2
D
D
G
E
F
qualified electrician
(Fig. 1). The green colored
rigid ear, lug, or the like (F) extending from the
adapter must be connected to a permanent
ground (G) such as a properly grounded outlet
box cover (Fig. 2). Whenever the adapter is
used, it must be held in place by a metal screw.
NOTE: In Canada, the use of a temporary
adapter is not permitted by the Canadian
Electrical Code.
961152284-R1
Advertisement
Table of Contents

Related Manuals for Hoover CLEANSLATE XL


Summary of Contents for Hoover CLEANSLATE XL
- Page 1 Versión en español: Puede encontrar la versión en español de este manual laminate flooring and to avoid potential en Hoover.com en esta página de productos. slip hazard, after use (a) do not leave the product on wood and laminate surfaces and...
-
Page 2: Getting Started
Lift tank solution port and add warm water dry” clean only). (Max 140 degrees F (60 degrees C)) to desired fill line. Then add Hoover Portable Solution and Test for colorfastness in a small, To lift the stain, suction up the dirt and pour to the solution fill line. -
Page 3: Thermal Protector
Do not add lubricant to motor bearings. Remove any dirt and debris from the filter grill located underneath the recovery tank. FORMULA CHART RATIO FOR HOOVER ® PORTABLE SOLUTION To clean out the hose, empty the Solution Tank GENERAL CLEANING... -
Page 4: Troubleshooting
To reduce the risk of personal injury, unplug before cleaning or servicing. REPLACEMENT PARTS AND ACCESSORIES SUCH AS SOLUTIONS AVAILABLE AT HOOVER.COM. IF APPLIANCE IS NOT WORKING AS IT SHOULD, HAS BEEN DROPPED, DAMAGED, LEFT OUTDOORS, OR DROPPED INTO WATER, CALL CUSTOMER SERVICE AT 1-800-944-9200 PRIOR TO CONTINUING USE. - Page 5 Versión en español: Puede encontrar la versión en español de este manual correctement mise à la terre (B) soit installée par un l’ e ndommager. en Hoover.com en esta página de productos. électricien qualifié figure 1. La patte, le taquet ou Pour réduire le temps de séchage, s’assurer de •...
-
Page 6: Pour Commencer
“W” ou “W/S”. souhaitée. Ajoutez ensuite la solution portable Hoover et versez jusqu’à la ligne de Testez d’abord la stabilité des couleurs remplissage de la solution. dans un petit endroit caché. Frottez Pour les taches tenaces, ajoutez de la solution doucement la surface à... -
Page 7: Entretien
C’est pourquoi vous ne devez pas ajouter de filtre située sous le réservoir de récupération. lubrifiant dans les roulements du moteur. TABLEAU DES RATIO DE FORMULE POUR LA SOLUTION PORTABLE HOOVER Décrochez le loquet et retirez le couvercle du réservoir. Pour nettoyer le tuyau, videz le réservoir NETTOYAGE GÉNÉRAL... -
Page 8: Dépannage
3. Réparation nécessaire. 3. Consulter notre site Internet à l'adresse www.hoover.com ou appeler le 1 800 944.9200. L'aspirateur n'aspire pas ou aspire mal 1. Le réservoir de récupération n’est pas installé correctement. 1. Vérifiez le positionnement du réservoir de récupération dans la base du nettoyeur. -
Page 9: Instrucciones De Seguridad Importantes
Hoover® con fines de uso para el aparato. tierra del equipo (C) y un enchufe de puesta a tierra contacto con las aberturas y las piezas móviles Consulte la sección Fluidos de limpieza de este... -
Page 10: Cómo Comenzar
A continuación, agregue la solución portátil Utilice su limpiador sólo en las tapi- Hoover y viértala hasta la línea de llenado de cerías marcadas con “W” o “W/S”. la solución. Para manchas difíciles, agregue solución al Pruebe la resistencia al color en 100% (sin agua). -
Page 11: Mantenimiento
Quite la suciedad y los desechos de la rejilla rodamientos del motor. del filtro ubicada debajo del depósito de recuperación. RELACIÓN DEL GRÁFICO DE LA FÓRMULA PARA LA SOLUCIÓN PORTÁTIL HOOVER Desenganche el pestillo y retire la tapa del depósito. LIMPIEZA GENERAL MANCHAS DIFÍCILES ... -
Page 12: Resolución De Problemas
3. Necesita un servicio de mantenimiento. 3. Visite nuestro sitio web en www.hoover.com o llame al teléfono 1-800-944-9200. La aspiradora no recoge suciedad o tiene 1. El tanque de recuperación no está instalado correctamente. 1. Verifique la ubicación del tanque de recuperación en la base del limpiador.
Need help?
Do you have a question about the CLEANSLATE XL and is the answer not in the manual?
Questions and answers