Table of Contents
Advertisement
Available languages
Available languages
Advertisement
Table of Contents

Related Manuals for Hoover Power Scrub Elite


Summary of Contents for Hoover Power Scrub Elite
- Page 1 Power Scrub Elite User Guide CWGDH012 hoover-mea.com Version 1.0...
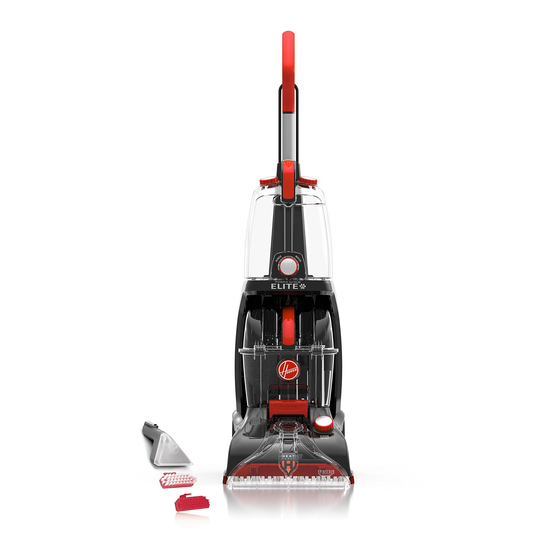
- Page 2 MACHINE OVERVIEW Handle Unit Trigger (hidden) Clean water/solution tank release button Solution tank cap Clean water tank cap Clean water/solution tank Wash/Rinse dial Dirty water tank release latch Quick cord release hook (hidden) Dirty water tank Dirty water tank release latch Recline pedal (hidden) Cleaning mode dial Hose connector port...
- Page 3 Cleaning and user maintenance shall not be made by children without supervision. Before using the carpet washer test your carpets/rugs/upholstery for colourfastness and pile distortion. Only Hoover recommended tools and solution should be used with this carpet washer. Using other solutions may invalidate the guarantee.
- Page 4 When using the carpet washer, basic safety precautions should always be observed and don’t over saturate your carpets. Only use Hoover carpet solution. Using other solutions may cause excess foaming and will invalidate your guarantee. The clean water tank should only be filled with warm water (max 40°C).
- Page 5 Quick Clean Mode: Best for a quick, surface clean because carpets dry in about 45 minutes. Deep Clean Mode: Best overall results for a thorough, deep clean. Twist the solution tank Pour Hoover carpet Twist the water tank Press the clean water/...
- Page 6 OPERATION Plug into the mains, Press the recline Squeeze the trigger to For best results apply press the on/off pedal pedal and pull the release solution and water/solution on the to switch on. handle backwards. water mix. forward stroke and release the trigger to pick up water/solution on the backward...
- Page 7 SpinScrub brushes and brushbar. Do not place the washer at top of stairs to avoid it falling down stairs. Place washer at bottom of stairs and work up. Using the hose and tool Pour Hoover carpet Fill the clean water Turn wash/rinse dial...
- Page 8 OPERATION Press the trigger on Squeeze the trigger To remove the tool, lift the hose to release on the forward stroke, and push the tool clip solution/water. release the trigger on over the tab at the end the backward stroke of the hose and pull to pick up solution/ to remove.
- Page 9 MAINTENANCE CAUTION: Always unplug the carpet washer before performing any maintenance/troubleshooting checks. Emptying and cleaning the dirty water tank IMPORTANT: Always empty and rinse out clean and dirty water tanks and leave to air dry before replacing. Do not leave solution stored in the tanks between uses. Lift the tank release Use the handle to lift For emptying mid clean,...
- Page 10 MAINTENANCE Lift and hook the latch To re-fit, slide the dirty Hook the tank release on the tank onto the lid water tank onto the catch over the front and push down to lock carpet washer, making of the tank and push into place.
- Page 11 MAINTENANCE CAUTION: Always unplug the carpet washer before performing any maintenance/troubleshooting checks. Cleaning the SpinScrub brushes Remove the tanks and Firmly pull the sides of Depress the clips to The SpinScrub brushes lie the washer on its the SpinScrub brushes release the SpinScrub can be removed and back exposing the...
- Page 12 MAINTENANCE IMPORTANT: A blocked/dirty SpinScrub filter will cause the SpinScrub brushes to slow. Cleaning the SpinScrub filter Remove both tanks Lift the nozzle release Hold the front of the Wipe any dirt and and tilt the carpet clip to unlock the nozzle and push debris from the washer so it is lying...
- Page 13 FAQs CAUTION: To reduce the risk of personal injury, unplug the carpet washer before performing maintenance/troubleshooting checks. Is there an accessory missing? • Check the contents panel on the box to make sure the part is definitely included with this carpet washer. Why won't the carpet washer turn on? •...
- Page 14 OTHER INFORMATION Service and Help If you have any queries or concerns about using your Hoover carpet washer, simply visit hoover-mea.com Consumables To purchase spares and accessories, please visit hoover-mea.com The use of genuine Hoover spare parts helps to maintain optimised performance and validates your guarantee.
- Page 15 NOTES...
- Page 16 Hoover-mea.com...
- Page 17 Hoover-mea.com...
- Page 18 مالحظات...
- Page 19 المستلزمات االستهالكية hoover-mea.com : ل� ش اء قطع الغيار والملحقات، تفضل بزيارة موقعنا ال إ لك� ت و� ن ي .إن استخدام قطع غيار هوفر ال أ صلية يساعد � ن ي الحفاظ عىل ال أ داء ال أ مثل وعىل سالمة ضمانك...
- Page 20 ال أ سئلة المتكررة .تنبيه: للحد من مخاطر ال إ صابة الشخصية، افصل غسالة السجاد قبل إجراء فحوصات الصيانة / استكشاف ال أ خطاء وإصالحها هل هناك قطعة ملحقة مفقودة؟ .• افحص لوحة المحتويات � ن ي الصندوق للتأكد من أن القطعة موجودة بالتأكيد مع غسالة السجاد هذه لماذا...
- Page 21 :الصيانة .SpinScrub المسدود/المىل ي ء بال أ وساخ إىل إبطاء فرشSpinScrub معلومة مهمة: سيؤدي مرشح SpinScrub تنظيف مرشح أمسك مقدمة الفوهة واضغط ل أ سفل قم بفك كال الخ ز ان� ي ن مع إمالة غسالة امسح أي أوساخ ورواسب من قم...
- Page 22 :الصيانة .تنبيه: قم دائم ً ا بفصل غسالة السجاد قبل إجراء أي فحوصات الصيانة / استكشاف ال أ خطاء وإصالحها SpinScrub تنظيف فرش وتنظيفهاSpinScrub يمكن فك فرش اضغط عىل المشابك لتحرير غطاء SpinScrub قم بسحب جوانب فرش قم بفك الخ ز انات مع إمالة الغسالة من...
- Page 23 :الصيانة ارفع وثبت المزلج الموجود � ن ي الخ ز ان ل إ عادة ال� ت كيب، أدخل خ ز ان الماء ثبت مزلج تحرير الخ ز ان عىل الجزء ال أ مامي من الخ ز ان وقم بضغطه عىل الغطاء واضغط ل أ سفل لتثبيته المتسخ...
- Page 24 :الصيانة .تنبيه: قم دائم ً ا بفصل غسالة السجاد قبل إجراء أي فحوصات الصيانة / استكشاف ال أ خطاء وإصالحها تفريغ وتنظيف خزان الماء المتسخ .معلومة مهمة: قم دائم ً ا بفصل غسالة السجاد قبل إجراء أي فحوصات الصيانة / استكشاف ال أ خطاء وإصالحها ،لتفريغه...
- Page 25 التشغيل لفك ال أ داة، ارفع وادفع مشبك تثبيت اضغط عىل زر التشغيل � ن ي الشوط اضغط عىل زر التشغيل عىل الخرطوم ال أ داة عىل اللسان الموجود � ن ي نهاية ال أ مامي, ثم حرره � ن ي الشوط الخلفي .ل...
- Page 26 التشغيل تنبيه: اختبار ثبات اللون – قم بتبليل قطعة قماش ماصة بيضاء بالمحلول. قم بفرك السجاد/ال أ غطية/المفروشات برفق � ن ي منطقة صغ� ي ة مخفية بقطعة القماش .المبللة. انتظر ع� ش دقائق وتحقق من إزالة أو بهتان اللون بمنشفة ورقية أو قطعة قماش بيضاء. إن كانت سجادتك تحتوي عىل أك� ش من لون، فقم بفحص كل ال أ لوان معلومة...
- Page 27 التشغيل للحصول عىل أفضل نتائج، استخدم اضغط عىل زر التشغيل ل إ طالق مزيج اضغط عىل دواسة ال إ مالة واسحب قم بتوصيل مصدر التيار ال ر ئيس ي ،الماء/المحلول � ن ي الشوط ال أ مامي .المحلول الماء .المقبض للخلف واضغط...
- Page 28 التشغيل تنبيه: قم دائم ً ا بفصل غسالة السجاد قبل إجراء أي فحوصات الصيانة / استكشاف ال أ خطاء وإصالحها. قم دائم ً ا بفصل غسالة السجاد قبل إجراء أي فحوصات الصيانة ./ استكشاف ال أ خطاء وإصالحها. احرص دوم ً ا عىل تفريغ وشطف خزانات الماء النظيف والمتسخ واتركها لتجف � ن ي الهواء قبل إعادة تركيبها معلومة...
- Page 29 التشغيل الرجاء قراءة قسم "معلومات السالمة العامة" قبل البدء � ف ي استخدام هذا الجهاز .معلومة مهمة: يجب تجفيف السجاد بالهواء الجاف تمام ً ا قبل الغسيل .اختبار ثبات اللون – قم بتبليل قطعة قماش ماصة بيضاء بالمحلول. قم بفرك السجاد/ال أ غطية/المفروشات برفق � ن ي منطقة صغ� ي ة مخفية بقطعة القماش المبللة .انتظر...
- Page 30 معلومات السالمة العامة .يتم تصنيع غسالة السجاد هذه لالستخدام الم� ن ن ىل ي فقط وليس لالستخدام التجاري أو الصناعي .ل تستخدم غسالة السجاد هذه إل � ن ي أماكن داخلية وحافظ عىل ال إ ضاءة الجيدة � ن ي المنطقة ال� ت ي تقوم بتنظيفها وكنسها .أبعد...
- Page 31 نظرة عامة عىل الجهاز المقبض الوحدة )زر التشغيل (مخفي زر تحرير خ ز ان المحلول/الماء النظيف غطاء خ ز ان المحلول غطاء خ ز ان الماء النظيف خ ز ان الماء النظيف/المحلول قرص الغسيل/الشطف مزلج تحرير خ ز ان الماء المتسخ )خطاف...
- Page 32 Power Scrub Elite دليل المستخدم CWGDH012 hoover-mea.com...
Need help?
Do you have a question about the Power Scrub Elite and is the answer not in the manual?
Questions and answers
The solution will not come onto the carpet. I pull the lever but nothing comes out. Why? Thank you.
The solution may not be coming out because the mode knob is in "Rinse Mode." Turn the knob to "Wash" to allow the solution to dispense.
This answer is automatically generated
The belt broke. How do I fix/replace it.
To fix or replace the broken belt on a Hoover Elite vacuum:
1. Remove the cover by unscrewing five screws.
2. Take off the broken or worn-out belt. If the belt is broken, discard it.
3. Wrap the new belt around the motor shaft.
4. Reattach the belt to the brushroll (beater bar).
5. Reassemble the vacuum by reversing the disassembly steps.
6. Put the height adjustment selector back in place.
7. Test the vacuum to ensure it runs properly.
If the old belt is stretched (the new belt fits inside it), replace it even if it is not broken.
This answer is automatically generated
HOW MUCH CLEANING SOLUTION PER GALLON OF WATER
Is not removing liquid from carpet