
Related Manuals for Hoover ONEPWR Blade+


Summary of Contents for Hoover ONEPWR Blade+
- Page 1 Power Scrub Elite User Guide Cordless Vacuum Cordless Vacuum Cordless Vacuum User Guide CLSV-B3ME CLSV-B4ME hoover-mea.com...
- Page 2 • Only Hoover ONEPWR batteries (BV15020ME/BV15030ME/BV15040ME) and charger (BV05100ME) should be used with this machine. • Only Hoover ONEPWR recommended tools and accessories should be used with this machine. • Always remove the battery from the machine before carrying out any maintenance or if storing unused for a long period of time.
- Page 3 BATTERY SAFETY PRECAUTIONS • Replace the battery with a Hoover ONEPWR battery only. Use of another battery may present a risk of fire or explosion. • Do not attempt to disassemble the battery, remove any component projecting from the battery terminals and do not dispose of in a fire.
- Page 4 If you have any queries or concerns about using your Hoover cordless vacuum, visit hoover-mea.com Consumables To purchase spares and accessories, please visit hoover-mea.com The use of genuine Hoover spare parts helps to maintain optimised performance and validates your guarantee. Technical Specifications CLSV-B3ME...
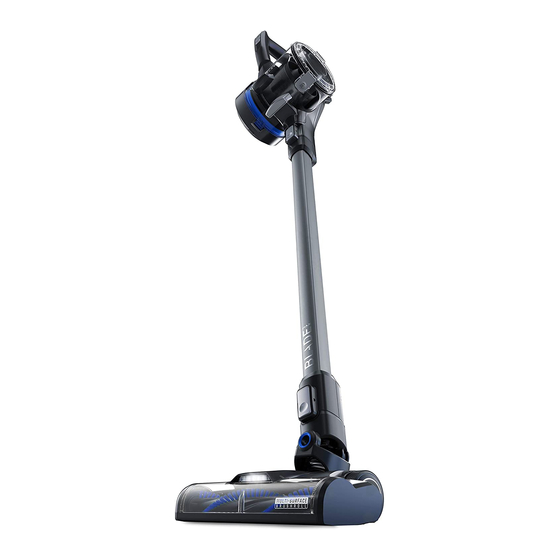
- Page 5 MACHINE OVERVIEW Carry handle Dirt container Filter cover and filter Dirt container release latch Dirt release button Power ON/OFF Brushbar ON/OFF Boost ON/OFF Battery level indicator light Reach wand Powered head Brushbar Battery dock Filter cover release tab (hidden) Crevice tool Dusting brush Crevice tool storage caddy Wall mount...
- Page 6 OPERATION Assembly To assemble the dirt container, line up the arrow on Attach the handheld to the reach wand until it clicks into the dirt container connection with the arrow on the place. Attach the reach wand to the powered head until it handle.
- Page 7 OPERATION Charging the battery IMPORTANT: THIS MACHINE IS ONLY TO BE USED WITH HOOVER ONEPWR BATTERIES AND CHARGER. PLEASE READ THE SAFETY GUIDE BEFORE USE. Before first use, ensure the battery is fully charged. Failure to fully charge the battery before first use may result in poor battery performance.
- Page 8 OPERATION Using the cordless vacuum and tools Press the on/off button to switch the Press the brushbar on/off button to Press the boost button on to increase machine on. switch the brushbar on. the suction for particularly dirty areas. IMPORTANT: The powered head brushbar should be ON for carpets and OFF for hard floors. Constant use of the boost mode and brushbar will reduce the battery run time.
- Page 9 MAINTENANCE Removing and refitting the dirt container CAUTION: Always remove the battery before carrying out any maintenance or troubleshooting. 1. Squeeze the latch on the dirt To refit, line up the dirt container When correctly fitted all 3 container to release. connection with the handheld handle.
- Page 10 MAINTENANCE Cleaning the filter and separator CAUTION: Always remove the battery before carrying out any maintenance or troubleshooting. Lift the filter and separator from the Push the tab on the lid of the dirt container and lift the cover to dirt container.
- Page 11 MAINTENANCE Cleaning and replacing the powered head brushbar Press the floorhead release button Using a coin, push and turn the brushbar lock anticlockwise to release to remove the floorhead from the the brushbar. machine. Pull the brushbar out from the To remove any threads or hair, slide Clear any dirt/debris from the end brushbar housing.
- Page 12 MAINTENANCE Checking for blockages Press the handheld release button Press the dirt container release Check the powered head for any and remove the reach wand. Check button and remove the dirt container. blockages and use a blunt object to and clear any dirt and debris from Check and clear any dirt and debris remove the blockage.
- Page 13 FAQs CAUTION: To reduce the risk of personal injury, unplug the cordless vacuum before performing maintenance/troubleshooting checks. Is there an accessory missing? Check the contents on the back of the box. Why does the machine have no power? • The battery is not fitted correctly. See 'Inserting the battery'. •...
- Page 14 NOTES...
- Page 15 مالحظات...
- Page 16 األسئلة املتكررة .تنبيه: لتقليل خطر وقوع إصابات الشخصية، افصل املكنسة الكهربائية الالسلكية من مصدر التيار الكهربايئ قبل إج ر اء فحوصات الصيانة/استكشاف األعطال وإصالحها هل هناك قطعة ملحقة مفقودة؟ .تف ق ّد املحتويات املوجودة عىل الجزء الخلفي من الصندوق ما سبب عدم وصول التيار الكهريب إىل الجهاز؟ ."عدم...
- Page 17 الصيانة تف ق ُّد االنسدادات تف ق َّد الرأس اآليل بح ث ًا عن أي انسدادات واستخدم جسم ً غري حاد اضغط عىل زر تحرير حاوية تجميع األتربة إلخ ر اج حاوية .اضغط عىل زر تحرير الوحدة املحمولة واخلع عصا التمديد .إل...
- Page 18 الصيانة تنظيف وإعادة تركيب قضيب الفرشاة الخاص بالرأس اآليل .استخدم عملة معدنية للضغط عىل قفل قضيب الفرشاة وإدارته يف عكس اتجاه عقارب الساعة لتحرير قضيب الفرشاة اضغط عىل زر تحرير رأس تنظيف األرضية لخلع رأس تنظيف .األرضية من الجهاز أزل أي أوساخ/بقايا من األغطية الطرفية ومن داخل مبيت إل...
- Page 19 الصيانة تنظيف الفلرت والفاصل .تنبيه: يجب دو م ً ا إخ ر اج البطارية قبل إج ر اء أي أعمل صيانة أو استكشاف األعطال وإصالحها .ارفع الفلرت والفاصل من حاوية األتربة .اضغط عىل اللسان املوجود عىل غطاء حاوية األتربة وارفع الغطاء للوصول إىل الفلرت اطرق...
- Page 20 الصيانة 20 9 خلع وإعادة تركيب حاوية األتربة .تنبيه: يجب دو م ً ا إخ ر اج البطارية قبل إج ر اء أي أعمل صيانة أو استكشاف األعطال وإصالحها عند تركيب الحاوية بشكل صحيح، تكون نقاط التوصيل الثالث وإلعادة تركيبها، قم مبحاذاة نقطة توصيل حاوية األتربة مع .اضغط...
- Page 21 التشغيل 21 8 استخدام املكنسة الكهربائية الالسلكية واألدوات .اضغط على زر التعزيز لزيادة قوة الشفط للمناطق األكثر اتسا خ ً ا اضغط على زر تشغيل/إيقاف قضيب الفرشاة لتشغيل قضيب .اضغط على زر التشغيل/اإليقاف لتشغيل الجهاز .الفرشاة .يف حالة األرضيات الصلبة يف...
- Page 22 التشغيل شحن البطارية .من هوفر. الرجاء ق ر اءة دليل السالمة قبل االستخدام معلومة مهمة: يجب استخدام هذا الجهاز فقط مع بطاريات وشاحن ONEPWR قبل االستخدام ألول مرة، تأكد من شحن البطارية بالكامل. قد يؤدي عدم شحن البطارية متا م ً ا قبل االستخدام للمرة األوىل إىل ضعف أداء البطارية. ويتباين العمر .االف...
- Page 23 التشغيل التجميع وص ّ ل الوحدة المحمولة بعصا التمديد حتى تثبت في مكانها بإحكام. وص ّ ل عصا التمديد بالرأس لتجميع حاوية األتربة، قم بمحاذاة السهم الموجود على نقطة توصيل حاوية األتربة مع السهم اآللي حتى تستقر في مكانها بإحكام. ادفع سلة األدوات على عصا التمديد وأدخل أداة تنظيف .الموجود...
- Page 24 نظرة عامة عىل الجهاز مقبض حمل الجهاز حاوية األتربة غطاء الفلرت والفلرت قفل تحرير حاوية األتربة زر تفريغ األتربة زر التشغيل/إيقاف التشغيل زر تشغيل/إيقاف تشغيل قضيب الفرشاة زر تشغيل/إيقاف تشغيل وضع التعزيز مؤرش مستوى شحن البطارية عصا التمديد الرأس اآليل قضيب...
- Page 25 معلومات عامة الخدمة واملساعدة hoover-mea.com إذا كانت لديك أي استفسا ر ات أو مخاوف بشأن استخدام املكنسة الكهربائية الالسلكية من هوفر، فتفضل بزيارة املوقع املستلزمات االستهالكية hoover-mea.com :ل رش اء قطع الغيار وامللحقات، تفضل بزيارة موقعنا اإللكرتوين .إن استخدام قطع غيار هوفر األصلية يساعد يف الحفاظ عىل األداء األمثل وعىل سالمة ضمنك...
- Page 26 معلومات السالمة املهمة • سنوات أو أكرب وكذلك بواسطة األشخاص الذين يعانون من قصور جسدي ميكن استخدام هذا الجهاز بواسطة األطفال الذين يبلغون من العمر أو حيس أو عقيل أو نقص الخربة واملعرفة برشط خضوعهم لإل رش اف وتوعيتهم باإلرشادات الخاصة باستخدام الجهاز بطريقة آمنة وأن يتفهموا املخاطر...
- Page 27 .هذا الجهاز • .بها مع هذا الجهاز Hoover ONEPWR يجب أال يتم استخدام سوى األدوات وامللحقات التي تويص • .أخرج البطارية دو م ً ا من الجهاز قبل إج ر اء أي أعمل صيانة أو يف حالة تخزين الجهاز وعدم استخدامه ملدة طويلة...
- Page 28 IMPORTANT SAFETY INFORMATION Power Scrub Elite User Guide Cordless Vacuum Cordless Vacuum مكنسة السلكية دليل املستخدم CLSV-B3ME CLSV-B4ME hoover-mea.com...
Need help?
Do you have a question about the ONEPWR Blade+ and is the answer not in the manual?
Questions and answers
How do I take this apart to clean ? It stinks when I’m and blowing