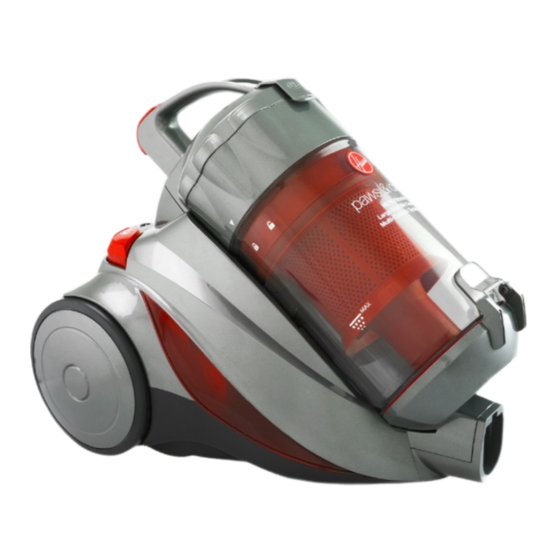
Summary of Contents for Hoover Paws & Claws 3014
- Page 1 Powerful Cyclonic Bagless Vacuum HEPA Filtration Large Dust Bin Capacity Multi-Cyclonic Technology paws & claws...
- Page 3 3014 Paws & Claws Congratulations on the purchase of your new HOOVER vacuum cleaner. There are many useful features built into your vacuum cleaner. We recommend that you carefully read this instruction manual for the best results. Features: 1. Handle 9.
-
Page 4: Before You Begin
Before You Begin This cleaner must be operated in accordance with these instructions and used only for domestic household cleaning to remove DRY dirt and dust from household carpets, flooring, walls and fabrics. This cleaner is not fit to be used as an industrial cleaner and will void the manufacturer’s warranty if used inappropriately. -
Page 5: Safety Precautions And Warnings
Safety Precautions & Warnings IMPORTANT! Always switch off the cleaner and remove the plug from the electricity power supply before cleaning your appliance, when not in use or attempting any maintenance task. The cleaner must only be connected to an AC power supply at the voltage shown on the rating label. - Page 6 15. To prevent electrical shock, do not immerse the 24. Do not leave the appliance unattended when it is appliance, power cord or power plug into water connected to a mains power supply. or any other liquids. 25. Before carrying out any maintenance service or 16.
- Page 7 Assembling IMPORTANT! Always remove the power plug from the power socket before fitting or removing accessories! 1. Flexible Hose Fitting: Insert the flexible hose into the air inlet of the vacuum until it clicks into place. Removing: To remove, press the Hose Release Button and gently pull to release the flexible hose.
- Page 8 Instructions For Use IMPORTANT! Always remove the power plug from the power supply before fitting or removing accessories. Turning On/Off the Cleaner Unwind a sufficient length of cable. The yellow mark on the power cable shows the ideal cable length. DO NOT extend the cable beyond the blue mark.
- Page 9 Accessories IMPORTANT! Always remove the power plug from the power supply before fitting or removing accessories. Mini Hand Turbo Brush The Mini Hand Turbo Brush is ideal for picking up pet hair from furniture & upholstery. This accessory features a transparent case so that you can easily see and remove any blockages that may occur.
- Page 10 2-in-1 Brush The 2-in1 Brush can be used as a: Dusting Brush for cleaning blinds, bookshelves and lampshades etc. Upholstery Tool for vacuuming furniture and upholstery. Note: to use the 2-in-1 Brush as a upholstery tool simple side out the brush attachment.
-
Page 11: Maintenance
Maintenance Emptying and Cleaning the Dust Bin IMPORTANT! Always remove the power plug from the power socket before performing any maintenance. Press the Dust Bin Release Button to remove the dust bin. Note: the dust bin should be emptied before dust and debris reaches the “MAX”... - Page 12 Cleaning and Replacing the Dust Bin Filter IMPORTANT! Always remove the power plug from the power socket before performing any maintenance. Caution: To avoid damaging the dust bin remove the dust bin from the cleaner before cleaning or replacing the dust bin filter. Lift the Dust Bin Lid Lever to access the dust bin filter.
- Page 13 Cleaning the Mini Hand Turbo Brush WARNING! Ensure the Mini Hand Turbo Brush is disconnected from the cleaner when performing any maintenance. To remove the clear cover the collar lock must be in unlocked by twisting the collar lock anticlockwise. The rotating bristles must be unlocked and in the upward position.
-
Page 14: Troubleshooting
Troubleshooting Problems and Solutions If you come across a problem, please use this checklist before contacting Hoover Customer Care. AUS: 1300 360 845, NZ: 0800 387 442 Fault Solutions The cleaner will not turn on. Check that the power cable is inserted into the power supply securely; remove from the power supply and then reinsert into the power supply. -
Page 15: Customer Care
Customer Care Please contact Hoover Customer Care: 1300 360 845 (AUS) 0800 387 442 (NZ) to find your local spare parts provider. Description Product Code HEPA Exhaust Filter 32200735 Dust Bin Sponge Filter 32200736 Dust Bin Filter 32200737... - Page 16 & claws Powerful Cyclonic Bagless Vacuum Conditions of warranty Your Hoover cleaner, in the case of domestic use, has a one year Hoover Floorcare is unable to accept responsibility under this parts and labour warranty against product defects and failures when...


Need help?
Do you have a question about the Paws & Claws 3014 and is the answer not in the manual?
Questions and answers
I cannot put this back together, I cleaned it and now I cannot put it back
To reassemble the Hoover Paws & Claws 3014 after cleaning, follow these steps:
1. Reattach the Flexible Hose: Insert the flexible hose into the air inlet of the vacuum until it clicks into place.
2. Reconnect the Handle:
- Gently insert the handle into the telescopic tube and push until it is secured in place.
- Insert the rod into the Combination Floor Tool.
3. Ensure Filters and Dust Bin Are in Place: Make sure the dust bin and filters are properly reinstalled before operating the vacuum.
Always ensure the power plug is disconnected from the power supply during reassembly.
This answer is automatically generated