Advertisement
Quick Links
Advertisement

Summary of Contents for PEUGEOT Reims PV-S681
- Page 1 Reims Cordless vacuum cleaner P V - S 6 8 1 ´ o w n e r S m a n u a l...
-
Page 2: Table Of Contents
Contents Index Important safe guards· · · · · · · · · · · · · · · · · · · · · 3 Component introduction · · · · · · · · · · · · · · · · · 6 Precautionary measures ·... -
Page 3: Important Safe Guards
Important safe guards When using an electrical appliance, basic safety precautions should always be observed, including the following. Read all instructions before using your vacuum cleaner. Warning: To reduce the risk of fire, electrical shock, or injury 1. Do not use outdoors or on wet surfaces 2. - Page 4 lint, hair and anything that may reduce air flow. 7. Keep hair, loose clothing, fingers, and all parts of body away from openings and moving parts. 8. Do not pick up anything that is burning or smoking, such as cigarettes, matches, or got ashes.
- Page 5 17. Use only on dry, indoor surfaces. 18. Do not use for any purpose other than described in this user’s guide. 19. If the supply cord is damaged, it must be replaced by the manufacturer, its service agent or similarly qualified persons in order to avoid a hazard.
-
Page 6: Component Introduction
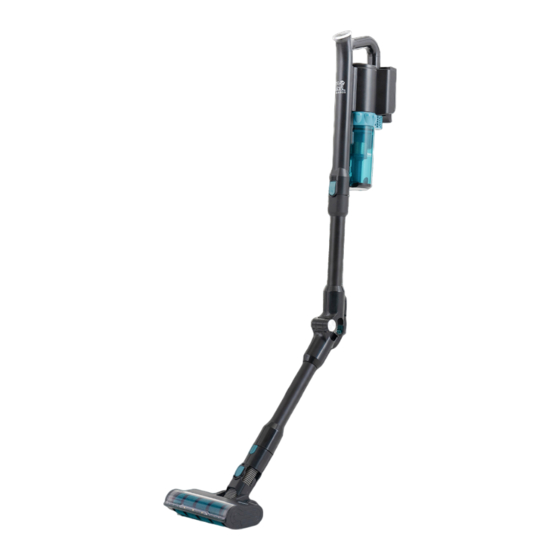
Component introduction Dust Cup Set Plastic Centering Filter System Dust Cup Dust Cup Bottom 1. Motorized Floor Brush head 8. Battery Pack 2. Aluminum tube 9. Dust cup 3. Tube release button 10. Dust cup bottom 4. Dust cup release button 11. -
Page 7: Precautionary Measures
Precautionary measures If the opening that sucks in the air, the brush or extension tubes are blocked, you should switch off the vacuum cleaner at once. First clear the blocked substance before you attempt to start the vacuum cleaner again. 1. - Page 8 - Floor brush head connected with the aluminum tube until you hear a audible clicking noise. Disassemble the floor brush head: - Press the tube release button, then remove the aluminum tube and floor brush head. Install the 2 in 1 crevice nozzle: - The crevice nozzle is suitable for narrow gaps cleaning and for using on upholstered surface cleaning.
- Page 9 - Install the blowing device. - The blowing device is used for the blowing function. The blower function is recommended for use to gather scattered dry waste such as dust, leaves and confetti or any new ideas from you. - Insert the blowing device into the vacuum cleaner body.
-
Page 10: Use The Vacuum Cleaner
Use the vacuum cleaner Install the battery pack: - Slide the battery pack onto the body block until you hear and feel it click into the place. Switch the vacuum cleaner on or off: - To switch it on, press the power switch, button, the vacuum cleaner is ON, and LED light is lighting up. -
Page 11: Charge The Vacuum Cleaner
Charge the vacuum cleaner The vacuum cleaner must be switched off for charging. The rechargeable battery is not fully charged upon delivery. To reach the maximum charging capacity, charge the appliance up fully before using it for the first time. Charging the product: - Plug the adapter plug into the connection socket on the rear side of the vacuum cleaner. -
Page 12: Clean The Vacuum Cleaner
Clean the vacuum cleaner Drop dust: Push the dust cup bottom release button, then the dust will fall down automatically. Usually you may only do like this to drop the dust (fig. a). Clean the dust cup: - Press the dust cup release button, then remove the dust cup from body. - Page 13 Clean the filter: - Take out the filter set. (fig. A) - Clean the filter by soft brush or rinse it in water and dry them completely before use again. All the filters are washable. (we recommend you to clean the filters when feeling the suction power becoming weak.) (fig.B) fig.
-
Page 14: Exploded View
Exploded view 16 17 14 15 37 38 35 36 31 32 20 19 12. Body support 26. Transparent panel 1. Conductive pin 13. Right body 27. Light guide holder cover 14. Brushless Motor plate Seal 2. Conductive pin 28. Switch PCB 15. - Page 15 2. Hypa frame 11. Barbed wire 2. Battery PCB 3. Exhaust cover 12. Dust cup lid seal 3. Battery holder seal left 13. Dust cup lid 4. Battery pack 4. Exhaust cover 14. Exhaust cover insert contacts spring 5. Exhaust cover 5.
-
Page 16: Warranty
• The product has been disassembled, modified, or repaired by persons, not authorised by the authorized Technical Support Service of Peugeot Smart Living. • Faults deriving from the normal wear and tear of its parts, due to use. - Page 17 Spirit of Ingenuity www.p eug e ot -s m ar tliv ing . co m Th e Pe ugeot l o go is a t rad ema rk of Etabl is s e me nts Pe ug eot Frères SA . Us e d un d er license.


Need help?
Do you have a question about the Reims PV-S681 and is the answer not in the manual?
Questions and answers