
Subscribe to Our Youtube Channel
Related Manuals for VADO INDIVIDUAL Tablet IND-T148/2-BLKK


Summary of Contents for VADO INDIVIDUAL Tablet IND-T148/2-BLKK
- Page 1 2 way thermostatic shower valve VADO Wedmore Road, Cheddar, Somerset, England BS27 3EB tel 01934 744466 fax 01934 744345 www.vado.com INSTALL ATION GUIDE sales@vado.com Version 1, 1-11-22...
-
Page 2: General Installation
Temperature resetting Important - please read Please read these instructions carefully before starting installation and keep for future reference. Splines Remove all packaging and check the product for missing parts or damage before starting installation. Any alterations made to this product and fittings may infringe water regulations and will invalidate the guarantee. -
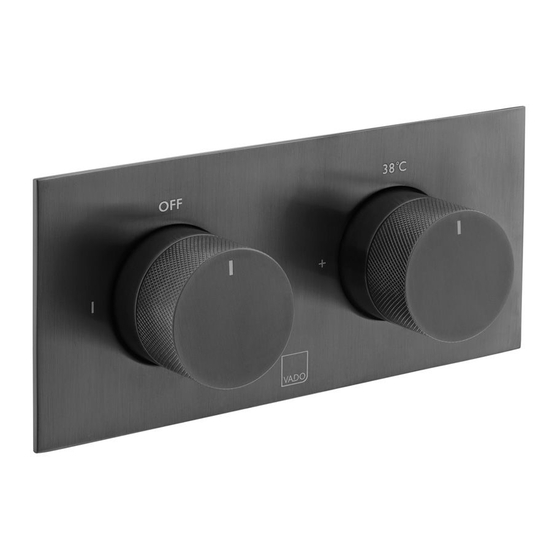
Page 3: Installation - Handles
Installation - handles Contents of Packaging Temperature handle (right) Handle stop at 12 o’clock Ensure the temperature handle is correctly located with the handle stop at 12 o’clock. Carefully slide the handle onto the splines of the valve and then screw the shroud part to the valve whilst holding the handle part. -
Page 4: Installation
Dimensions Installation Connect hot supply to the lower right inlet of the valve and cold supply to the Outlet 143mm upper right inlet. Cold Connect the outlets to the desired channels e.g. outlet 1 to the shower head and outlet 2 to the handset. ¾"... - Page 5 Installation Installation - Quick guide 90mm Mortar guard Fixing screws Fixing points 90mm Select the position for the shower valve and offer the shower valve to the wall, make sure the valve is horizontal with a level and mark the 4 fixing points with a suitable pencil, see above left for dimensions.
- Page 6 Installation - Quick guide Installation Valve Mortar guard Rinse pipe work thoroughly before fitting the valve. Warning! Please check for any hidden cables and pipes before drilling holes in the wall. The valve must be set into the wall between (75mm minimum – 100mm maximum) If you are fitting the valve to a partition wall or a wall of particularly soft substrate you will need specialist fixings.
Need help?
Do you have a question about the INDIVIDUAL Tablet IND-T148/2-BLKK and is the answer not in the manual?
Questions and answers