Advertisement
Quick Links
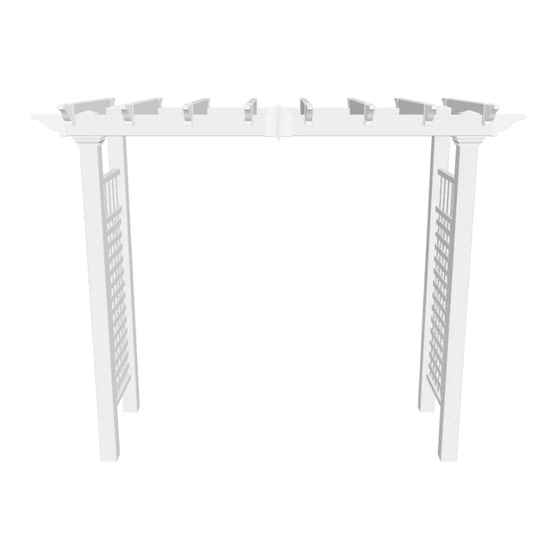
A S S E M B LY I N S T R U C T I O N S
Please read through before startin g as sembly.
IMP ORTANT: CHECK THE IN SIDE OF YOUR POSTS FO R AL L MATERIALS .
Chec k Box for These Contents
In the event of missing or defective parts please call our customer service dept. at
1.
Rafters (8) Length 38"
2.
Pergola End Caps (20) - 10700-1
3.
Post Caps (4) - 10824
4.
Right Posts (2) Length 84"
5.
Left Posts (2) Length 84"
6.
Post T rims (4) - 10737-1
7. Carrying Beams (4) Length 46 1/2"
8. Side Panel T op-Rails (2) Length 31 5/8" (80 cm) -
9. Side Panel V ertical Spindles Length 10 3/8"
10. Side Panel Middle Rails (2) Length 31 5/8" (80 cm) -
11. Side Panel Square Lattices (2) Length 47 3/4"
12. Aluminum Stiffener Inserts (2) - 10996
13. Carrying Beam Coupler (2) - 10707-1
14. Side Panel Horizontal Bottom Rails (2) Length 31 5/8" (80 cm) -
15. 3 in. (76 m.) Stainless Steel Screws (32) -
16. 1 1/2 in. (38 mm.) Stainless Steel Screws (12) -
17. T ube of V inyl Glue (2) -
20000
18.
#8 x 2 1/2" (6.3 cm.) Stainless Steel Screws (for wood posts) (8) - 20009-1
Additional Materials Required
• 4" x 4" x 4' (244 cm) Long Wood Posts (4) (Only for Option 1)
• Concrete Ready Mix
* Purchase separately from your local lumber store
Tools Y ou Will Need
• Hammer - Tape Measure - Level - Stool or Short Ladder - Shovel
• Cordless Drill (1/8" x 2")- 3 mm x 51mm Steel Drill Bit
General In form at io n
• Rea d Instructions through carefully before beginning assembly.
• When assembling components, place on a non-abrasive surface
(i.e. shipping box) to avoid scratching.
• We recommend an area approx 10'x 8' (3 m x 2.4 m) for unobstructed assembling.
• You should not need to use excessive force when assembling components.
86.5 in
(220 cm)
(204 cm)
-
10838
-
10792
-
10821
-
10839
10822
-
10795
10823
- 10793
20007
20005
107.75 in
(274 cm)
80.5 in
80 in
(203 cm)
88 in
(224 cm)
(Mon. to Fri. 8:00 AM to 5:00 PM EST).
1
2
3
4
6
7
10794
www.wearevita.com
52.25 in
(133 cm)
58.5 in
10.3 in
24 in
32 in
8
9
10
11
12
13
5
14
15
16
18
(Not to scale)
V2.8/090623
82
1
Advertisement

Related Manuals for vita Fairfield Grande


Summary of Contents for vita Fairfield Grande
- Page 1 A S S E M B LY I N S T R U C T I O N S www.wearevita.com 52.25 in 107.75 in (133 cm) (274 cm) 86.5 in 80.5 in (220 cm) 58.5 in (204 cm) 10.3 in 80 in 24 in (203 cm)
- Page 2 (not provided ) Repeat for second beam. Four holes facing up Predrilled holes facing up Pre-drill holes on bottom and top to accomodate for internal steel stiffener. Fairfield Grande Arbor / Arch...
- Page 3 These parts will fall into place once you and spindles. Slide the top rail over the lattice assembly. move to step 3 and insert the panel into the Repeat for other side panel. posts. Fairfield Grande Arbor / Arch...
- Page 4 If you purchased the Trim Kit (sold separately), also slide the second set of trim caps and base moldings at this point. “R” Glue and insert post caps on top of posts as illustrated on underside of post top. Fairfield Grande Arbor / Arch...
- Page 5 Note: To glue the post trims in place: 1. Slide the post trim down. 2. Apply a generous amount of vinyl glue around the post. 3. Slide the post trim back up to desired location and allow a few minutes to cure. Fairfield Grande Arbor / Arch...
- Page 6 • is intended to be used as a stand alone garden accent or pathway • is located on level ground Consider Using: 4” EZ Mount Post (Kit of 4) • Purchase from Vita, www.wearevita.com • Instructions are included with the kit Into Earth with Concrete Footing (Option One) (Measurements shown are approximate Arch must be well secured to prevent tipping over from wind load, etc.
Need help?
Do you have a question about the Fairfield Grande and is the answer not in the manual?
Questions and answers