Advertisement
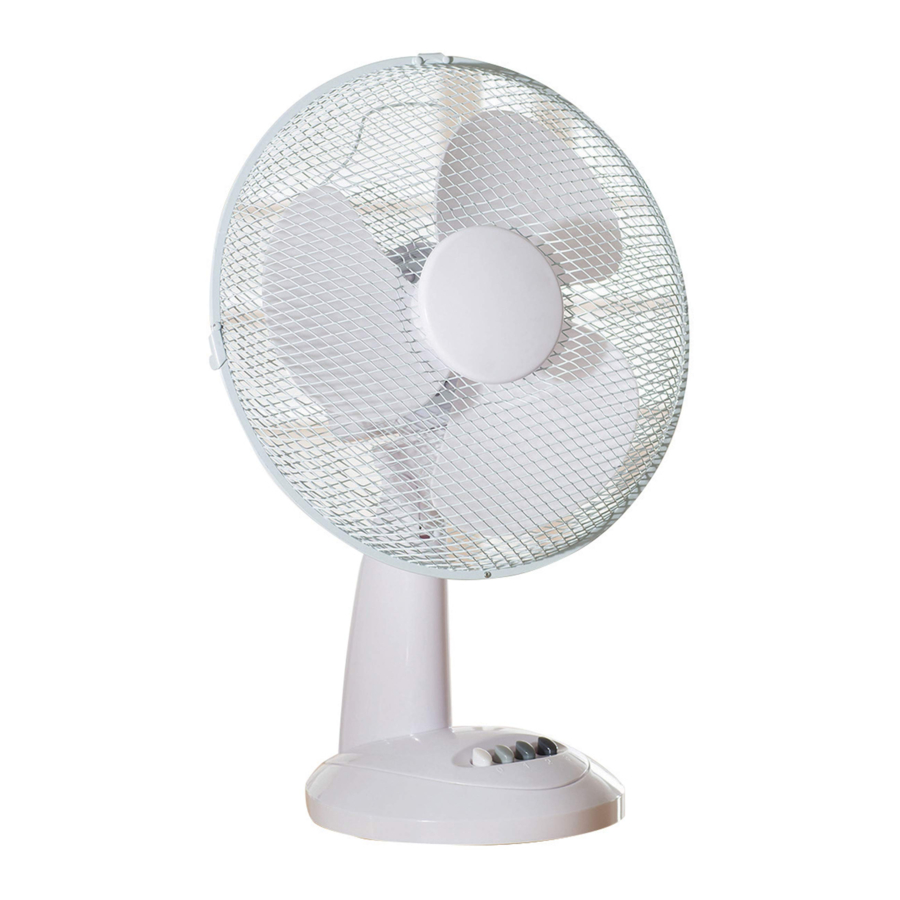
Description of parts

- Front Guard
- Guard Nut and Screw
- Fan Blade
- Rear Guard Fixing Nut
- Rear Guard
- Motor Housing
- Oscillating Control
- Power cord
- Speed Control Switches
- Motor Spindle
- Blade Retaining Nut
- Base Surround
- Base Fastening Screws
- Carry Handle
- Guard Fastening Clips
Assembly
- First attach the Base Surround (12) to the base of the fan using the four pozidrive screws supplied (13) Take care not to overtighten the screws.

- Next place the fan on its base and remove the Rear Guard Fixing nut (4) from the Motor Housing (6) by unscrewing anticlockwise (arrow).

- Note the two Rear Guard locating pins on the Motor Housing Rear guard shown.

- Place the Rear Guard (5) over the two pins on the Motor Housing (6) and replace the Rear Guard Fixing nut (4) and screw it back on clockwise.
![]()
NB ensure that the guard is fitted such that the Carry Handle (14) is at the top. - Take the Fan Blade (3); slide it onto the Motor Spindle (10), after first removing the plastic spindle cover. Ensure that the notch on the rear of the fan blade fits over the splines on the spindle (arrow).

NB Rear Guard removed for clarity - Secure the fan blade to the motor spindle by screwing on the Blade Retaining Nut (11) in an anticlockwise direction.
![]()
NB the retaining nut is reverse threaded. - Remove the small Guard Nut & Screw from the Front Guard.
![]()
- Move the Clips (15) at the edge of the front guard outwards.

- Hang the front guard (1) by its hook over the top of the rear guard (5).

- Bring the front guard down to meet the rear guard and push the clips inwards until the front guard is fastened to the rear guard.

- Finally fit the Guard Nut and Screw (2 - arrow) through the holes in the bottom edge of the guard and tighten with a suitable pozidrive screwdriver (not supplied).

NB this screw and nut must be fitted so that the guard cannot be removed accidentally.


Operating your desk fan
Place the fan in the desired position ensuring that it is stable.
If desired, the fan guard can be tilted up and down to alter the direction of the airflow. NB do not adjust the fan whilst connected to the mains and/or switched on.
Press the '0' button on the base to ensure the fan is off.
Insert the mains plug into the nearest socket.
Press the 1 button for the low speed.
Press the 2 button for the medium speed Press the 3 button for the high speed
NB Press the '0' button to switch the fan off.
Making your fan oscillate from side to side
Press the oscillation control (7) down to enable the fan to oscillate from side to side.
Pull the control up to stop the fan oscillating.
Care and Use of your Fan
- Ensure that the fan is not connected to the mains supply before cleaning.
- Wipe the fan body clean with a clean, soft damp cloth.
- Do not immerse the fan or its cord in water or any other liquid.
Technical Data
Voltage: 220-240V AC 50Hz
Rated power: 35W
Model Number: COL1063
Protection Class: Class II
Electrical Connections
This appliance is fitted with a fused three-pin plug to BS 1363. If the plug has to be removed, it should be cut off and carefully disposed of immediately. To avoid a possible shock hazard, do not insert the discarded plug into a mains socket.
Fitting a new plug
If for any reason you need to fit a new plug, the flexible mains lead must be connected as shown below. The wires in the mains lead fitted to this appliance are coloured in accordance with the following code:

- The Blue wire must be connected to the terminal marked N or coloured Black.
- The Brown wire must be connected to the terminal marked L or coloured Red.
- Check that there are no cut or stray strands of wire inside the plug.
- Use a 3 Amp BS 1362 fuse, only use BSI or ASTA approved fuses.
- If you are in any way unsure which plug or fuse to use, always refer to a qualified electrician.
- After replacing or changing a fuse on a moulded plug, the cover must be refitted to the plug; the appliance must not be used without a fuse cover.
IMPORTANT SAFEGUARDS
When using electrical appliances, basic safety precautions should always be followed. These instructions should be saved for future reference:
- Read and familiarise yourself with all operating instructions before using this Desk Fan.
- Before plugging your unit into the mains, visually check that the unit is intact and has not suffered any transit damage.
- Do not use this product with a programmer, timer, separate remote-control system or any other device.
- Check that the voltage indicated on the data plate corresponds with that of the local network before connecting the appliance to the mains power supply.
- This appliance can be used by children aged from 8 years and above and persons with reduced physical, sensory or mental capabilities or lack of experience and knowledge if they have been given supervision or instruction concerning use of the appliance in a safe way and understand the hazards involved. Children shall not play with the appliance. Cleaning and user maintenance shall not be made by children without supervision.
- Close supervision is required when using this appliance near children.
- Never leave this appliance within reach of children.
- Children of less than 3 years should be kept away unless continuously supervised.
- Do not immerse the appliance or its cord in water or any other liquids.
- Do not leave the appliance unattended during use.
- Do not leave the appliance unattended whilst connected to the mains supply.
- Always use this appliance on a solid, level, surface.
- Do not use this appliance outdoors.
- It is imperative to unplug the power cord after the appliance has been used, before it is cleaned and whilst being repaired.
- Repairs to electrical appliances should only be performed by a qualified electrician. Improper repairs may place user at serious risk.
- Do not allow the mains cable to hang over sharp edges or come in contact with hot surfaces.
- Do not operate this appliance with a damaged plug or cord, after a malfunction or after being dropped or damaged in any way.
- Regular, periodic checks should be carried out on the mains cable to ensure no damage is evident. Should there be any signs of damage the appliance should not be used.
- If the power cable is damaged, it should only be replaced by the manufacturer or a suitable qualified after-sales-service in order to avoid a hazard.
- Do not run the mains cable under carpets, rugs, etc.
- This appliance is intended for household use only and should not be used for industrial purposes.
- Do not use any accessories or attachments with this appliance other than those supplied or recommended by the supplier.
- Do not use this appliance for anything other than its intended use.
- Do not push objects (including fingers) into the fan grill or any openings as this could risk injury, damage to the appliance and/or electric shock.
- Unplug after each use. Grasp the plug, not the cord.

Documents / Resources
References

Download manual
Here you can download full pdf version of manual, it may contain additional safety instructions, warranty information, FCC rules, etc.
Advertisement


Need help?
Do you have a question about the COL1063 and is the answer not in the manual?
Questions and answers