
Related Manuals for Daewoo COL1063


Summary of Contents for Daewoo COL1063
-
Page 2: Important Safeguards
IMPORTANT SAFEGUARDS When using electrical appliances, basic safety precautions should always be followed. These instructions should be saved for future reference: • Read and familiarise yourself with all operating instructions before using this Desk Fan. • Before plugging your unit into the mains, visually check that the unit is intact and has not suffered any transit damage. - Page 3 • Do not operate this appliance with a damaged plug or cord, after a malfunction or after being dropped or damaged in any way. • Regular, periodic checks should be carried out on the mains cable to ensure no damage is evident. Should there be any signs of damage the appliance should not be used.
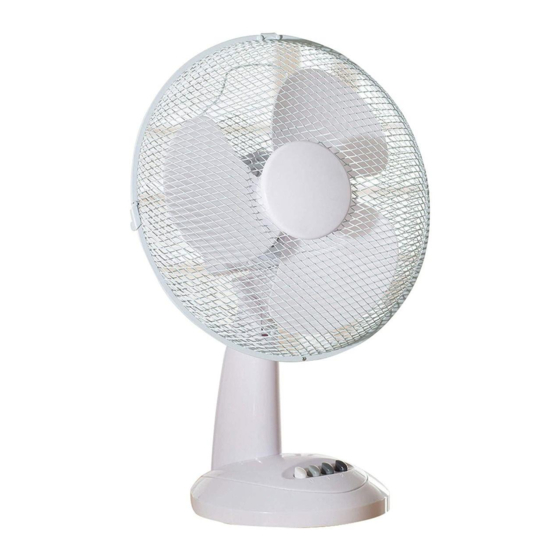
- Page 4 Assembly 1: First attach the Base Surround (12) to the base of the fan using the four pozidrive screws sup- plied (13) Take care not to over- tighten the screws. 2: Next place the fan on its base and remove the Rear Guard Fixing nut (4) from the Motor Housing (6) by un- screwing anticlockwise (arrowed).
- Page 5 4: Place the Rear Guard (5) over the two pins on the Motor Housing (6) and replace the Rear Guard Fixing nut (4) and screw it back on clock- wise. NB ensure that the guard is fitted such that the Carry Handle (14) is at the top.
- Page 6 8: Move the Clips (15) at the edge of the front guard outwards. 9: Hang the front guard (1) by its hook over the top of the rear guard (5). 10: Bring the front guard down to meet the rear guard and push the clips inwards until the front guard is fastened to the rear guard.
-
Page 7: Electrical Connections
Technical Data Voltage 220-240V AC 50Hz Rated power Model Number COL1063 Protection Class Class II Electrical Connections This appliance is fitted with a fused three-pin plug to BS 1363. If the plug has to be removed, it should be cut off and carefully disposed of immedi- ately. - Page 8 Fitting a new plug If for any reason you need to fit a new plug, the flexible mains lead must be connected as shown below. The wires in the mains lead fitted to this appliance are coloured in accordance with the following code: Connect Brown to Live (L) Connect Blue to...
Need help?
Do you have a question about the COL1063 and is the answer not in the manual?
Questions and answers