
Related Manuals for Munters MH270


Summary of Contents for Munters MH270
- Page 1 Original instructions User´s manual MH270 Desiccant dehumidifier Applies to all units manufactured from week 50, 2009 190TGB-1012-A1006 © Munters Europe AB 2010...
-
Page 2: Warranty And Obligations
Important user information Intended use of equipment Safety Munters dehumidifiers are intended to be used for the In this publication hazardous activities are indicated and dehumidification of air. All other uses of the equipment, preceded by the common hazard symbol. -
Page 3: Table Of Contents
Contents Connecting the humidistat ... . Important user information ....Intended use of equipment ... 3.9.1 General . -
Page 4: Introduction
1 ~ 230V 50 Hz 1,8 kW 0,19 kW 1,99 kW IP44 Made in Sweden Munters Europe AB Isafjordsgatan 1 164 26 Kista, Sweden Figure 1.1 Identification label position (A) Figure 1.2 Identification label 1.4 Scrapping The dehumidifier must be handed in for scrapping in accordance with valid regulations. Contact the local authorities. -
Page 5: Product Design Information
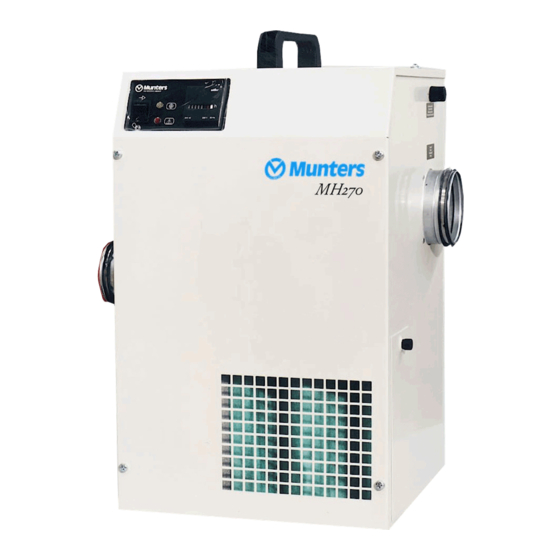
Product design information 2.1 Product description The MH270 desiccant dehumidifier is designed to efficiently dehumidify air. It is designed for extended periods of operation and has a common fan for both process and reactivation airflows (i.e. a three hole unit). -
Page 6: Dimensions And Service Space
2.3 Dimensions and service space Scaled and dimensioned AutoCAD drawings are available in Munters’ DryCAD program (can be ordered at your nearest Munters office). Figure 2.2 Dimensions 1. Process/Reactivation Air Inlet 3. Wet Air Outlet 5. Service Access 2. Dry Air Outlet 4. -
Page 7: Installation
3.1 General The MH270 is intended for indoor installation. The unit shall be placed in an upright position on a level surface. If the unit is stored prior to installation, place it in a roofed area, on a level surface where it is protected from impact, dust, frost, rain or aggressive contaminants. -
Page 8: Packaging And Delivery Inspection
Contact Munters immediately if delivery is not complete in order to avoid installation delays. Any visible damage must be reported in writing to Munters within five days and prior to unit installation. If the unit is to be put into storage prior to installation, see section 3.5, Storing the equipment . -
Page 9: Duct/Hose Connections
3.7 Duct/hose connections 3.7.1 General NOTE! Noice reduction can be achieved by connecting ducts to the dehumidifier. Follow the instructions below when attaching ducts or flexible hoses to the unit's air connections. Duct length should be kept as short as possible to minimise static pressure loss. ■... - Page 10 Connections for rated airflow The wet air restrictor plate (supplied with the dehumidifier) must be fitted over the wet air outlet (as shown in Figure 3.1 ) when: The unit is operating in the freeblowing mode. ■ A dry air duct is connected to the unit (length <15 m) and the wet air outlet is freeblowing. ■...
-
Page 11: Installation Examples
3.7.2 Installation examples Closed airflow system The closed airflow system is mainly used where the room to be dehumidified contains little or no ventilation, and is partially sealed. A. Room/space to be dehumidified The wet air restrictor plate must be fitted over the wet air outlet when a wet air duct is connected to the unit (length <10 m) and the dry air outlet is freeblowing. -
Page 12: Electrical Connections
3.8 Electrical connections 3.8.1 General Included with delivery is a 2.5 m long power cable with a plug for connection to an earthed outlet. The voltage and frequency are specified on the unit’s identification plate. 3.8.2 Safety WARNING! The unit must be connected to an earthed electrical outlet. WARNING! The unit must not be connected to other mains than specified on the unit’s identification plate 3.9 Connecting the humidistat... -
Page 13: Humidistat Connection Kit
3.9.2 Humidistat connection kit Follow the instructions below to assemble and connect the humidistat connection kit. 1. Connect the leads to pins 1 and 2, and the screen to the earth pin. Figure 3.5 Connection of leads A. Lead connections B. -
Page 14: Airflow Set-Up Data
3.10 Airflow set-up data Where ducts exceed the maximum lengths specified in the following table, the dry and wet air dampers must be used to balance the proportion of wet air to dry air. The correct balance is essential to maintain the operating efficiency of the unit. - Page 15 NOTE! Adjustments of the wet air damper will have an impact on the dry airflow. Measure once again the value for “A” and “B” respectively and make required adjustments until the wet air is in balance with the required dry airflow.
-
Page 16: Operation
3.11 Operation WARNING! The mains cable must be extended to it’s full length before switching on the dehumidifier. The unit must not be operated with the mains cable still wrapped around the cable stowage. 3.11.1 Starting up Before starting the dehumidifier for the first time, carry-out the following checks: 1. -
Page 17: Options
NOTE! Depending on the position of the link on the control PCB, the fan may contue to run when the reactivation heater has been switched off. For details see section 3.15, Continuous Fan Operation. 4. Slowly decrease the humidistat set-point and check that the dehumidifiers switches on (heater indicator and fan on) when the set-point value is below the RH in the room where the humidistat is installed. -
Page 18: Continuous Fan Operation
3.15 Continuous Fan Operation A link on the control PCB (see see figure Figure 3.10 ) can be pre-selected to control the fan as follows: Link Position Description Process and reactivation fans are running all the time that the unit is switched on. This facility is useful for maintaining air circulation during periods of low demand or if a pressurised environment is desired to prevent uncontrolled infiltration of humid air. -
Page 19: Maintenance
Maintenance interval lengths are primarily determined by operating conditions and the environment in which the unit is installed. When in doubt, consult Munters’ product service department. See addresses for Munters representatives on the back cover of this manual. -
Page 20: Maintenance Schedule
4.3 Maintenance schedule The following maintenance schedule is recommended by Munters and covers procedures for inspection and maintenance as well as suggested time intervals for a unit that operates under normal operational and environmental conditions. If the process air has a high dust content, preventative scheduled maintenance should be performed at shorter intervals than what is specified below. -
Page 21: Fault Tracing
Fault tracing 5.1 General This chapter is intended to facilitate basic fault tracing and provide instructions on actions to remedy problems. 5.2 Safety WARNING! Always unplug the dehumidifier before any maintenance or repair work is carried out. In case of a fixed installation where the plug is being replaced by a circuit breaker, the power must be switched off and the circuit breaker locked. -
Page 22: Fault Tracing List
5.3 Fault tracing list Go through the following fault tracing list below before contacting Munters’ product service department. The list provides help in identifying types of faults that are easy to remedy without the assistance of specially trained personnel Fault symptom... -
Page 23: Resetting High Temperature Cut-Out
5.4 Resetting High Temperature Cut-Out To reset the high temperature cut-out, remove (unscrew) the black cover and press in the reset button. Figure 5.1 High temperature cut-out Fault tracing 190TGB-1012-A1006... -
Page 24: Capacity Diagrams
Capacity diagrams Approximate capacity in kg/h. For detailed information, please contact your nearest Munters office or refer to Munters’ DryCap program. Figure 6.1 Capacity diagram - rated airflow 1. Process air temperature (ºC) 2. Process air relative humidity (%RH) 3. Dehumidification capacity (kg/h) (moisture removal kg/hour) -
Page 25: Fan Diagrams
Fan diagrams Figure 7.1 Fan performance guidelines A. Wet airflow B. Dry airflow Δρ. Differential pressure (Pa) q. Airflow (M Fan diagrams 190TGB-1012-A1006... -
Page 26: Sound Data
Sound data See Figure 3.2 for closed airflow system example. Correction of K at ISO-band No./Center Frequency (Hz) Noise *dB(A) Path 1/64 2/125 3/250 4/500 5/1000 6/2000 7/4000 8/8000 71-24 -21,5 Table 8.1 Sound data (115/230V, 50 Hz) Figure 8.1 Noise Path Symbols Noise Path : Total Noise level dB (Rel. -
Page 27: Technical Specification
Technical specification Technical data Model: MH270 Process air Rated airflow (m³/h) Reduced airflow with ducting (m³/h) Minimum available static pressure (Pa) Fan motor power (kW) 0,186 Reactivation air Reduced airflow with ducting (m³/h) Minimum available static pressure (Pa) Fan motor power (kW) - Page 28 E-mail: avfuktning@munters.se E-mail: franz.pitzl@munters.at E-mail: marketing@munters.it Web: http://www.munters.se Web: http://www.munters.at Web: http://www.munters.it BELGIUM FINLAND NETHERLANDS SWITZERLAND Munters - Sales Dehumidification Systems Munters Oy Munters Vochtbeheersing Munters GmbH Lyhtytie 22 Energieweg 69 Luftentfeuchtung Dehumidification Ingberthoeveweg 3E P O Box 36, FIN-00741...
Need help?
Do you have a question about the MH270 and is the answer not in the manual?
Questions and answers