LG HM121HF UB60 Installation Manual
Air-to-water heat pump
Hide thumbs
Also See for HM121HF UB60:
- Owner's manual (65 pages) ,
- Installation manual (187 pages) ,
- Data book (57 pages)
Table of Contents
Advertisement
INSTALLATION MANUAL
AIR-TO-WATER
HEAT PUMP
Please read this installation manual completely before
installing the product.
Original instruction
EN ENGLISH
DE DEUTSCH
PL POLSKI
BG БЪЛГАРСКИ
DA DANSK
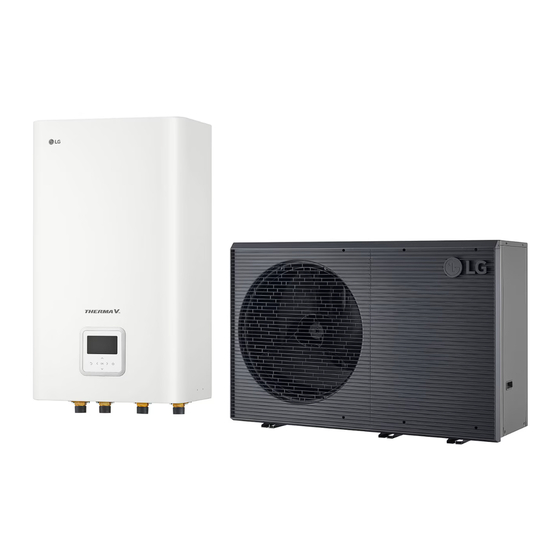
Outdoor Unit
HM121 / 141 / 161HF UB60
HM123 / 143 / 163HF UB60
HM093HFX UB60
MFL68681839
Rev.00_011524
IT
ITALIANO
EL
ΕΛΛΗΝΙΚΑ
RO ROMÂNĂ
SR SRPSKI
Indoor Unit
HN1616HC NK0
HN1639HC NK0
Copyright © 2023 - 2024 LG Electronics Inc. All Rights Reserved.
ES
ESPAÑOL
CZ ČEŠTINA
PT PORTUGUÊS
HR HRVATSKI
FR FRANÇAIS
NL NEDERLANDS
HU MAGYAR
SL
SLOVENŠČINA
www.lg.com
Advertisement
Table of Contents

Related Manuals for LG HM121HF UB60


Summary of Contents for LG HM121HF UB60
- Page 1 HR HRVATSKI SLOVENŠČINA DA DANSK Outdoor Unit Indoor Unit HM121 / 141 / 161HF UB60 HN1616HC NK0 HM123 / 143 / 163HF UB60 HN1639HC NK0 HM093HFX UB60 www.lg.com MFL68681839 Rev.00_011524 Copyright © 2023 - 2024 LG Electronics Inc. All Rights Reserved.
-
Page 2: Table Of Contents
TABLE OF CONTENTS TABLE OF CONTENTS SAFETY INSTRUCTIONS............5 READ ALL INSTRUCTIONS BEFORE USE ...........5 Safety Messages ..................5 Notes for Flammable Refrigerant..............6 DELIVERED PARTS ..............20 GENERAL INFORMATION ............22 Model information ..................22 Parts and Dimensions .................23 Control Parts ....................27 Control Panel....................29 Typical Installation Example ................30 Cycle Diagram.....................31 Wiring Diagram ...................32 Conditions to be considered when installing the outdoor unit....36... - Page 3 TABLE OF CONTENTS Meter Interface ...................80 Central Controller ..................81 DHW Tank....................82 DHW Tank Kit .....................85 Solar Thermal Kit..................87 Dry Contact ....................89 External Controller - Setting up programmable digital input operation ..91 Remote Temperature Sensor ..............92 Solar pump....................94 External pump.....................95 Wi-Fi Modem ....................96 Energy State ....................97 Digital Input for energy saving (ESS, Smart Grid)........98 2Way Valve ....................99...
- Page 4 TABLE OF CONTENTS COMMISSIONING..............164 Check List before Starting Operation............164 Starting Operation..................166 Starting Operation flow chart ..............166 Trouble shooting ..................167 ANNEX..................174...
-
Page 5: Safety Instructions
SAFETY INSTRUCTIONS SAFETY INSTRUCTIONS READ ALL INSTRUCTIONS BEFORE USE The following safety guidelines are intended to prevent unforeseen risks or damage from unsafe or incorrect operation of the appliance. Safety Messages This symbol is displayed to indicate matters and operations that can cause risk. -
Page 6: Notes For Flammable Refrigerant
SAFETY INSTRUCTIONS Notes for Flammable Refrigerant The following symbols are displayed on units. This symbol indicates that this appliance uses a flammable refrigerant. If the refrigerant is leaked and exposed to an external ignition source, there is a risk of fire. This symbol indicates that the Installation Manual should be read carefully. - Page 7 SAFETY INSTRUCTIONS • Use the correctly rated breaker or fuse. - There is risk of fire or electric. • Do not modify or extend the power cable. - There is risk of fire or electric shock. • Do not install, remove, change, inspection and maintenance, repair or reinstall the unit by yourself (customer).
- Page 8 SAFETY INSTRUCTIONS • Copper in contact with refrigerants shall be oxygen-free or deoxidized, for example Cu-DHP as specified in EN 12735-1 and EN 12735-2. • Compliance with national gas regulations shall be observed. • Refrigerant tubing shall be protected or enclosed to avoid damage.
- Page 9 SAFETY INSTRUCTIONS • Make sure to install necessary safety devices. • Do not let refrigerant enter the sewage system. • Pipe-work shall be protected from physical damage. • Mechanical connections (mechanical connectors or flared joints) shall be accessible for maintenance purposes. •...
- Page 10 SAFETY INSTRUCTIONS • When flammable gas leaks, turn off the gas and open a window for ventilation before turning the unit on. - There is risk of explosion or fire. • If strange sounds, or smell or smoke comes from unit, turn the breaker off or disconnect the power supply cable.
- Page 11 SAFETY INSTRUCTIONS • Be careful that some part of the control box are hot. - There is risk of physical injury or burns. • When the unit is soaked (flooded or submerged), contact an Authorized Service Center. - There is risk of fire or electric shock. •...
- Page 12 SAFETY INSTRUCTIONS • Store away from oxidizing gases and other oxidizing materials. • The outdoor unit shall be stored in a space(especially safety zone) without continuously operating open flames (for example an operating gas appliance) and ignition sources (for example an operating electric heater).
- Page 13 SAFETY INSTRUCTIONS Leak detection methods The following leak detection methods are deemed acceptable for systems containing flammable refrigerants. Electronic leak detectors shall be used to detect flammable refrigerants, but the sensitivity may not be adequate, or may need re-calibration. (Detection equipment shall be calibrated in a refrigerant-free area.) Ensure that the detector is not a potential source of ignition and is suitable for the refrigerant used.
- Page 14 SAFETY INSTRUCTIONS Removal and evacuation When breaking into the refrigerant circuit to make repairs – or for any other purpose – conventional procedures shall be used. However, for flammable refrigerants it is important that best practice is followed since flammability is a consideration. The following procedure shall be adhered to: Remove refrigerant;...
- Page 15 SAFETY INSTRUCTIONS Charging procedures In addition to conventional charging procedures, the following requirements shall be followed. - Ensure that contamination of different refrigerants does not occur when using charging equipment. Hoses or lines shall be as short as possible to minimise the amount of refrigerant contained in them.
- Page 16 SAFETY INSTRUCTIONS Cylinders shall be complete with pressure relief valve and associated shut-off valves in good working order. Empty recovery cylinders are evacuated and, if possible, cooled before recovery occurs. The recovery equipment shall be in good working order with a set of instructions concerning the equipment that is at hand and shall be suitable for the recovery of flammable refrigerants.
- Page 17 SAFETY INSTRUCTIONS CAUTION Installation • Keep level even when installing the unit. - To avoid vibration or water leakage. • Use two or more people to lift and transport the unit. - Avoid personal injury. • Do not install the unit in potentially explosive atmospheres. •...
- Page 18 SAFETY INSTRUCTIONS Safety when installing the product • Any air vent located inside occupied space must be closed after air was released. Automatic air vents must be closed with a cap. If leaked refrigerant enters the water cycle, the gas shall not be automatically released into the occupied space.
- Page 19 SAFETY INSTRUCTIONS • Do not step on or put anything on the unit. - There is risk of personal injury and failure of unit. • Use a firm stool or ladder when cleaning or maintaining the unit. - Be careful and avoid personal injury. •...
-
Page 20: Delivered Parts
DELIVERED PARTS DELIVERED PARTS Before starting installation, please make it sure that all parts are found inside the product box. INDOOR UNIT BOX Item Image Quantity Item Image Quantity Installation Manual Indoor unit (1Sheet) Owner's / Installation manual Installation Sheet (Simple) OUTDOOR UNIT BOX Item... - Page 21 DELIVERED PARTS INSTALLATION TOOLS Figure Name Figure Name Screw driver Ohmmeter Electric drill Ammeter Leak detector Measuring tape, Knife (Suitable for R290) Thermometer, Hole core drill Horizontal meter Spanner Pliers Torque wrench Fire extinguisher...
-
Page 22: General Information
GENERAL INFORMATION Model information Additional information about all possible combinations including Energy labels and ErP datasheets can be found on following website: https://www.lg.com/global/support/cedoc/cedoc NOTE Search for outdoor unit's model name on that website. Operating condition - Maximum operating temperature of water : 75 °C - Minimum operating temperature of water : 15 °C... -
Page 23: Parts And Dimensions
GENERAL INFORMATION Parts and Dimensions Indoor unit : External (Unit : mm) * The feature may be vary according to the type of model. Description Name Remark Control Panel Built-in Remote Controller... - Page 24 GENERAL INFORMATION Indoor unit : Internal (Unit : mm) 301.2 84.5 81.2 Description Name Remark Leaving Water Pipe Male PT 1 inch Entering Water Pipe Male PT 1 inch Control Box PCB and terminal blocks Expansion Tank Absorbing Volume change of heated water Air Vent Air Pumping when Charging water Backup heater...
- Page 25 GENERAL INFORMATION Outdoor unit : External (Unit : mm) 6-holes for anchor bolts (M10) 231.3 717.4 231.3 1561 Description Name Entering Water Pipe (Male PT 1 inch) Leaving Water Pipe (Male PT 1 inch) Air discharge Grille Cable Conduit (Power) Cable conduit (Communication)
- Page 26 GENERAL INFORMATION Outdoor unit : Internal (Unit : mm) Description Name Remark Compressor Increase pressure of the refrigerant. Fin tube Heat Exchanger Heat exchange between refrigerant and air. Circulating the air. Control Box PCB and terminal blocks.
-
Page 27: Control Parts
GENERAL INFORMATION Control Parts Control Box : Indoor Unit 1Ø Electric Heater Model Description Name Remark Terminal blocks The terminal blocks allow easy connection of field wiring Unit Earth-leakage The ELB protects the unit against overload or short circuit breaker Heater PCB(Printed Circuit Board) controls the functioning of Heater PCB the backup heater... - Page 28 GENERAL INFORMATION 3Ø Electric Heater Model Description Name Remark Terminal blocks The terminal blocks allow easy connection of field wiring Unit Earth-leakage The ELB protects the unit against overload or short circuit breaker Magnet switch Magnet switch controls the functioning of the backup heater The main PCB(Printed Circuit Board) controls the functioning Main PCB of the unit and the connected accessories...
-
Page 29: Control Panel
GENERAL INFORMATION Control Panel Operation display window Back button On/Off Button OK Button Up/Down/Left/Right Button Operation display window - Operation and Settings status display - Home screen: Show 'Monitoring screen' Back button - Other cases: Move to previous stage - Navigate within menu and setting options Up/down/left/right button - Change values - Enter menu... -
Page 30: Typical Installation Example
Magnetic Contactor Thermostat Pressure Reducing Drain Drain Pan Cover Plate Valve ※ For more installation scenes, visit http://partner.lge.com/ or contact your local LG office. Select Region → Doc. Library → (Product) Heating → Application Guide → Referenced Drawing for Application... -
Page 31: Cycle Diagram
GENERAL INFORMATION Cycle Diagram : Heating inlet : Cooling <Water Side> : Heating outlet <Refrigerant Side> : Heating <Outdoor Unit> <Indoor Unit> 4 Way V/V Air Vent Pressure Sensor Pressure Switch Check V/V Expansion Vessel Heat Sink Pressure Sensor EEV1 EEV2 Comp Shut off... -
Page 32: Wiring Diagram
GENERAL INFORMATION Wiring Diagram Indoor Unit : 1 Phase(Ø) - Page 33 GENERAL INFORMATION Indoor Unit : 3 Phase(Ø)
- Page 34 GENERAL INFORMATION Outdoor Unit : 1 Phase(Ø)
- Page 35 GENERAL INFORMATION Outdoor Unit : 3 Phase(Ø)
-
Page 36: Conditions To Be Considered When Installing The Outdoor Unit
INSTALLATION OF OUTDOOR UNIT INSTALLATION OF OUTDOOR UNIT The outdoor unit is installed outside to exchange heat with ambient air. Therefore, it is important to secure proper space around the outdoor unit and care for specific external conditions. This chapter presents a guide to install the outdoor unit, make a route to connect with the indoor, and what to do when installed around seaside. -
Page 37: Safety Zone
INSTALLATION OF OUTDOOR UNIT Safety Zone Since the outdoor unit contains flammable refrigerant, a separate safety zone must be defined near the outdoor unit. CAUTION Be very careful for Safety Zone • There must be no building openings. (windows, doors, roof windows, etc.) •... - Page 38 INSTALLATION OF OUTDOOR UNIT Ground installation in a corner with wall at the left side (Unit : mm) 1 000 1 800 Ground installation in a corner with wall at the right side (Unit : mm) 1 000 1 800...
-
Page 39: Installation At Seaside
INSTALLATION OF OUTDOOR UNIT Installation at Seaside CAUTION • Unit should not be installed in areas where corrosive gases, such as acid or alkaline gas, are produced. • Do not install the product where it could be exposed to sea wind (salty wind) directly. It can result corrosion on the product. -
Page 40: Seasonal Wind And Cautions In Winter
INSTALLATION OF OUTDOOR UNIT Seasonal wind and cautions in winter - Sufficient measures are required in a snow area or severe cold area in winter so that product can be operated well. - Get ready for seasonal wind or snow in winter even in other areas. - Install a suction and discharge duct not to let in snow or rain. -
Page 41: Transporting The Unit
INSTALLATION OF OUTDOOR UNIT Transporting the Unit - When carrying the suspended unit, pass the ropes between legs of base panel under the unit. - Always lift the unit with ropes attached at four points so that impact is not applied to the unit. - Attach the ropes to the unit at an angle Ⓐ... - Page 42 INSTALLATION OF OUTDOOR UNIT CAUTION Be very careful while carrying the product. • Do not have only one person carry product if it is more than 20 kg. • PP bands are used to pack some products. Do not use them as a mean for transportation because they are dangerous.
-
Page 43: Foundation For Installation
INSTALLATION OF OUTDOOR UNIT Foundation for Installation - Check the strength and level of the installation ground so that the unit will not cause any operating vibration or noise after installation. - Fix the unit securely by means of the foundation bolts. -
Page 44: Installation Of Indoor Unit
INSTALLATION OF INDOOR UNIT INSTALLATION OF INDOOR UNIT The indoor unit should be installed in a room that allows easy access to outdoor unit and heating system both. In this chapter conditions for installation place is described. In addition, considerations when installing accessories or 3rd party accessories are described, too. - Page 45 INSTALLATION OF INDOOR UNIT Mounting to Wall Step 1. Disconnect the remote control case from the front panel and disconnect the remote control cable. CAUTION After installation is completed, return the remote control to its original state. NOTE Use a flat-blade screwdriver or a coin to remove the remote control case. Step 2.
- Page 46 INSTALLATION OF INDOOR UNIT Step 4. Detach the Installation sheet. Screw bolts at the hole marks on the wall. When screwing bolts, use M8 ~ M11 anchor bolts to secure hanging the indoor unit. NOTE Self drilling screw can be used as alternatives of M8 ~ M11 anchor bolts. But M8 ~ M11 anchor bolts are more preferred.
-
Page 47: Electrical Wiring
ELECTRICAL WIRING ELECTRICAL WIRING General considerations and warnings - Follow ordinance of your governmental organization for technical standard related to electrical equipment, wiring regulations and guidance of each electric power company. WARNING • Be sure to have authorized electrical engineers do the electric work using special circuits in accordance with regulations and this installation manual. - Page 48 ELECTRICAL WIRING General Consideration Followings are should be considered before beginning indoor unit wiring. - Field-supplied electrical components such as power switches, circuit breakers, wires, terminal boxes, etc should be properly chosen with compliance with national electrical legislation or regulation. - Make it sure that supplied electricity is enough to operate the product including outdoor unit, electric heater, water tank heater, etc.
- Page 49 ELECTRICAL WIRING Point for attention regarding quality of the public electric power supply - European/International Technical Standard setting the limits for voltage changes, voltage fluctuations and flicker in public low-voltage supply systems for equipment with rated current ≤ 75 A. - European/International Technical Standard setting the limits for harmonic currents produced by equipment connected to public low-voltage systems with input current ≤16 A of >...
- Page 50 ELECTRICAL WIRING Precautions when laying power wiring Use round pressure terminals for connections to the power terminal block. Power wire Round pressure terminal When none are available, follow the instructions below. - Do not connect wiring of different thicknesses to the power terminal block. (Slack in the power wiring may cause abnormal heat.) - When connecting wiring which is the same thickness, do as shown in the figure below.
- Page 51 ELECTRICAL WIRING Perform the electrical wiring work according to the electrical wiring connection. - All wiring must comply with local requirements. - Select a power source that is capable of supplying the current required by the unit. - Use a recognized ELCB(Electric Leakage Circuit Breaker) between the power source and the unit.
- Page 52 ELECTRICAL WIRING Specification of wires and circuit breakers Model name Max. Circuit Power cable Power supply Cable spec (Buyer) current breaker (incl. Earth) HM163HF 380-415V 50 Hz 16.1 A 16 A 2.5 mm x 5C H07RN-F HM143HF 380-415V 50 Hz 16.1 A 16 A 2.5 mm...
- Page 53 ELECTRICAL WIRING Electrical connections at outdoor unit Step 1. Disassemble Side panel and cover of control box from the outdoor unit 1 Phase(Ø), 3 Phase(Ø) Power Terminal Block Cable Conduit (Communication) Cable Conduit (Power) Step 2. Connect power cable to main Power terminal The earth cable is connected to the Control box case where earth symbol is marked.
- Page 54 ELECTRICAL WIRING 3 Phase(Ø) Communication cable Outdoor Unit Power Cable Conduit (Communication) Cable Conduit (Power) Failure to do these instruction can result in fire, electric shock or death. • Make sure the power cable do not touch to copper tube. •...
- Page 55 ELECTRICAL WIRING Terminal Block Information Symbols used below pictures are as follows : - L, L1, L2 : Live (230 V AC) - N : Neutral (230 V AC) - BR : Brown, WH : White, BL : Blue, BK : Black 3 Phase(Ø) 1 Phase(Ø) Terminal Block 4...
- Page 56 ELECTRICAL WIRING 1 Phase(Ø) Communication cable (28) (29) Main PCB terminal block at outdoor unit IDU B IDU A Power supply indoor unit External power supply (same dedicated power 18 (L) 19 (N) supply for the indoor unit and outdoor unit) Power supply Backup heater and Boost heater (optional) 1(L) 2(N) 3(L) 4(N) External power supply...
- Page 57 ELECTRICAL WIRING 3 Phase(Ø) Communication cable (28) (29) Main PCB terminal block at outdoor unit IDU B IDU A Power supply indoor unit External power supply 18 (L) 19 (N) (same dedicated power supply for the indoor unit and outdoor unit) Power supply Backup heater and Boost heater (optional) 1(R) 2(S) 3(T) 5(L)
-
Page 58: Water Piping
WATER PIPING WATER PIPING Procedures about water piping and electric wiring at the indoor unit are described in this chapter. Water piping and water circuit connection, water charging, pipe insulations will be shown for water piping procedures. For wiring, terminal block connection, connecting with the outdoor unit, electric heater wiring will be introduced. - Page 59 WATER PIPING While connecting water pipes, followings should be considered. - Pipe fittings (e.g. L-shape elbow, T-shape tee, diameter reducer, etc) should be tightened strongly to be free from water leakage. - Connected sections should be leakage-proof treatment by applying teflon tape, rubber bushing, sealant solution, etc.
-
Page 60: How To Install Downward Water Piping
WATER PIPING How to install downward water piping 1. Remove 2 existing rubber pipes Existing rubber pipes 2. Change direction of 2 brass connectors 3. Install the delivered rubber pipes kit Delivered parts WARNING Do not forget to use delivered clamps to fix rubber pipes, Otherwise water leakage may occur. NOTE When the work is completed, move 2 brackets from the base pan to the rear panel and screw them. - Page 61 WATER PIPING Water Charging For water charging, please follow below procedures. Step 1. Open all valves of whole water circuit. Supplied water should be charged not only inside the indoor unit, but also in the under floor water circuit, sanitary water tank circuit, FCU water circuit, and any other water circuits controlled by the product.
-
Page 62: Water Pump Capacity
WATER PIPING Water pump Capacity The water pump is variable type which is capable to change flow rate, so it may be required to change default water pump capacity in case of noise by water flow. In most case, however, it is strongly recommended to set capacity as Maximum. -
Page 63: Performance Curve
WATER PIPING Performance curve GRUNDFOS Water Pump : UPML GEO 20 – 105 CHBL Q-H Chart 100% Q [LPM] OH SUNG Water Pump : ODM-061P Q-H Chart 100% Q [LPM] Performance test based on standard ISO 9906 with pre-pressure 2.0 bar and liquid temperature 20 °C. -
Page 64: Water Quality
WATER PIPING Water Quality Water quality should be complied with EN 98/83 EC Directives. Detailed water quality condition can be found in EN 98/83 EC Directives. CAUTION • If the product is installed at existing hydraulic water loop, it is important to clean hydraulic pipes to remove sludge and scale. -
Page 65: Frost Protection By Antifreeze Valve
WATER PIPING Frost protection by antifreeze valve About antifreeze valve This is a valve to prevent freeze in winter. When no antifreeze is added to the water, you can use antifreeze valves at all lowest points of the field piping to drain the water from the system before it can freeze To install antifreeze valve To protect the field piping against freezing, install the following parts:... - Page 66 WATER PIPING NOTE • Do not make any trap connections. If the shape of the connection pipe has the potential to create a trap effect, part of the pipe will not be able to drain and frost protection will no longer be guaranteed.
-
Page 67: Water Volume And Expansion Vessel Pressure
WATER PIPING Water Volume and Expansion Vessel Pressure Inside expansion vessel is included which is 8 liter capacity with 1 bar pre-pressure. That means, according to the volume-pressure graph, total water volume of 230 liter is supported as default. If total water volume is changed because of installation condition, the pre-pressure should be adjusted to secure proper operation. -
Page 68: Accessories Installation
In this chapter, specifications about supported 3rd party accessories and how to connect to this product is introduced. It is noted that this chapter only deal with 3rd party accessories. For accessories supported by LG Electronics, please refer to installation manual of each accessories. - Page 69 ACCESSORIES INSTALLATION Item Purpose Model Cloud Gateway To use Becon cloud PWFMDB200 To enable remote system Wi-Fi Modem PWFMDD200 operation from smartphone Extension cable To connect with Wi-Fi modem to for Wi-Fi PWYREW000 the USB cable Modem To interlock with 2nd circuit operation and control temperature Thermistor for of mixing circuit or to interlock...
- Page 70 ACCESSORIES INSTALLATION CAUTION • Install the drain pan when cooling. • If not installed, water may form. • Please refer to separate installation manual when installing drain pan. Accessories supported by 3rd party Companies Item Purpose Specification • Solar collector To generate auxiliary heating Solar Heating System •...
-
Page 71: Before Installation
ACCESSORIES INSTALLATION Before Installation WARNING Followings should be kept before installation • Main power must be turned off during installing accessories. • 3rd party accessories should be comply with supported specification. • Proper tools should be chosen for installation. • Never do installation with wet hands. Thermostat Thermostat is generally used to control the product by air temperature. - Page 72 ACCESSORIES INSTALLATION General Information The Heat Pump supports following thermostats. Type Power Operating Mode Supported Heating Only (3) Mechanical 230 V~ Heating / Cooling (4) Heating / Cooling / DHW Heating (5) Heating Only (3) Electrical 230 V~ Heating / Cooling (4) Heating / Cooling / DHW Heating (5) (1) There is no electric circuit inside the thermostat and electric power supply to the thermostat is not required.
- Page 73 ACCESSORIES INSTALLATION How to wire Heating / Cooling / DHW Heating thermostat Follow below procedures Step 1 ~ Step 3. Step 1. Uncover front cover of the unit and open the control box. Step 2. Identify the power specification of the thermostat. If it is 220-240 V~, go to Step 3. Step 3.
- Page 74 ACCESSORIES INSTALLATION Final check DIP switch setting : - Set DIP switch No. 8 to ‘ON’. Otherwise, the unit can not recognize the thermostat. Remote Controller : - ‘Thermostat’ text is displayed on the remote controller. - Only the water temperature setting is available and the other button input is prohibited. - In case of Heating / Cooling / DHW Heating thermostat, select ‘Heat&Cool / DHW' as the Thermostat Control Type in the remote controller installer settings.
-
Page 75: 2Nd Circuit
ACCESSORIES INSTALLATION Circuit The 2 circuit is a function that can separately control the circuit1 requiring high temperature and the circuit 2 requiring medium temperature, you need to prepare a separate Mix Kit. The mix kit must be installed in the circuit 2. [Install Guide Mixing circuit Heating] Circuit 2 Convector... - Page 76 [Circuit 1] Direct Circuit Radiator Radiator NOTE • The location of the external pump may vary depending on the installer settings. • Temperature sensor specification: LG-accessory PRSTAT5K10 at 25 °C : 5 kΩ Minimum operating temperature range : -30 °C~100 °C...
- Page 77 ACCESSORIES INSTALLATION [Thermistor for Mixing circuit] Sensor Sensor Holder Sensor Connector Follow below procedures step 1 ~ step 4. Step 1. Install sensor connector to discharge pipe of mix pump. (Welding must be performed to connect the sensor connector to the pipe) Step 2.
-
Page 78: 3Rd Party Boiler
ACCESSORIES INSTALLATION Party Boiler The product can be used by connecting an Auxiliary boiler. 3rd party boiler can be enabled/disabled by manually via remote controller or automatically itself by means of comparing the outside air temperature and the pre-set temperature. Only Bivalent-alternative operation is possible. -
Page 79: 3Rd Party Controller
Step 4. Connect the 3rd party controller to terminal block 2(21/22) completely. CN_MODBUS TB 2 PARTY CONTROLLER (DC 5 V) PARTY CONTROLLER or METER INTERFACE(LG) Indoor PCB NOTE • If CN_MODBUS port is used to interlink with LG metering module, a 3rd-party controller cannot be connected at the same time. -
Page 80: Meter Interface
ACCESSORIES INSTALLATION Meter Interface This accessory (PENKTH000) can be used to connect 3rd-party wattmeter (max. 3) using pulse input or Modbus and one heatmeter using pulse input. The consumed electric power and/or produced thermal energy is displayed on the remote controller. -
Page 81: Central Controller
Step 3. Access and Device Registration Log in to central controller and register device with address set. Consult a qualified engineer/ technician for the installation of central controller. If you have any installation queries, contact the LG service center or LG Electronics. -
Page 82: Dhw Tank
※ For detailed connection refer to manufacturer's manual of the DHW tank. WARNING The schematic does not include all necessary safety devices. For details refer to Hydronic schemes provides by local LG office. General Information supports following 3way valve. Type... - Page 83 PUMP Cold water Space heating ※ Water In / Water Out installation scene may vary depending on the model. WARNING The schematic does not include all necessary safety devices. For details refer to Hydronic schemes provides by local LG office.
- Page 84 ACCESSORIES INSTALLATION How to wire recirculation pump Follow below procedures step 1 ~ step 4. Step 1. Check if the power of the unit is turned off. Step 2. Disassemble front panels and distinguish control box(Indoor) of the unit. Step 3. Check if the harness(Violet) is inserted fully to the indoor unit PCB (CN_PUMP_A15). Step 4.
-
Page 85: Dhw Tank Kit
ACCESSORIES INSTALLATION DHW Tank Kit This accessory (PHLTA/PHLTC) is used to connect a DHW boost heater. The kit consists of earth- leakage breaker, circuit breaker and internal wires. It also includes the DHW thermistor. How to install DHW tank kit [Parts of DHW Tank Kit] PHLTA / PHLTC Sensor... - Page 86 ACCESSORIES INSTALLATION How to wire DHW boost heater If LG tank [OSHW-x00F(D)] is used, a Boost heater is included in the tank. Step 1. Open the cover at side of tank. Step 2. Find terminal block and connect wires as below. Wires are field-supplied item.
-
Page 87: Solar Thermal Kit
This product can be used by connecting the solar thermal kit in the field. It can be utilized hot water heated by solar thermal system. End-user must be install solar thermal kit accessory(PHLLA) provided by LG. How to Install Solar Thermal Kit... - Page 88 ACCESSORIES INSTALLATION PT1000 (3rd-party) SOLAR TEMP. SOLAR THERMAL COLLECTOR SENSOR SOLAR PUMP DHW TANK WATER THERMOSTATIC TB_SENSOR_SOLAR MIXING VALVE DHW TANK (MANDATORY) SENSOR (A) TB1 5 / 6 THERMA CN_TH4 TB1 12 / 13 / 14 DHW TANK CITY WATER BOTTOM SUPPLY SENSOR (B)
-
Page 89: Dry Contact
ACCESSORIES INSTALLATION Dry Contact Dry Contact is a solution for automatic control of HVAC system at the owner's best. In simple words, it's a switch which can be used to turn the unit On/Off after getting the signal from external sources. How to install dry contact [Parts of Dry contact] Dry Contact body... - Page 90 ACCESSORIES INSTALLATION [Setting of Contact Signal Input] • For input contact closure only(No power input) Thermostat LG does not supply this section (Field supply) NOTE Do not input the voltage signal in "NON VOLT" setting mode otherwise it will cause serious damage •...
-
Page 91: External Controller - Setting Up Programmable Digital Input Operation
ACCESSORIES INSTALLATION External Controller - Setting up programmable digital input operation If you require to control depending on external digital input(ON/OFF), connect cable to indoor PCB(CN_EXT). Follow below procedures step 1 ~ step 4. Step 1. Check if the power of the unit is turned off. Step 2. -
Page 92: Remote Temperature Sensor
ACCESSORIES INSTALLATION Remote Temperature Sensor Remote temperature sensor can be installed any place a user wants to detect the temperature. Installation condition Role and constraint while installation of remote air temperature sensor is very similar to that of thermostat. • Distance between the unit and the remote air temperature sensor should be less than 15 m due to length of the connection cable of remote air temperature sensor. - Page 93 ACCESSORIES INSTALLATION How to Install Remote Temperature Sensor [Parts of Remote Temperature Sensor] Cable Screw(to fix remote sensor) Installation Manual Follow below procedures step 1 ~ step 5. Step 1. Decide where the remote temperature sensor is Installed. Then, Determine the location and height of the fixing screws in fig.
-
Page 94: Solar Pump
ACCESSORIES INSTALLATION Solar pump Solar pump can be required to energize water flow when solar thermal system is installed. How to wire solar pump Follow below procedures step 1 ~ step 4. Step 1. Check if the power of the unit is turned off. Step 2. -
Page 95: External Pump
ACCESSORIES INSTALLATION External pump External pump (3rd-party) can be utilized if internal pump cannot overcome system pressure losses; if secondary pump is needed (in case parallel buffer tank) or - if two heating circuits are needed - as circuit pump to feed the radiator circuit. How to wire external pump Follow below procedures step 1 ~ step 3. -
Page 96: Wi-Fi Modem
ACCESSORIES INSTALLATION Wi-Fi Modem Wi-fi modem enables remote system operation from smartphone. Available functions include selection of on/off, operation mode, DHW heating, temperature setup and weekly scheduling etc. For detailed instructions, refer to the manual included in the accessories. How to wire Wi-Fi Modem [Parts of Wi-Fi modem] Wi-Fi modem body USB Cable... -
Page 97: Energy State
ACCESSORIES INSTALLATION Energy State This product provides energy states that enable customers to use as much as possible of their own renewable energy. It can shift setpoints depending on input signal from Energy Storage System (ESS) or from any other third-party device using Modbus RTU or Digital 230V inputs. Available Energy States There are 8 energy states available. -
Page 98: Digital Input For Energy Saving (Ess, Smart Grid)
ACCESSORIES INSTALLATION Digital Input for energy saving (ESS, Smart Grid) This product provides two digital inputs (TB_SG:ES1/ES2) that can be used to switch between energy states when not using Modbus RTU (CN-COM). Available Energy States There are 8 energy states available in total. Four different states can be triggered using the 230V-inputs –... -
Page 99: 2Way Valve
ACCESSORIES INSTALLATION 2Way Valve 2way valve is required to control water flow while cooling operation. Role of 2way valve is to cut off water flow into under floor loop in cooling mode when fan coil unit is equipped for cooling operation. General Information supports following 2way valve. -
Page 100: 3Way Valve(A)
ACCESSORIES INSTALLATION 3Way Valve(A) 3Way Valve(A) is required to operate DHW water tank. Role of 3way valve is flow switching between space heating circuit and water tank heating loop. General Information supports following 3way valve. Type Power Operating Mode Supported Selecting Flow A between Flow A and Flow B SPDT... -
Page 101: Final Check
ACCESSORIES INSTALLATION Final check Check point Description - Check if the shut-off valves should be assembled with Connection of Water Water inlet and outlet pipe of the unit Inlet/Outlet - Check the location of the water inlet/outlet water pipe - Check the pressure of supplying water by using pressure gauge inside the unit (Monitoring screen). -
Page 102: Configuration
CONFIGURATION CONFIGURATION is designed to satisfy various installation environment, it is important to set up system correctly. If not configured correctly, improper operation or degrade of performance can be expected. DIP Switch Setting CAUTION Turn off electric power supply before setting DIP switch •... - Page 103 CONFIGURATION DIP Switch Information Option Switch 1 Description Setting Default As Master (LG extension modules) MODBUS Communication Type As Slave (3rd party controller) Unified Open Protocol MODBUS Function No function Antifreeze agent is not used Antifreeze Agent Antifreeze agent is used * * Possibility to allow colder water temperature by setting.
- Page 104 CONFIGURATION Option Switch 2 Description Setting Default Heat pump is installed (Heating (Cooling) circuit only) Accessory installation Heat pump information + DHW tank is installed Heat pump + DHW tank + Solar thermal system is installed Heating Only Cycle Heating & Cooling Electric heater is not used Half capacity is used Selecting Backup heater...
- Page 105 CONFIGURATION Outdoor PCB SW1G OFF is selected ON is selected...
- Page 106 CONFIGURATION DIP Switch Information Description Setting Default Always Mode - Maintain low noise mode even if target temp. cannot be reached for long time. Low Noise Mode ON/OFF Partial mode - Escape low noise mode if target temp. cannot be reached for long time.
- Page 107 CONFIGURATION NOTE Input current value can be limited by DIP Switch operation. Model Name Peak Control Mode Running Current (A) Chassis Phase (Ø) Capacity (kW) 1 Step 2 Step UN60B...
-
Page 108: Service Setting
SERVICE SETTING SERVICE SETTING How to enter service setting To enter the menu displayed at the bottom, you need to enter the service setting menu as follows. • In the menu screen, press [<,>(left/right)] button to select the setting category, and press [OK] button to move to the setting list. -
Page 109: Service Contact
SERVICE SETTING Service contact Check and input the service center phone number that the user can call when there is service issue. • In the service setting list, select the service contact point and press [OK] button to move to the detail screen. -
Page 110: Installer Setting
It must be set by the installation specialist with the installation license, and if it is installed or changed without installation license, all problems caused will be the responsibility of the installer, and may void the LG warranty. • In the menu screen, press [<,>(left/right)] button to select the setting category, and press [∧(up)] button for 3 seconds to enter the password input screen for the installer setting. -
Page 111: Installer Setting
INSTALLER SETTING Installer setting • You can set the product user functions. • Some functions may not be displayed/operated in some product types. - Page 112 INSTALLER SETTING...
- Page 113 INSTALLER SETTING...
- Page 114 INSTALLER SETTING...
- Page 115 INSTALLER SETTING...
- Page 116 INSTALLER SETTING...
- Page 117 INSTALLER SETTING...
- Page 118 INSTALLER SETTING...
- Page 119 INSTALLER SETTING...
- Page 120 INSTALLER SETTING...
- Page 121 INSTALLER SETTING...
- Page 122 INSTALLER SETTING...
- Page 123 INSTALLER SETTING...
- Page 124 INSTALLER SETTING...
- Page 125 INSTALLER SETTING...
- Page 126 INSTALLER SETTING...
- Page 127 INSTALLER SETTING...
- Page 128 INSTALLER SETTING...
- Page 129 INSTALLER SETTING...
- Page 130 INSTALLER SETTING...
- Page 131 INSTALLER SETTING...
- Page 132 INSTALLER SETTING...
- Page 133 INSTALLER SETTING...
-
Page 134: Installer Settings In Detail
Weather-dependent (Auto mode) or Fixed target (Heat/Cool mode) are possible. If this control method is chosen, LG room air temperature sensor(s) or LG remote controller must be placed inside reference room(s). The Inverter cycle will be controlled directly by... - Page 135 The possible options depend on setting ‘Control method’. The devices must be placed in suitable reference rooms. Refer to chapter ‘Accessories installation’. If LG room sensors are used, the sensor controlling Circuit 1 (Direct circuit) must be connected to CN_ROOM and the sensor controlling Circuit 2 (Mixing circuit) to CN_LEAK_ROOM2.
- Page 136 INSTALLER SETTING Example 2) - RS3(A) is used to control both levels (upstairs/radiators & downstairs/underfloor heating) including Installer settings. This Remote controller is also used to sense the room temperature of the ground floor (Mixing circuit). Settings on RS3(A): Configuration - Control method: Air+Water Configuration - Select room devices - RMC linked to: Circuit1&2 Configuration - Select room devices - Circuit 1 - Room air sensor option: Remote controller Configuration - Select room devices - Circuit 2 - Room air sensor option: Remote controller...
- Page 137 INSTALLER SETTING Example 3) Configuration - Control method: Water Configuration - Select room devices - RMC linked to: Circuit1&2 Configuration - Select room devices - Circuit 1 - Digital input - CN-THMO Configuration - Select room devices - Circuit 2 - Digital input - CN-CC CN-THMO1 (TB3:23-27) Circuit 1...
- Page 138 INSTALLER SETTING Configuration - External Pump This function can be set to control the external water pump. Three options are possible, related to the location of the pump. In case of long piping, the External pump is used to overcome high pressure losses or as secondary pump in combination with a parallel buffer tank.
- Page 139 Both, heat pump and boiler can be used for space heating and DHW heating. If the Bivalent temperature is reached, the boiler takes over completely and the heat pump is turned off. NOT controlled by LG Controlled by LG Space...
- Page 140 DHW by heat pump deactivated (→ DIP switch SW2/2&3) The boiler is connected to the space heating circuit and covers the DHW demand throughout the year. The heat pump is used for space heating above Bivalent temperature only. NOT controlled by LG Controlled by LG Space...
- Page 141 INSTALLER SETTING Configuration - Select outdoor air sensor Setting defines if the pre-installed air sensor (mounted at grille of outdoor unit) or a dedicated outside sensor (wall-mounted / accessory) is used for weather-dependent operation (Auto mode). It is highly recommended to use wall-mounted sensor – especially when the outdoor unit is exposed to sunlight.
- Page 142 INSTALLER SETTING General - Water Flow Control This setting defines how the integrated water circulation pump is controlled. Select the desired method to control the pump and set the target value if needed. - Pump Capacity: The pump operates with the capacity set (10~100 %) - Fixed Flow Rate: The water pump is automatically controlled to maintain the set flow rate.
- Page 143 INSTALLER SETTING General - Anti-freezing option This setting defines the level of frost protection, when the Remote control is turned off. Setting Detection Case Operation Outside temp. < 0 °C Pump always ON AND Outlet water temp. ≤ 20 °C Outside air temp.
- Page 144 INSTALLER SETTING General - Backup heater release temp. Depending on local climate conditions, it is necessary to change the temperature condition in which backup heater is released. The backup heater operates in ‘Bivalent-parallel’ to heat pump cycle. It means, below the set outside temperature is released, but it will only run if the target temperature is not reached by cycle.
- Page 145 INSTALLER SETTING General - Screed drying This function is used to increase the temperature of a newly installed underfloor heating system. It prevents that the cement is heated too fast and breaks. After activation, the main screen displays „Screed drying“ and the step in progress at the bottom of the screen. - Step: By default the program starts with Step1.
- Page 146 INSTALLER SETTING NOTE • If the upper limit setting value of the heating LW temperature is 55 °C or lower, it is set to 55 °C forcibly. If the lower limit setting value of the heating LW temperature is 25 °C or higher, it is set to 25 °C forcibly.
- Page 147 INSTALLER SETTING General - Buffer tank hysteresis If a big buffer tank is connected in parallel to the heat pump, a separate sensor can be connected to PCB-connector TB_SENSOR/BUFFER sensing the temperature at the top of the tank or at its outlet pipe.
- Page 148 INSTALLER SETTING Circuit 1(2) - Room heating - Air heating set temperature - This setting limits the air temperature range applied to Heating operation that the User can set manually in the Remote controller (Control method=Air or Air+Water; Mode=HEAT) Circuit 1(2) - Room heating - Water heating set temperature - This setting limits the water temperature range applied to Heating operation that the User can set manually in the Remote controller (Control method=Water;...
-
Page 149: Auto Mode - Seasonal Auto Temp
INSTALLER SETTING Auto mode - Seasonal auto temp. If mode is set to Auto, the target temperature is adapted to outside air temperature. 01 02 This way of control is much more energy efficient than heating(cooling) mode with fixed target temperature. -
Page 150: Domestic Hot Water - Dhw Temperature Settings
INSTALLER SETTING Domestic hot water - DHW temperature settings The DHW target temperature is set in Main screen by User. ‘DHW set temp range’ will limit the setting range. The type and volume of the tank, as well as the consumption should be taken into account. -
Page 151: Domestic Hot Water - Thermal Disinfection
INSTALLER SETTING Domestic hot water - Thermal disinfection This function can help to prevent legionella bacteria from growing. It is recommended to activate the function if the DHW is not consumed on a regular base. In order to kill the bacteria, a temperature of 70 °C or higher is recommended. For this purpose it is necessary to install and activate an electric boost heater. -
Page 152: Domestic Hot Water - Dhw Heating Duration
INSTALLER SETTING Domestic hot water - DHW heating duration Domestic hot water - DHW electric re-heating The following settings can be used to limit the duration of DHW heating and DHW boost heater: - Domestic hot water - DHW heating duration - Active time: Maximum time how long DHW heating by heat pump cycle is activated, until operation mode returns to space heating - Domestic hot water - DHW heating duration - Stop time:... -
Page 153: Domestic Hot Water - Dhw Re-Circulation
INSTALLER SETTING Domestic hot water - DHW re-circulation In this menu, the recirculation pump can be activated and the pattern of operation is defined. NOTE Operation times of the Recirculation pump should be limited to times when comfort is really needed. -
Page 154: Solarthermal System - Solar Collector Operating Range
INSTALLER SETTING Solarthermal system - Solar collector operating range Solarthermal system - Solar tank temp. limit Solarthermal system - Solathermal dT Basically, the Solar pump starts if the Collector temperature (TB_SENSOR/SOLAR) is higher than the temperature at bottom part of the DHW tank (CN_TH4/WATER TANK SENSOR(B)). By default, the pump starts when the collector is 8 degrees warmer and stops when it is only 2 degrees warmer. -
Page 155: Service - Actuator Test - Test Mode
INSTALLER SETTING Service - Pump test run 'Test run' will activate the Main pump for 1 hour. During this period, the pump will be turned on and off intermittently to purge air from the cycle. Based on setting 'Configuration/External pump', the External pump will be activated, too. The operation can be stopped by pushing the On/Off button on the Remote controller. -
Page 156: Service - Frost Protection Temperature
INSTALLER SETTING Service - Frost protection temperature A frost protection function prevents freeze up of water pipes. If any pipe sensor measures a temperature below 4°C (Default), the water pump and backup heater are turned on. Defrosting operation is blocked if the leaving water temperature drops below 4 °C (Default) and it won’t start until a temperature of 15 °C (Default) is reached. -
Page 157: Connectivity - Modbus Address(Hex)
INSTALLER SETTING Connectivity - Modbus address(HEX) This function allows control of the heat pump by external devices. NOTE To use this function DIP switch No.1 of SW1 must be set to ON and No.2 to Off. Modbus memory map - Baud Rate : 9 600 bps - Stop Bit : 1 stop bit - Parity : None Parity Coil Register (0x01) - Page 158 INSTALLER SETTING Discrete Register (0x02) Register Description Value explanation 10001 Water flow status 0 : Flow rate ok / 1 : Flow rate too low 10002 Water Pump status 0 : Water Pump OFF / 1 : Water Pump ON 10003 Ext.
- Page 159 INSTALLER SETTING Input Register (0x03) Register Description Value explanation 30001 Error Code Error Code 30002 ODU operation Cycle 0 : Standby(OFF) / 1 : Cooling / 2 : Heating 30003 Water inlet temp. [0.1 °C ×10] 30004 Water outlet temp. [0.1 °C ×10] 30005 Backup heater outlet temp.
- Page 160 INSTALLER SETTING Holding Register (0x04) Register Description Value explanation 40001 Operation Mode 0 : Cooling / 4 : Heating / 3 : Auto 0 : Water outlet temp. control 40002 Control method (Circuit 1/2) 1 : Water inlet temp. control 2 : Room air control Target temp (Heating/Cooling) 40003...
-
Page 161: Connectivity - Cn_Ext
INSTALLER SETTING Connectivity - CN_EXT Instead of external Dry contact, CN-EXT can be used to lock the heat pump by external signals. Setting Contact input Operation * Remark Not use CN_EXT is not used In case of simple operation, operation on/off is Open Operation “Off”... -
Page 162: Connectivity - 3Rd Party Boiler
INSTALLER SETTING Connectivity - 3rd party boiler Either the heat pump or the boiler is used for space heating (Bivalent-alternative operation) Two different modes are available to switch-over between heat pump and boiler: - Manual: The boiler is activated and de-activated by User setting ‘Function/3rd party boiler’. - Auto: The boiler output is activated based on outdoor temperature. -
Page 163: Connectivity - Energy State
- for instance from PV-panels. There are two options to make use of this logic: - Use Modbus: LG Energy Storage System (ESS) or another third-party device is connected by Modbus serial line. - Use Digital inputs: A third-party controller (e.g. SmartHome controller or PV inverter) is connected through 230 V inputs ("SG-Ready contacts"). -
Page 164: Commissioning
Product • Refrigerant leakage is a serious danger. Installation Refrigerant leakage If leakage found, contact qualified LG air conditioning installation person. • While cooling operation, condensed dew can drop down to the bottom Drainage treatment of the unit. In this case, prepare drainage treatment (for example,... - Page 165 COMMISSIONING To assure best performance of , it is required to perform periodical check and maintenance. It is recommended to proceed following check list for once a year. CAUTION Turn off the power before proceeding maintenance. Category Item Check Point •...
-
Page 166: Starting Operation
COMMISSIONING Starting Operation Check before Starting Operation Check to see whether there is any refrigerant leakage, and check whether the power or transmission cable is connected properly. Confirm that 500 V megger shows 2.0 MΩ or more between power supply terminal block and ground. -
Page 167: Trouble Shooting
COMMISSIONING Trouble shooting operates not properly or it does not start operation, please check following list. CAUTION Turn off the power before proceeding troubleshooting. Critical trouble / Heavy trouble Slight trouble Option trouble Error Problem which Compressor cycle In most case, A problem is can stop system trouble. - Page 168 COMMISSIONING Troubleshooting for Problem while Operation Problem Reason Solution • Setting target • Set target temperature correctly. temperature is not • Check if temperature is water-based or air-based. See proper. 'Remote sensor active' and 'Temp. sensor selection' • Charged water is not •...
- Page 169 • Sensor fault DHW tank sensor broken • Electrical or mechanical EEPROM error damage of EEPROM • Request support from LG (Indoor-PCB) • BLDC water pump defect BLDC water pump • Trouble with BLDC-type • Wrong connection or damage of driver...
- Page 170 COMMISSIONING Error code Title Cause of error Check point • Check the actual flow rate in the remote controller (Monitoring screen) • Make sure there is no water leakage / low pressure • Flow rate <= Minimum flow • Make sure the strainer or water pipe is for at least 15 seconds not clogged and valves are open.
- Page 171 COMMISSIONING Error code Title Cause of error Check point • Malfunction of compressor • Blocking of pipe CT 2 (Max CT) • Input over-current • Low voltage input • Refrigerant, Pipe length, Blockage... • DC Link Voltage is above • Check CN_(L), CN_(N) Connection 420 V DC DC Link Voltage is •...
- Page 172 COMMISSIONING Error code Title Cause of error Check point • Bad connection of thermistor connector Problem in • Open / Short discharge-pipe • Defect of thermistor connector • Soldered poorly temperature (Open/Short) • Internal circuit error sensor • Defect of outdoor PCB(Inverter) •...
- Page 173 COMMISSIONING Error code Title Cause of error Check point • EEPROM contact defect/wrong insertion EEPROM • EEPROM Access error and Checksum • Different EEPROM Version Check SUM error mismatched • ODU Inverter & Main PCB (Assembly 1) damage • Overload operation (Outdoor fan constraint, •...
-
Page 174: Annex
ANNEX ANNEX NOTE The sensor resistance value and the voltage value at both ends may vary depending on the ambient temperature and the value has a deviation of 5 %. There may be some errors depending on the measurement equipment. Room air temperature sensors (NTC 10kOhm) Indoor Temp.(°C) Resistance(kΩ) - Page 175 ANNEX Flow sensor Flow(l/min) Voltage(V) 0.50 10.0 0.70 15.0 0.90 20.0 1.10 25.0 1.30 30.0 1.50 35.0 1.70 40.0 1.90 45.0 2.10 50.0 2.30 55.0 2.50 60.0 2.70 65.0 2.90 70.0 3.10 75.0 3.30 80.0 3.50 Water pressure sensor Pressure (bar) Voltage(V) 0.53 0.56...
- Page 176 ANNEX Plugged Unplugged 0.5 ~ 3.5 V 5.0 V (± 5 %) (± 2 %) Check the voltage Check the voltage for Power supply NOTE Supply voltage of 5VDC must be supplied between Pins 1 (brown) and 3 (blue). Measure voltage between Pins 2 (white) and 3 (blue) and compare with chart above.
- Page 177 LG Electronics Inc. Single Point of Contact (EU/UK) : LG Electronics European Shared Service Center B.V. Krijgsman 1, 1186 DM Amstelveen, The Netherlands Factory : LG Electronics Inc. 84, Wanam-ro, Seongsan-gu, Changwon-si, Gyeongsangnam-do, KOREA UK Importer : LG Electronics U.K. Ltd...
Need help?
Do you have a question about the HM121HF UB60 and is the answer not in the manual?
Questions and answers