Xerox Phaser 3500 User Manual
Xerox phaser 3500: user guide
Hide thumbs
Also See for Phaser 3500:
- Service manual (150 pages) ,
- Benutzerhandbuch (61 pages) ,
- Quick reference manual (6 pages)
Table of Contents
Advertisement
Quick Links
Advertisement
Table of Contents

Related Manuals for Xerox Phaser 3500


Summary of Contents for Xerox Phaser 3500
- Page 1 Phaser™ 3500 Laser Printer...
- Page 2 Copyright © 2005 Xerox Corporation. All Rights Reserved. Unpublished rights reserved under the copyright laws of the United States. Contents of this publication may not be reproduced in any form without permission of Xerox Corporation. Copyright protection claimed includes all forms of matters of copyrightable materials and information now allowed by statutory or judicial law or hereinafter granted, including without limitation, material generated from the software programs which are displayed on the screen such as styles, templates, icons, screen displays, looks, etc.
-
Page 3: Table Of Contents
Printer Options and Supplies........ - Page 4 Recycling............34 Phaser® 3500 Laser Printer...
- Page 5 Precautions for Moving the Printer ........42...
-
Page 6: Features
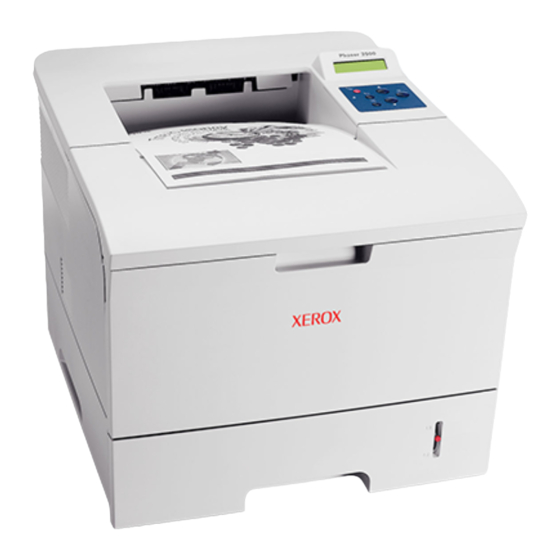
Features Printer Tour Printer Features The Phaser 3500 Laser Printer embodies a multitude of features to meet your printing needs: Great performance and superior print quality Letter: 35 pages per minute (ppm) with 1200 A4: 33 ppm with 1200 Up to 288 MB RAM memory... -
Page 7: Front View
Front View Rear View Printer Options and Supplies The following printer options and supplies are available for Phaser 3500 printers: Options and Supplies Item 64 MB additional RAM memory 128 MB additional RAM memory 256 MB additional RAM memory Network Interface Card (NIC) -
Page 8: Control Panel Layout
The alphanumeric display provides status messages and control panel menus. Error and Warning Messages When there is a problem with the printer, the control panel LED (2) blinks orange for an error and a warning. An error or warning message is displayed in the Alphanumeric Display (1). -
Page 9: Information Pages
Information Pages Your printer comes with a set of information pages that helps you solve printing problems and obtain the best results from your printer. You can access these pages from the printer’s control panel. To print information pages: On the control panel, press the Menu button, then press the OK button to select Information. -
Page 10: Printer Drivers
Xerox makes driver installation easy with its Walk-Up Technology. For more information about printer drivers, see the video at www.xerox.com/office/drivers. Available Printer Drivers Xerox provides drivers for a variety of page description languages and operating systems. The following drivers are available: Driver... -
Page 11: Printer Driver Features
Printer Driver Features The following chart displays the Xerox driver features that are available with specific operating systems. Feature Windows 2000, Windows XP, Windows Server 2003 Print-Quality Both Modes 2-Sided Both Printing N-Up Both Booklet Both Poster PCL6 Printing Fit to Page... -
Page 12: Changing Settings With The Remote Control Panel
Changing Settings with the Remote Control Panel To change settings using the Remote Control Panel: Click Start, select Programs, select Xerox Phaser 3500, then click Remote Control Panel. Make changes to the Remote Control Panel settings on the Printing, Config, Job, Test PCL, Flash Font and Macro, and PS 3 tabs. -
Page 13: Status Monitor
You can also warm up the printer by pressing the OK button on the control panel. If you find that the printer is going into the Power Saver mode too often and you do not want to wait while the printer warms up, you can increase the length of time before the printer goes into the Power Saver mode. -
Page 14: Selecting Tray Settings
Press the OK button to save the changes. Tray Sequence You can specify the sequence in which the printer selects the paper trays. When a tray runs out of a particular paper during printing, the printer selects the next tray in the sequence containing the same paper type and size to continue printing. -
Page 15: Fonts
Select either Using a PC Printer Driver You can print a font list from the printer driver. PostScript font lists are available only with Windows 2000, Windows XP, or Windows Server 2003. To print either a PostScript or PCL font list from your printer driver: Select Start. -
Page 16: Registering Your Printer
Select PCL Font List or PostScript Font List from the drop-down list. Click Print. Registering Your Printer Registering your printer is quick and easy. You can register your printer using one of the following methods: Mail the registration card that came with your printer Fill out the online form at www.xerox.com/office/register... -
Page 17: Supported Paper
Follow the guidelines in these tables to ensure the best print quality and avoid printer jams. For best results, use only Xerox Printing Media specified for your printer. These media are guaranteed to produce excellent results with your Phaser 3500 Laser Printer. -
Page 18: Basic Printing
Note A minimum clearance of 32 cm (12.6 in.) must be maintained at the rear of the printer. See the Setup Guide that came with your printer for minimum clearances. Changing Paper Type and Size on the Control Panel If you have changed the paper size in Tray 1 (MPT), you need to change the printer settings. -
Page 19: Adjusting Printing Options
With the desired document or graphic open in your application, access the Print dialog box. Select the Phaser 3500 printer and click the Properties or Preferences button to open the printer driver. Make selections from the driver tabs. See the “PCL6 Printer Driver Options for Windows Operating Systems”... - Page 20 PCL6 Printer Driver Options for Windows Operating Systems Operating System Driver Tab Windows 2000, Layout tab Windows XP, Windows NT4.0, or Windows Server More Layout Options 2003 dialog box Paper tab Image Options tab Output Options tab Watermark tab Troubleshooting tab 1 The Phaser 3500B and Phaser 3500N configurations may be upgraded to use these printing options.
- Page 21 PostScript Printer Driver Options for Windows Operating Systems Operating System PostScript Driver Tab Windows 2000, Layout tab Windows XP, or Windows Server 2003 Paper/Quality tab Advanced Options dialog Troubleshooting tab Windows NT4.0 Paper Setup tab Advanced dialog box Printing Options...
-
Page 22: Using The Manual Feed Mode
At your computer, select Print, select Properties or Preferences, select the Paper tab, select the Force printing from specific tray, select Tray 1 [Manual Feed] from the Source drop-down list, then click OK to send the job to the printer. Open Tray 1 (MPT) by pushing the handle down and pulling out. -
Page 23: Selecting The Bypass Tray 1 (Mpt) Mode
The Bypass Tray 1 (MPT) mode setting can be set from the control panel. There are two options: When the bypass mode is enabled (On), the printer prints the job on the paper loaded in Tray 1 (MPT) even if it does not match the paper type and size selected for the print job. To use a tray other than Tray 1 (MPT), you must select Force printing from a specific tray in your printer driver. -
Page 24: 2-Sided Printing
Use paper with a weight range between 75~90 g/m Binding Preferences Use the printer driver to select Portrait or Landscape orientation for the images on the page. When you print 2-sided jobs, you need to select the binding preference. This determines how the pages turn. - Page 25 For the Phaser 3500B and Phaser 3500N configurations, before printing two-sided jobs, make sure that the optional duplex unit is set as installed in the Windows printer properties window. The procedure differs depending on the printer driver used. If you use the Windows PostScript driver: Click Start.
- Page 26 The Quick Reference Guide can also be found at 3500support. In the printer driver, on the Layout tab, select None, Flip on Long Edge, or Flip on Short Edge under Print on Both Sides. Click OK to accept the printer driver settings, then click OK to print.
-
Page 27: Manual 2-Sided Printing
Print to print one side of your job. Remove the pages from the output tray and place the printed side face up in Tray 2 [or 3] with the top of the page entering the printer last. At your computer, select odd numbered pages to print. -
Page 28: Transparencies
Fan the transparencies to release sheets that may stick together. Insert the transparencies into Tray 1 (MPT). For information about how to load paper in Tray 1 (MPT), see the Quick Reference Guide that came with your printer. The Quick Reference Guide can also be found at www.xerox.com/office/3500support. -
Page 29: Printing Transparencies From Tray 2 Or 3
Type, then press the OK button. Select Transparency, then press the OK button. Press the Cancel button to return to the main menu. In the printer driver, select Tray 1 as the paper source. Printer Setup, then press the OK button. -
Page 30: Envelopes
Caution Never use envelopes with windows or metal clasps; they can damage the printer. Damage caused by using unsupported envelopes is not covered under the Xerox warranty, service agreement, or Total Satisfaction Guarantee. The Total Satisfaction Guarantee is available in the United States and Canada. Coverage may vary outside these areas, please contact your local representative for details. -
Page 31: Printing Envelopes
Print a test envelope from your application to confirm that the orientation of your envelope is correct. For information, see the Quick Reference Guide that came with your printer. The Quick Reference Guide can also be found at www.xerox.com/office/3500support. Printer Setup, then press the OK button. -
Page 32: Labels
Verify that the labels’ adhesive material can tolerate fusing temperatures of 200° C (392° F) for 0.1 second. Do not use any sheets where labels are missing; it may damage printer components. Store unused labels flat in their original packaging. Leave the labels inside the original packaging until ready to use. -
Page 33: Custom Size Paper
Loading Custom Size Paper in Tray 1 (MPT) Insert the custom size paper into Tray 1 (MPT). Adjust the guides to match the size of the paper. Place the side to be printed face up with the top of the page entering the printer first. -
Page 34: Advanced Options
Press the Down Arrow or Up Arrow button to set the paper size, then press the OK button. Press the Cancel button to return to the main menu. In the printer driver, select Tray 1 as the paper source. Advanced Options Printing Multiple Pages to a Single Sheet (N-Up) When printing a multiple-page document, you can print more than one page on one side of a single sheet of paper. -
Page 35: Scaling
2, 4, 6, 9, or 16. Mac OS 9.x PostScript driver: In the printer driver, click the pull-down menu for General and select the number of pages per sheet. Mac OS X, version 10.2 and higher PostScript driver: In the printer driver, click on the pull-down menu and select Layout. -
Page 36: Printing Booklets
“Supported Paper” on page 12. Note A duplex unit must be installed on your printer to perform automatic 2-sided printing. The Phaser 3500B and Phaser 3500N configurations may be upgraded to include this feature. -
Page 37: Printing Posters
Negative Output drop-down list. Click OK to save your choice. Mac OS 9.x PostScript driver: In Page Setup, click Options. In the PSPrinter Options dialog box, under Visual Effects, select Flip Horizontal, Flip Vertical, or Invert Image. Mirror Image Phaser® 3500 Laser Printer Advanced Options... -
Page 38: Printing Watermarks
Printing Cover Pages A cover page can be printed as the first page of a document. The printer enables you to choose a different paper source for the cover page than for the body of a document. For instance, use your company letterhead or colored paper for the first page of a document or report. -
Page 39: Supplies And Recycling
When the control panel prompts that the toner is low or needs to be replaced, verify that you have replacements on hand. To order supplies, contact your local reseller or go to www.xerox.com/office/3500supplies. Configuration Page The “Configuration Page” displays the status of the toner in the print cartridge. To print the “Configuration Page”:... -
Page 40: Connections And Networks
Windows operating systems: Run the Installer on the Software and Documentation CD-ROM to automatically set the printer’s IP address if the printer is connected to an established TCP/IP network. You can also manually set the printer’s IP address on the control panel. -
Page 41: Connecting Via Usb
1284-B [male] cable), with a maximum length of 10 feet (three meters). Connect the parallel cable to the printer and the computer while they are both Off, and then turn them On. Install the printer driver from the Software and Documentation CD-ROM, and then select the appropriate LPT parallel port. -
Page 42: Configuring The Network Address
If your computer is on a large network, contact your network administrator for the appropriate TCP/IP addresses and additional configuration information. If you are creating your own small Local Area Network or connecting the printer directly to your computer using Ethernet, follow the procedure for automatically setting the printer’s Internet Protocol (IP) address. -
Page 43: Manually Setting The Printer's Ip Address
If you are on a network without a DNS server, or in an environment where the network administrator assigns printer IP addresses, you can use this method to manually set the IP address. Manually setting the IP address overrides DHCP and AutoIP. Alternatively, if you are in a small office with a single PC and use a dialup modem connection, you can manually set the IP address. -
Page 44: Macintosh Os 9.X
Click the Add icon in the Printer List window, and then select Rendezvous from the drop-down menu. Select the printer in the window. Select Xerox from the list of manufacturers in the lower drop-down menu. Select the appropriate printer model from the list of available devices. Click the Add button. -
Page 45: Troubleshooting
Cleaning the Outside of the Printer You can clean the outside of the printer with a soft, damp cloth. You can use a cloth moistened with a mild neutral detergent to remove stains; do not spray detergent directly onto the printer. -
Page 46: Led Descriptions
The printer displays error or warning messages on the control panel display. Hardware or software failures that may require service support are presented as errors. When the printer’s control panel displays an error message, the LED blinks or turns orange. An error message replaces the status lines. -
Page 47: Precautions For Moving The Printer
Moving the Printer Within the Office The printer can be safely moved from one location within an office to another as long as it travels in an upright position, gently. Any jarring movement, such as pushing the printer over a raised door threshold or across a parking lot, can damage the printer. -
Page 48: Additional Resources
Knowledge Base and technical support via email and driver downloads. A set of Xerox links is installed in your web browser’s Favorites folder when you install the printer drivers on your computer. The Troubleshooting tab in your Windows printer driver also includes useful links. -
Page 49: Electrical Safety
If you do not know if an outlet is grounded, ask an electrician to check the outlet. Do not use a ground adapter plug to connect the printer to an electrical outlet that does not have a ground connection terminal. -
Page 50: Laser Safety
The power cord is attached to the printer as a plug-in device at the back of the printer. If it is necessary to disconnect all electrical power from the printer, disconnect the power cord from the electrical outlet. Warning Do not remove the covers or guards that are fastened with screws unless you are installing optional equipment and are specifically instructed to do so. -
Page 51: Printing Safety Guidelines
Do not place the printer in direct sunlight. Do not place the printer in line with the cold air flow from an air conditioning system. Place the printer on a level, solid surface with adequate strength for the weight of the printer. -
Page 52: Physical Specifications
Symbols Marked on the Product Hot surface on or in the printer. Use caution to avoid personal injury. Use caution (or draws attention to a particular component). B–Printer Specifications (English Only) Physical Specifications Width: 396 mm (15.6 in.) Depth: 453 mm (17.8 in.) Height: 348 mm (13.7 in.) -
Page 53: Electrical Specifications
Up to 35 pages per minute (ppm) Fuser Life Maximum 150,000 pages Controller Specifications 400 MHz processor Memory 32 MB standard on all printers Maximum 288 MB Page Description Languages (PDL) PCL5e (driver not included) PCL6 PostScript B–Printer Specifications (English Only) Phaser® 3500 Laser Printer... - Page 54 Consult the dealer or an experienced radio/television technician for help. Any changes or modifications not expressly approved by Xerox could void the user's authority to operate the equipment. To ensure compliance with Part 15 of the FCC rules, use shielded interface cables.
- Page 55 This product, if used properly in accordance with the user's instructions, is neither dangerous for the consumer nor for the environment. A signed copy of the Declaration of Conformity for this product can be obtained from Xerox. D–Material Safety Data Sheet (English Only) For Material Safety Data information regarding your Phaser 3500 printer, go to www.xerox.com/office/msds.
- Page 56 For more information about Xerox environmental programs, visit www.xerox.com/environment.html. If your product is not part of the Xerox program and you are managing its disposal, please note that the product may contain lead and other materials whose disposal may be regulated due to environmental considerations.
- Page 57 PCL6 PostScript printing Phaser® 3500 Laser Printer Index–1...
- Page 58 Phaser® 3500 Laser Printer Index–2 Index...
- Page 59 Knowledge Base LED descriptions moving and repacking the printer print-quality problems Status Monitor typefaces user safety Walk-Up technology warning messages watermarks web links...
Need help?
Do you have a question about the Phaser 3500 and is the answer not in the manual?
Questions and answers