Advertisement
Available languages
Available languages
Quick Links
H A Z E T- W E R K
HÖCHSTE TECHNOLOGIE IN DER WERKZEUGFERTIGUNG SEIT 1868
HIGHEST TECHNOLOGY IN TOOL MANUFACTURE SINCE 1868
Reparaturanleitung Aufrollführung
Schlauchaufroller Druckluft
Roll-up Guide Repair Instructions
Air Hose Reel
b
9040N-10-01/3
9040N-13-01/3
Advertisement

Related Manuals for Hazet 9040N-10-01/3


Summary of Contents for Hazet 9040N-10-01/3
- Page 1 H A Z E T- W E R K HÖCHSTE TECHNOLOGIE IN DER WERKZEUGFERTIGUNG SEIT 1868 HIGHEST TECHNOLOGY IN TOOL MANUFACTURE SINCE 1868 9040N-10-01/3 9040N-13-01/3 Reparaturanleitung Aufrollführung Schlauchaufroller Druckluft Roll-up Guide Repair Instructions Air Hose Reel...
- Page 2 1965-20 Ursprungssprache deutsch – Original language German HAZET-WERK Hermann Zerver GmbH & Co. KG ; Güldenwerther Bahnhofstraße 25 - 29 · 42857 Remscheid · GERMANY } 10 04 61 · 42804 Remscheid · GERMANY · [ +49 (0) 21 91 / 7 92-0 \ +49 (0) 21 91 / 7 92-375 (National) ·...
- Page 3 Entfernen der seitlichen Abdeckung. Die 4 mit Pfeilen markierten Schrauben demontieren.
- Page 4 Die Abdeckung mit Hilfe des Keils aufspreizen und den Keil zur Fixierung stecken lassen. Haltestift der Aufrollführung entfernen.
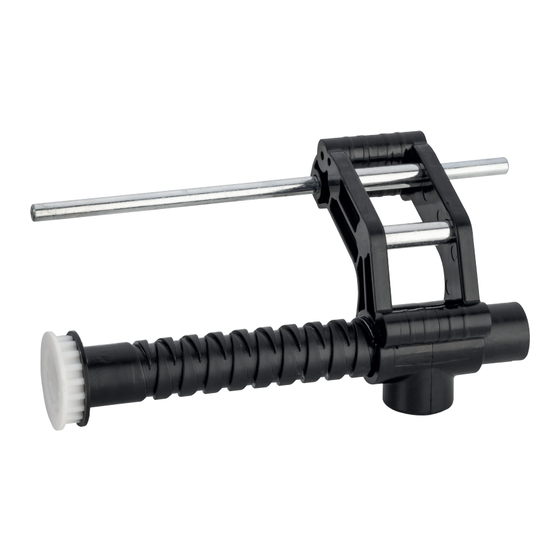
- Page 5 Demontage der Aufrollführung. Zur Fixierung des Zahnriemens, kann der zuvor demontierte Haltestift verwendet werden. Im Anschluss erfolgt die Demontage der Aufrollführung.
- Page 6 Demontage der beiden Schrauben in der Aufrollführung. Demontage der beiden Stifte in der Aufrollführung.
- Page 7 Montage der neuen Aufrollführung. Zuerst die Schrauben und die Stifte demontieren, dann den Mechanismus um den Schlauch bauen. Einsetzen der beiden Stifte in der Aufrollführung.
- Page 8 Montage der beiden Schrauben in der Aufrollführung. Aufsetzen des Zahnriemens auf das Zahnrad.
- Page 9 Einsetzen der Schlauchführung. Die Position auf der Gewindewalze muss ganz rechts sein, wenn der Schlauch fast komplett aufgerollt ist. ACHTUNG: Die richtige Führung des Zahnriemens beachten.
- Page 10 Entfernen des Keils. Gehäuse mit Schrauben schließen.
- Page 11 1965-20 Original language German HAZET-WERK Hermann Zerver GmbH & Co. KG ; Güldenwerther Bahnhofstraße 25 - 29 · 42857 Remscheid · GERMANY } 10 04 61 · 42804 Remscheid · GERMANY · [ +49 (0) 21 91 / 7 92-0 \ +49 (0) 21 91 / 7 92-375 (National) ·...
- Page 12 Remove the side cover. Remove the 4 screws marked with arrows.
- Page 13 Spread the cover using the wedge and leave the wedge in place to fix it. Remove the retaining pin of the roll-up guide.
- Page 14 Removal of the roll-up guide. The previously dismantled retaining pin can be used to fix the toothed belt. The roll-up guide is then removed.
- Page 15 Removal of both screws in the roll-up guide. Removal of both pins in the roll-up guide.
- Page 16 Installation of the roll-up guide. First remove the screws and the pins, then build the mechanism around the hose. Insertion of both pins in the roll-up guide.
- Page 17 Installation of both screws in the roll-up guide. Mounting the toothed belt on the sprocket.
- Page 18 Inserting the hose guide. The position on the thread roller must be all the way to the right when the hose is almost completely rolled up. ATTENTION: Observe the correct guidance of the toothed belt.
- Page 19 Removal of the wedge. Close the housing with screws.
- Page 20 HAZET-WERK Hermann Zerver GmbH & Co. KG · ; Güldenwerther Bahnhofstraße 25 - 29 42857 Remscheid · GERMANY · } 10 04 61 · 42804 Remscheid · [ +49 (0) 21 91 / 7 92-0 \ +49 (0) 21 91 / 7 92-375 (National) · \ -400 (International) ^ hazet.de · ] info@hazet.de...
Need help?
Do you have a question about the 9040N-10-01/3 and is the answer not in the manual?
Questions and answers