Table of Contents
Advertisement
Available languages
Available languages
Advertisement
Table of Contents

Related Manuals for DeLonghi Pinguino Smart


Summary of Contents for DeLonghi Pinguino Smart
- Page 1 www.delonghi.com...
-
Page 2: Portable Air Conditioner
EL SERIES PORTABLE AIR CONDITIONER Instructions for use. Keep these instructions Visit www.delonghi.com for a list of service centers near you. ELECTRIC CHARACTERISTICS 115 V~ 60 Hz CONDITIONNEUR D’AIR PORTATIF Mode d’ e mploi . Conservez cette notice Visitez www.delonghi.com pour y voir une liste des centres de réparation proches de chez vous. - Page 3 pag. 4 page 16 pág. 28...
-
Page 5: Important Safeguard
Important safeguard • Avoid using heaters near the unit. • The unit should be transported in a vertical • Use this appliance only as described in this position. If this is not possible secure the unit at instruction manual. an angle, do not lie it horizontally. As with any electrical appliance, the instructions •... - Page 6 INTRODUCTION • The outlet is a 3-hole grounded outlet . If this is not Thank you for choosing a De’Longhi product. Please take a few the case, you must choose another outlet. Failure to follow moments to read the instructions to avoid risks or damage to the these important safety instructions absolves the manufac- appliance.
- Page 7 Proceed as follows: CONDITIONING WITHOUT INSTALLATION • Drill a hole ø 5,25 inches (134 mm) in an outside wall or You can also set-up in a double-hung window: through a wooden kickboard. Respect the dimensions and • Place the window bracket in the window sill, extend the height of the hole given in figure 3 and 4.
-
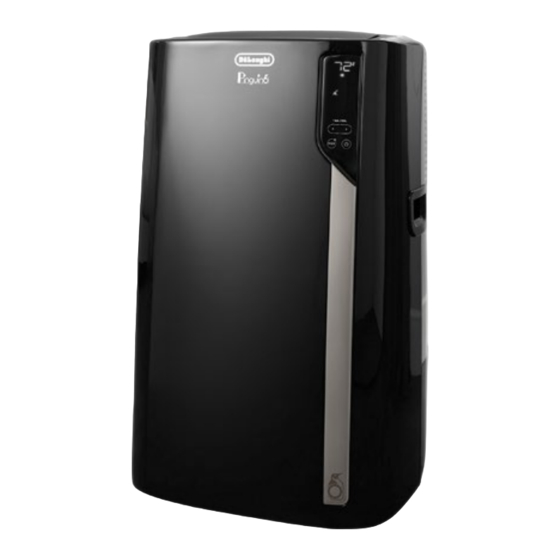
Page 8: Control Panel
C2. Function selection key MODE (air conditioning, dehumidi- 1-800-322-3848 [US only] fying, fan, ON-OFF WiFi - reset WLAN settings) 1-888-335-6644 [Canada only] C3. Increase key or log onto our website at www.delonghi.com C4. Decrease key C5. Temperature indicator C6. Air conditioning symbol C7. WiFi symbol C8. -
Page 9: Operating From The Control Panel
OPERATING FROM THE CONTROL PANEL Note: The most suitable temperatures, during the summer range from 75 to 81°F. However, setting the temperature signifi- TURNING THE APPLIANCE ON/OFF cantly lower than the outdoor temperature is not recommended. Before plugging the appliance In conditioning mode, the air flow can be selected only from the check the cap on back of the remote control and app. -
Page 10: Operating From The Remote Control
OPERATING FROM THE REMOTE CONTROL D1. ON/STAND-BY (on/off) button D2. REAL FEEL button INSERTING OR REPLACING THE BATTERIES D3. MODE button • Remove the cover on the rear of the remote control; D4. Decrease button • Insert or replace the batteries with two new R03 “AAA” 1.5V D5. - Page 11 • In particularly severe environmental conditions (large size REAL FEEL FUNCTION of the environment, high temperature or humidity outside, poor insulation of the room, too many of people or strong heat load in the room, strong exposure to the sun ...) this device may not be able to reach the best comfort level.
-
Page 12: Setting The Timer
If the memorized “Home WLAN” settings needs to be changed, or nonshielded cables my result in interference to radio or proceed as follows: reception. a) keep touched for about 20 seconds the MODE button C2 on This Class B digital apparatus complies with Canadian ICES-003. the control panel until a prolonged beep is emitted;... -
Page 13: Self-Diagnosis
SELF-DIAGNOSIS The appliance has a self diagnosis system to identify a number of warning/malfunctions. Error messages are displayed on the appliance display. IF ... IS DISPLAYED, IF ... IS DISPLAYED, IF ... IS DISPLAYED, IF ... IS DISPLAYED, “Low Temperature” “Probe Failure”... -
Page 14: Cleaning The Cabinet
CLEANING CHECKS AT THE START OF THE SEASON Make sure the power cable and socket are in perfect condition Before cleaning or maintenance, turn the appliance off by and make sure the earthing system is efficient. Comply strictly touching the button, wait a few seconds, then unplug from with the installation standards. - Page 15 TO AVOID DAMAGE TO THE UNIT: NEVER TRANSPORT OR TURN THE APPLIANCE UPSIDE DOWN OR ON ITS SIDE. IF THIS OCCURS, WAIT 6 HOURS BEFORE TURNING THE APPLIANCE ON, 24 HOURS IS RECOMMENDED. After the unit has been on its side, oil needs to return to the compressor to en- sure proper function.
-
Page 16: Troubleshooting
TROUBLESHOOTING Check the following points before calling the authorised Technical Service Centre in your area. PROBLEMS CAUSES SOLUTIONS The air conditioner does not turn on lt is not plugged in plug it in there is no power wait the internal protection device was triggered call the help centre The air conditioner works for a short the air exhaust hose is obstructed or bent correctly position the air exhaust hose, period of time... -
Page 17: Précautions Importantes
Précautions importantes • Ne posez pas d’ o bjets chauds ou lourds sur l’appareil. • Utilisez cet appareil uniquement tel que décrit • Nettoyez les filtres au moins une fois par dans le présent manuel d’instructions. semaine. Comme avec tous les appareils électriques, les •... - Page 18 INTRODUCTION • L’alimentation électrique de la prise secteur correspond à la valeur indiquée sur la plaque signalétique à l’arrière de Merci d’avoir choisi l’appareil De’Longhi. l’appareil ; Prenez quelques minutes pour lire ce mode d’ e mploi. Vous évi- • La prise et le réseau électrique conviennent à l’appareil; terez ainsi de vous exposer à...
- Page 19 • Lorsque vous installez le conditionneur d’air, vous devriez laisser une porte légèrement ouverte (1 cm environ) afin de garantir une ventilation et une pression correcte dans la pièce. • Conservez les tuyaux d’air aussi courts et exempts de cour- bures que possible afin d’...
-
Page 20: Panneau De Commande
C14. Symbole du ventilateur le service à la clientèle au: C15. Symbole de déshumidification 1-800-322-3848 [États-Unis seulement] 1-888-335-6644 [Canada seulement] C16. Symbole de l’alarme C17. Définit les valeurs de température ou visitez notre site Web au: www.delonghi.com... -
Page 21: Mode Déshumidification
FONCTIONNEMENT MODE CLIMATISATION MISE EN MARCHE/EXTINCTION DE L’APPAREIL Idéal pour les périodes chaudes et étouf- fantes où il est nécessaire de rafraîchir tout Avant de brancher l’appareil vé- en déshumidifiant la pièce. rifiez toujours que les bouchons qui se trouvent à l’arrière de Pour enregistrer correctement ce mode: l’appareil sont bien insérés dans •... -
Page 22: Utilisation De La Télécommande
Les vitesses d’air disponibles sont: Vitesse minimum: lorsque l’ o n désire le maximum de silence max 23 ft Vitesse moyenne: si l’ o n désire contenir le niveau max 7 m sonore en maintenant tout de même une bonne ca- pacité... - Page 23 SELECTING THE TEMPERATURES In conditioning modes press button > D5 or < D4 to select the HAUT desired temperature. Courbe de fonctionnement Perfect! SELECTING THE AIR FLOW In conditioning and fan modes, press button D6 to select the MOYEN desired air flow. The air flow available are: Perfect! Minimum air flow: when maximum silent opera-...
-
Page 24: Réglage Du Minuteur
FCC AND CANADA EMC COMPLIANCE ton, le volet recommence à se déplacer d’avant-arrière. Remarques: Afin d’ é viter d’ e ndommager les mécanismes in- INFORMATION ternes, le volet ne doit pas être déplacé manuellement. This device complies with Part 15 of the FCC Rules. Operation is subject to the following two conditions: FONCTION WIFI (1) This device may not cause harmful interference, and... - Page 25 FCC/IC RADIATION EXPOSURE STATEMENT RSSs. Operation is subject to the following two conditions: (1) This device may not cause interference; and This equipment complies with FCC/IC RSS-102 radiation expo- (2) This device must accept any interference, including inter- sure limits set forth for an uncontrolled environment. ference that may cause undesired operation of the device.
- Page 26 CONSEILS • Ne pas poser d’ o bjets sur le climatiseur; • Ne pas obstruer les prises d’air. Voici quelques conseils pratiques pour obtenir un rendement optimal de votre climatiseur: NETTOYAGE • fermer toutes les portes et les fenêtres de la pièce à clima- Avant toute opération de nettoyage ou d’...
-
Page 27: Conditions Limites
INSPECTIONS AU DÉBUT DE LA SAISON AFIN D’ÉVITER TOUT DOMMAGE À L’APPAREIL Assurez-vous que le câble d’alimentation est en parfait état et NE TRANSPORTEZ NI NE RENVERSEZ L’APPAREIL À L’ENVERS OU que le système de mise à la terre est efficace. Conformez-vous SUR LE CÔTÉ. -
Page 28: Dépannage
DÉPANNAGE Vérifiez les points suivants avant d'appeler votre SAV agréé le plus proche. PROBLÈMES CAUSES SOLUTIONS Le conditionneur d’air ne s’allume pas ll n'est pas branché branchez-le il n'y a pas de courant attendez le dispositif de protection interne a été Appelez le centre d’assistance déclenché... -
Page 29: Importantes Medidas De Seguridad
Importantes medidas de • No deje objetos pesados o calientes sobre el aparato. seguridad • Limpie los filtros al menos una vez a la semana. • Evitar el uso de calentadores cerca de la unidad. • Utilice este aparato sólo como se describe en •... - Page 30 INTRODUCCIÓN • La salida de la fuente de alimentación se corresponde con el valor indicado en la etiqueta de clasificación en la parte Gracias por elegir un producto De’Longhi. Le rogamos que dedi- posterior del aparato. que unos instantes a leer las instrucciones para evitar riesgos o •...
- Page 31 • Al instalar el acondicionador de aire, usted debe dejar una puerta ligeramente abierta apenas 1/2” (1 cm) para garan- tizar la correcta ventilación y presión en la habitación. • Mantener las mangueras de aire tan cortas y libres de cur- vas como sea posible para evitar constricciones.
-
Page 32: Panel De Control
C14. Indicador de flujo de aire atención al cliente gratuito en: C15. Símbolo de deshumidificador 1-800-322-3848 [EE. UU. solamente] 1-888-335-6644 [Canadá solamente] C16. Símbolo de alarma C17. Valores de ajuste de temperatura O inicie sesión en nuestro sitio web en www.delonghi. -
Page 33: Modo De Deshumidificación
OPERACIÓN DESDE EL PANEL DE CONTROL • Para cambiar la temperatura a alcanzar, toque la tecla < C4 o > C3. ENCENDER Y APAGAR EL APARATO Nota: Las temperaturas más adecuadas durante el verano os- Antes de enchufar el aparato cilan entre 75 a 81°F. - Page 34 DESCRIPCIÓN DEL CONTROL REMOTO SELECT THE TEMPERATURE SCALE La temperatura puede visualizarse en °C o °F. Para cambiar la unidad de medida de temperatura pulse ambas teclas au- mento > C3 y disminución < C4 por aproximadamente 10 seg. OPERACIÓN DESDE EL CONTROL REMOTO D1.
- Page 35 Mínimo flujo de aire: cuando se desea una Perfect! operación de silencio máximo. Medio flujo de aire: cuando el nivel de ruido Perfect! debe ser bajo pero con un buen nivel de confort. Flujo de aire máximo: para máximo rendimiento. Perfect! ORANGE LIGHT GREEN LIGHT...
- Page 36 SÍMBOLO WIFI FIJO be determined by turning the equipment off and on, the Significa que las características WiFi están activas Y user is encouraged to try to correct the interference by one or more of the following measures: que se ha encontrado la Home WLAN •...
- Page 37 doit être installé et utilisé avec une distance minimale de 20 cm entre le radiateur et votre corps. Cet transmetteur ne doit pas être co-situé ou opérant en liaison avec toute autre antenne ou transmetteur. FCC/IC RADIATION EXPOSURE STATEMENT This equipment complies with FCC/IC RSS-102 radiation expo- sure limits set forth for an uncontrolled environment.
-
Page 38: Limpieza Del Aparato
CONSEJOS LIMPIEZA Siga estas advertencias para obtener el mayor rendimiento del Antes de realizar cualquier operación de limpieza o manteni- climatizador: miento apague el aparato con el botón • cierre las puertas del ambiente que debe acondicionar. La A continuación quite la clavija de la toma de corriente. única excepción es el caso de instalación mediante un agu- jero en la pared. -
Page 39: Especificaciones Técnicas
CONTROLES AL INICIO DE LA TEMPORADA PARA EVITAR DAÑOS A LA UNIDAD: Asegúrese de que el cable de alimentación y el zócalo estén en NUNCA TRANSPORTE O GIRE EL APARATO BOCA ABAJO O SOBRE perfectas condiciones y asegúrese de que el sistema de puesta SU COSTADO. -
Page 40: Solución De Problemas
SOLUCIÓN DE PROBLEMAS Compruebe los siguientes puntos antes de llamar al Centro de Servicio Técnico autorizado en su zona. PROBLEMAS CAUSAS SOLUCIONES El acondicionador de aire no se enciende. no está enchufado Enchúfelo no hay alimentación espere el dispositivo de protección interna se ha Llame al Centro de ayuda disparado El aire acondicionado funciona por un...
Need help?
Do you have a question about the Pinguino Smart and is the answer not in the manual?
Questions and answers