Harman JBL QUANTUM Stream Studio Owner's Manual
Hide thumbs
Also See for JBL QUANTUM Stream Studio:
- Quick start manual (34 pages) ,
- Owner's manual (21 pages) ,
- Quick start manual (20 pages)
Table of Contents
Advertisement
Quick Links
Advertisement
Table of Contents

Related Manuals for Harman JBL QUANTUM Stream Studio


Summary of Contents for Harman JBL QUANTUM Stream Studio
- Page 1 Stream Studio O W N E R ’ S M A N U A L...
-
Page 2: Table Of Contents
TABLE OF CONTENTS INTRODUCTION ......................1 WHAT’S IN THE BOX ..................... 2 PRODUCT OVERVIEW ....................3 GETTING STARTED....................... 4 System compatibility ...........................4 Connecting USB power cable ........................4 Connecting a monitoring headphone .....................5 First time setup on PC ..........................6 First time setup on Mac ..........................7 USING YOUR MICROPHONE .................. -
Page 3: Introduction
Introduction Congratulations on your purchase! This manual includes information on the JBL Quantum Stream Studio microphone. We encourage you to take a few minutes to read this manual, which describes the product and includes step-by-step instructions to help you to set up and get started. Read and understand all the safety instructions before using your product. -
Page 4: What's In The Box
What’s in the box JBL Quantum Stream Studio microphone USB power cable (USB-A to USB-C) QSG, warranty card and safety sheet - 2 -... -
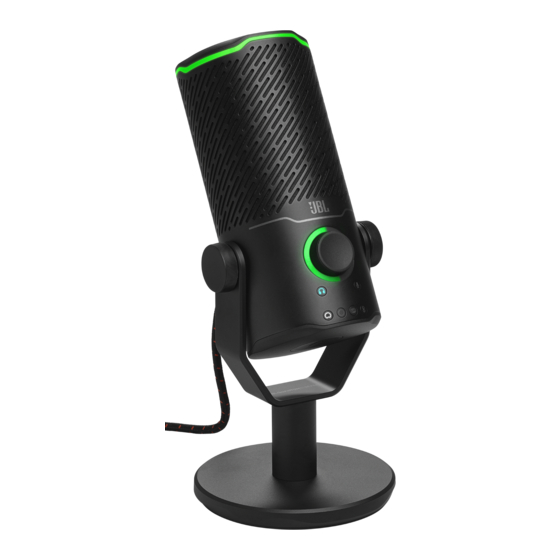
Page 5: Product Overview
Product overview • Mutes or unmutes the microphone. Ring LED (RGB lighting + mute/unmute indicator) Volume knob • Adjusts headphone volume, microphone gain, or audio/voice monitor. Volume indicator (headphone | microphone | audio/voice monitor | VU meter) Mode indicators (headphone | microphone | audio/voice monitor) Microphone stand Polar pattern button Polar pattern indicators (cardioid/ominidirectional/stereo/bidirectional) -
Page 6: Getting Started
Getting started System compatibility • PC and Mac (desktop or laptop) with USB-A or USB-C ports • Mobile devices with USB-C ports • PlayStation™: PS4/PS5 console with USB-A port • Nintendo Switch™ with USB-C port and Nintendo Switch™ console with USB-A port Connecting USB power cable 1. -
Page 7: Connecting A Monitoring Headphone
NOTES: • For best performance, use the original cable. Third-party USB cables may not work with all models of said devices. • USB-C to USB-C cable is not included by-pack. Connectivity with USB-C may not work with all models of said devices. Connecting a monitoring headphone 2.5 mm 3.5 mm... -
Page 8: First Time Setup On Pc
First time setup on PC Download from www.jblquantum.com/engine to gain full access to features on your JBL Quantum Stream Studio, such as EQ settings, polar pattern selection, audio/voice monitor and lighting customization. Software requirements Platform: Windows 10 (64 bit only) / Windows 11 500MB of free hard drive space for installation 1. -
Page 9: First Time Setup On Mac
JBL Quantum Stream Studio NOTE: • By default, all sounds will be played through the JBL Quantum Stream Studio microphone and heard through a headphone connected to it. To hear sound from the Mac directly, select the built-in speakers. - 7 -... -
Page 10: Using Your Microphone
Using your microphone Selecting a polar pattern × 1 The polar pattern defines a microphone’s sound pickup sensitivity related to its angle and directions. Select an appropriate polar pattern according to your recording needs. • Press the polar pattern button to switch among cardioid (default), omnidirectional, stereo, and bidirectional. -
Page 11: Positioning
Positioning For optimal performance, speak towards the side instead of the top of the microphone. Recommended Not recommended Mute/unmute × 1 • Press on the top to mute or unmute the microphone. Ring LED color Microphone status RGB lighting on, microphone muted. RGB lighting on, microphone unmuted. -
Page 12: Headphone Volume/Microphone Gain
Headphone volume/microphone gain × 1 To adjust the headphone volume: • Rotate the volume knob clockwise or counterclockwise. The volume indicator lights up in teal and changes when you adjust the headphone volume. The volume indicator flashes twice in teal when the maximum or the minimum headphone volume is reached. -
Page 13: Audio/Voice Monitor
Audio/voice monitor × 2 To adjust the audio/voice monitor: • Press the volume knob twice, then rotate it clockwise or counterclockwise. The volume indicator lights up as a two-tone ring. The ring’s color ratio changes as you adjust the audio/voice monitor. - 11 -... -
Page 14: Mounting Options
Mounting options You can either place the microphone on an even surface directly or mount it with compatible accessories (not included). Mic mount with 5/8" male screw 1. Detach the microphone and the clamp from the round base to expose the 5/8" (15.88 mm) female thread. -
Page 15: Mic Mount With 5/8" Female Screw
Mic mount with 5/8" female screw 1. Detach the microphone and the clamp from the round base. 2. Detach the screw adapter from the round base. 3. Attach the screw adapter to the clamp with the 5/8" (15.88 mm) male thread exposed. -
Page 16: Mic Mount With 1/4" Male Screw
Mic mount with 1/4" male screw 1. Detach the microphone and the clamp from the round base. 2. Detach the screw adapter from the round base. 3. Attach the screw adapter to the clamp with the 1/4" (6.35 mm) female thread exposed. -
Page 17: Mic Mount With 1/4" Female Screw
Mic mount with 1/4" female screw 1. Detach the microphone and the clamp from the round base. 2. Detach the screw adapter from the round base. 3. Attach the screw adapter to the clamp with the 1/4" (6.35 mm) male thread exposed. -
Page 18: Shock Mount For 2.2" Diameter Microphones
Shock mount for 2.2" diameter microphones 1. Detach the microphone from the clamp and the round base. 2. Attach the microphone onto a shock mount supporting 2.2" (55 mm) diameter microphones securely. - 16 -... -
Page 19: Product Specifications
Product Specifications MICROPHONE • Power required/consumption: 5 V 500 mA • Sample rates: 44.1 kHz / 48 kHz / 96 kHz / 192 kHz • Bit rate: 16 / 24 bit • Capsules: 3 * 14 mm Electret Condenser Microphone •... -
Page 20: Troubleshooting
Make sure that the microphone is properly connected to your headphone and PC, Mac or gaming console device. • Make sure that you have chosen JBL Quantum Stream Studio as the sound source of your PC, Mac or gaming console device. •... - Page 21 Speak towards the side instead of the top of the microphone. My voice cannot be heard by my teammates • Make sure that you have chosen JBL Quantum Stream Studio as the recording device in the sound settings of your PC, Mac or gaming console device. •...
- Page 22 HP_JBL_Quantum Stream Studio_OM_SOP_V4_EN...
Need help?
Do you have a question about the JBL QUANTUM Stream Studio and is the answer not in the manual?
Questions and answers