Table of Contents
Advertisement
Advertisement
Table of Contents

Related Manuals for Winbook XL2


Summary of Contents for Winbook XL2
- Page 1 User’ s Manual notebook computers...
-
Page 2: Table Of Contents
Hardware — Inventory ....... . . 1.3 The WinBook XL2 — Port; Bay; Connector; Indicator Descriptions;... - Page 3 Battery Operation — Charging; Changing ....3.2 Power Management — WinBook XL2 Low Power Measures; Standby and Suspend ....... . . 3.4 Infrared (IR) Port —...
- Page 4 Chapter 6: Video Settings ..... . 6.1 Video Settings ........6.2 SVGA Port .
- Page 5 User’s Manual Table Contents Windows 98 Maintenance Wizard ..... . . 8.21 Cleaning ......... . . 8.22 Operating Environment .
- Page 6 Table of Contents Table Contents...
-
Page 7: Fcc Statement
Federal Communications Commission (FCC) Statement This equipment has been tested and found to comply with the limits for a class B digital device, pursuant to Part 15 of the FCC Rules. Their limits are designed to provide reasonable protection against harmful interference when the equipment is operated in a residential installation. This equipment generates, uses, and can radiate radio frequency energy, and if not installed and used in accordance with the instruction manual, may cause harmful interference to radio communica- tions. -
Page 8: Conventions Of This Manual
Using this manual will help you get the most from your WinBook computer. Keep the manual and the “Read Me First” card with your WinBook XL2 to refer to when you want information and help. If you are an experienced user of computers and/or Windows useful to read Chapter One on the features specific to your WinBook XL2 and then take advantage of the HTML-based “WinBook XL2 Help”... - Page 9 In order to get the optimal usage out of your WinBook XL2, you should remember the following: • Read through all the instructions for your WinBook XL2, including this manual and the “Read Me First”...
- Page 10 User’s Manual ducts. Keep the computer away from sources of excessive moisture. Damage to the computer caused by immersion is not covered by the warranty. • When cleaning the computer or its components, apply the proper cleaning solutions or sprays only to the cloth, not to the computer or its components.
- Page 11 Preface...
- Page 12 User’s Manual The information in this document and the associated WinBook XL2 Help file is subject to change without notice and should not be construed as a commitment by the manufacturer. The manufacturer assumes no responsibility for any errors or omissions that might appear in this document or the associated WinBook XL2 Help file.
-
Page 13: Chapter 1: Getting Started
Chapter 1: Getting Started Chapter One: Getting Started... - Page 14 Consult your doctor or other health professional for medical advice on how to reduce your risk of injury or discomfort from continuous keyboard use. Your WinBook XL2 has all the power and can perform all of the functions of a desktop computer, but its slim design and light weight provide you with portability that can free you to use the computer almost anywhere you go.
-
Page 15: Hardware Inventory
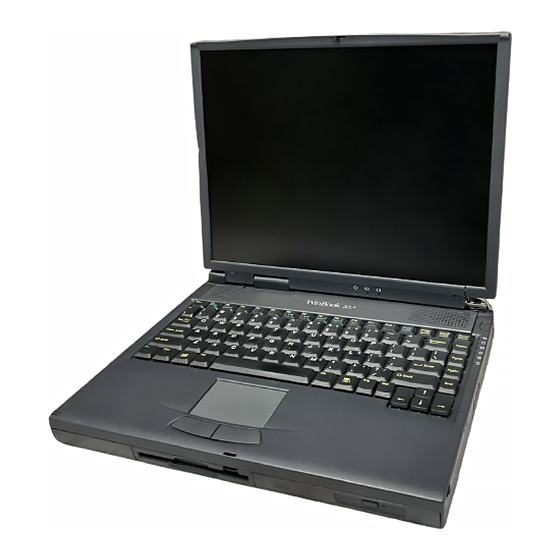
When you unpack your WinBook XL2, check that all the items that you ordered are present and in good condition. Check the inventory checklist that came in the WinBook XL2 box to be sure that all the components and optional components that you ordered are included. If anything is missing or damaged, contact Customer Service immediately (the Customer Service number can be found on the “Read Me First”... - Page 16 PC cards, USB devices, printers, etc. The WinBook XL2 Before you begin using your WinBook XL2, you should take a moment to familiarize yourself with the various ports, bays, connectors, and indicators that make up your system.
- Page 17 The floppy disk drive or LS-120 drive is built into your system. If your WinBook XL2 came with an LS-120 drive, you will be able to use this drive to read or write to standard 3.5” floppy disks or to high-capacity LS-120 SuperDisks.
- Page 18 The IR port on the WinBook XL2 comes disabled, to avoid device conflicts. If you will be using the IR port, see the WinBook XL2 Help file in the WinBook folder of the Start Menu for instructions (Start/Programs/WinBook/WinBook XL2 Help) for activat-...
- Page 19 The back of the system has two doors that cover some of the I/O ports for your WinBook XL2. The door on the left flips down and slides in to reveal the docking port of your system. This door should be closed when the system is undocked.
- Page 20 The serial port is designated as COM1. The SVGA port allows you to connect any standard computer monitor to your system. The TV-out port allows you to connect your WinBook XL2 to a television receiver and direct the screen output to that receiver. AC Connector...
- Page 21 This jack does not provide a pass-through option for connect- ing a phone to this same line. You can obtain adapters that will allow you to connect a phone to the same line as your WinBook XL2. Figure 1.5: Left Side View of the WinBook XL2...
- Page 22 You should exercise care when opening these compartments since damage to the components inside could seriously disrupt system operation. Figure 1.6: Bottom view of the WinBook XL2. Battery Releases CD-ROM Release CD-ROM Upgrade Access Panel 1.10 Figure 1.6)
- Page 23 The power LEDs located on the display panel indicate the different power use and battery statuses of your WinBook XL2. The functions of these LEDs are indicated by icons: a plug, a battery and a battery with a line through it (left to right).
- Page 24 User’s Manual Figure 1.8: System Status LEDs • When the system is placed into suspend or standby mode, the green light will begin to flash, until the system is awakened. • When the AC adapter is recharging the internal battery, the amber light below the battery icon with a line through it will turn on.
-
Page 25: Power On
In certain programs, this will prevent the screen from scrolling. Power On The first time you use your WinBook XL2, use your AC power adapter. This will allow your battery to fully charge. It is recommended that you then allow the battery to fully discharge and recharge three times. This will help calibrate the electronics that monitor and maintain the battery charge. - Page 26 1.14 When you first start your new WinBook XL2, you will need your Windows 98 manual. On its cover is your product key number for Window 98. During this first setup, you can click on the Next button to move to the next step.
- Page 27 If you explore the start menu, you will also notice a WinBook folder in the program groups. This folder holds your WinBook XL2 Help file and possi- bly other files that contain information about your WinBook XL2.
- Page 28 User’s Manual The Keyboard Your main interface with your computer will be your keyboard. If you are unfamiliar with the standard PC keyboard, some of its keys are explained in this section. The keyboard has all the standard computer typing keys and some control keys.
- Page 29 Chapter 1: Getting Started Figure 1.9: The XL2 Keyboard (Shown with pointing stick available on selected models.) Your keyboard also has two Windows 98 keys: a Start key (which bears the Windows logo), which allows you to pull up the Start menu, and a Menu...
- Page 30 User’s Manual KEYS [Fn]+[F1] [Fn]+[F2] [Fn]+[F3] [Fn]+[F4] [Fn]+[F6] [Fn]+[F7] [Fn]+[F8] [Fn]+[F9] [Fn]+[F10] [Fn]+[F11] 1.18 FUNCTION(S) Puts the LCD display into a standby mode If an external monitor or television receiver is present, you can toggle 1) to an external monitor, 2) to a TV receiver, 3) to a simultaneous display on the screen and a monitor, and 4) back to the built-in screen.
- Page 31 Use of an external pointing device with your WinBook XL2 is discussed in Chapter Four. No matter which pointing device you use, its speed, or the speed of an external mouse, for your WinBook XL2 system can be adjusted to accom- modate your personal preferences.
-
Page 32: Lcd Display
LCD Display Your WinBook XL2 comes with a back-lit LCD display panel. The intensity of the panel will vary slightly with your angle to the screen. You can adjust the angle of the panel to provide optimal clarity. You can also adjust the brightness of the screen by using the [Fn]+[F6] key combination (to darken the screen) or the [Fn]+[F7] key combination (to brighten the screen). - Page 33 Battery & Power Saving When the AC Adapter is connected to your WinBook XL2, your battery will charge whether the computer is on, off, or in the power saving mode. It will, however, charge much faster if the computer is off.
-
Page 34: Control Panel
Windows 98 sessions. Power Management Your WinBook XL2 should run for over two hours on a single, fully charged battery and longer if power management is employed. The key to obtaining optimal battery life for your system is effective power manage- ment. - Page 35 Figure 1.11: The speaker icon on the taskbar. Built-in Microphone The microphone built into the case of your WinBook XL2 provides you with an integrated source for adding sound to your applications or for using the speech functions of your applications. You will need applications capable of using such sound input to make use of the microphone.
-
Page 36: Cd-Rom Drive/Dvd Drive
Your CD drive can also be used to play audio CDs through the audio hardware built into your WinBook XL2. Your CD-ROM will also be able to read from photo CDs. - Page 37 5. Be sure to carefully center the CD and press it into place on the loading tray. Since your WinBook XL2 is meant to be portable, the CD is secured onto the tray rather than simply resting in a recess.
- Page 38 If your WinBook XL2 has a DVD drive, you will be able to use this drive to play DVD video disks. You can connect your computer to an s-video equipped television or video device to play videos stored on DVD.
- Page 39 If you purchased some other software, or if you already own software that you will be installing on your new WinBook XL2 system, or if you buy software at a later date, you will need to know how to install that software on the WinBook XL2 system.
-
Page 40: Chapter 2: Basic Computing
Chapter 2: Basic Computing Chapter Two: Basic Computing... -
Page 41: Ram
Windows 98 below for more detailed information. The WinBook XL2 is designed to be run straight out of the box, so, if you are an experienced computer user, you should be ready to go. You can find additional information about specific features of your system in the chap- ters that follow and in the WinBook XL2 Help File in the WinBook folder on your hard drive. -
Page 42: Hard Drives
Hard Drives The hard drive is the fixed disk, which provides the primary storage medi- um for your data. Most of your programs and data will be stored on the hard drive. The capacity of your hard drive will probably be one or more gigabytes (1 gigabyte (GB) = 1,000,000,000 bytes or 1024MB). - Page 43 User’s Manual Figure 2.2: C: drive properties You can also find out the capacity, used space and available space on the C: drive by right-clicking on the C: drive in the My Computer window and select- ing properties from the drop-down menu. (Figure 2.2: C: Drive Properties) The Windows Explorer provides an alternative way of seeing the contents of the C: drive...
- Page 44 It is also a good idea to check your hard disk on a periodic basis for disk errors that can lead to data loss. The ScanDisk utility in Windows 98 (Start/Programs/Accessories/System Tools/ScanDisk) provides a means of checking your system for such errors. Information about using this utili- ty can be found in your Windows 98 documentation.
- Page 45 User’s Manual Figure 2.5 Advanced Task Scheduler Properties comes up, click on the Settings tab and select those options that will limit the task when running on battery power. This will delay the task until you are running on AC and can be sure that the task will be properly completed. It will also keep an automated task from draining battery power from an unattended system.
-
Page 46: The Device Manager
WinBook XL2. Device Manager is the place where you can learn this information about your system. If you want to know more... -
Page 47: Data Handling
User’s Manual Be sure to read the Windows 98 manual care- fully before altering any settings in Device Manager. Figure 2.7 Device Manager get some basic information here on the source of the problem. If there is a conflict between two (or more) devices, you will also be told which devices are trying to use the same IRQ or resource. - Page 48 Chapter 2: Basic Computing Windows 98 does make use of the extensions to track which programs are associated with which extensions. Your software will usually assign an extension to the long file name when you save, but you can choose the extension yourself if you would prefer.
- Page 49 (Your primary storage medium is your hard drive.) Data is stored on diskettes as magnetic fields. Your WinBook XL2 system came equipped with a 3.5” diskette drive or an LS-120 drive capable of reading 3.5” diskettes. To read data from or write data to your diskette, insert your diskette into the drive.
- Page 50 Chapter 2: Basic Computing magnetic fields. Avoid placing the diskette near sources of strong magnetic fields, such as motors, telephones, speakers and television sets. Avoid exposing the diskette to extreme temperatures, moisture, smoke, direct sun- light, dust, dirt and ashes. These can all damage your diskette. Store in a proper case when not in use.
-
Page 51: Windows 98 Functions
CD or DVD. Windows 98 Functions Your WinBook XL2 ships with the Windows 98 operating system. This desktop: (Figure 2.8: Windows 98 Desktop) •... - Page 52 • Provides an “address” line for a given directory, which can allow you to quickly type in a different directory or web (World Wide Web—see below for more information) address and change the active window. Note: When typing in a new address, remember that web addresses use forward slashes to separate directories or folders, while Windows 98 uses backward slashes.
- Page 53 User’s Manual You can switch between Web style and Classic style (Windows 95 style) win- dows by right-clicking on the desktop, selecting Active Desktop/Customize my Desktop/Folder Options. This will pull up the dialog box that lets you toggle among the available modes. Figure 2.10 My Computer 2.14 Your taskbar also includes a clock.
- Page 54 The Windows 98 documentation can provide you with information on using the various aspects of this operating system. Your WinBook XL2 has been set up with most common Windows 98 com- ponents active. There are, however, other components that can be added to the Windows installation.
-
Page 55: Windows 98 Classic Desktop
This will allow you to take advan- tage of the speed and power of your computer. Your WinBook XL2 system is capable of running older DOS and Windows 3.x software if you already have such programs, but neither of these will take advantage of all of the features of your WinBook XL2 system. -
Page 56: Modem Communications
Communications Your WinBook XL2 might have come with a fax/modem (built-in or a PCMCIA card) that allows you to take advantage of the fax and communi- cations abilities of your system. The fax/modem is capable of running in two modes: as a fax and as a modem (which can be connected to other computers via their modems). - Page 57 Note to advanced users: a list of AT commands is available in the WinBook XL2 Help file. Fig. 2.11 Online Folder 2.18 The speed of your modem (e.g. 56,600 baud) represents the speed at which the modem is capable of transmitting information.
- Page 58 Internet and the World Wide Web If your WinBook XL2 came with a modem, or if you have a network con- nection, you can use your computer to connect to the Internet and World Wide Web.
- Page 59 Internet connections are a useful way to exchange information and acquire updates of programs, including updated drivers or files for your WinBook XL2. Once you have become familiar with your WinBook XL2, you can find more extensive information about the World Wide Web in your WinBook XL2 Help file.
-
Page 60: Chapter 3: Mobile Computing
Chapter 3: Mobile Computing Chapter Three: Mobile Computing... - Page 61 Battery Operation Charging Your WinBook XL2 comes equipped with a durable, lightweight, recharge- able lithium-ion battery that can power your system for over two hours when fully charged (longer if power management is used). The actual dura- tion of a charge will vary with how you use the computer and with how much you take advantage of the power management features of the system.
- Page 62 [PgUp] to run the battery calibration. Follow the instructions provide by the battery calibration utility. As part of the calibration, the WinBook XL2 will discharge the battery and shut down the system. This process can be very lengthy. You should see a message indicating the status of the calibration.
- Page 63 Power Management In order to make the most of the mobile computing capabilities of your WinBook XL2, you will need to be aware of how to manage the power con- sumption of your system. Aggressive power conservation can provide extend- ed computer usage.
- Page 64 There are two power management systems available to you. 1. Your WinBook XL2 has power management features built into the BIOS Setup program. You can change the degree of power management by entering the BIOS Setup program (see Chapter Eight) and adjusting the power management settings.
- Page 65 Portable/Laptop and Always On. Each provides default settings which anticipate standard power usage in each setup. Your unit should be set to default to Portable/Laptop settings. You can customize the settings to match your usage and save your own schemes (e.g. Airline Travel).
- Page 66 Engaging power savings while your system is plugged in can help speed the recharging of your battery, so you might want to create a power scheme that allows you to have a faster charging mode and another that allows you to use AC power without any power management interruptions.
- Page 67 There are some measures that you can take as a user to help optimize battery use in your WinBook XL2. If you are running one or more PCMCIA cards, using the system audio and making frequent calls to...
-
Page 68: Standby And Suspend
When battery power gets low, the unit will provide warnings and eventually take action to help preserve data. When the WinBook XL2 estimates that the battery has only a few minutes of battery power remaining (the actual time will vary with usage), the right indicator on the hinge of the display panel will start to flash red. - Page 69 Suspend mode for up to a week on a fully charged battery. Remember which mode you have chosen when you shut down the comput- er. Hitting a key or moving the mouse will activate a WinBook XL2 in Standby mode. The Suspend mode is exited by hitting the power button.
- Page 70 Infrared (IR) Port The infrared (IR) port of your WinBook XL2 provides a powerful tool for connecting to other computers, networks, and peripherals via a high-speed wireless connection. This port is sometimes referred to as a serial infrared port (SIR), but it is also capable of functioning as a second parallel port for printing.
- Page 71 User’s Manual This will bring up the IR software built into Windows 98. This software will begin scanning for a present IR device. If one is found, it will com- plete the connection. If a device is not found, try adjusting the distance and angle between the two IR ports.
-
Page 72: Infrared Transfers
Windows 95, you will need to set up the connection as a Direct Cable Connection. The WinBook XL2 Help File has information about how to set up and use such an infrared connection. If all computers involved are using Windows 98, you can follow the instructions below for transferring files. - Page 73 User’s Manual Figure 3.12: Infrared Recipient You might be asked to activate the Infrared Recipient utility on the other computer. If so, double- click on its icon in My Computer on that other system. 3.14 Figure 3.13: Infrared Transfer My Computer. (Figure 3.12) This will open the Infrared Transfer window. Make sure that the infrared port of any other computer to be used is enabled.
- Page 74 Windows 98, you should also deactivate the infrared port in the BIOS Setup program to help minimize device conflicts. See your WinBook XL2 Help file for instructions for activating and deactivating the port. Chapter 3: Mobile Computing Figure 3.14: Infrared Files Being Sent...
-
Page 75: Ir Printing
If you need a larger display and an external monitor is not available, you can use the TV-out jack on your WinBook XL2 to direct the screen output of your system to a television screen your WinBook XL2 includes both a standard TV-out jack and an s-video jack. - Page 76 Although it is tempting to pack your WinBook XL2 in your luggage, it is apt to result in a broken system. The best solution is to carry the WinBook XL2 with you.
-
Page 77: Travel
The WinBook XL2 can be used safely in a moving car. Power adapters that will connect between the WinBook XL2 and a cigarette lighter socket are available. - Page 78 • Hand your WinBook XL2 to an airport attendant rather than setting it on the conveyor for security checks. This will help reduce the possibility of theft. (Note: Airport X-Ray machines will not damage your system.) •...
- Page 79 User’s Manual Remember to pack: • Your WinBook XL2 • Your WinBook XL2 CD (which contains the drivers for your system) and Windows 98 CD • Your AC adapter/power cord • Any international converters for your adapter • A spare length of phone cord •...
-
Page 80: Chapter 4: Desktop Operation
Chapter 4: Desktop Operation Chapter Four: Desktop Operation... - Page 81 Even if you have an existing desktop system, you will find it useful on occasion to be able to connect your WinBook XL2 as if it were a desktop system. This chapter discusses those functions of your WinBook XL2 that are typical of desktop systems.
- Page 82 Figure 4.2: The Audio Mixer. There are controls available here for System Volume, Wave Files, Synthesizer, Line-in, CD Audio, Auxiliary Audio, Video Sound, Microphone, Mono In, PC Speaker and IIS, but you can control which ones appear in the mixer by clicking on Options/Properties and checking or unchecking the boxes for the functions that you want to have visible in the mixer.
- Page 83 User’s Manual Figure 4.3: Recording Control. If your sound requirements change, you can look into a high-quality PCMCIA sound card for your system. If the Advanced button does not appear on your mixer, click on Options/Advanced Controls. Figure 4.4: Advanced Microphone Properties There is an advanced microphone proper- ties button on the...
- Page 84 Figure 4.5: CD Player Playing an Audio CD You can play audio CDs through the sound system. Place the audio CD in the drive (see Chapter One for instructions on inserting a disk). The CD Player in Windows 98 will recognize the audio CD and launch the program to control the playback of the CD.
- Page 85 Playing Sound Files In addition to playing music from audio CDs, your WinBook XL2 can play audio files stored in MIDI or WAVE file formats, as well as sound stored in audio form and used in programs and games. With the proper software, you can also use the sound system to play audio files via the World Wide Web, including live audio broadcasts.
-
Page 86: External Speakers & Microphone
(Start/Settings/Control Panel). For sound files that require excellent sound quality, you should consider buying an external microphone designed for high-quality voice recording (which can be connected to your WinBook XL2 through the microphone jack on the right side of the system). - Page 87 Installing Your Printer for Windows 98 When you first boot your WinBook XL2 you will be offered the opportu- nity to set up your printer. If you did not set up your printer at that time, or if you have added a printer to your...
- Page 88 Chapter 4: Desktop Operation In the “Add Printer Wizard” click on Next. (Figure 4.7) Figure 4.7: Add Printer Wizard. Figure 4.8: Add Printer Wizard. You will be asked to identify the printer as local or network. (Figure 4.8)
- Page 89 User’s Manual If your printer came with an installation disk, it might have drivers there (this will often be the case if the printer came into production after the most recent release of Windows 98). You should check your printer manual for informa- tion on using the installation disk.
- Page 90 This would be a good idea if this is a new printer, or the first printer that you have set up for your WinBook XL2. (Figure 4.12) When Windows 98 has finished loading your printer drivers, you will be returned to the Printers menu.
- Page 91 (such as printers). EPP transfer mode provides increased performance for 2-way transfers such as those used to link another computer to your WinBook XL2 system for file transfer. You might need to check the documentation of your device to determine the modes supported.
- Page 92 You can connect an external VGA or SVGA monitor to your WinBook XL2 through the video port on the rear of the system. You can direct the output to the LCD, the external monitor or both by toggling the LCD/CRT setting ([Fn]+[F2]) or by right-clicking on the ATI display icon on the taskbar, selecting Settings/Display Settings.
- Page 93 I/O door on the back side of the WinBook XL2. The small I/O door is located on the right side of the WinBook XL2 as you face the back side. The serial port is the left connector inside of the small bay.
-
Page 94: Usb Ports
WinBook XL2. The Serial Communications Port on your WinBook XL2 is COM1. There is also a serial infrared port which is normally located on COM3 (see Chapter Three for information about enabling and using the infrared port). - Page 95 These devices can draw power through the hub device, leaving your WinBook XL2 free to conserve or recharge battery power. If you have a mobile USB device and want to make use of the WinBook XL2 as the...
-
Page 96: Optional Port Replicator
Panel (Start/Settings/Control Panel/ Add New Hardware) to set up the system to work with this additional hardware. To connect your WinBook XL2 to a port replicator, open the left rear door to expose the docking port of your system. Slide your WinBook XL2 back into the port replicator so that the docking port connects to the port replica- tor. - Page 97 If you want to use a joystick or gamepad with your WinBook XL2, read the section of the WinBook XL2 Help File on joystick installation and use.
- Page 98 Chapter 4: Desktop Operation 4.19...
-
Page 99: Chapter 5: Pc Cards (Pcmcia)
Chapter 5: PC Cards (PCMCIA) Chapter Five: PC Cards (PCMCIA) -
Page 100: Pc Cards
WinBook XL2. If the driver for your actual card is not found in Windows 98 database of dri- vers and you choose a generic driver, you should consider taking the card out of the slot when it is not in use to avoid draining the battery. - Page 101 Most cards with some external connection will allow you to remove or recess the connection for travel. Remember to take any removable connec- tions with you when you travel if you intend to use the card. Your system should already be equipped with drivers for the PCMCIA slot (these are not the same drivers as the ones for the specific cards).
- Page 102 User’s Manual Figure 5.2: PCMCIA Slots. Figure 5.3: The PCMCIA Icon on the Taskbar. through the process of loading these drivers. You might be asked to indicate the source of the drivers. Windows 98 has drivers for many PCMCIA cards, but you should check the documentation for your card to determine whether the manufacturer has provided more current drivers.
- Page 103 5. If the card has any external connections, secure them to the card and the necessary external device. 6. When you are finished using the card, click once on the PCMCIA icon on the taskbar. This will bring up a popup menu for shutting down any cards in the PCMCIA bay.
- Page 104 User’s Manual Figure 5.5: PCMCIA Properties. You can check on the status of the installed PC Card by clicking on the icon on the taskbar. You can check or alter the properties of the PC card usage by your system by double-clicking on that icon. This will call up the PC Card Properties dialog box.
-
Page 105: Pcmcia Network Connections
PCMCIA Network Connections If you have a network PCMCIA card, you will first need to have your WinBook XL2 recognize the card and load the necessary drivers (see above). Once your network card has been recognized and Windows 98 has installed the necessary networking files, you will be asked to restart your system to allow the new networking environment to function. - Page 106 A"Network Neighborhood" icon will now be present on your desktop to allow quick access to network functions. WinBook does not provide Technical Support for net- work functions. Contact your network administrator for assistance. prompted for a username and password when Windows 98 loads. You must supply a username.
- Page 107 (Figure 5.8) You will also see a button here that will allow you to set up your WinBook XL2 for file and/or print- er sharing. If you will want to allow your files or your printer to be shared by other computers on the network, you can set up the file and printer sharing as described in the section below.
-
Page 108: Sharing
WinBook XL2, you will need to set up your system for file sharing. You can set this up by double-clicking on the Network icon in the Control Panel (see Figure 5.7) - Page 109 Figure 5.10: File and Print Sharing If you want to allow access to certain files on your system, you will now need to designate those files for sharing. Open the Windows Explorer program (Start/Programs/Windows Explorer) or My Computer and the drive window contain- ing the folders you want to share.
- Page 110 User’s Manual You will now be asked to establish the kind of access you want to allow to this folder. (Figure 5.12) Figure 5.12: Access to Shared Folders You should consider who will be using the access and why and establish the necessary passwords.
-
Page 111: Pcmcia Scsi Interface
In order to use devices that require a SCSI interface, you will need to install a SCSI interface card in one of the PCMCIA slots in your WinBook XL2. Once your card has been recognized and the proper drivers loaded, you will be able to connect SCSI devices to your WinBook XL2. -
Page 112: Pcmcia Modem
PCMCIA Modem Your WinBook XL2 might have come with an optional PCMCIA modem. Even if your unit came with a built-in modem, you might purchase a PCM- CIA modem (e.g. one that connects to a cellular phone). If so, once the... -
Page 113: Chapter 6: Video Settings
Chapter 6: Video Settings Chapter Six: Video Settings... -
Page 114: Video Settings
User’s Manual Video Settings Your WinBook XL2 provides you with a wide range of video inputs and outputs. You should take a little time to familiarize yourself with these aspects of your machine. Your WinBook XL2 allows you adjust the brightness of the LCD screen by using the [Fn]+[F6] hot key combination to decrease screen brightness or the [Fn]+[F7] hot key combination to increase screen brightness. - Page 115 SVGA port. Remember to change back down to a supported resolution before returning video output to the LCD screen. Your WinBook XL2 provides easy access to various video settings and util- ities by a right-click on the ATI icon in the system tray of your taskbar.
- Page 116 Figure 6.3: Access to Video Settings This pop-up menu also provides quick access to the Display Settings for your WinBook XL2. (Figure 6.3) Note: You can also bring up the Display Properties dialog box by right-clicking on the Windows 98 desktop and selecting “Properties.”...
- Page 117 The tabs across the top allow you to move among the various dialog boxes that control settings for your system. These settings are discussed in detail in your WinBook XL2 Help file located in the WinBook folder of the Start Menu.
-
Page 118: Svga Port
You can connect an external VGA or SVGA monitor to your WinBook XL2 through the video port on the rear of the system. You can direct the output to the LCD, the external monitor or both by toggling the LCD/CRT setting ([Fn]+[F2]) or by right-clicking on the ATI icon on the taskbar and selecting “Settings”... -
Page 119: Tv-Out
TV-out Your WinBook XL2 comes equipped with a TV-out jack that allows you to direct the screen output of your system to a television screen. You will need to purchase A/V cables that are capable of fitting your jacks. The TV-out... - Page 120 LCD or external monitor by selecting their radio buttons. Press [Fn]+[F2] to toggle the output to your WinBook XL2’s display screen (you might need to press it more than once—wait to see if the dis- play returns to the display screen and toggle it again if it does not).
-
Page 121: Dvd
S-video input port. If your television or video device has an S-video port, you can attain sharper image quality by connecting your WinBook XL2 to that device with that S-video port than you can with a traditional TV-out (composite) connection. This can be especially helpful in DVD playback, since it allows for smoother video transmission between your system and the video device. -
Page 122: Zoomed Video
Zoomed Video does not send video to the processor of your system, so it is not a method of capturing video signals for editing by your computer. Your WinBook XL2 comes equipped with ZV support via the two PCM- CIA slots. In order to take advantage of your ZV port, you will need to purchase a ZV interface card for your system. -
Page 123: Chapter 7: Upgrading
Chapter 7: Upgrading Chapter Seven: Upgrading... - Page 124 Memory Since RAM requirements for software programs are constantly increasing, your WinBook XL2 is made to allow for an easy upgrade in system memory with SO-DIMM modules provided by WinBook Corporation. Your WinBook XL2 has two memory slots that allow you to install new memory configurations.
- Page 125 The chart below shows you some of the possible memory configurations for your WinBook XL2: Module 1 Module 2 16MB None 16 MB 16MB 32MB None 32MB 16MB 32MB 32MB 64MB None 64MB 16MB 64MB 32MB 64MB 64MB To install memory modules: 1.
- Page 126 User’s Manual Figure 7.3: Removing the RAM compartment panel 4. The RAM compartment is located under the panel just above the keyboard. 5. Gently slide the panel forward to loosen it. 6. Gently grip the side edges of the panel and angle it up and forward to remove it from the compartment.
- Page 127 Figure 7.4: Removing the Old Memory Card slide it from its edge connector slot. Store the card in the anti-static bag that contains your new card(s). (Figure 7.4) 8. To install the new memory card, hold the card with its gold edge connector toward the edge connector slot of the compartment.
- Page 128 12. Push the cover down until it is flat and slide it towards the rear of the computer as far as it can go. 13. Slide the end caps back on. 14. Start your computer. The WinBook XL2 should automatically register the new memory. If the memory size indicated during the POST...
- Page 129 Swappable Drives Hardware and software changes quickly. In order to make it easy for you to expand the capacity of your WinBook XL2, the hard drive in your WinBook XL2 is made to be easily swapped out for upgrading. (Figure 7.7) You should be sure to back up your hard drive before attempting to...
- Page 130 To upgrade your hard drive: 1. Back up the installed drive completely. Be sure that you have the bootable CD-ROM that came with your WinBook XL2 if your new drive does not come with an operating system (e.g. Windows 98) already loaded.
- Page 131 (Figure 7.9) 6. Slide the hard disk drive unit out of the system. (Figure 7.10) 7. The drive is attached to a special bracket that secures it to the WinBook XL2. Remove this bracket from your existing drive.
- Page 132 User’s Manual Figure 7.10: Removing the Hard Disk Drive 8. Remove the new hard drive from its anti-static bag. You can use the same anti-static bag to store your old hard drive. 9. Attach the bracket to the new drive. 10.
- Page 133 CD-ROM that came with your system, not the Windows 98 CD-ROM. The CD-ROM that came with your system has all the proper drivers and information to restore your WinBook XL2 to its original factory configuration. Chapter 7: Upgrading 7.11...
-
Page 134: Firmware Upgrades
Other Upgrades (Card Bus) The easiest way to upgrade the capabilities of your WinBook XL2 is to take advantage of the PCMCIA slots in your system. These can be used to provide a network connection, communications hardware, or connections to external equipment via a PCMCIA card (or PC card) interface. - Page 135 Chapter 7: Upgrading 7.13...
-
Page 136: Chapter 8: Configuring & Maintaining Your System
Chapter 8: Configuring & Maintaining Your System Chapter Eight: Configuring & Maintaining Your System... -
Page 137: Setup Program
User’s Manual Check your WinBook XL2 Help file in the WinBook folder of the Start menu for the most current BIOS information for your system. You can also obtain updated BIOS software from the WinBook technical support site: http://www.winbookcorp.com/ If your system is set to... - Page 138 Power Management Setup: Selecting this item calls up the Power Management Setup menu, which controls the built-in power management features of your WinBook XL2. See the section on this menu below for specific instructions. Peripheral Setup: Selecting this item calls up the Peripheral Setup menu, which controls how your system uses its ports and audio.
- Page 139 User’s Manual Setup to perform an auto-detect on each boot (see the section below on Standard CMOS Setup). This latter option should be used if you will be switching between hard drives and do not want to manually detect the hard drive each time you switch.
- Page 140 If there will be more than one user of this WinBook and you want to limit other users’ access to the BIOS settings, you should consider enabling this password option. Auto Configuration with Optimal Settings: Selecting this item will cause the system to change all BIOS information from the current settings to settings that will provide optimal performance.
-
Page 141: Standard Cmos Setup Menu
Floppy Drive A: This item controls the setting for the type of floppy disk Properties window. Windows drive. If your WinBook XL2 came with a floppy disk drive, you should 98 will also adjust your system leave this value at “1.44 MB 3 1/2.” If your unit came with an LS-120 time automatically to account drive, you should leave this item set at “Not Installed.”... -
Page 142: Advanced Cmos Setup Menu
LCD and CRT will slow video response time slightly. BootUp Sequence: This item establishes the BootUp Sequence for your computer. Your WinBook XL2 will check the drives in the order designat- ed and load the operating system from the first drive in the sequence that contains one. - Page 143 User’s Manual Figure 8.3: The Advanced CMOS Setup Menu (C)1998 American Megatrends, Inc. All Rights Reserved ” S elect Display Type ” B ootUp Sequence ” ” B oot Mode ” F loppy Access ” S .M.A.R.T. for Hard Disks BootUp Num-Lock ”...
- Page 144 S.M.A.R.T. for Hard Disks: S.M.A.R.T. is a set of hard disk diagnostics built directly into your hard disk drive. Activating this option will allow the WinBook XL2 to take advantage of these diagnostics. Set this item to “Auto” to have the system detect the presence of a S.M.A.R.T. drive. You can disable this item if you find that the S.M.A.R.T.
-
Page 145: Power Management Menu
“disable” this option. Power Management Menu Your WinBook XL2 has an array of elaborate power management features that will enable you to extend battery life. As you use your system, you should try various power management settings to find the balance of sys- tem response and power management that works best for you. - Page 146 Figure 8.4: The Power Management Menu AMIBIOS SETUP - POWER MANAGEMENT SETUP (C)1998 American Megatrends, Inc. All Rights Reserved ” P ower Savings mode Customized ‡ Disabled will disable all CPU Auto Doze Mode Enabled Standby Timeout 10 minutes Suspend Mode Auto ‡...
- Page 147 User’s Manual Autosave functions (or other automatic functions, such as email checking) in programs can reset the timeouts for your system. If you want the system to time out after a specific period of inactivity, make certain that automatic functions are dis- abled or set with a longer time period than the system timeouts.
- Page 148 Battery Low Warning Beep: This item allows you to disable the beeping sound that your WinBook XL2 emits when the battery is low. We recom- mend that you leave this function enabled to help prevent data loss.
-
Page 149: Peripheral Setup Menu
Com2 Port (Modem): If you have an internal modem for your WinBook XL2, this item should be set to “Auto.” If enabled, the modem port will be the Com2 port on your system. If you find that the “Auto” setting causes conflicts with other devices, you can use one of the other settings available under this option. - Page 150 Figure 8.5: The Peripheral Setup Menu. AMIBIOS SETUP - PERIPHERAL SETUP (C)1998 American Megatrends, Inc. All Rights Reserved Com2 Port (Modem} Com1 Port Com3 Port (IR) IR Mode IR DMA Channel LPT Port LPT Extended Mode EPP Version LPT Port DMA Channel LPT Port: This item allows you to set the I/O address for the LPT (paral- lel) port.
- Page 151 Normal: This setting assumes that the communication is primarily from the computer to a peripheral (such as a printer). This setting is not intended for a parallel connection between your WinBook XL2 and another computer for file transfers. Bi-Directional: This setting allows for information to move equally in both directions.
- Page 152 being infected is relatively minimal (although not nonexistent). Unfortunately, that is a very limiting way to use a computer. You should regularly check your computer for viruses (not all viruses act immediately, some are set to engage when a function is performed or when a specific date and time arrives).
-
Page 153: Encryption
User’s Manual This aggressive form of password protection can be used to limit access to your system and files. If this password is set to always activate, it will restrict the computer from booting unless your password is provided. It will not, however, protect your data if the drive is removed and placed into another machine. -
Page 154: Internet Connections
When conducting business on the Internet, be certain that you are using a secure site before providing sensitive financial information such as credit card numbers. Physical Security You can help protect your WinBook XL2 from theft by taking several steps: •... -
Page 155: System Maintenance - Backup
These drives provide more speed than a traditional backup-only drive. Most such drives can be con- nected to your WinBook XL2’s parallel port or through a PCMCIA card that provides a SCSI port or other interface port. (Units with an LS-120 drive already have such a large -capacity drive.) -
Page 156: Software Updates
Software Updates One way to insure the optimal operation of your WinBook XL2 is to be certain that you have the most current software. Manufacturers regularly update and repair programs and drivers. WinBook posts updated versions of your system’s BIOS software on the technical support web site: www.winbookcorp.com... -
Page 157: Cleaning
Never spray or pour liquid cleaners onto your keyboard. Moisture that gets under the keyboard can damage internal components of your WinBook XL2. Cleaning solutions should be applied lightly to a clean cloth or cotton swab. Pointing devices: Before cleaning any part of your system, be sure to shut down and unplug the system. -
Page 158: Operating Environment
Vents: After shutting down and unplugging your system, use a hand-held vacuum to clean the vents on the case of your WinBook XL2. If you work in a dusty environment, you should try to vacuum often to avoid accumula- tion of dust on internal components. - Page 159 Humidity: A relatively small amount of moisture can cause a short in electronic components. If you see condensation appearing on other equipment around you, you should not turn on your WinBook XL2. In general, relative humidities in excess of 85% should be avoided.
-
Page 160: Chapter 9: Troubleshooting
Chapter 9: Troubleshooting Chapter Nine: Troubleshooting... -
Page 161: Audio
• Are the headphones connected? Make sure the cord is plugged into the external speaker jack. This is the jack closest to the front of the system. • Are you using the correct connector? The WinBook XL2’s external speaker connector is compatible with a 3.5mm stereo audio plug. If you... - Page 162 • Check that Mute is not enabled. Press [Fn]+[F10] to toggle the Mute setting. • If you have external speakers or head phones plugged into the WinBook XL2, the built-in speakers are automatically disabled. Try unplugging external speakers or headphones to see if the audio is restored to the built-in speakers.
- Page 163 User’s Manual • Are you using the correct connector? The WinBook XL2 external speak- er connector is compatible with a 3.5mm stereo audio plug. If you are using a different plug, it may not be compatible. • Inspect the cord for wear or damage. Usually you will find this at the ends of the cable where connectors are attached.
-
Page 164: Booting Up
• Double-click on the speaker icon on the taskbar. When the mixer appears, click on Options and then Properties. When the mixer property window appears, click on the radio button beside Recording and then click OK to view the recording mixer. Check to see that the microphone settings are correct. - Page 165 Restore CD to install Windows 98 in the original con- figuration for your WinBook XL2. If you have a full back-up of your drive, you should then be able to restore your programs and files to the...
- Page 166 • CD-ROM does not have the necessary files to properly boot. Try another bootable CD-ROM. • CD is damaged. If this is the Restore CD that came with your WinBook XL2, contact Technical Support about obtaining a replacement. PROBLEM: Computer does not come on when the power switch is turned on.
-
Page 167: Cd-Rom/Dvd
PROBLEM: My CD-ROM/DVD Drive door won’t open. ACTIONS: • Turn the WinBook XL2 on. While the power is ON, press the button on the drive. The drive door should open. • If the door still will not open, you can manually eject the disk. There is a small hole on the door of the CD-ROM/DVD drive. - Page 168 • Check that Mute is not enabled. Press [Fn]+[F10] to toggle the Mute setting. PROBLEM: My DVD video won’t play. ACTIONS: • Launch your DVD player. DVD videos required a software decoder to allow playback. You will need to start the DVD player to allow DVD playback.
-
Page 169: Drives
See the Windows 98 documentation for informa- tion on how to adjust the size of the Recycle Bin. • The WinBook XL2 comes equipped with removable hard drive. If it would be inconvenient to remove files to gain disk space, you can easily upgrade your drive to one with a higher capacity. - Page 170 • Have you formatted the disk? Some new disks are not formatted for use with your WinBook XL2. If your disk is not formatted, or if the disk is formatted for use with another type of computer, Windows 98 will notify you.
-
Page 171: Keyboard
• Have you formatted the disk? Some new disks are not formatted for use with your WinBook XL2. If your disk is not formatted, or if the disk is formatted for use with another type of computer, Windows 98 will notify you. - Page 172 XL2 is not working. ACTIONS: • If you plugged the keyboard into the WinBook XL2 after it was turned on, restart the WinBook XL2 with the keyboard plugged in. If restarting doesn’t help, your keyboard may be defective or incompatible with PS/2 or USB specifications.
-
Page 173: Miscellaneous
User’s Manual Miscellaneous PROBLEM: Date reads January 1, 1980 or some other very early date. ACTIONS: • The lithium ion battery that maintains the system clock might be dis- charged. Contact Technical Support for information about replacement. PROBLEM: System is not using AC power source when AC adapter is connected. - Page 174 • Check to be certain that the phones are working. • If this modem is internal, check to see that it has not been disabled. Enter the Setup program (see Chapter Eight) and check the Peripheral Setup Menu. If the modem has been disabled, set it to “Auto” or to a specific address.
-
Page 175: Pcmcia Cards
ACTIONS: • Check to be certain that the card is not a Type III card. The PCMCIA slots on your WinBook XL2 are not made to accept a Type III card. Pointing Devices PROBLEM: I plugged an external PS/2 pointing device into the WinBook XL2, but it doesn’t work. - Page 176 Confirm that you want to save the settings and then hit [Enter]. Wait while the computer restarts. After your WinBook XL2 restarts, the touchpad will not work, but the external device should begin working. If none of the pointing devices are working, you can use the [Alt]+[F4] key combination or the [Start] key to enter the shutdown menu.
- Page 177 • Move the pointing device more slowly across the screen. Rapid pointer movement can cause the pointer to sometimes disappear when the WinBook XL2 is using resources to save a file or print a document. Usually the pointer’s characteristics will return to normal after the WinBook XL2 finishes tasks that consume its resources.
-
Page 178: Ports
Setup program to be sure that the port is set to either “Auto” or set to a specific address (make sure the address is correct and does not conflict with another device). If the port is disabled, the WinBook XL2 will not communicate with external devices connected to the port. - Page 179 Chapter Eight. • Your cable may be broken or you may have the wrong kind of cable. If so, the WinBook XL2 will not be able to communicate with external devices. Try replacing the cable.
- Page 180 Also see that the printer’s communication cable is connected properly to the WinBook XL2’s LPT1 Port and to the back of the printer. • If the printer is turned on, there should be a power indicator that illumi- nates.
- Page 181 User’s Manual • If you have a parallel device with a pass-though (such as a scanner or external drive) between your WinBook XL2 and your printer, make sure that the connections are secure and that the parallel device is on (many pass through devices require power to allow parallel signals to pass through).
- Page 182 NOTE: If you don’t see your printer listed in the Windows 98 printer list, chances are that your printer’s manufacturer can provide you with a Windows 98 Driver disk. Many printers from the same vendor may have similar characteristics and will be able to work with one of the Windows 98 standard drivers.
-
Page 183: Software
• Make sure that the TV-out or S-video connection is secure. • Make sure that the TV out function is enabled. Your television must be connected to the WinBook XL2 to allow for the signal to be directed out. Right-click the ATI icon on the taskbar and select “Settings” and “Display Settings.”... -
Page 184: Usb - Universal Serial Bus
• The TV-out port only directs video output to the receiver. To transmit sound, a cable must also be connected to the audio-out jack on the right side of your WinBook XL2 and to the audio in jacks of the TV receiver. USB (Universal Serial Bus) PROBLEM: USB device does not function properly. -
Page 185: Windows 98
User’s Manual PROBLEM: USB causes rapid consumption of battery life. ACTIONS: • Make sure that your USB device is using its own power source or, if it does not have its own power source, connect it to a USB peripheral that does have its own power source (such as a printer). -
Page 186: Zoomed Video
Chapter 9: Troubleshooting Zoomed Video PROBLEM: Zoomed Video does not work. ACTIONS: • Make sure card is properly seated and that it has been recognized by the computer. 9.27... -
Page 187: Glossary
Glossary Glossary... - Page 188 ACPI (Advanced Configuration and Power Interface) Power management standard in Windows 98. It helps optimize power management for your WinBook XL2. ACPI also allows applications to take control of power management, for example to prevent a timeout from interrupting a presentation.
- Page 189 Glossary You do not use the BIOS, but Windows 98 (and DOS) uses the BIOS as a way of communicating with your equipment. A bit (or Binary digit) is the smallest unit of information used by a computer. Eight bits make up a byte. Abbreviated with a small b. Boot The process of turning on a computer and loading the operating system (Windows 98) that controls the computer.
- Page 190 User’s Manual Client A computer on a network which relies on another “server” computer to provide some of its programs or functions, or for its connection to other computers on the network. Clock Speed This is the measure of how fast a computer’s CPU (central processing unit) runs.
- Page 191 DC (Direct Current) The AC Adapter changes AC from a wall socket to lower voltage DC, and inputs the DC into the WinBook XL2 to charge the rechargeable batteries which power the WinBook XL2. Defragmenting...
-
Page 192: Of Audio
ECP compatible expansion devices such as printers, backup tape drives, or LAN adapters. Embedded Numeric Keypad Feature of the WinBook XL2: 15 keys are within the rest of the keyboard. The numeric assignments are found on the upper right side of each key. Ethernet Local area network (LAN) hardware specification. - Page 193 These usually have a high capacity for data storage (in most newer computers this capacity is in Gigabytes). Hot Docking The ability of the WinBook XL2 to be connected to the port replicator while in normal operating mode.
- Page 194 (often green or blue). Infrared (IR) Port Communications port that allows wireless communications between the WinBook XL2 and IrDA (Infrared Data Association) compatible devices. Communications over the infrared port operate similar to a TV remote control. Internet Not a physical network, but the interconnection of many physical networks (commercial, educational, governmental, and private).
- Page 195 IRQs or Interrupts Signals used by the devices in a computer to inform the CPU that they need CPU cycles. Your WinBook XL2 uses 16 interrupts which are num- bered from 0 through 15 (with one reserved for error handling). Conflicts can occur if two devices use the same IRQ, since each can interfere with the functioning of the other.
- Page 196 User’s Manual Megabyte (MB) 1,048,576 bytes or 1024 KB. Modem (From MOdulate/DEModulate) A device which allows information to be transmitted from one computer to another via telephone lines. MPEG-2 (Motion Picture Experts Group version 2) MPEG-2 (pronounced M-peg) is a means of compressing video to allow for transfer of audio-visual images (up to broadcast quality) to devices such as computers.
- Page 197 International Association) A device using PCMCIA standards (also referred to as the PC Card standard) that the user can install into the WinBook XL2. These credit- card sized electronic modules include, modems and network adapters. See Chapter Five for more information.
- Page 198 User’s Manual PS/2 Keyboard Keyboard standard for PCs that was set by IBM in 1987 with their introduction of the PS/2 system. The WinBook XL2 will work with keyboards adhering to this standard. PS/2 Pointing Device Pointing device that uses a PS/2 interface connector to plug into the computer, e.g.
- Page 199 SIR (Serial Infrared) Infrared connection between two infrared-capable devices that operates as an additional serial port on the WinBook XL2. For the purposes of the operation of the system, the SIR uses IRQ and COM settings as if it were a normal serial port.
-
Page 200: Suspend Mode
(chrominance and luminance). This dual signal provides higher image fidelity when displayed on a televi- sion screen. The WinBook XL2 has an s-video port that can be used to direct output to s-video enabled televisions or video devices. - Page 201 Glossary System Error Messages A system error message indicates a problem with the computer itself. These messages normally appear during the power-on self-test, before the operating system prompt appears. Taskbar The strip across the edge (usually bottom) of the Windows 98 desktop that holds the start button, system tray (containing the clock and other features), toolbars and buttons for the currently running applications.
- Page 202 User’s Manual A new bus that is capable of transmitting data at a speed of up to 1.5MB per second. Up to 127 peripheral devices can be chained together and con- nected to the USB port of your system. The USB connection is capable of transmitting both data and current, so USB devices can even be powered by the power supply of your system.
- Page 203 Glossary XGA (Extended Graphics Array) Video standard that allows your WinBook XL2 to provide a resolution of 1024 x 768 pixels, while allowing for many more colors than SVGA or VGA video. ZV (Zoomed Video) Port A port built into the PCMCIA slots (and conforming to PCMCIA standards) that allows for high-speed video transmission.
-
Page 204: Index
Index Index... - Page 205 User’s Manual AC Adapter, 1.7, 1.11, 1.12, 1.13, 1.21, 3.2, 3.3, 3.9, 3.20, 4.16, 7.3, 7.8, ACPI, 3.5, G.2 Index Audio Jacks, 1.6 Audio Mixer, 1.23, 1.24, 1.26, 4.2, 4.3, 4.4 Auto Dim, 8.8, 8.10 Battery, iv, 1.11, 1.12, 1.20, 1.22, 3.2-3.3, 3.7-3.10, 3.20, 5.2, 7.3, 7.8, BIOS, 3.5, 3.7, 3.15, 6.2, 6.8, 7.6, 7.12, 8.2, 8.4-8.5, 8.8, 8.9, 8.11, 8.17, Boot, 4.12, 7.8, 8.4, 8.8, 8.10, 9.5, 9.7, 9.21, 9.26, G.3 Cache, 9.10, G.3...
- Page 206 Defragmentation, 2.4, 2.7, G.5 Device Manager, 2.7-2.8, 5.3, 5.14, 9.20 DMA, 8.9, 8.14, 8.15, 8.16, G.5 Docking Port, 1.3, 1.7, 1.8, 4.7, 4.17 Drivers, 1.3, 1.27, 2.15, 2.20, 3.18, 3.20, 4.8, 4.11, 4.12, 4.15, 4.16, 5.2- 5.4, 5.7, 5.13, 6.6, 6.7, 7.8, 7.11, 8.21, 9.6, 9.17, 9.23, 9.25, 9.26 DVD, iv, 1.3, 1.4, 1.5, 1.13, 1.24, 1.25, 1.26, 2.11, 2.12, 6.8, 6.9, 7.11, 8.3, 8.7, 9.5, 9.8, 9.9, G.2, G.5, G.6, G.10 ECP, 4.12, 8.16, 9.22, 9.23, 9.25, 9.26, G.6...
- Page 207 User’s Manual Infrared Port (SIR), 1.26, 3.11, G.8 Install, 1.15, 1.27, 2.7, 2.11, 2.12, 3.3, 4.12, 5.7, 5.13, 7.2, 7.3, 7.5, 7.10, Index Internet, vi, 1.15, 2.2, 2.12, 2.14, 2.19-2.20, 3.19, 4.6, 8.18, 8.19, 8.21, IRQ, 2.8, 3.11, G.9, G.13 Keyboard, ii, iii,1.2, 1.5, 1.11, 1.12, 1.16-1.17, 1.19, 2.15, 4.2, 4.14, 4.15, LCD, 1.5, 1.17, 1.18, 1.20, 3.6, 4.13, 6.2, 6.3, 6.6-6.8, 7.3, 8.7, 8.8, 9.8, LED, 1.11, 1.21, 1.26...
- Page 208 Network, 2.3, 2.12, 2.18, 2.19, 2.20, 3.16, 4.8, 4.9, 5.2, 5.5, 5.7, 5.8, 5.9, 5.10, 5.12, 7.12, 8.13, 8.18, 8.19, 8.21, G.4, G.6, G.8, G.10, G.11, G.13 NTSC, 6.8, 8.8, 8.10, 9.25, G.10 Numeric Keypad, 1.16, G.6 NumLock, 1.16 Online Services, 1.15 PAL, 6.8, 9.25, G.10 Parallel Devices, 4.12, 4.13, 4.16, 4.17, 9.22 Parallel Port, 1.8, 2.11, 3.11, 3.16, 4.12, 8.15, 8.20, 9.22, 9.23, G.6...
- Page 209 User’s Manual Printer, 1.8, 1.14, 2.17, 3.16, 3.18, 3.20, 4.7, 4.8, 4.9, 4.10, 4.11, 4.12, PS/2, 4.7, 4.15, 9.13 Index RAM, 1.18, 2.2, 2.4, 2.15, 3.6, 3.9, 3.10, 7.2, 7.4, 7.6, 8.11, 8.12, 8.13, Recycle Bin, 9.10 Safety, iii, iv, 3.16, 3.17 Security, 3.19, 7.7, 8.2, 8.16, 8.17, 8.18, 8.19 Serial Port, 1.7, 1.8, 4.8, 4.14, 4.15, 8.9, 8.14, 9.19, 9.20, G.13 Setup, 1.14, 3.5, 3.6, 4.8, 4.12, 8.2, 8.3, 8.4, 8.5, 8.6, 8.8, 8.9, 8.11, 8.15,...
- Page 210 Taskbar Scheduler, 2.5, 2.6, Technical Support, 1.14, 2.15, 3.11, 3.18, 5.2, 5.3, 5.8, 7.12, 8.2, 8.5, 8.21, 9.5, 9.6, 9.7, 9.8, 9.12, 9.13, 9.14 Temperature, 3.17, 8.23 Time, 1.13-1.15, 1.20, 1.22, 2.4, 2.6, 2.12, 2.14, 2.17, 2.18, 3.2, 3.8, 3.9, 3.10, 4.5, 4.8, 4.15, 4.17, 4.18, 5.2, 5.7, 6.2, 6.6, 6.7, 6.8, 8.2-8.4, 8.6, 8.7, 8.9, 8.11-8.14, 8.17-8.18, 8.20, 8.21, 9.10, 9.15, 9.21, G.5, G.12 Touchpad, 1.19, 4.14, 8.9, 8.10, 8.23, 9.17, 9.18, 9.19, G.15...
- Page 211 WinBook Corporation 2701 Charter Street Hilliard, Ohio 43228...
Need help?
Do you have a question about the XL2 and is the answer not in the manual?
Questions and answers