Table of Contents
Advertisement
XL Manual
XL Chapter One: Getting Started __________________2
XL Chapter Two: Basic Computing ________________20
XL Chapter Three: Mobile Computing ______________ 50
XL Chapter Four: Desktop Operation _______________71
XL Chapter Five: PC Cards (PCMCIA) _____________84
XL Chapter Six:
Upgrading ______________________93
XL Chapter Seven: Configuring and Maintenance ______109
XL Chapter Eight: Troubleshooting _________________119
Advertisement
Table of Contents

Related Manuals for Winbook XL


Summary of Contents for Winbook XL
- Page 1 XL Manual XL Chapter One: Getting Started __________________2 XL Chapter Two: Basic Computing ________________20 XL Chapter Three: Mobile Computing ______________ 50 XL Chapter Four: Desktop Operation _______________71 XL Chapter Five: PC Cards (PCMCIA) _____________84 XL Chapter Six: Upgrading ______________________93 XL Chapter Seven: Configuring and Maintenance ______109...
-
Page 2: Chapter One: Getting Started
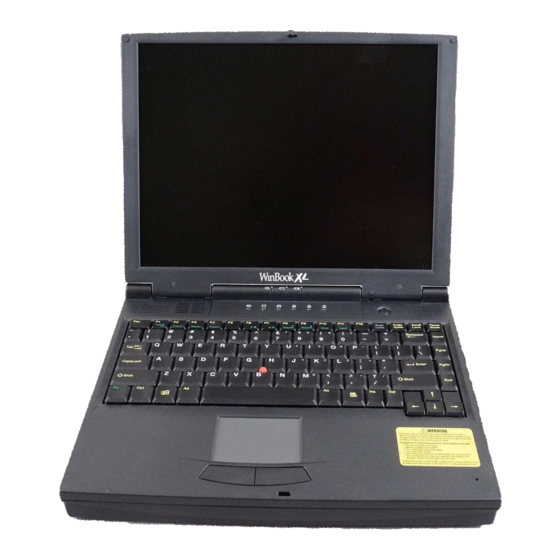
Your WinBook XL has all the power and can perform all of the functions of a desktop computer, but its slim design and light weight provide you with portability that can free you to use the computer almost anywhere you go. -
Page 3: The Right Side
The front release latch is used for releasing the display panel to reveal the LCD screen and keyboard of the WinBook XL. To open the display panel: slide the release latch to the right and gently lift the display panel to a vertical position. - Page 4 See the section below on the Bottom of the system for information. THE REAR The back of the system has two doors that cover I/O ports for your WinBook XL. The door on the left flips down to reveal the docking port of your system. This door should be closed when the system is undocked.
-
Page 5: The Left Side
The USB (Universal Serial Bus) port of your WinBook XL allows you to add a wide variety of devices to your machine. The USB port can allow you to connect up to 128 devices through this single port, at very high data transfer rates of up to 12 Mbps (Mega-bits per second). - Page 6 Turn the system upside down and slide clip for the metal anchor toward the edge to move the metal anchor out of the cabinet. You can now secure the WinBook XL to any secure object with a standard lock or cable.
- Page 7 The power LEDs located on the hinge of the display panel indicate the current power use and battery status of your WinBook XL. These functions of these LEDs are indicated by icons: a plug, a battery and a battery with a line through it (left to right). These LEDs can be seen whether the display panel is opened or closed.
- Page 8 Power On The first time you use your WinBook XL, use your AC power adapter. This will allow your battery to fully charge. It is recommended that you then allow the battery to fully discharge and recharge three times.
- Page 9 Windows Registry for your WinBook XL. Correcting a misspelled name at a later date will require you to use the REGEDIT program, which is a program that you should completely avoid unless you are an experienced user of Windows 95.
- Page 10 The folder also includes an icon where you can find information about the term of the services. If you explore the start menu, you will also notice a WinBook folder in the program groups. This folder holds your WinBook XL Help file and possibly other files that contain information about your WinBook XL.
- Page 11 In addition to its function as a normal keyboard, your keyboard also contains controls for various aspects of your WinBook XL, including the intensity of the LCD screen. These controls appear in green on the keys and are activated by pressing the [Fn] key (located at the lower left corner of your keyboard) in conjunction with the key for the specific control function (or by holding the [Fn] key while pressing the key for the specific control function).
- Page 12 d in the Setup program, 3) to a simultane display on the screen and a monitor, and 4) back to the built- in screen. [Fn]+[F3] Sends your system into Standby mode to conserve power [Fn]+[F4] Suspends current work to RAM or Hard Drive powers...
- Page 13 Mouse Buttons & Pointing Devices Your WinBook XL comes with a pointing stick device, can be configured for an optional touchpad pointing device and can support an external mouse via the PS/2 or serial port. All of these pointing devices can be used simultaneously.
- Page 14 [Sidebar: Pencil icon: If you decide to add a touchpad to your WinBook XL at a later time, you will need to return the system to the manufacturer to have the touchpad installed.] Use of an external pointing device with your WinBook XL is discussed in Chapter Four.
- Page 15 Battery & Power Saving When the AC Adapter is connected to your WinBook XL, your battery will charge whether the computer is on, off, or in the power saving mode. It will, however, charge much faster if the computer is off.
-
Page 16: Power Management
Windows 95 sessions. POWER MANAGEMENT Your WinBook XL should run for over three hours on a single, fully charged battery and longer if power management is employed. The key to obtaining optimal battery life for your system is effective power management. - Page 17 Your CD drive can also be used to play audio CDs through the audio hardware built into your WinBook XL.
- Page 18 Carefully place the CD (audio or data), with the label side up, on the disc tray. Be sure to carefully center the CD and press it into place on the loading tray. Since your WinBook XL is meant to be portable, the CD is secured onto the tray rather than simply resting in a recess.
- Page 19 If you purchased some other software, or if you already own software that you will be installing on your new WinBook XL system, or if you buy software at a later date, you will need to know how to install that software on the WinBook XL system.
-
Page 20: Chapter Two: Basic Computing
Chapter Two: Basic Computing The WinBook XL is designed to be run straight out of the box, so, if you are an experienced computer user, you should be ready to go. You can find additional information about specific features of your system in the chapters that follow and in the WinBook XL Help File in the WinBook folder on your hard drive. - Page 21 generally take up much less (stored in plain text, a 1,000 page manuscript will fit in less than 1 megabyte). [Sidebar: If your computer is connected to a network, you will also have access to hard drives on other computers. See the networking documentation in Windows 95 to see how to access such drives.] Your hard drive is usually the C: drive in your system.
- Page 23 The Windows Explorer provides an alternative way of seeing the contents of the C: drive (^Start/Programs/Windows Explorer^). See the Windows 95 documentation for more information on this program. Computer disks will often get fragmented. This means that files are not stored in a single piece but are broken up and distributed.
- Page 24 WinBook XL. Device Manager is the place where you can learn this information about your system. If you want to know more information about these pieces of the computer, you can right click on the particular device in the Device Manager and then click on Properties.
- Page 25 any settings in ^Device Manager^.] Data Handling Once you have your computer running, you will start to generate data of your own. This data will be stored in files (distinct collections of related data stored in a single format). You provide names for those files when you save them from within the application that has been used to create them.
- Page 26 (Your primary storage medium is your hard drive.) Data is stored on diskettes as magnetic fields. Your WinBook XL system came equipped with a 3.5" drive that installs in the media bay. To read data from or write data to your diskette, insert your diskette into the drive. You will need to tell your software which drive to read from and write to (A:, unless you have changed the designation).
- Page 27 and running off the CD. If you would not find it inconvenient to run the program with the CD in the drive, you might want to consider this when purchasing applications software that provides the choice of CD or multiple diskettes. This may often be slower, but, in a program that does not make a lot of calls to the disk, the difference might not be noticeable.
- Page 28 DOS memory requirements, you might want to read an older DOS manual to familiarize yourself with DOS-based programs. If you need additional drivers to use your system with DOS programs, check the disks that came with your WinBook XL or contact Technical Support for information on obtaining those drivers.] Windows 95 has a number of components built into it which can allow you to write letters and papers, draw pictures, send faxes and the like.
- Page 29 Call Waiting can interrupt or cancel transmissions by the fax modem. Contact your local phone company for information.] Your WinBook XL comes with a built-in fax/modem that allows you to take advantage of the fax and communications abilities of your system. The fax/modem is capable of running in two modes: as a fax and as a modem (which can be connected to other computers via their modems).
-
Page 30: Modem Communications
appropriately before faxing.] MODEM COMMUNICATIONS You can use the modem to connect to other computers with a modem, or to log into networks that allow modem access. Your modem can be set to emulate a terminal for logging into remote systems. - Page 31 Internet. Most major commercial providers also have connections to the Internet. You might also have access to the Internet by dialing into a network at home or school. Some communities have local "freenets" which can be used to provide a connection to the Internet. XL Chapter Three...
- Page 32 Your WinBook XL has all the power and can perform all of the functions of a desktop computer, but its slim design and light weight provide you with portability that can free you to use the computer almost anywhere you go.
- Page 33 The front release latch is used for releasing the display panel to reveal the LCD screen and keyboard of the WinBook XL. To open the display panel: slide the release latch to the right and gently lift the display panel to a vertical position.
- Page 34 See the section below on the Bottom of the system for information. THE REAR The back of the system has two doors that cover I/O ports for your WinBook XL. The door on the left flips down to reveal the docking port of your system. This door should be closed when the system is undocked.
- Page 35 The USB (Universal Serial Bus) port of your WinBook XL allows you to add a wide variety of devices to your machine. The USB port can allow you to connect up to 128 devices through this single port, at very high data transfer rates of up to 12 Mbps (Mega-bits per second).
- Page 36 Turn the system upside down and slide clip for the metal anchor toward the edge to move the metal anchor out of the cabinet. You can now secure the WinBook XL to any secure object with a standard lock or cable.
- Page 37 The power LEDs located on the hinge of the display panel indicate the current power use and battery status of your WinBook XL. These functions of these LEDs are indicated by icons: a plug, a battery and a battery with a line through it (left to right). These LEDs can be seen whether the display panel is opened or closed.
- Page 38 Power On The first time you use your WinBook XL, use your AC power adapter. This will allow your battery to fully charge. It is recommended that you then allow the battery to fully discharge and recharge three times.
- Page 39 Windows Registry for your WinBook XL. Correcting a misspelled name at a later date will require you to use the REGEDIT program, which is a program that you should completely avoid unless you are an experienced user of Windows 95.
- Page 40 The folder also includes an icon where you can find information about the term of the services. If you explore the start menu, you will also notice a WinBook folder in the program groups. This folder holds your WinBook XL Help file and possibly other files that contain information about your WinBook XL.
- Page 41 In addition to its function as a normal keyboard, your keyboard also contains controls for various aspects of your WinBook XL, including the intensity of the LCD screen. These controls appear in green on the keys and are activated by pressing the [Fn] key (located at the lower left corner of your keyboard) in conjunction with the key for the specific control function (or by holding the [Fn] key while pressing the key for the specific control function).
- Page 42 d in the Setup program, 3) to a simultane display on the screen and a monitor, and 4) back to the built- in screen. [Fn]+[F3] Sends your system into Standby mode to conserve power [Fn]+[F4] Suspends current work to RAM or Hard Drive powers...
- Page 43 Mouse Buttons & Pointing Devices Your WinBook XL comes with a pointing stick device, can be configured for an optional touchpad pointing device and can support an external mouse via the PS/2 or serial port. All of these pointing devices can be used simultaneously.
- Page 44 [Sidebar: Pencil icon: If you decide to add a touchpad to your WinBook XL at a later time, you will need to return the system to the manufacturer to have the touchpad installed.] Use of an external pointing device with your WinBook XL is discussed in Chapter Four.
- Page 45 Battery & Power Saving When the AC Adapter is connected to your WinBook XL, your battery will charge whether the computer is on, off, or in the power saving mode. It will, however, charge much faster if the computer is off.
- Page 46 Windows 95 sessions. POWER MANAGEMENT Your WinBook XL should run for over three hours on a single, fully charged battery and longer if power management is employed. The key to obtaining optimal battery life for your system is effective power management.
- Page 47 Your CD drive can also be used to play audio CDs through the audio hardware built into your WinBook XL.
- Page 48 Carefully place the CD (audio or data), with the label side up, on the disc tray. Be sure to carefully center the CD and press it into place on the loading tray. Since your WinBook XL is meant to be portable, the CD is secured onto the tray rather than simply resting in a recess.
- Page 49 If you purchased some other software, or if you already own software that you will be installing on your new WinBook XL system, or if you buy software at a later date, you will need to know how to install that software on the WinBook XL system.
-
Page 50: Chapter Three: Mobile Computing
Battery Operation Charging Your WinBook XL comes equipped with a durable, lightweight, rechargeable lithium-ion or Ni- MH battery that can power your system for over three hours when fully charged (longer if power management is used). The actual duration of a charge will vary with how you use the computer and with how much you take advantage of the power management features of the system. - Page 51 Changing You can purchase a second battery for your WinBook XL. This second battery is installed in the battery bay. Slide the center release on the battery toward the rear of the system. Slide the edge release toward the middle of the machine.
- Page 52 Remember: to reset the default, you must use the Setup program. There are two power management systems available to you. Your WinBook XL has power management features built into the BIOS Setup program. You can change the degree of power management by entering the BIOS Setup program (see Chapter Seven) and adjusting the power management settings.
- Page 53 Clicking on the ^Advanced^ button on allows you to set add a Suspend function to the start menu. It also allows you to set the system to resume normal functioning when the modem detects an incoming call. If power management is causing problems with system operation, you can try the options provided by clicking on the ^Troubleshooting^ tab.
- Page 54 The Windows 95 power management tools also allow you to specify the time period of inactivity before the hard disk is spun down. Spinning down the disk provides considerable power savings. If you want optimal battery life and are using the Windows 95 power management, you should consider a relatively short period of disk inactivity here.
-
Page 55: Infrared (Ir) Port
Since the system is powered-down, it takes longer to resume operation. The WinBook XL can remain in the Suspend mode for up to a week on a fully charged battery. Remember which mode you have chosen when you shut down the computer. Hitting a key or moving the mouse will activate a WinBook XL in Standby mode. - Page 56 The infrared (IR) port of your WinBook XL provides a powerful tool for connecting to other computers, networks, and peripherals via a high-speed wireless connection. This port is sometimes referred to as a serial infrared port (SIR), but it is also capable of functioning as a second parallel port for printing.
- Page 57 You can adjust the options for your IR port by selecting the ^Options^ tab. If your IR port does not function or conflicts with another device you have added, you can changing the setting for the COM port (see Chapter Seven).
- Page 58 For proper operation of a IR connection, you might need to set up the identification information in the IR software.
- Page 59 IR Connections Between Computers If you are going to use the IR port to send information between your WinBook XL and another IR-capable computer, there are a couple of steps that you will need to perform before your WinBook XL is ready to be used in this way.
- Page 60 Click on Direct Cable Connection. If you have not already set up the Dial-up Networking option, you will be asked to establish this as well. The Dial-up Networking activates certain network options of Windows 95 that are necessary for using the Direct Cable Connection. Click OK to activate the new option(s).
- Page 61 [Sidebar: Pencil icon: You can select any network and workgroup name that you want, but, if you will be using certain kinds of network connections, such as establishing your system as a World Wide Web server, you might want to select a name that does not contain spaces. World Wide Web domain names cannot contain spaces and you will be forced to change the computer name at a later time if you choose to use your system for this purpose.
- Page 62 If you do not want to allow sharing of your files or printer via your WinBook XL (that is, if it will only be a guest), you can continue on to the section on "Making the Connection." You will still be able to access files and printers that are set up for sharing.
- Page 63 You will be asked to decide if want to allow file sharing, print sharing, or both. Click on the appropriate checkboxes. You have now established the file and print sharing for your WinBook XL. You can click OK to exit the Network utility. (You might be asked to reboot.) If you want to allow access to certain files on your system, you will now need to designate those files for sharing.
- Page 64 [Sidebar: Pencil icon: Sharing is a done by folders and not by files. You might want to set up separate folders for shared files, if you do not want all files in an existing folder to be accessible to another machine.] You will now be asked to establish the kind of access you want to allow to this folder.
- Page 65 IR connection. ^Making the Connection^ To establish the IR connection between your WinBook XL and another system, you will use the IR as if it were a direct cable connection between the systems. Note: the other machine will also need to have the software to support this connection. If the other machine is not set for a Direct Cable Connection, please repeat the steps above with the other machine.
- Page 66 [Fig. 3.22: IR Connection Between Computers (ir-host.bmp)] In subsequent session, your WinBook XL will default to the host/guest status that it had in the last session. You can change this by clicking on the Change button. You will then be asked to establish the port for the connection.
-
Page 67: Using A Tv Receiver
If you want to enable the television output for your WinBook XL, follow the directions below. -
Page 68: Zoomed Video
Safety & Operation The WinBook XL does not have a handle or a rough surface for a sure grip, so use a carrying case when traveling. At times, you may want to put both the case and the WinBook XL within a larger briefcase to conceal the system and reduce the risk of theft. - Page 69 Avoid high and low Temperatures. While you travel in the summer, do not leave your WinBook XL in a car trunk on a hot day. Trunk temperatures can reach 140° F, beyond the safe range for the WinBook XL. Also be careful when shipping or storing your WinBook XL so that it is not exposed to high or low temperatures.
- Page 70 Travel Tips It is a good idea to load common printer drivers onto your WinBook XL (such as HP Laser Jet and DeskJet drivers). This will allow you to print from many printers at your destination, even if you do not carry your own printer with you.
-
Page 71: Chapter Four: Desktop Operation
WinBook XL as if it were a desktop system. This chapter discusses those functions of your WinBook XL that are typical of desktop systems. - Page 72 the left [Fn]+[Y] Shifts audio balance to the right which control the output of the sound hardware, you can adjust the volume and balance of the audio output by double-clicking on the speaker icon on the taskbar and using the slides in the audio mixer.
- Page 73 Playing an Audio CD You can play audio CDs through the ESS sound system by swapping in the CD-ROM drive (remember to reboot the system so that the drivers for the drive). Place the audio CD in the drive (see Chapter One for instructions on installing the drive and insertong a disk). The CD Player in Windows 95 will recognize the audio CD and launch the program to control the playback of the CD.
- Page 74 CD in the drive.] Playing Sound Files In addition to playing music from audio CDs, your WinBook XL can play audio files stored in MIDI or WAVE file formats, as well as sound stored in audio form and used in programs and games.
-
Page 75: Connecting Peripherals
An external microphone will disable the built-in microphone. [Sidebar: Pencil icon: Connection to some sound sources, such as musical keyboards, might require a MIDI port. You can obtain a mini-docking station for your WinBook XL that provides such a port.]... - Page 76 When you first boot your WinBook XL you will be offered the opportunity to set up your printer. If you did not set up your printer at that time, or if you have added a printer to your system, you can follow the steps below to prepare your printer for use in Windows 95.
- Page 77 [Sidebar: Pencil icon: If your printer came with an installation disk, it might have drivers there (this will often be the case if the printer came into production after the most recent release of Windows 95). You should check your printer manual for information on using the installation disk.
- Page 78 You will then be asked if you want to print a test page. This would be a good idea if this is a new printer, or the first printer that you have set up for your WinBook XL. When Windows 95 has finished loading your printer drivers, you will be returned to the Printers...
- Page 79 EPP transfer mode provides increased performance for 2-way transfers such as those used to link another computer to your WinBook XL system for file transfer. You might need to check the documentation of your device to determine the modes supported. If you need to change the transfer mode of your printer, you can do so in the Setup program (see Chapter Seven).
- Page 80 If you use a serial mouse, connect the mouse to the serial port located behind the small I/O door on the back side of the WinBook XL. The small I/O door is located on the right side of the WinBook XL as you face the back side. The serial port is the left connector inside of the small...
- Page 81 The Communications Ports on your WinBook XL allow you to connect external devices such as a mouse, a modem, a printer, a scanner or another computer to the WinBook XL. The Serial Communications Port on your WinBook XL is COM1. There is also a serial infrared port which is normally located on COM2 (see Chapter Three for information on using the infrared port).
-
Page 82: Optional Port Replicator
WinBook XL free to conserve or recharge battery power. If you have a mobile USB device and want to make use of the WinBook XL as the power source for the device, consider using an aggressive power management setting to help maximize battery life. - Page 83 Port Replicator [Sidebar: Pencil Icon: The Port Replicator does not include a TV-out jack. Since the Port Replicator covers the rear of the machine, you will have to undock your WinBook XL to use the TV-out feature of your system.] The port replicator provides you with the opportunity to set up a permanent work area for your WinBook XL, for use as your desktop system.
-
Page 84: Chapter Five: Pc Cards (Pcmcia)
WinBook XL. If the driver for your actual card is not found in Windows 95 database of drivers and you choose a generic driver, you should consider taking the card out of the slot when it is not in use to avoid draining the battery. - Page 85 Panel/System. Once in the System window, click on the Device Manager tab. If the drivers are loaded, you should see the "Cirrus Logic PCIC compatible PCI to PCMCIA Bridge." To use the PC Card: Open the PCMCIA door. Insert the card into one of the two slots (the slots are identical). Push to make sure to it is properly seated (the eject button will move out when the card is seated).
-
Page 86: Pcmcia Network Connections
If there are no external connections, you can close the door. When you are finished using the card, click once on the PCMCIA icon on the taskbar. This will bring up a popup menu for shutting down any cards in the PCMCIA bay. Select the appropriate card (if you have two cards in place) and click to deactivate the card. - Page 87 There will be protocols there to control how the information is transferred between machines. You will also see a button here that will allow you to set up your WinBook XL for file and/or printer sharing. If you will want to allow your files or your printer to be shared by other computers on the network, you can set up the file and printer sharing as described in the section below.
- Page 88 Computer^. Resources on the network available to you can be accessed through this window. ^Sharing^ If you want to make files on your WinBook XL available to another computer, or if you want to allow another system to print to a printer attached to your WinBook XL, you will need to set up your system for file sharing.
- Page 89 [Sidebar: Pencil icon: Sharing is a done by folders and not by files. You might want to set up separate folders for shared files, if you do not want all files in an existing folder to be accessible to another machine.] You will now be asked to establish the kind of access you want to allow to this folder.
-
Page 90: Pcmcia Scsi Interface
In order to permit you to use devices that require a SCSI interface, you will need to install a SCSI interface card in one of the PCMCIA slots in your WinBook XL. Once your card has been recognized and the proper drivers loaded, you will be able to connect SCSI devices to your... -
Page 91: Pcmcia Modem
PCMCIA Modem Although your WinBook XL comes with a built-in 33.6 bps modem, you might have occasion to use a PCMCIA modem (e.g. a special modem designed for use with a cellular phone). If so, once the modem card has been recognized, you will be asked to set up the modem for use with your system. - Page 92 Fill in the information requested to assure proper operation of your PCMCIA modem. XL Chapter Six...
-
Page 93: Chapter Six: Upgrading
WinBook XL to be easily upgraded to meet your changing computing needs. The motherboard in your WinBook XL is made to allow for an upgrade to a faster processor should that suit your future needs. It is not recommended that you attempt to do this yourself. - Page 94 Forcing a SO-DIMM module in or out of a socket can damage the socket and/or the SO-DIMM module.] Your WinBook XL comes with a memory module installed in left memory compartment. You can upgrade the amount of RAM in your system by adding an additional module to the right memory compartment and/or replacing the module in the left compartment with a larger capacity module.
- Page 95 Slide the cover toward the front of the system and then remove it. The cover of the left memory compartment can be removed by sliding it to the right and lifting it out of its bay. If you will need to remove a module or modules to complete your upgrade, angle the card slightly upward and gently slide it from its edge connector slot.
- Page 96 Hardware and software changes quickly. In order to make it easy for you to expand the capacity of your WinBook XL, the hard drive in your WinBook XL is made to be easily swapped out for upgrading. You should be sure to back up your hard drive before attempting to change the hard drive.
- Page 97 To upgrade your hard drive: Back up the installed drive completely. Be sure that you have the bootable floppy disk that came with your WinBook XL if your new drive does not come with an operating system (e.g. Windows 95) already loaded.
- Page 98 Angle it from the bay. Set the screws in a safe place. The drive is attached to a special bracket that secures it to the WinBook XL. Remove this bracket from your existing drive.
- Page 99 If not, be sure to place your floppy drive into the media bay and place your bootable floppy disk into the drive before turning on the computer. When you are ready to boot, turn on your WinBook XL. Skip to step 20 if your drive has an operating system already loaded.
-
Page 100: Firmware Upgrades
Other Upgrades The easiest way to upgrade the capabilities of your WinBook XL is to take advantage of the PCMCIA slots in your system. These can be used to provide a network connection, communications hardware, extra hard drive capacity, or connections to external equipment via a PCMCIA card (or PC card) interface. - Page 101 WinBook XL to be easily upgraded to meet your changing computing needs. The motherboard in your WinBook XL is made to allow for an upgrade to a faster processor should that suit your future needs. It is not recommended that you attempt to do this yourself.
- Page 102 Forcing a SO-DIMM module in or out of a socket can damage the socket and/or the SO-DIMM module.] Your WinBook XL comes with a memory module installed in left memory compartment. You can upgrade the amount of RAM in your system by adding an additional module to the right memory compartment and/or replacing the module in the left compartment with a larger capacity module.
- Page 103 Slide the cover toward the front of the system and then remove it. The cover of the left memory compartment can be removed by sliding it to the right and lifting it out of its bay. If you will need to remove a module or modules to complete your upgrade, angle the card slightly upward and gently slide it from its edge connector slot.
- Page 104 Hardware and software changes quickly. In order to make it easy for you to expand the capacity of your WinBook XL, the hard drive in your WinBook XL is made to be easily swapped out for upgrading. You should be sure to back up your hard drive before attempting to change the hard drive.
- Page 105 To upgrade your hard drive: Back up the installed drive completely. Be sure that you have the bootable floppy disk that came with your WinBook XL if your new drive does not come with an operating system (e.g. Windows 95) already loaded.
- Page 106 Angle it from the bay. Set the screws in a safe place. The drive is attached to a special bracket that secures it to the WinBook XL. Remove this bracket from your existing drive.
- Page 107 If not, be sure to place your floppy drive into the media bay and place your bootable floppy disk into the drive before turning on the computer. When you are ready to boot, turn on your WinBook XL. Skip to step 20 if your drive has an operating system already loaded.
- Page 108 Other Upgrades The easiest way to upgrade the capabilities of your WinBook XL is to take advantage of the PCMCIA slots in your system. These can be used to provide a network connection, communications hardware, extra hard drive capacity, or connections to external equipment via a PCMCIA card (or PC card) interface.
-
Page 109: Chapter Seven: Configuring & Maintaining Your System
Setup Program Your WinBook XL system should have arrived all ready to run, but you still should have some familiarity with your system and how it is set up. While you do not need to be a computer technician to use the Setup program, you should not make any changes to the settings until you have read this section and are familiar with the details of the Setup program. - Page 110 If there will be more than one user of this WinBook and you want to limit other users' access to the BIOS settings, you should consider enabling this password option.
-
Page 111: Standard Cmos Setup Menu
LCD and CRT will slow video response time slightly. BootUp Sequence: This item establishes the BootUp Sequence for your computer. Your WinBook XL will check the drives in the order designated and load the operating system from the first drive in the sequence that contains one. -
Page 112: Power Management Menu
S.M.A.R.T. for Hard Disks: S.M.A.R.T. is a disk monitoring system designed to provide increased data reliability. Monitoring software built into the drive and your WinBook XL watches for disk failure and warns you if such failure appears to be immanent. The default setting is "AUTO."... - Page 113 Power Savings Mode: This item allows you to set the level of power management. There are three options: Disabled: This setting disables all timeouts and the CPU auto doze. Maximum: Provides optimal battery conservation, but slows performance. Customized: Allows you to enter individual values for the various power management features to most closely match your needs.
-
Page 114: Peripheral Setup Menu
Changing settings in this menu can affect the operation of your system.] Modem Port: If you have an internal modem for your WinBook XL, this item should be enabled. If enabled, the modem port will be set to COM3. - Page 115 IRQ. Audio Device: This item allows you to enable or disable the built-in Yamaha sound system of your WinBook XL. Audio I/O: This item allows you to set the I/O address for the audio system. You can disable this system or set a specific address.
- Page 116 In order to insure that you have such a disk, you should write protect the boot disk that came with your WinBook XL. You should consider carrying a write-protected boot disk with your computer, to allow for a clean boot wherever you might be using your system.
-
Page 117: Operating Environment
It is a good idea to keep a backup copy of your data at a site other than your primary worksite for your WinBook XL system. If your WinBook XL system is in your office, you might consider taking your backup home with you. - Page 118 Vents: After shutting down and unplugging your system, use a hand-held vacuum to clean the vents on the case of your WinBook XL. If you work in a dusty environment, you should try to vacuum often to avoid accumulation of dust on internal components.
-
Page 119: Chapter Eight: Troubleshooting
Problem: The external keyboard that I connected to my WinBook XL is not working. Actions: • If you plugged the keyboard into the WinBook XL after it was turned on, restart the WinBook XL with the keyboard plugged in. If restarting doesn’t help, your keyboard may be defective or incompatible with PS/2 specifications. - Page 120 • Your external pointing device may not work properly if it is not plugged in before you start your WinBook XL. If you forgot to plug it in before starting the WinBook XL, connect the pointing device to the WinBook XL, then restart.
- Page 121 COM1. • Your cable may be broken or you may have the wrong kind of cable. If so, the WinBook XL will not be able to communicate with external devices. Try replacing the cable.
- Page 122 If the line of sight between the transceivers is blocked, communication between the devices will stop. The WinBook XL and the external device should be about two feet apart with an angle of no more than 15°. Some devices work best if kept at least six inches apart.
- Page 123 • You may be using the wrong cable or the cable may be faulty. If your cable is the incorrect kind or faulty, contact your local computer store to obtain another. If you take the cable to the supplier, they might be able to test it to see if it is working. •...
- Page 124 • Check that Mute is not enabled. Press [Fn]+[F10] to toggle the Mute setting. • If you have external speakers or head phones plugged into the WinBook XL, the built-in speakers are automatically disabled. Try unplugging external speakers or headphones to see if...
- Page 125 This jack has the speaker icon on it. • Are you using the correct connector? The WinBook XL external speaker connector is compatible with a 3.5mm stereo audio plug. If you are using a different plug, it may not be compatible.
- Page 126 Problem: My CD-ROM Drive door won’t open. Actions: • Turn the WinBook XL on. While the power is ON, press the button on the CD-ROM Drive. The drive door should open. • If the door still will not open, you can manually eject the disk. There is a small hole on the door of the CD-ROM drive.
- Page 127 • Have you formatted the disk? Some new disks are not formatted for use with your WinBook XL. If your disk is not formatted, or if the disk is formatted for use with another type of computer, Windows 95 will notify you. Format the floppy disk by clicking on My Computer, then right-clicking on the 3 ½...
- Page 128 • Have you formatted the disk? Some new disks are not formatted for use with your WinBook XL. If your disk is not formatted, or if the disk is formatted for use with another type of computer, Windows 95 will notify you. Format the floppy disk by clicking on My Computer, then right-clicking on the 3 ½...
- Page 129 • If you have forgotten your password, there is no easy way to recover the password. You will need to return the computer to WinBook for service. Problem: The computer provides a message indicating that the operating system is missing.
- Page 130 • Be sure that battery is properly seated in the battery bay. • If you are not sure of the battery charge level, try connecting the AC adapter. Problem: No video output to LCD. Actions: • Be sure that the output has not been redirected to an external monitor. Use the [Fn]+[F2] key combination to toggle the video output.
- Page 131 Actions: • Double-click on the ^Power^ icon in the ^Control Panel ^(^Start/Settings/Control Panel/Power^). When the Power Properties window is opened, click on the ^Advanced^ button. Click on the box beside "Show suspend command on start menu" so that there is an "x" in the box..
-
Page 132: Pcmcia Cards
• Check to make sure that connection type and protocol are properly set. • Check to be certain that the receiving system is compatible with your modem. • Try connecting at a slower speed. • Be certain that all software for the connection is properly set. PCMCIA Cards Problem: I cannot fit another card in the PCMCIA bay when a card is already in place. - Page 133 WinBook XL (the jack with the headphone icon) and to the audio in jacks of the TV receiver. Zoomed Video Problem: Zoomed Video does not work. Actions: • On system start-up, you are given an option to choose to enable the lower PC card slot as a PCMCIA slot or ZV slot.
Need help?
Do you have a question about the XL and is the answer not in the manual?
Questions and answers