Advertisement
Quick Links
Advertisement

Related Manuals for Leica Stellaris 5


Summary of Contents for Leica Stellaris 5
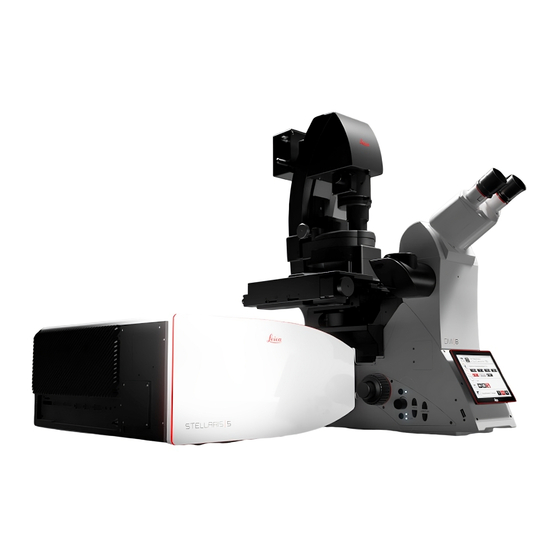
- Page 1 LEICA Stellaris 5 Confocal microscope Manual/Quick guide Matyas Molnar, Biovis 2024...
- Page 2 Starting the microscope Turn ON the computer, wait till Windows is booted Log in with your UU AKKA account Turn ON the scanner box switches below the table: Power button ON Laser button ON iii. Turn the laser interlock key to vertical position (emission light ON) Wait approx.
- Page 3 The microscope stand Visualizing the sample through the eyepiece using fluorescent light (IL) If you don’t see any signal through the eyepiece, make sure that you are using the following settings on the TFT screen: Visualizing the sample through the eyepiece using brightfield light (TL) If you don’t see any signal through the eyepiece, make sure that you are using the following settings on the TFT screen:...
- Page 4 Follow these steps to have light through the eyepiece: Select the desired objective and use the correct immersion medium for it. On the TFT screen the objective buttons blink when there’s a change in the immersion medium. Press them again after changed the immersion medium. Port: Eyepieces 100% Magn.-Changer: 1 To change the intensity for the TL or IL:...
- Page 5 Using the LAS X software In LAS X, hover the mouse on any button to get info about it. Configuration tab Under the configuration tab, several options can be changed and lasers can be turned ON and OFF. In the Laser config menu: laser can be turned ON or OFF. We have two lasers, a fixed 405nm and a tunable White light laser (WLL) 485-790nm.
- Page 6 Acquisition menus Auto mode. If you are unsure what Acquisition mode: you are doing, start setting up your Type of imaging, 2D, 3D, time-lapse, imaging here. spectral scanning, simultaneous or Objectives sequential imaging Image compass Lasers, detection windows, etc. Live mode. Same as Detection configuration.
- Page 7 Auto mode (Dye Assistant) Auto mode is a quick and easy way to create the settings for fluorophores and channels. Unexperienced users can start with the auto mode. Please note that auto mode might not work perfectly in special cases or has to be fine-tuned manually. Users shouldn’t rely on auto modes, the safest way is to set up the imaging as manually as possible.
- Page 8 Manual mode, semi-manual mode (Image Compass) Setting up the channels with the image compass is a love and hate thing. It was made user friendly and super-overcomplicated at the same time where you need to alternate between clicking buttons and dragging-dropping items. Watch out for high numbers of buttons, check-in marks, padlocks, menus and small signs.
- Page 9 Manual mode: Start with the semi-manual mode (by dragging and dropping a fluorophore to a detector) and modify the automatically generated channel (detection range, tuning the WLL onto a different laser wavelength, etc.). “Add Laser” (drag and drop this button to a desired laser wavelength) and turn ON a desired detector set up the detection...
- Page 10 Adjusting the correct intensity with the Detection configuration menu or the knobs The best way to adjust the correct intensity of a channel is to use the Over-/Underexposure tool on the left side of the image window (first button). If Over-/Underexposure tool is activated we see the overexposed pixels in blue.
- Page 11 detector? There are no rules here, both have advantages and disadvantages. If we use high laser power with low gain we see a good quality image with low noise, but we can bleach the sample, so as always, COMPROMISE between quality and time/bleaching! Don’t use a default laser or gain settings, always change them freely to get the best image without ruining the sample.
- Page 12 Z-stacking (3D imaging) 1. Go to Live or Fast Live mode, use the focus knob to find the end of the sample and push Begin to select the starting position of the sample where the first 2D stack should be made. 2.
- Page 13 The image window Over- /Underexposure LUT Add scalebar and annotations Zoom Auto contrast View all channels separately View histogram Hide/view channels 3D viewer (opens up in new module) Right click on the image to Snapshot a view (for MIP or orthogonal view for example)
- Page 14 Saving, exporting In LAS X projects can be created and saved. In a project, many images, datasets, snapshots can be saved and later re-used. Saved data will end up in .lif files that can be opened in LAS X, ImageJ, and Imaris.
- Page 15 Shutting down the microscope Clean after yourself, put in the smallest objective and cover the microscope stand with its dust cover. Use the logbook and type in your imaging session’s details. 3. In LAS X software save everything, and turn OFF all lasers To turn OFF the lasers, use ONLY the ON-OFF sliders in the Laser Overview window (in the Acquire tab) or in the Laser Config window (in the Configuration tab).
Need help?
Do you have a question about the Stellaris 5 and is the answer not in the manual?
Questions and answers