Table of Contents
Advertisement
Quick Links
Advertisement
Table of Contents

Related Manuals for Dräger HPS SafeGuard


Summary of Contents for Dräger HPS SafeGuard
- Page 1 Dräger HPS SafeGuard Instructions for use Dräger HPS SafeGuard...
-
Page 2: Table Of Contents
Contents Contents Dräger HPS SafeGuard Safety-related information ........ Conventions in this document ......Meaning of the warning notices ......Description ............Product overview ..........Feature description ..........Intended use ............Approvals............. Explanation of type-identifying marking and symbols ............... Use .............. -
Page 3: Safety-Related Information
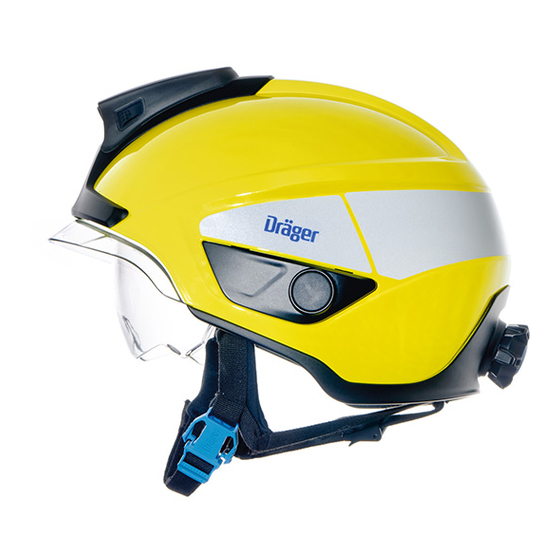
Feature description ous situation. If not avoided, it could result in death or serious The fire helmets in the Dräger HPS SafeGuard series consist injury. of a paint-coated helmet shell made of glass-fibre reinforced thermosetting plastic featuring the following properties:... -
Page 4: Approvals
Dräger Safety AG & Co. KGaA 50 - 67 Head circumference in cm 4.2.2 Putting on the helmet When adjusting the helmet, take into consideration whether a flame protection hood or respiratory protective mask will be used. Instructions for use Dräger HPS SafeGuard... -
Page 5: During Use
► Even if the damage is not visible at first, the fire helmet must be replaced after a heavy bump or impact. Damaged or impact-stressed fire helmets may no longer be used. This also applies if no external damage is visible. Instructions for use Dräger HPS SafeGuard... - Page 6 3. Check the O-rings in the front adjusting ring for damage and replace as necessary. Spare parts required: – Clip lock (3724501) – Belt suspension (3724051) – Harness (3701665) – Head straps (3724529) – Shock absorption pad (3724518) – Rear head padding (3701614) Instructions for use Dräger HPS SafeGuard...
- Page 7 5. Loosen and remove the front support ring from the front adjusting ring. The supporting arms of the front adjusting ring have oblong holes into which the rear support ring can be pushed. Instructions for use Dräger HPS SafeGuard...
- Page 8 The screws on the front adjusting ring also hold the function plates and the face protector. When the screws on the front adjusting ring are loosened, the function plates and the face protector loosen also. Instructions for use Dräger HPS SafeGuard...
- Page 9 6. Insert the face protector into the helmet shell and press the function plate onto the helmet shell. Place the face protector on the dome of the function plate between the helmet shell and the front adjusting ring. Instructions for use Dräger HPS SafeGuard...
- Page 10 12. Attach the front support ring to the rear support ring. 9. Insert the telescope in the adjusting wheel in order to position the rear support ring in the helmet shell. Instructions for use Dräger HPS SafeGuard...
- Page 11 15. Adjust the rear head padding and attach to the rear support ring. 3. Attach the new harness to the front and rear adjusting rings. 5.2.4.2 Replacing the harness Spare parts required: Instructions for use Dräger HPS SafeGuard...
- Page 12 The front head padding is firmly attached to the front support ring. In order to replace the head padding at the front, the front support ring must be replaced. Spare parts required: – Front support ring with head padding (3724542) Instructions for use Dräger HPS SafeGuard...
- Page 13 The screws on the front adjusting ring also hold the function plates and the face protector. When the screws on the front adjusting ring are loosened, the function plates and the face protector loosen also. Instructions for use Dräger HPS SafeGuard...
- Page 14 3. Pull the telescope out of the adjusting wheel. 4. Place the cover on the front plate. 5. Tighten the screw with the torque screwdriver (torque: 0.7 Nm) Instructions for use Dräger HPS SafeGuard...
- Page 15 8. Release the helmet end plate in the helmet shell. 5.2.8 Replacing the O-ring on the adjusting wheel Tools required: – Torx screwdriver T15 – Torque screwdriver T15 – Circlip pliers Instructions for use Dräger HPS SafeGuard...
- Page 16 Maintenance Spare parts required: 4. Pull the adjusting wheel out of the helmet shell. – HPS SafeGuard O-rings spare part set (3701637) – If required, adjusting wheel (3701635) 1. Pull the harness from the oblong hole. 5. Remove the O-ring from the adjusting wheel.
- Page 17 50 °C, a flash-off time of at least 10 minutes at room temperature should be respected. 5.2.9.3 Affixing the front reflective strip 1. Remove the protective foil from one side. Instructions for use Dräger HPS SafeGuard...
-
Page 18: Cleaning And Disinfecting
MediClean Forte: 0.5 % to 1.0 % safely remove 99.999 % of germs is necessary only in very few cases. Disinfectants cause the surface of all parts and neodisher Dekonta AF: 1 % Instructions for use Dräger HPS SafeGuard... -
Page 19: Separate Cleaning Of The Neck Guards
DekontaAF: neodisher Polyklar 0.05 % to 0.1 % 1) The liquor ratio indicates the ratio of the weight of the goods being washed or the capacity, to the quantity of cleaning solution (water including detergent) in the machine. Instructions for use Dräger HPS SafeGuard... -
Page 20: Transport
Storage conditions: Temperature 0°C to 45°C rel. humidity up to 90 % 11.2 Visors Visor material Polycarbonate Optical class 11.3 Chemical permeation resistance The fire helmets and visors are resistant to the following chemicals: Instructions for use Dräger HPS SafeGuard... - Page 21 Order list Instructions for use Dräger HPS SafeGuard...
- Page 22 Manufacturer Dräger Safety AG & Co. KGaA Revalstraße 1 D-23560 Lübeck Germany +49 451 8 82-0 9300891 – 1412.667 en © Dräger Safety AG & Co. KGaA Edition: 01 – 2023-05 Subject to alterations www.draeger.com...
Need help?
Do you have a question about the HPS SafeGuard and is the answer not in the manual?
Questions and answers