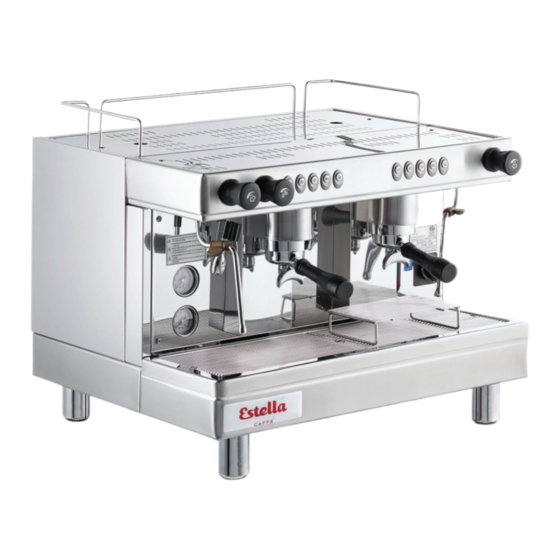
Estella 236ECEM1 Service Manual
Hide thumbs
Also See for 236ECEM1:
- User manual (13 pages) ,
- User manual (15 pages) ,
- User manual (12 pages)
Table of Contents
Advertisement
07/2021
SERVICE MANUAL
ESPRESSO MACHINES
#236ECEM1
#236ECEM2
#236ECEM3
One Group
Two Group
Three Group
NOTICE
This manual is for a cer fi ed service technician and should not be used by those who are not properly trained.
This manual cannot cover all possible condi ons that may occur and is not intended to be all encompassing.
You should read this manual in its en rety and the specifi c repair you wish to do prior to star ng the repair.
This will allow you to determine if you have the correct tools, instruments, and skills to perform the procedure.
Advertisement
Table of Contents

Related Manuals for Estella 236ECEM1


Summary of Contents for Estella 236ECEM1
- Page 1 07/2021 SERVICE MANUAL ESPRESSO MACHINES #236ECEM1 #236ECEM2 #236ECEM3 One Group Two Group Three Group NOTICE This manual is for a cer fi ed service technician and should not be used by those who are not properly trained. This manual cannot cover all possible condi ons that may occur and is not intended to be all encompassing.
-
Page 2: Table Of Contents
236ECEM1 ........ -
Page 3: Specifi Ca Ons
SPECIFICATIONS 236ECEM1 236ECEM2 236ECEM3 Groups Boiler Capacity 6 Qt. 13 Qt. 19 Qt. Voltage 110V 220V 220V Wa age 2000W 4700W 6500W Width 19 ⁄ " 27 ⁄ " 37" Depth 21 ⁄ " 21 ⁄ " 21 ⁄ "... -
Page 4: Ini Al Setup
INITIAL SETUP NOTE: All units must be installed per local standards in force with regards to plumbing and electrical. For this reason, a qualifi ed technician is required for the plumbing and electrical connec ons. Plumbing Fig. 1 1. Dispose of packaging properly 2. -
Page 5: Programming
Initial Starting Fig. 3 1. Turn unit on (Fig. 3) and allow boiler to fi ll; internal pump will shut off when full (2-3 minute fi ll me) Dispensing bu ons will fl ash sequen ally during startup, le to right Fig. -
Page 6: Preventa Ve Maintenance
PREVENTATIVE MAINTENANCE NOTE: To ensure the best quality, longevity, and warranty status, these units should be cleaned daily. End of Day Cleaning Fig. 8 Reverse Flushing 1. Add blind fi lter cap (backfl ush disk) to portafi lter (Part #236BFDISK) 2. - Page 7 Descaling Boiler as Needed (Recommended every 6 months) 1. Ensure unit is off , cooled down, and boiler Fig. 14 tank is empty 2. Disconnect from power supply 3. Remove 2 screws from top rear cover and remove cover (Fig. 14) 4.
-
Page 8: Troubleshoo Ng
TROUBLESHOOTING PROBLEM POSSIBLE SOLUTION PAGE Make sure water supply is turned on Make sure drain pan valve is closed Pump runs and shuts off , Check incoming water pressure is 1 bar (30 psi) or higher but site gauge Check water probe func on isn't in green or is Check boiler solenoid almost in green... - Page 9 PROBLEM POSSIBLE SOLUTION PAGE Check hot water nozzle for clogs Check water level site gauge is in green range Check gasket plug in tap valve No water from hot Check SSR status light water nozzle Check boiler element Check pressure adjustment switch Replace circuit board Check water level site gauge is in green range Check for steam from steam wand...
-
Page 10: Part Replacement
PART REPLACEMENT CAUTION: Components can be HOT Pre-Maintenance Follow these pre-maintenance steps before servicing your Estella Caff e Espresso Machine 1. Turn unit off (Fig. 17) Fig. 17 Fig. 18 2. Disconnect from power supply 3. Turn off water supply 4. -
Page 11: Boiler Water Level Probe
b. Slide down into drain pan cup area Fig. 21 Fig. 22 4. Remove phillips screw from group solenoid valve wire plug (Fig. 21) 5. Pull wiring plug 6. Remove brass hex nut and copper tube (Fig. 22 A) 7. Remove hex nut from bo om side of valve body 8. -
Page 12: Solid State Relay (Ssr)
Solid State Relay (SSR) Time Estimate: Approximately 20 min. Part: #236PECEM2 for 1 and 2 group units #236PECEM3 for 3 group unit Tes ng • Status Light, will illuminate when powered "on" • On = pressure switch ac va on •... -
Page 13: Boiler Solenoid Valve (Fill Valve)
Boiler Solenoid Valve (Fill Valve) Time Estimate: Approximately 30 min. Part: #236PECEM12 for 1 group unit #236PECEM11 for 2 and 3 group units Tes ng • Audible click can be heard when turned on/off • Ohms should read ~ 2.03, if coil is good •... -
Page 14: Steam Pressure Switch
Steam Pressure Switch Time Estimate: Approximately 30 min. 1. Follow pre-maintenance steps from page 10 2. Remove 2 screws from top rear cover and remove cover (Fig. 31 A) 3. Remove 2 screws from rear cover and remove cover (Fig. 31 B) Fig. -
Page 15: Boiler Element
Boiler Element Time Estimate: Approximately 60 min. Part: #236PECEM7 for 1 group unit #236PECEM8 for 2 group unit #236PECEM9 for 3 group unit Tes ng • Disconnect wires and bus bars from element before tes ng • Part #236PECEM7 for 1 group unit should read ~9.2 ohms across each loop •... -
Page 16: Boiler Pump
Boiler Pump Time Estimate: Approximately 60 min. Part: #236PECEM15 for 1 group unit #236PECEM16 for 2 and group units Replace pump if motor is running but no water is being pushed from outlet of pump 1. Follow pre-maintenance steps from page 10 2. -
Page 17: Boiler Flowmeter
Boiler Flowmeter Time Estimate: Approximately 15 min. Part: #236PECEM18 1. Follow pre-maintenance steps from page 10 2. Ensure cup drain pan is removed 3. Remove phillips screw from wire plug (Fig. 42 A) Fig. 42 4. Remove wire plug 5. Remove hex nut and copper tube from inlet (Fig. -
Page 18: Circuit Board Fuses
Circuit Board Fuses Fig. 43 Time Estimate: Approximately 10 min. 1. Turn unit off (Page 10, Fig. 17) 2. Disconnect unit from power supply 3. Remove 2 screws from upper rear cover and remove cover (Fig. 43 A) 4. Remove 2 screws from right cover and Fig. -
Page 19: Steam Wand
Steam Wand Time Estimate: Approximately 10 min. Clearing Clogs A. Gasket • Soak wand sprayer in detergent as needed #236PECEM32 • Clean sprayer holes by poking through them B. Spring Gasket 1. Follow pre-maintenance steps from page 10 #236PECEM31 C. O-Ring 2. -
Page 20: Filter Mount And Screen
Filter Mount and Screen Fig. 52 Time Estimate: Approximately 30 min. 1. Follow pre-maintenance steps from page 10 2. Remove 2 screws from top front cover and remove cover (Fig. 49 A) 3. Remove 3 socket head cap screws (Fig. 53) with 4 mm hex key bit Fig. -
Page 21: Group Head Filter And Gasket
Group Head Filter and Gasket Fig. 57 Time Estimate: Approximately 15 min. 1. Follow pre-maintenance steps from page 10 2. Remove 2 screws from top front cover and remove cover (Fig. 57) 3. Remove top brass hex head plug (Fig. 58) with 16mm socket 4. -
Page 22: Steam And Hot Water Plug
Steam and Hot Water Plug Fig. 61 Time Estimate: Approximately 20 min. 1. Follow pre-maintenance steps from page 10 2. Remove 2 screws from top front cover and remove cover (Fig. 61) 3. Pry off cap from steam wand knob (Fig. 62) AND/OR Pry off... -
Page 23: Gauges, Steam Pressure, And Water Pressure
Steam Pressure Gauge Water Pressure Gauge #236PECEM34 #236PECEM33 Gauges, Steam Pressure, and Water Pressure Time Estimate: Approximately 25 min. 1. Follow pre-maintenance steps from page 10 Fig. 68 Fig. 69 2. Ensure cup drain pan has been removed 3. Remove screw from on/off switch knob and remove knob (Fig. -
Page 24: Wiring Diagrams
WIRING DIAGRAMS 236ECEM1 Main Switch F1 Main Fuse Motor Power F2 Motor Fuse Fill Water Valve Group 1 Solenoid J11 Cup Size Bu ons J12 Water Probe J13 Program Switch J17 Group 1 Flowmeter... -
Page 25: 236Ecem2
236ECEM2 Main Switch F1 Main Fuse Motor Power F2 Motor Fuse Fill Water Valve Group 1 Solenoid Group 2 Solenoid J11 Cup Size Bu ons J12 Water Probe J13 Program Switch J16 Group 2 Flowmeter J17 Group 1 Flowmeter... -
Page 26: 236Ecem3
236ECEM3 Main Switch F1 Main Fuse Motor Power F2 Motor Fuse Fill Water Valve Group 1 Solenoid Group 2 Solenoid Group 3 Solenoid J11 Cup Size Bu ons J12 Water Probe J13 Program Switch J15 Group 3 Flowmeter J16 Group 2 Flowmeter J17 Group 1 Flowmeter...
Need help?
Do you have a question about the 236ECEM1 and is the answer not in the manual?
Questions and answers
I need help with my 236ECEM1 Stella, coffee machine, espresso machine, it’s leaking water and I need help finding the right parts
To find the right parts for a leaking Estella 236ECEM1 espresso coffee machine, refer to the parts diagram in the manual. Identify the leaking area on your machine and match it with the corresponding part number and description in the diagram. Once identified, use the part number to order the correct replacement part.
This answer is automatically generated
I’m looking to replace the portafilter gasket for my Estella Caffe 236ECEM2. I cannot find the replacement part. Is there a serial number on the gasket that will help me locate one? Or can you just put me in the right direction for one.
The documents do not mention a serial number on the portafilter gasket for the Estella Caffe 236ECEM2 or where to find a replacement part.
This answer is automatically generated