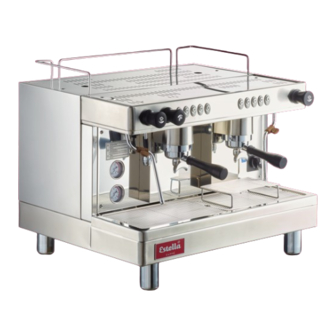
Estella 236ECEM1 User Manual
Hide thumbs
Also See for 236ECEM1:
- User manual (13 pages) ,
- User manual (15 pages) ,
- Service manual (26 pages)
Subscribe to Our Youtube Channel
Summary of Contents for Estella 236ECEM1
- Page 1 U S E R M A N U A L E S P R E S S O M A C H I N E S # 2 3 6 E C E M 1 • 1 G r o u p # 2 3 6 E C E M 2 •...
- Page 2 Setup ............4-5 Operation ............5 Cleaning & Maintenance ......6-7 Parts Diagram ..........8 Wiring Diagram (236ECEM1) ...... 9 Wiring Diagram (236ECEM2) ....10 Wiring Diagram (236ECEM3) .....11 Note: Save these instructions for future reference. G E N E R A L This manual specifies important operation, maintenance, and safety information.
-
Page 3: Specifications
Every machine has an identification label placed on the front of the machine. The label includes information of model number, voltage, serial number, wattage, and its certificate. Please do not remove this label in order for technician to check electrical information in the future. 236ECEM1 236ECEM2 236ECEM3... -
Page 4: Installation
I N S T A L L A T I O N • A cold water connection is required for this unit to function properly. • Contact a qualified technician to ensure that your electrical and water setup are correct to the specifications of the machine. -
Page 5: Operation
To configure output button 1, press output button 1, which should light LED 1 and switch off all other LEDs. Press and hold the button until the desired output is reached. Users can measure fluid ounces or time dispensed for their settings. At this point, LED 1 should be off and LED's 2, 3 and 4 should be lit. -
Page 6: Cleaning And Maintenance
C L E A N I N G & M A I N T E N A N C E Machine Body Wipe machine exterior with soft, slightly dampened cloth daily before starting operations. If necessary, a mild, non-corrosive cleaning agent may be applied to the cloth. DO NOT spray cleaning agents directly on the machine body to avoid corrosion and possible damage to circuits. - Page 7 Water Tray and Discharge Trough Turn off the machine and remove the water tray. Wash thoroughly with cleaning solution and rinse with water. After removing the water tray, wipe and remove sediments in the discharge trough with a wet cloth or napkin and wash with hot water to clear the discharge tube.
-
Page 8: Parts Diagram
PA R T S D I A G R A M Description Description Hot Water Knob Foot Espresso Brewing Unit Control Panel Sight Glass (Boiler Water Level Check Window) Steam Knob Espresso Filter Holder Brewing Group Cup Rack Steam Tube Water Pressure Gauge Main Power Switch Steam Pressure Gauge... -
Page 9: Wiring Diagram
W I R I N G D I A G R A M #236ECEM1 w w w. E s t e l l a E q u i p m e n t . c o m... - Page 10 W I R I N G D I A G R A M #236ECEM2 w w w. E s t e l l a E q u i p m e n t . c o m...
- Page 11 W I R I N G D I A G R A M #236ECEM3 w w w. E s t e l l a E q u i p m e n t . c o m...


Need help?
Do you have a question about the 236ECEM1 and is the answer not in the manual?
Questions and answers