Table of Contents
Advertisement
Available languages
Available languages
Quick Links
Advertisement
Chapters
Table of Contents

Related Manuals for Conel CLEAR PRO R


Summary of Contents for Conel CLEAR PRO R
- Page 1 CLEAR PRO RD 3/4“ - 1 1/4“ HAUSWASSERSTATION MONTAGE- UND BETRIEBSANLEITUNG DOMESTIC WATER UNIT OPERATING INSTRUCTIONS CLEAR PRO R 3/4“ - 1 1/4“ RÜCKSPÜLFILTER MONTAGE- UND BETRIEBSANLEITUNG BACKWASH FILTER OPERATING INSTRUCTIONS...
-
Page 2: Table Of Contents
INHALTSVERZEICHNIS VERWENDUNGSBEREICH VERWENDETE SYMBOLE ANFORDERUNGEN VERWENDETE WERKSTOFFE AUSFÜHRUNG MONTAGE 6.1 Anschlussflansch montieren 6.2 Rückspülfilter CLEAR PRO R / Hauswasserstation CLEAR PRO RD montieren AUSGANGSDRUCK EINSTELLEN RÜCKSPÜLUNG WARTUNG 9.1 Manuelle Absperrung 9.2 Leckageschutz (optional) 9.3 Wartung Druckminderer 9.4 Wartung Filterelement TECHNISCHE DATEN... -
Page 3: Verwendungsbereich
Sachschäden zu vermeiden, beachten Sie Kapitel 6. „Montage“ und 8. „Rückspülung“. / Der Raum für die Installation muss trocken und frostfrei sein. / Die CLEAR PRO RD sowie die CLEAR PRO R dürfen keinen starken Stößen ausgesetzt sein. / Vor der Hauswasserstation oder dem Rückspülfilter muss ein Absperrventil installiert sein! So kann die Wasserzufuhr bei Installation, Wartung oder Reparatur unterbrochen werden. -
Page 4: Ausführung
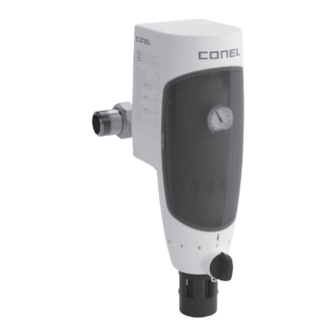
Metallische Werkstoffe erfüllen die Anforderungen der DIN 50930-6 („Beeinflussung der Trinkwasser- beschaffenheit“) und die Bewertungsgrundlage für metallene Werkstoffe, kurz: UBA BWGL-Metalle, des Umweltbundesamtes. AUSFÜHRUNG CLEAR PRO R ist ein rückspülbarer Filter mit / Filterelement aus Edelstahl (Durchlassweite unten: 95 µm / oben: 125 µm) / Ablauftrichter [a] / Flansch [b] / Monatsring [c] (markiert nächste Filterwartung) -
Page 5: Rückspülfilter Clear Pro R / Hauswasserstation Clear Pro Rd Montieren
Die Rohrleitungen müssen durchgespült werden Die Flanschfläche ist senkrecht auszurichten Abb. 6.2 6.2 Rückspülfilter CLEAR PRO R / Hauswasserstation CLEAR PRO RD montieren Es ist zu beachten, dass die Hauptachse senkrecht ausgerichtet ist (Abb. 6.3). Die Installation darf nur von geeignetem Fachpersonal durchgeführt werden. -
Page 6: Rückspülung
Um den Schmutz, der ausgefiltert und vom Siebgewebe aufgefangen wird, zu entfernen, müssen die Filter CLEAR PRO R und CLEAR PRO RD in regelmäßigen Zyklen rückgespült und somit gereinigt werden. Gemäß DIN EN 806-5 sollte dies mindestens alle 6 Monate geschehen. Auch bei einer Verringerung des Wasserdurchflusses sollte rückgespült werden. -
Page 7: Wartung
WARTUNG Vor Beginn der Wartungsarbeiten müssen alle bauseitigen Absperrungen vor und hinter dem CLEAR PRO RD oder dem CLEAR PRO R geschlossen werden. Darüber hinaus ist immer eine Druckentlastung erforderlich. Zusätzlich muss die Absperrung des Filters geschlossen werden, wie nachfolgend beschrieben. -
Page 8: Leckageschutz (Optional)
Filter 3/4“ - 1 1/4“, CLEARPNLS, (Abb. 9.4). Die Funktion der Absperrung wird bei diesem System vollauto- matisch von dem Controller übernommen. Der Nachrüst-Leckageschutz CLEAR PRO CONEL misst den Durchfluss mittels einer Turbine mit vorgeschaltetem Wider- stand. Abb. 9.4 9.3 Wartung Druckminderer... - Page 9 Abb. 9.6: Reduzierhülse [a] und Ablauftrichter [b] entfernen Abb. 9.7: Klammer [c] nach unten ziehen. Griff [d] zusammen mit dem Spindeladapter [e] entfernen Abb. 9.8: Die beiden Schrauben [f] auf der Rückseite des Gehäuses lösen und heraus- schrauben Abb. 9.9: Haube oben [g], Frontblende [h] und Haube unten mit Abdeckung und Monats- ring [i] vorsichtig voneinander lösen und entfernen Abb.
- Page 10 ACHTUNG!! Bevor die Demontagearbeiten fortgeführt werden können, ist eine Druckentlastung ZWINGEND ERFORDERLICH! Gemäß Kapitel 7 Ausgangsdruck einstellen, den Druck komplett minimieren (-). Gemäß Abb. 7.2 den Sechskant-Stiftschlüssel entgegen dem Uhrzeigersinn bis zum Anschlag drehen. Abb. 9.10: Schraubkappe [a] mit Hilfe einer Armaturenzange in Pfeilrichtung drehen und aus dem Ventilkörper lösen Bei Montage ist darauf zu achten, dass ein...
-
Page 11: Wartung Filterelement
9.4 Wartung Filterelement Die Hauswasserstation CLEAR PRO RD und auch der Rückspülfilter CLEAR PRO R sind so konzipiert, dass nach der Demontage (gemäß Kapitel 9.3 Wartung Druckminderer, Abb. 9.5 bis 9.9) das Filter- element gereinigt oder ausgetauscht werden kann. Gehen Sie wie folgt vor: Abb. -
Page 12: Technische Daten
Scheibe und die zylindrische Druckfeder das Filterelement [d] kann aus dem Ventilkörper herausge- zogen und gereinigt werden; falls erforderlich, kann es ausgetauscht werden; Das CONEL Ersatzfilterelement [d] (siehe Kapitel 12, Ersatz- teile) ist dafür vorgesehen Abb. 9.17 TECHNISCHE DATEN... -
Page 13: Abmessungen
ABMESSUNGEN Abb. 11.1 Abmessungen Hauswasserstation CLEAR PRO RD und Rückspülfilter CLEAR PRO R DN 20 (3/4“) DN 25 (1“) DN 32 (1 1/4“) A [mm] B [mm] C [mm] D (EN 10226) R 3/4“ R 1“ R 1 1/4“... -
Page 14: Ersatzteile
ERSATZTEILE Abb. 12.1... - Page 15 YSK233200901 YSK233200901 YSK233200901 CLEAR Druckminderer DN20-32 YSK233200903 YSK233200903 YSK233200903 CLEAR Ersatzfilterelement DN20-32 YSK233200909 YSK233200909 YSK233200909 CLEAR Wartungsnuss Filtertasse YSK233200907 YSK233200907 YSK233200907 DN20-32 Ersatzteile Rückspülfilter CLEAR PRO R DN 20 DN 25 DN 32 Pos. Bezeichnung (3/4“) (1“) (1 1/4“) CLEAR Manometer 16 bar...
-
Page 17: Table Of Contents
SYMBOLS USED REQUIREMENTS MATERIALS USED DESIGN MOUNTING 6.1 Mounting conncection flange 6.2 Mounting CLEAR PRO R backwash filter / CLEAR PRO RD domestic water unit SETTING OUTPUT PRESSURE BACKWASHING MAINTENANCE 9.1 Manual shut-off 9.2 Leakage protection (optional) 9.3 Maintenance pressure reducer 9.4 Maintenance filter element... -
Page 18: Field Of Application
/ The room for installation must be dry and frost-free. / The CLEAR PRO RD as well as the CLEAR PRO R must not be exposed to strong impacts. / A shut-off valve must be installed upstream of the domestic water station or the backwash filter! This allows the water supply to be interrupted during installation, maintenance or repair. -
Page 19: Design
UBA BWGL-Metalle, of the Federal Environment Agency. DESIGN CLEAR PRO R is a backwashable filter with / stainless steel filter element (passage width bottom: 95 µm; top: 125 µm) / drain funnel [a]... -
Page 20: Mounting Clear Pro R Backwash Filter / Clear Pro Rd Domestic Water Unit
The flange surface is to be aligned vertically. Fig. 6.2 6.2 Mounting CLEAR PRO R backwash filter / CLEAR PRO RD domestic water unit Note that the main axis is aligned vertically (Fig. 6.3) Installation may only be carried out by suitable qualified personnel. -
Page 21: Backwashing
BACKWASHING In order to remove the dirt that is filtered out and collected by the screen mesh, CLEAR PRO R or CLEAR PRO RD filter must be backwashed and thus cleaned in regular cycles. According to DIN EN 806-5, this should be done at least every 6 months. Backwashing should also be carried out when water flow is reduced. -
Page 22: Maintenance
MAINTENANCE Before starting maintenance work, all on-site shut-offs in front of and behind the CLEAR PRO RD or the CLEAR PRO R must be closed. In addition, pressure relief is always required. Also the shut-off of the filter must be closed, as described below. -
Page 23: Leakage Protection (Optional)
9.2 Leakage protection (optional) Optionally, the manual shut-off can be replaced by the retrofit leakage protection CLEAR PRO CONEL MultiControl for filters 3/4“ - 1 1/4“, CLEARPNLS, (Fig. 9.4). With this system, the function of the shut-off is taken over fully automatically by the controller. - Page 24 Fig. 9.6: Remove the reducing sleeve [a] and drain funnel [b] Fig. 9.7: Pull bracket [c] downwards. Remove the handle [d] together with the spindle adapter [e] Fig. 9.8: Loosen the two screws [f] on the back of the housing and unscrew them Fig.
- Page 25 WARNING!! Before proceeding with the disassembly work, a pressure relief is STRICTLY REQUIRED! According to chapter 7 Set outlet pressure, minimise the pressure completely (-). According to Fig. 7.2, turn the hexagonal pin spanner anticlockwise as far as it will go. Fig.
-
Page 26: Maintenance Filter Element
9.4 Maintenance filter element The CLEAR PRO RD domestic water unit and also the CLEAR PRO R backwash filter are designed in such a way that the filter element can be cleaned or replaced after disassembly (according to chapter 9.3 Maintenance of pressure reducer, Fig. 9.5 to 9.9). -
Page 27: Technical Data
[d] can be pulled out of the housing and cleaned; if necessary, it can be replaced; The CONEL replacement filter element [d] (see chapter 12, Spare parts) is designed for this purpose Fig. 9.17 TECHNICAL DATA... -
Page 28: Dimensions
DIMENSIONS Fig. 11.1 Dimensions CLEAR PRO RD domestic water unit and CLEAR PRO R backwash filter DN 20 (3/4“) DN 25 (1“) DN 32 (1 1/4“) A [mm] B [mm] C [mm] D (EN 10226) R 3/4“ R 1“ R 1 1/4“... -
Page 29: Spare Parts
SPARE PARTS Fig. 12.1... - Page 30 CLEAR Pressure reducer DN20-32 YSK233200903 YSK233200903 YSK233200903 CLEAR Spare filter element DN20-32 YSK233200909 YSK233200909 YSK233200909 CLEAR Maintenance nut filter cap YSK233200907 YSK233200907 YSK233200907 DN20-32 Spare parts backwash filter CLEAR PRO R DN 20 DN 25 DN 32 Item Description (3/4“) (1“)
- Page 32 CONEL DER BESTE FREUND DES INSTALLATEURS. Montage- und Bedienanleitung CLEAR PRO RD und CLEAR PRO R/1.0/07-23/© CONEL GmbH / Margot-Kalinke-Straße 9 / 80929 München Sämtliche Bild-, Produkt-, Maß- und Ausführungsangaben entsprechen dem Tag der Drucklegung. Technische Änderungen vorbehalten. Modell- und Produktansprüche können nicht geltend gemacht werden.
Need help?
Do you have a question about the CLEAR PRO R and is the answer not in the manual?
Questions and answers