
Related Manuals for STIEBEL ELTRON ETS 200 G


Summary of Contents for STIEBEL ELTRON ETS 200 G
- Page 1 OPERATION AND INSTALLATION 使用与安装说明书 Electric storage heater | 储热式电暖器 » ETS 200 G » ETS 300 G » ETS 400 G...
-
Page 2: Technical Description
1 Operating Instructions for the user and the professional 1.1 Technical Description 1.2.2 Heat Discharge The heater’s casing surfaces and the air Storage heaters store electrically generated The heat discharge is controlled by a outlet grille can heat up to temperatures heat during low-cost electricity tariff periods wall-mounted room temperature regulator above 80 °C. -
Page 3: Care And Maintenance
1.4 Care and Maintenance 1.5 Important Note Do not spray cleaning spray into the air If slight brown discoloration of the unit vents. Keep these instructions in a safe place, pass housing should occur, this should be rub- The ventilation duct behind the air outlet on to the new owner in case of a change of bed off immediately with a soft cloth (with grille (fig. -
Page 4: Installation Instructions
2 Installation Instructions for the professional Ø 9 Table 1 Type ETS 200 G ETS 300 G ETS 400 G Width ”a20” Distance ”a40” "b01" Entry electrical cables Weight (with core bricks) Connection 1/N/PE~ 50 Hz 220 V Rated power Rated current 13.6... -
Page 5: Technical Data
2.1 Technical Data The heat stored in this way is then dis- The operating equipment must be de- The unit must be installed and connected charged with the aid of a fan, also partly signed for the rated consumption of the by a specialist under consideration of these through the heater surface. -
Page 6: Unit Installation
Floor fastening Disassembly of the right side wall (3): 2.5 Unit Installation The unit is fixed to the floor by screwing the Remove the rotary knob (a), screws (b1 The storage heater must be secured by a bottom of the unit to the floor through four and b2) on the side wall (3), pull the side wall or floor fixture (fig. -
Page 8: First-Time Operation
2.6 First-time Operation Insert the core bricks (fig. L and M) 2.5.3 Readying unit for operation The core bricks are delivered packed sepa- Cleaning the unit (fig. O and P) 2.6.1 Function Test rately. The open unit must be cleaned after instal- Check the function of the fan for the storage Core bricks with slight transportation dam- lation and insertion of the core bricks. -
Page 9: Environment And Recycling
N LE N LE 1/N/PE AC 50Hz 220V External room temp. regulator temperature limiter - charging Timer temperature limiter fan E1 - E3 Heating element temperature limiter - charging Safety temperature limiter Terminal M1 - M2 fan 2.8 Transfer Explain the functions of the unit to the user. - Page 12 1. 使用说明 供用户和专业安装人员. 1.1 产品技术原理 1.2.2 热能释放 以下是此储热式电暖器,尤其是出风 ● 口部位,应和周围物体所保持的最小 储热式电暖器是在价格优惠的低谷电区间 热能释放是通过外置的室内温度控制器 距离,物体包括:家具,窗帘及纺织 (具体时间区段由电力供应部门决定,主 (另购附件)来进行控制的。 品,以及其它可燃和不可燃材料。 要是夜间时段),将电能转化成热能储存 用户在室内温度控制器上设定好所希望 (图D) 起来。然后再根据所需要的室内温度将 的室内温度值,然后温控器通过启动和停 储存的热能通过风扇以热风的形式释放出 止机器内部的风扇来控制热能的释放,以 距离出风口 500 mm 来。也有一小部分的热能通过电暖器的表 使得室温保持在设定的温度。 距离右侧壁板 面释放出来。 在寒冷的冬季,如果您离家外出较 (用于安装的空间) 100 mm 长一段时间(例如几天),建议您将温度 距离左侧壁板 70 mm 设定在10℃左右,避免房间温度过 1.2 操作说明 距离左侧壁板,当并排...
- Page 13 1.4 保养与维护 1.5 重要提示 不要将清洁喷雾剂喷入出风口内。 出风口后面的风道内日久天长会积聚一些 如果在电暖器外壳表面出现浅棕色污点, 请将此说明书存放在安全的地方。 尘土,应该由专业的技术人员每两年进行 请马上用湿布擦除。(可使用热水和洗涤 当电暖器易主时,请将说明书一起转交给 一次检查。 剂)此电暖器在冷却状态下可以使用常规 新的所有者。 我们建议您在定期的例行维护时对控制部 方式清洁。 当需要进行维修时,请将此说明书呈交给 件进行检查。 请不要使用研磨剂和强力去污剂清洁本产 维修人员查阅。 从第一次使用开始最晚不超过10年内,应 品。 该由专业的技术人员对此电暖器的安全 性,控制部件,以及整个储热放热控制系 统进行一次彻底的检测。 常见故障及解决方法: 可由用户解决 仅由专业人员解决 检查: 检查: 储热式电暖器不热 ...充热旋钮是否设定在位置3上。 ...加热管的控制电路是否正常。 ...家里的配电箱中对应的保险丝是否已熔 ...在接线端子L处是否有电压。 断或者对应的漏电保护器或接地故障断路器 ...安全保护限温器(F1)是否已经动 是否已分断。 作。 然后排除引起故障的因素!...
- Page 14 2. 安装说明供专业安装人员 Ø 9 表1 ETS 200 G ETS 300 G ETS 400 G 型号 宽度 ”a20” 距离 ”a40” "b01" 电源线接入口 重量 (包括储热砖) 1/N/PE~ 50 Hz 220 V 电气连接 额定功率 13.6 18.2 额定电流 16,0 24.0 32.0 参考储热量 17,0 25.5 35.0 最大储热量...
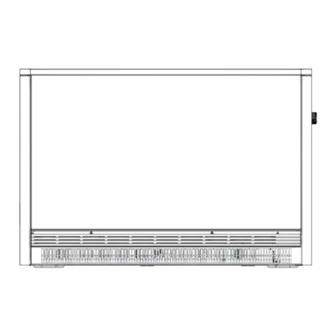
- Page 15 2.4 安装场所 2.1 技术数据 2.3 使用规程及规定 此设备严禁用在下述环境: 本产品必须由专业安装人员根据此说明书 注意不要让包装物碎片进入机体! ● 存有化学品,粉尘,燃气或蒸汽,可 的指示进行安装和连接. 要注意遵守国家相关的有关建筑物和 ● 能引发火灾和爆炸的房间内。 车库的规定。 紧邻装有易燃易爆物质的管道或容器 设备安装位置的地面一定要有足够的 2.2 技术说明(图F) ● 附近。 承重能力。 控制面板 与周围物体表面之间的最小距离不能 如有任何疑问应向建筑专家资询。 上盖 得到保证时。 (关于储热式电暖器的重量请参见技术 右侧板 在具有废气,机油,汽油等气体挥发 规格表。) 前面板 物的房间中使用时,这些挥发物的气 必须要与相邻物体表面保持有规定的 ● 出风口 味会有被加强的可能,并且会导致经 最小距离(参见图C和D) 进风口 久不散。...
- Page 16 地面固定 通过打开的背板(15)穿入电源线和用 ● 检查隔热材料是否有因运输而 本设备可通过底部的四个9mm的预 来连接充热和放热控制单元的电缆, 导致的损坏,如有必要需进行 留孔与地面用螺栓紧固。(有关尺 并根据说明书2.5.2章节的指导进行连 更换。 寸请参阅“技术规格”和图E。) 接。(敷设大约210mm长的接线,然后 此种固定安装方式只有在将进出风 根据实际情况截短。 放入储热砖(图L和M) 口拆下,并将风扇托盘移出后才能 注意不要阻挡侧壁上的风道。) 储热砖为单独包装和运输。因运输所导致 进行。 将产品放置在所设计好的位置,然后 ● 储热砖的轻微破损不会影响电暖器的性 固定在墙上。(如果必要的话,固定在 能。放入储热砖(9)(图L)时,须轻轻抬起 2.5.1 产品的安装(图G-J) 地板上。) 加热管(17)。将储热砖有凹陷的一面向 取下内盖板(10)和纸隔板,然后从内 ● 轻轻向下按压进风口两端(6),向外 ● 上,距右侧隔热材料一定距离放在加热管 侧面取下按钮(图K)。注意不要将包装 取出进风口。卸下出风口(5)的2个螺 下面,然后推向右侧和背面的隔热材料。 物碎片带入机器中。 钉,取下出风口(图G)。 在抬起加热管时。注意不要使右侧隔热板 卸下前面板(4)的2个螺钉,轻提取下 ●...
- Page 18 2.5.2 电气连接 2.7 维修,及添加附件 在下部挂上右侧板,向上倾斜,挂住 ● 此电暖器的加热管通过连接到接线端 上边并用螺钉(b1和b2)固定。(和拆 在进行初始安装、拆除修理后的重新安 卸过程相反—参照2.5.1章节“卸下右 子“L”, “N” 和 “ ”以接入电源 装、以及移动机器时,都必须依照本说明 侧板”,图G-J) 1/N/PE ~ 50 Hz 220V。 书的要求进行。同时必须注意以下事项: 挂上前面板,在下部用2个螺钉固定( ● 本产品可以用普通绝缘护套线直接来进行 隔热板如果有明显的损坏迹象而影响安全 使用两个带有内螺纹的孔)(图Q) 连接。主电源线的芯数和最小截面积需采 时必须更换。将要被换上的隔热板需要经 用两个1/4圈固定帽将出风口(5)固 ● 用3x2.5mm ,外置温控器的连接线需采用 过严格的测试 定。(图R) 2x1.5mm 。 把进风口的顶边挂在空气导向组件的 ● 请参照正确的接线图与表1进行连接。...
- Page 19 N LE N LE 1/N/PE AC 50Hz 220V 外置室内温控器 过温保护器 - 充热 定时器 过温保护器 - 风扇 E1 - E3 加热管 过温保护器 - 充热 安全保护限温器 接线端子 M1 - M2 风扇...
- Page 20 Deutschland Verkauf Tel. 05531 702-110 | Fax 05531 702-95108 | info-center@stiebel-eltron.de STIEBEL ELTRON GmbH & Co. KG Kundendienst Tel. 05531 702-111 | Fax 05531 702-95890 | kundendienst@stiebel-eltron.de Dr.-Stiebel-Straße 33 | 37603 Holzminden Ersatzteilverkauf Tel. 05531 702-120 | Fax 05531 702-95335 | ersatzteile@stiebel-eltron.de Tel.
Need help?
Do you have a question about the ETS 200 G and is the answer not in the manual?
Questions and answers