Table of Contents
Advertisement
Quick Links
MALLINCAM SolarCam 20
[Version 1.0]
Michael Burns
Rock Mallin
[
Mallincam SolarCam 20 User Manual
This document will quickly introduce you to the wonders of the Mallincam SolarCam
20 Camera. We will include instructions on how to install the Software and Drivers and
how to connect the SolarCam 20 to your computer along with explanations of the
camera's major settings. The purpose of this guide is to quickly get you up and
running with the SolarCam 20 Camera so that you can image the skies and share
your passion with others.
SolarCam 20 User Manual
Revision Sheet
]
Page i
Advertisement
Table of Contents

Subscribe to Our Youtube Channel
Related Manuals for MallinCam SolarCam 20


Summary of Contents for MallinCam SolarCam 20
- Page 1 SolarCam 20 to your computer along with explanations of the camera’s major settings. The purpose of this guide is to quickly get you up and running with the SolarCam 20 Camera so that you can image the skies and share your passion with others.
-
Page 2: Revision History
Revision Sheet Revision History Version Date Revision Description 11/06/2023 Template Creation SolarCam 20 User Manual Page ii... -
Page 3: Table Of Contents
Mallincam SOLARCAM 20 with a Computer ..................13 Connecting the SolarCam 20 to your Computer ................13 Starting on the SolarCam 20 on the Computer ....................13 SolarCam 20 Quick Setup and Pictorial Workflow ................14 Detailed Work-Flow Procedures on a Computer ....................15 Resolution .............................. - Page 4 Mallincam SolarCam 20 User Manual November 6, 2023 Capture Tab .........................28 Snapshot Icon ..............................28 Resolution Tab ..................... 29 Binning Tab ............................... 30 Exposure Control Tab ..............31 Auto Exposure .............................. 31 Area Exposure .............................. 31 ..............................31 Manual Exposure Setting ..........................32 Exposure Time ..............................
- Page 5 Mallincam SolarCam 20 User Manual November 6, 2023 File Format ..............................41 Path................................42 Time Stamp ..............................42 3D DeNoise ..............................42 ROI Tab ....................43 Select ROI ..............................43 Select ROI Coordinates ..........................44 Mask Tab ....................45 Select Mask ..............................45 Select Mask Area ............................
- Page 6 Mallincam SolarCam 20 User Manual November 6, 2023 Reset All ................................ 57 Load Fluorescence Mode ..........................57 Light Frequency Tab ............................58 Light Frequency ............................58 Other Settings Tab ................... 58 Other Settings ............................... 58 Image Tab ............................59 Save image As..............................59 Image Crop ..............................
- Page 7 Appendix B: Using Filters ........................78 Mallincam Polarizing Filter ..........................78 Mallincam IR Filter ............................78 Appendix C: Connecting to Night Skies Network (NSN) using the SolarCam 20 Software ..79 Setting up to Broadcast on LiveSkies .....................79 Introduction ............................... 79 Obtaining a Broadcast Account ......................... 80 Logging into Liveskies ............................
- Page 8 When I save my AVI Video it only saves part of the Video.............. 96 My SolarCam 20 is frozen, or the commands do not seem to be working correctly....96 My Image on the Screen is great, but when I try to Modify it, the image is all White....96 Appendix E: Notes ..........................97...
-
Page 9: Introduction
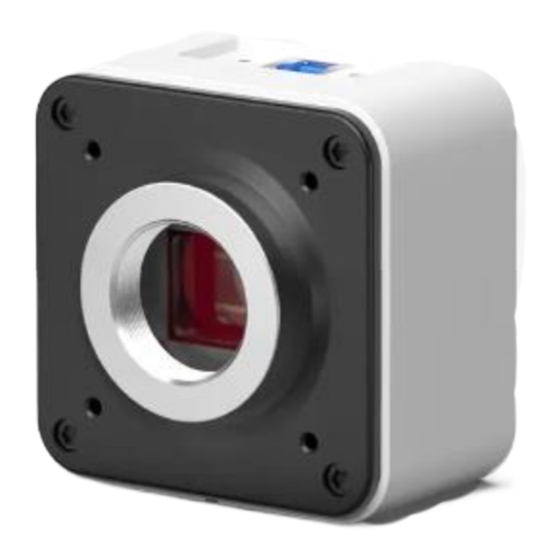
Equipped with a square megapixel ceramic CMOS sensor featuring a pixel size of 2.4μm x 2.4μm, the SolarCam 20 delivers impressive 5472 x 3648 resolution, covering a diagonal field of view of 15.86mm. The SolarCam 20 camera produces high-resolution 20 million-pixel images using various solar telescope setups. -
Page 10: The Contents Of The Solarcam 20 - Package
Mallincam SolarCam 20 User Manual November 6, 2023 The Contents of the SOLARCAM 20 - Package Specifications: Sensor: Sony CMOS sensor IMX183CQJ-J Sensor size: 13.1 x 8.8 mm Array Diagonal: 15.86 mm Active pixel array size: 5472 (H) × 3648 (V) (20 Mega Pixels) Effective Area: 13.1mm x 8.8mm... -
Page 11: Included In Package
② Flash drive containing software installation files. ③ USB 3.0 Cable with mounting screws. ④ 1.25” eyepiece adapter Optional Components ➢ Mallincam 1.25” 0.5 x Focal Reducer w/25mm extension ➢ Mallincam 1.25” IR Blocking Filter ➢ Mallincam 1.25” Polarizing Filter SolarCam 20 User Manual... -
Page 12: Installing Driver And Software
Visit the Software Downloads Page in the Support Tab located on the website: Step 1 www.mallincam.net Select the Blue Click Here Button to download the SolarCam 20 Driver. Step 2 MALLINCAM HD-10 II, SolarCam 20 Software After you have clicked on the Blue... -
Page 13: First Time Installation Of Software
Mallincam SolarCam 20 User Manual November 6, 2023 First Time Installation of Software Double-Click on the Mallincam2.4 Setup to start the installation MallinCam2.4 Setup process (You may need to accept installation). The following window will appear: Click on Next to continue the installation process. - Page 14 The Mallincam2.1 and Drivers will be installed on your computer. Then the Completing the MallinCam Setup Window will pop-up. Click on Finish to acknowledge the installation. Once complete, you will now have a Mallincam Icon on your desktop. SolarCam 20 User Manual Page 12...
-
Page 15: Mallincam Solarcam 20 With A Computer
Laptop or Computer Starting on the SolarCam 20 on the Computer Attach the provided USB 3.0 cable from the SolarCam 20 to a USB 3.0 port on your Computer (Drivers may install on first attachment). Double-Click on the Mallincam Icon (located on your Desktop) to start the software (Note: it takes a few seconds to activate). -
Page 16: Solarcam 20 Quick Setup And Pictorial Workflow
Mallincam SolarCam 20 User Manual November 6, 2023 SolarCam 20 Quick Setup and Pictorial Workflow A typical workflow when using the SolarCam 20. Connect SolarCam 20 Computer Select Capture Set Resolution Set Binning Set Exposure Adjust Image Save Images Exit Program... -
Page 17: Detailed Work-Flow Procedures On A Computer
SOLARCAM 20 Control Software below. Once you have the SolarCam 20’s Software up and running, you should see an image of whatever the SolarCam 20 camera is looking at (at whatever exposure setting the software is set at). -
Page 18: Gain
Click on the button accept the new exposure value. The SolarCam 20 will not change the exposure value until you give it permission by clicking on the button. -
Page 19: White Balance
Step 4 Different planetary objects, in combination with different sky conditions, may throw off the colour balance of the SolarCam 20. We can bring everything back to normal by using the White Balance control which is located in the Feature Tab. -
Page 20: Hue, Saturation, Light, Contrast, Sharpness, And Dpc
Mallincam SolarCam 20 User Manual November 6, 2023 Hue, Saturation, Light, Contrast, Sharpness, and DPC Step 4 Located in the Image Adjust Tab are the six controls called Hue, Saturation, Light, Contrast, Sharpness and DPC. By using the mouse cursor, Left-Click-Hold-and-Drag the slider bar of each of the controls to produce an image that meets your requirements. -
Page 21: Flat Field Calibration Wizard
Mallincam SolarCam 20 User Manual November 6, 2023 Flat Field Calibration Wizard This control will start a process that will help eliminate any optical spots caused by dust and particles on the optical path (from lenses to mirrors on the telescope). This Wizard will walk you through taking a couple of images so it can detect and remove the imperfections making a more uniform image. -
Page 22: Gamma
The Histogram allows you to manually or automatically adjust the image levels of all color components the image that the SolarCam 20 camera is producing. You can control each individual channel (Red, Green, and Blue) or the combined color channel. The color level... -
Page 23: Capture A Snapshot
Mallincam SolarCam 20 User Manual November 6, 2023 Capture a Snapshot Step 6 You now have your masterpiece on the screen (the Moon, a Planet), and you have played with the Histogram and the Image adjustment tools and now you would like to save it for bragging rights. - Page 24 Mallincam Software. From here we can tweak the image before re-saving it (but most of us will use another image tweaking software after we have finished with the SolarCam 20 session). Later in this User Manual, we will discuss the Image Window’s...
-
Page 25: Capture And Save A Video Sequence
Mallincam SolarCam 20 User Manual November 6, 2023 Capture and Save a Video Sequence Step 7 So, you might be thinking that still captures are good, but video captures are better. Well, let’s save a short video clip (in format) of what our Mallincam SolarCam 20 is imaging. - Page 26 You also have one other option that you can select with the Auto Stop technique, Delay Time. If you check-marked the Delay Time, then you can enter time delay (minutes, seconds, milliseconds) before the Mallincam Software executes your Video Recoding. SolarCam 20 User Manual Page 24...
- Page 27 Mallincam SolarCam 20 User Manual November 6, 2023 Total Frame Click on its radial button to activate its selector. Then either enter in the number of frames you would like to record or use the arrows beside the box to set the number of frames.
-
Page 28: Exit The Software
The Software will ask you for verification, Select to shut down the Mallincam Software. Remember the SolarCam 20 is power though the USB 3.0 Port, so when the software is shut down, the camera also shuts down. The above instructions were meant to get you going quickly and provide enough instructions to adjust your live image in real time. -
Page 29: Mallincam Software Commands
November 6, 2023 Mallincam Software Commands In the Previous section we walked through the process of connection the SolarCam 20 to your telescope, Installing the Software, and taking and capturing images and videos. Here we will go into full detail about each of the commands available to you. Don’t be afraid to experiment with the camera so that it produces the best images matching your equipment. -
Page 30: Capture Tab
Snapshot Icon Snapshot icon allows you to take an immediate snapshot image of what the Mallincam SolarCam 20 camera is displaying. The image will be saved in the location and format of choice as designated in the File Save Tab (see below). -
Page 31: Resolution Tab
Live Image The higher the resolution, the longer it takes the Resolution SolarCam 20 to refresh the next real time image. Also, the larger the resolution, the larger the file/video file size when saving. When trying to produce as many images for... -
Page 32: Binning Tab
The SolarCam 20 provides binning choices for you to select from. This process allows you to increase the sensitivity of the Mallincam Camera by providing you with the option of combining sensor cells together to increase the photon capture area. For example, a 2 x 2 binning will link 4 cells (in a 2 by 2 array) together, so you have about 4 times the capture area than one cell. -
Page 33: Exposure Control Tab
Exposure Control Tab It is here in the Exposure Control Tab that you have complete control of the exposure process. You can have the SolarCam 20 camera pick the best exposure for the current image, or you can take control of the exposure yourself. -
Page 34: Manual Exposure Setting
The new exposure will not change until you click on the button to the right of the time boxes. The SolarCam 20 has a range of exposure times going from 18 μs This control allows you to use a slider to change the exposure. -
Page 35: Bit Of Depth Tab
Mallincam SolarCam 20 User Manual November 6, 2023 Bit of Depth Tab It is here in the Bit Dept Tab that you have the ability to choose either 8-bit 16-bit display. Using 8 bit, the image is capable of displaying... -
Page 36: White Balance Tab
Mallincam SolarCam 20 User Manual November 6, 2023 White Balance Tab It is here in the White Balance Tab that you have complete control of the individual color components of the image. White Balance is the process of removing unrealistic color casts, so that objects which are white in reality are rendered white in your image. -
Page 37: Color Control
Balance sliders, you will more accurately achieve the correct color temperature. The color temperature settings range from 2000K to 15000K. This control resets the SolarCam 20 White Balance back to its factory defaults which are automatic with a color image. -
Page 38: Image Adjust Tab
Mallincam SolarCam 20 User Manual November 6, 2023 Image Adjust Tab It is here in the Image Adjust Tab that you have complete control of the real time image adjustment available for the camera. This tab allows you to adjust the Hue, Saturation, Light, Contrast, Sharpness,... -
Page 39: Sharpness
Mallincam SolarCam 20 User Manual November 6, 2023 Feature Title Usage Sharpness can be defined as edge contrast, that is, the contrast along edges in an object in the image. When we increase sharpness, we increase the contrast only along/near edges in the object while leaving smooth areas of the image alone. -
Page 40: Default
2) You are prompted to move to another blank area (leaving the t-shirt, just slightly move telescope), and then take another image via clicking the Button. The SolarCam 20 will then apply the Flat Field Correction (notice the checked checkmark... -
Page 41: Histogram Tab
Mallincam SolarCam 20 User Manual November 6, 2023 Histogram Tab It is here in the Histogram Tab that you have complete control of the Live Image Histogram which allows you to either manually control the brightness of each of the color channels or let the software perform this task for you. -
Page 42: Right Control
Mallincam SolarCam 20 User Manual November 6, 2023 This control allows you to enter in a value for the Right Control which represents the amount of pixel value proportion for bright. When the Auto Max is selected, When the Auto... -
Page 43: File Save Tab
Format, and File location when you save Snapshots Videos of what the SolarCam 20 is imaging. You can save a Snapshot simultaneously in JPG, TIF, and PNG format. Feature Title Usage When this is selected (it is either this or... -
Page 44: Path
Mallincam SolarCam 20 User Manual November 6, 2023 Using Browse will open-up the Windows Directory Window for you to locate and/or create a folder location to save your images or videos. Path When this checkbox is selected, the saved images... -
Page 45: Roi Tab
Mallincam SolarCam 20 User Manual November 6, 2023 ROI Tab It is here in the Tab (Region of Interest) where you can select a rectangular area of the whole image to become the only region to display in the Image Window. This control allows you to... -
Page 46: Select Roi Coordinates
Mallincam SolarCam 20 User Manual November 6, 2023 Feature Title Usage When this is selected (it is either this or Select Region), you will be able to enter the coordinates of the upper left corner of the rectangle, then enter the width and the height of the region into the boxes provided. -
Page 47: Mask Tab
Mallincam SolarCam 20 User Manual November 6, 2023 Mask Tab It is here in the Mask Tab where you can select a rectangular area of the whole image to highlight a region to display within Image Window. This control allows you to define a... -
Page 48: Select Mask Area
Mallincam SolarCam 20 User Manual November 6, 2023 Feature Title Usage When this is selected (it is either this or Select Mask), you will be able to enter the coordinates of the upper left corner of the rectangle, then enter the width and the height of the region into the boxes provided. -
Page 49: Image Stitching (Live) Tab
Mallincam SolarCam 20 User Manual November 6, 2023 Image Stitching (Live) Tab It is here in the Image Sticking Tab where you can join overlapping images to create a mosaic of a larger area of an object of interest. This control will have very little use in planetary imaging as the objects as relatively small as compared to the Image Window, but it is great for the Moon and Sun. - Page 50 Mallincam SolarCam 20 User Manual November 6, 2023 navigation display frame in the Stitching Window is green, the software will perform one stitching; each time the sample is moved, the software will perform one stitching. If the navigation display frame is red, it means that...
-
Page 51: Edf (Live) Tab
Mallincam SolarCam 20 User Manual November 6, 2023 EDF (Live) Tab It is here in the EDF Tab (Extended Depth of Field) where you can combine the same image with different focus locations. This control will have very little use in planetary imaging except for the Moon, as most objects will have the same focus location. -
Page 52: Realtime Dye Tab
Mallincam SolarCam 20 User Manual November 6, 2023 Realtime Dye Tab It is here in the Video Record Tab where you can add a color Dye (a color overlay) to the image (works best for grey images). You can use one of the preset colors or even create and save a color on your own making. -
Page 53: New Dye
Mallincam SolarCam 20 User Manual November 6, 2023 Feature Title Usage This selection allows you to select the Dye Color from your previously created and saved colors. Note: If you select from available color palette, New Dye and there is only... -
Page 54: Video Record Tab
Mallincam SolarCam 20 User Manual November 6, 2023 Video Record Tab It is here in the Video Record Tab where you can save the real time videos of what you are imaging. You have full control of how you want... -
Page 55: Playback Rate
Mallincam SolarCam 20 User Manual November 6, 2023 Feature Title Usage This control allows you to record your Video as fast as theoretically possible (depends upon hardware and size of frame being captured) to as slow as 1 frame per second. -
Page 56: Delay Capture Tab
Mallincam SolarCam 20 User Manual November 6, 2023 Delay Capture Tab It is here in the Delay Capture Tab where you can delay the capture of multiple Snapshot images with a set interval between each image. You also have the option of combining these snapshots into a Video sequence. -
Page 57: Interval Time
Mallincam SolarCam 20 User Manual November 6, 2023 Feature Title Usage This control allows you to enter the amount of pause the software should take between each Snapshot (entered in the Total Frame above). Interval Time The time is entered in either minutes, seconds, or... -
Page 58: Save Settings Tab
Group name. You can save numerous different setting scenarios on the computer. Then at a later date, you can reload all of those settings back into the SolarCam 20 and continue from where you left off. We recommend that you use a naming convention that will make sense to you. -
Page 59: Import
The imported group name will be added to your database. Will reset the current SolarCam 20 internal camera Reset All settings to factor defaults. Thus, overriding current group settings. This is a great button to use when you have configured the SolarCam 20, but you cannot get it back to normal. -
Page 60: Light Frequency Tab
Feature Title Usage Select an option to see if it improves your image. Light Frequency Other Settings Tab Not activated for the Mallincam SolarCam 20 Feature Title Usage Negative: One Checked, it changes the color of the current image to its inverse color. -
Page 61: Image Tab
Mallincam SolarCam 20 User Manual November 6, 2023 Image Tab Image Tab is the control used to activate other image modification controls for adjusting image details of your Snapshot images. This Tab allows quick and simple adjustments of a Snapshot image within the software, but most of us may use other image adjusting software as well. -
Page 62: Image Crop
Mallincam SolarCam 20 User Manual November 6, 2023 Feature Title Usage This icon allows you to select a rectangular area of your image and remove everything else. On your Display Window Click on the icon, then left-click- hold and drag to select a rectangle of interest. -
Page 63: Contrast
Mallincam SolarCam 20 User Manual November 6, 2023 Feature Title Usage This slider control allows you to adjust the Contrast value for the overall image. Increasing the Contrast Contrast increases the difference between the dark light areas. The Contrast ranges from with the default being 0. -
Page 64: Image Dye Tab
Mallincam SolarCam 20 User Manual November 6, 2023 Image Dye Tab Image Dye Tab allows you to create false color images with a color overlay. Picking a color from the palette will shade the whole image with that color in appropriate intensities. -
Page 65: Binaryzation Tab
Mallincam SolarCam 20 User Manual November 6, 2023 Binaryzation Tab Binaryzation Tab allows you to set the grayscale value of the pixels from a range of to 255. The end result of this process is to create an image which is truly... -
Page 66: Advanced Computational Imaging Tab
Mallincam SolarCam 20 User Manual November 6, 2023 Advanced Computational Imaging Tab Advanced Computational Tab allows you merge saved images to either improve their depth-of-view, create a mosaic of the overlapping images, or produce an image with a High-Dynamic Range. -
Page 67: Histogram Tab
Mallincam SolarCam 20 User Manual November 6, 2023 Histogram Tab It is here in the Histogram Tab that you have complete control of the Saved Image Histogram which allows you to either manually control the brightness of each of the color channels or let the software perform this task for you. -
Page 68: Smooth Tab
Mallincam SolarCam 20 User Manual November 6, 2023 Smooth Tab Smooth Tab allows you to apply any of the three techniques of smoothing your image to both reduce the noise and the level of detail. The choices are Gaussian Blur,... -
Page 69: Radius
Mallincam SolarCam 20 User Manual November 6, 2023 Feature Title Usage The purpose of this slider is to control the amount the selected algorithm will affect the image. The Radius range is from (smallest effect) to (maximum effect). Set the... -
Page 70: Filter/Extract/Inverse Color Tab
Mallincam SolarCam 20 User Manual November 6, 2023 Filter/Extract/Inverse Color Tab The Filter/Extract/Inverse Tab allows you to play with the colors of the image, by either removing a specific color, selecting, or even complementing colors to try to pull out deeper structure in the image. -
Page 71: Inverse Color
Mallincam SolarCam 20 User Manual November 6, 2023 Feature Title Usage This control will invert (reverse) every pixel value of the image to their complementary color. For example, see below on the right an image of the Moon with the Inverse selected. -
Page 72: Deconvolution
Mallincam SolarCam 20 User Manual November 6, 2023 Deconvolution Deconvolution Tab allows you use to apply an algorithmic process of reversing the optical distortion that takes place in the an optical/atmospheric acquisition process of the telescope, thus creating clearer images. -
Page 73: Automatic Counting
Mallincam SolarCam 20 User Manual November 6, 2023 Automatic Counting This control has no real application for us. It allows you to set up a bunch of parameters, then counts objects in the image that matches those parameters. I tried it with Sunspots, or... -
Page 74: Display Tab
Mallincam SolarCam 20 User Manual November 6, 2023 Display Tab The Display Tab allows you to zoom in or out, resize or even reset the real time image screen to its default size. Here you also will be able to flip or rotate the image for your needs. -
Page 75: Black Background
Mallincam SolarCam 20 User Manual November 6, 2023 Feature Title Usage Clicking on this control will make your image take up the whole screen (no control tabs visible) with Black panels. You can return to a screen with control tabs by either hitting the... -
Page 76: Rotate 90
Mallincam SolarCam 20 User Manual November 6, 2023 Feature Title Usage Clicking on this control will rotate the image clockwise. You can apply this control to again rotate the image another and repeat as necessary. Rotate 90 Config Tab The Display Tab allows you to select which controls you would... -
Page 77: Info Tab
Mallincam SolarCam 20 User Manual November 6, 2023 Info Tab The Info Tab allows you to select which language you would like to see the controls in. You can also find the version number of the software currently installed on your computer along with information about the camera. -
Page 78: On Screen Controls
Mallincam SolarCam 20 User Manual November 6, 2023 On Screen Controls Feature Title Usage This icon is located on the upper right of the Image Tray. Clicking on this icon will open a Directory window where you can choose a location to load... -
Page 79: Appendix
A focal reducer is a set of converging (or positive) lenses that cause the light from a telescope to converge at a steeper angle to the focal plane of the SolarCam 20 camera. It is as if it were coming from an objective with a faster (lower) focal ratio and a shorter focal length. -
Page 80: Appendix B: Using Filters
(or block) specified wavelengths of light hit the sensor. Each filter has a job to do, and the more specialized that job, usually the more expensive the filter. For use with the Mallincam SolarCam 20 there are two filters that may be of interest to you. -
Page 81: Appendix C: Connecting To Night Skies Network (Nsn) Using The Solarcam 20 Software
Currently Mallincam Software is not capable of modifying the Video Image and having that Video Image directly captured by LiveSkies. So, if you want to use all the features of the Mallincam Software and broadcast those results, as well as save screen shots and videos of your images, then we need another program to capture Mallincam Software’s output and have the output... -
Page 82: Obtaining A Broadcast Account
Mallincam SolarCam 20 User Manual November 6, 2023 Obtaining a Broadcast Account Step 1 Visit https://liveskies.org Click on Sign up To Broadcast (located at top right of screen) Step 2 Remember each channel name will have a unique email address. -
Page 83: Logging Into Liveskies
Mallincam SolarCam 20 User Manual November 6, 2023 Logging into Liveskies Visit https://liveskies.org Step 1 Click on the red Login button on the upper right of the window. Step 2 A login window will pop up. Enter both your Username and Password and click on the red Login button. - Page 84 Video Source Step 4 At this point, determine how you would like to broadcast your live video of Mallincam Software. I will go into more detail with two options, SplitCam and OBS in the next section. I am assuming that you have either SplitCam or OBS running and displaying the active Mallincam Software Window. (See below on how to achieve this).
-
Page 85: This Section Explains How To Capture And Broadcast Using Either Splitcam Or Obs
This section explains how to Capture and Broadcast Using either SplitCam or OBS You will want to stream the Mallincam image to the Liveskies server. I will give procedure for two of many options. Once you have activated your choice, just bring the Mallincam Window up front so you can control it. If you have multiple monitors, you can leave Liveskies and Mallincam Software each on its own monitor, so they are available to control. - Page 86 When Share Window is selected, a drop-down box will provide a list of programs currently running. Choose MALLINCAM You will now have SplitCam displaying the Mallincam’s window in its display window. I recommend setting the resolution to 1920 x 1080 in SplitCam’s General Settings (the 3 horizontal lines beside My Project on the SplitCam screen.
-
Page 87: Live Chat
SplitCam and the Mallincam Software To control Mallincam Software, just bring it to the front. If you have a small sized monitor, you may want to reduce the size of the Mallincam Software Window so you can also view the Liveskies window and participate in the chat process. -
Page 88: Using Obs (Open Broadcast Software) - This Is A More Challenging Process To Initially Setup
A new Window will open up where you can select from a list of possible sources. Two two best choices are Display Capture and Window Capture. We recommend Window Capture. When the Window Capture selection appears, use the dropdown list to select Mallincam. SolarCam 20 User Manual Page 86... - Page 89 Mallincam SolarCam 20 User Manual November 6, 2023 You will see the Mallincam Software screen in OBS’s display. If you have the Desktop Audio setting too high, then you will catch your voice on that as well and this can lead to repeated echoing.
- Page 90 Step 7 button, do not worry about Video source) We need to tell OBS (and give permission) where to send the Mallincam’s live video image. In the Liveskies window, place Step 8 your mouse over the orange name of your channel. A pop-down list will appear.
- Page 91 Mallincam SolarCam 20 User Manual November 6, 2023 Move the mouse to select External Encoders on OBS Drop Down The Broadcast Video window will appear that contains all of the data needed for broadcasting. Only the first two lines, RTMP Address and Stream Name contains the information OBS needs.
- Page 92 (once you select Start Streaming). You can minimize OBS and use Mallincam Software as you normally would. But, since you have not logged in, you will NOT be able to use Live Chat (bummer). So, just log in to your Channel and then view your own channel to use Live Chat or Log in as Guest to view the channel.
-
Page 93: Viewing A Live Skies Channel
Mallincam SolarCam 20 User Manual November 6, 2023 Viewing a Live Skies Channel Logging into Liveskies Visit https://liveskies.org Below the main display window of Liveskies is a list of the currently broadcasting channels, or just click on the CHANNELS button on the top line to display currently broadcasting channels. - Page 94 Mallincam SolarCam 20 User Manual November 6, 2023 Enter both your Username Password and click on the red Login button. Step 2 You can have Liveskies remember your credentials. When you have successfully logged in, you will be presented with the main display and control window.
-
Page 95: To Live Chat
Mallincam SolarCam 20 User Manual November 6, 2023 You can make the Broadcast Video Window full screen by clicking on the located on the bottom right side of the Liveskies video window (you will not be able to see the Live Chat Window), or simply by double clicking on the Video Window of the broadcast (double clicking on the full screen broadcast channel will return it to its original size). - Page 96 Mallincam SolarCam 20 User Manual November 6, 2023 One Page Broadcast Summary SolarCam 20 User Manual Page 94...
-
Page 97: Appendix D - First Aid For The Solarcam 20
Appendix D – First Aid for the SolarCam 20 The SolarCam 20 Software is not Working Diagnosis: This software automatically looks for the SolarCam 20 camera when it starts. If it cannot locate the camera attached to a USB 3.0 Port, all controls will be inactive. Cure: First step: Make sure the LED light on top the camera is lit. -
Page 98: When I Save My Avi Video It Only Saves Part Of The Video
Make sure your Windows environment is up to date. Cure: My SolarCam 20 is frozen, or the commands do not seem to be working correctly. Diagnosis: Somehow the SolarCam 20 internals have become corrupted (power surge, static, cosmic ray) and all we need to do is reboot the camera and software. -
Page 99: Appendix E: Notes
Mallincam SolarCam 20 User Manual November 6, 2023 Appendix E: Notes _______________________________________________ _______________________________________________ _______________________________________________ _______________________________________________ _______________________________________________ _______________________________________________ _______________________________________________ _______________________________________________ _______________________________________________ _______________________________________________ _______________________________________________ _______________________________________________ _______________________________________________ _______________________________________________ _______________________________________________ _______________________________________________ _______________________________________________ _______________________________________________ ____________________________________________ SolarCam 20 User Manual Page 97... - Page 100 Mallincam SolarCam 20 User Manual November 6, 2023 SolarCam 20 Quick Guide Page 98...
Need help?
Do you have a question about the SolarCam 20 and is the answer not in the manual?
Questions and answers