Table of Contents
Advertisement
Quick Links
SKYRAIDER DS16C
[Version 3.4]
Michael Burns
Rock Mallin
[
SkyRaider DS16C User Manual
This document will quickly introduce you to the wonders of the MallinCam SkyRaider
DS16C Camera. It will include instructions on how to install the Software and Drivers
and how connect the SkyRaider to your computer along with explanations of the
camera's major settings. The purpose of this guide is to quickly get you up and
running with the SkyRaider Camera so that you can image.
SkyRaider DS16C User Manual
Revision Sheet
]
Page i
Advertisement
Table of Contents

Subscribe to Our Youtube Channel
Related Manuals for MallinCam SKYRAIDER DS16C


Summary of Contents for MallinCam SKYRAIDER DS16C
- Page 1 Rock Mallin SkyRaider DS16C User Manual This document will quickly introduce you to the wonders of the MallinCam SkyRaider DS16C Camera. It will include instructions on how to install the Software and Drivers and how connect the SkyRaider to your computer along with explanations of the camera’s major settings.
-
Page 2: Revision History
Revision Sheet Revision History Version Date Revision Description 11/20/2016 Template Creation 10/28/2017 Digital Binning 01/14/2018 Flat Fields 07/14/2018 Sharpness SkyRaider DS16C User Manual Page ii... -
Page 3: Table Of Contents
SkyRaider DS16C User Manual July 14, 2018 Table of Contents Contents Revision History ........................... ii Table of Contents .......................... 1 Introduction ..........................6 The Contents of the SkyRaider-DS16C Package ..............7 Specifications: ............................7 System Requirements: ........................... 8 In the Box............................... 8 Installing Driver and Software .................... - Page 4 SkyRaider DS16C User Manual July 14, 2018 More Detailed Work-Flow Procedure ..................30 Quick Workflow for MallincamSky ....................30 Detailed Workflow of Video Imaging Planetary Objects ..............33 Detailed Workflow of Video Imaging Deep Sky Objects ..............39 The SkyRaider Software Controls ..................48 Top Menu Line .........................
- Page 5 SkyRaider DS16C User Manual July 14, 2018 Image ..............................73 Mode ..............................73 Adjust ............................... 74 Rotate ............................... 79 Crop ..............................80 Scale… ............................. 81 Histogram ............................82 Process ..............................84 Image Stacking ..........................87 Options ..............................89 Window ..............................95 Close All ............................
- Page 6 Installing Mallincam ASCOM Driver .................. 145 AutoGuiding with SkyRaider ....................147 Guiding with MaximDL and Mallincam ASCOM .............. 147 Guiding in PHD2 with Mallincam ASCOM Driver ............151 Running PHD2 with WDM Driver + ToupST4 Driver ............155 Appendix ..........................160 Imaging in SharpCap ......................
- Page 7 AstroLive and the SkyRaiderDS16C ..................168 Start AstroLive ........................... 168 Click on the Choose Still Button ......................168 From the Pull Down list select ASCOM Mallincam Driver .............. 169 Click on the Properties Box ....................... 169 Sequence Generator Pro and SkyRaider DS16C ..............170 Start Sequence Generator Pro ......................
-
Page 8: Introduction
The New MALLINCAM SKYRAIDER DS16C camera's Panasonic sensor sensitivity is augmented by incorporating CDS (correlated double sampling) procedures. This feature ensures that the SkyRaider DS16C is perfect for astronomy and other dark field applications, as well as the bright field applications required for lunar, and filtered solar observing. -
Page 9: The Contents Of The Skyraider-Ds16C Package
SkyRaider DS16C User Manual July 14, 2018 The Contents of the SkyRaider-DS16C Package Specifications: • PC Win XP, Win7, Win 8, Win 10. Mac. • Support and includes Full Trigger Mode • Live Stacking on the Fly • Live Star Registration, Ideal for all Motorized Alt-Az mounted telescopes •... -
Page 10: System Requirements
USB port: USB 3.0 Port (Recommended) • Display: 17" or Larger Recommended • In the Box The SkyRaider DS16C Plus includes the following standard equipment: ➢ MALLINCAM SkyRaider-DS16C Camera ➢ Mallincam SkyRaider CCD with Software ➢ High Precision 1.25" Eyepiece Adapter ➢ 2” Adapter ➢... -
Page 11: Installing Driver And Software
SkyRaider DS16C User Manual July 14, 2018 Installing Driver and Software System Requirements PC running either Windows ® (32-bit & 64-bit) XP, Vista, 7, 8, 8.1, 10, Mac, Linux Performance is not guaranteed if the following specification cannot be reached. - Page 12 SkyRaider DS16C User Manual July 14, 2018 Make sure that the SkyRaiderDS16C is not plugged into the computer. Place your mouse on the zipped file, Right-Click to pop-up an Action Window, Step 3 and choose Extract All … Just Click on the Extract button, when the next Window pops-up. Windows should now open up the actual folder that contains the software to install.
- Page 13 SkyRaider DS16C User Manual July 14, 2018 The installation program now wants to know where you would like to install the software. Either choose your own location or select the default. Click on Install to proceed. Step 7 Windows may again ask for permission to install the device software.
- Page 14 SkyRaider DS16C User Manual July 14, 2018 Click on Finish, and the MallincamSky will start and will appear on your screen. Step 9 Now you can plug in the SkyRaiderDS16C into your computer (see the next Chapter called “Connecting the SkyRaider” for more details). It will take a moment for Windows to attach the drivers to the port, then you are ready to start imaging.
-
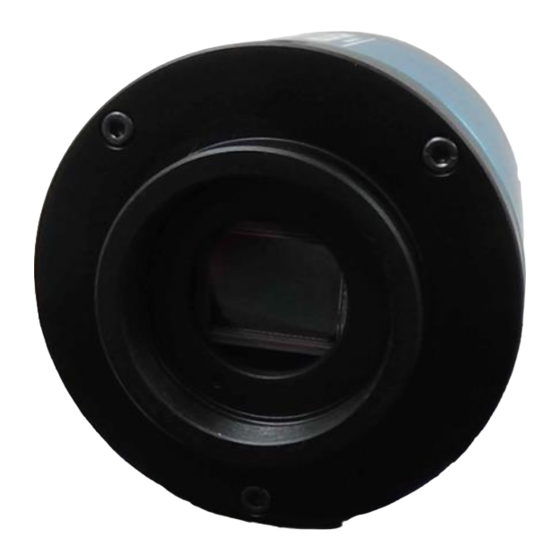
Page 15: Connecting The Skyraider
SkyRaider DS16C User Manual July 14, 2018 Connecting the SkyRaider Connecting the SkyRaider-DS16C to your Computer Remove the rubber dust cover from the front of the SkyRaider-DS16C camera (place it back in the box for safe keeping). Screw in the 1.25” adapter or the 2” adapter to the front of the SkyRaider-DS16C. - Page 16 SkyRaider DS16C User Manual July 14, 2018 Attach the 5-meter USB 3.0 Cable from the back of the SkyRaider DS16C to a free USB 3.0 port on your computer. The SkyRaider DS16C has some strict power and thru-put requirements, and not all computers are created equal.
-
Page 17: Connecting Autoguider Cable To The Skyraider-Ds16C
July 14, 2018 Connecting AutoGuider Cable to the SkyRaider-DS16C If you are going to use your SkyRaider Ds16C as an Autoguider, then you will need to attach the provided ST4 cable. Attach one end of the ST4 cable into the ST4 slot on the back of the SkyRaider- DS16C, and the other end into the ST4 port on your Telescope Mount. -
Page 18: Using Mallincamsky Software
SkyRaider DS16C User Manual July 14, 2018 Using MallincamSky Software The MallincamSky Window ① ② ④ ⑤ ③ The MallincamSky Software Window is segmented into a few regions to make viewing and adjusting the SkyRaider camera easy and intuitive. ① The Top Menu Line provides dropdown menus and icons to allow you to make major settings of the software ②... -
Page 19: Skyraider Quick Setup And Pictorial Work-Flow
SkyRaider DS16C User Manual July 14, 2018 SkyRaider Quick Setup and Pictorial Work-Flow A typical workflow when using the SkyRaider DS16C with MallincamSky. Start Mallincam Deep Sky Object Planetary Start Trigger Video Mode to Image Mode then Take Dark Field... -
Page 20: Live Stack Pictorial Work-Flow
SkyRaider DS16C User Manual July 14, 2018 Live Stack Pictorial Work-Flow A typical workflow when Live-Stacking with MallincamSky. Expose Object Choose and Activate Video Mode or Trigger Mode Live Stack Choose type of Stacking Adjust Image Save and Record SkyRaider DS16C User Manual... -
Page 21: Dark Field Pictorial Work-Flow
SkyRaider DS16C User Manual July 14, 2018 Dark Field Pictorial Work-Flow A typical workflow when taking a Dark Field with MallincamSky. Determine Maximum Exposure Choose and Activate Video Mode or Trigger Mode with Maximum Exposure Choose Quantity and Click Dark Field... -
Page 22: Flat Field Pictorial Work-Flow
SkyRaider DS16C User Manual July 14, 2018 Flat Field Pictorial Work-Flow Determine Flat Field Exposure Choose and Activate Video Mode or Trigger Mode with Maximum Exposure Required. Click on Loop Prepare Telescope Choose Quantity and Click for Flat Field on Capture to take Flats... -
Page 23: Histogram Pictorial Work-Flow
SkyRaider DS16C User Manual July 14, 2018 Histogram Pictorial Work-Flow A typical workflow when using the Histogram Command with MallincamSky. Expose Object Select Histogram Increase Left number Increase Right number or Move Left Bar in or Move Right Bar in... -
Page 24: Roi Pictorial Work-Flow
SkyRaider DS16C User Manual July 14, 2018 ROI Pictorial Work-Flow A typical workflow when using the ROI Command with MallincamSky. Expose Object Trigger Mode Video Mode Video Mode Trigger Mode SkyRaider DS16C User Manual Page 22... -
Page 25: Save Image Pictorial Work-Flow
SkyRaider DS16C User Manual July 14, 2018 Save Image Pictorial Work-Flow A typical workflow on how to Save an Image with MallincamSky. Expose Object SkyRaider DS16C User Manual Page 23... -
Page 26: Record Video Pictorial Work-Flow
SkyRaider DS16C User Manual July 14, 2018 Record Video Pictorial Work-Flow A typical workflow on how Record a Video with MallincamSky. Expose Object Video Mode to Image Enter File Location, Format, Options->Preferences… Prefix, Type, Number of Seconds Number of Videos, Time between... -
Page 27: Batch Record Pictorial Work-Flow
SkyRaider DS16C User Manual July 14, 2018 Batch Record Pictorial Work-Flow A typical workflow on how to Batch Record a series of Videos with a single Click. Expose Object Enter File Location, Format, Prefix, Type, Number of Seconds Number of Videos, Time between... -
Page 28: Auto Capture Pictorial Work-Flow
SkyRaider DS16C User Manual July 14, 2018 Auto Capture Pictorial Work-Flow A typical workflow on how to Auto Capture a series of Images with a single Click. Expose Object Choose Exposure Time Enter File Location, Format, Prefix, Type, Capture Mode,... -
Page 29: Save Sequence Of Images Pictorial Work-Flow (Trigger Mode)
SkyRaider DS16C User Manual July 14, 2018 Save Sequence of Images Pictorial Work-Flow (Trigger Mode) A typical workflow on an alternative method to Save a Sequence of Images with the Sequence Command in Trigger Mode with MallincamSky. Expose Object Stop Looping... -
Page 30: Digital Binning
SkyRaider DS16C User Manual July 14, 2018 Digital Binning A typical workflow on applying Digital Binning. Choose a Method (usually Additive), now select a Binning Number from 1 (default) to 4. Notice the video window will decrease in size, so you may need to increase the Zoom factor. -
Page 31: Sharpen Pictorial Work-Flow
SkyRaider DS16C User Manual July 14, 2018 Sharpen Pictorial Work-Flow Determine Flat Field Exposure Choose and Activate Video Mode or Trigger Mode with Maximum Exposure Select Sharpen Choose percentage with Value slider SkyRaider DS16C User Manual Page 29... -
Page 32: More Detailed Work-Flow Procedure
Imaging Workflow, and finally a more detailed section on Workflow on Imaging Deep Sky Objects. The Mallincam SkyRaider DS16C Cameras provide a processing technique called Dark Field Correction (see the Section Dark Field Explanation in the Appendix for a complete description of Dark Field Correction). - Page 33 Either enter in the time into the appropriate boxes, or use the up and down arrows beside the chosen Exposure time unit to set your maximum time. To start the SkyRaider DS16C taking continuous exposures, Left-Click on the Loop button.
- Page 34 Step 8 You can now spend some time to become more comfortable with the MallincamSky Software. The SkyRaider DS16C User Manual will go into more detail about all the options and adjustment you can perform with the SkyRaider series of cameras. But, don’t be afraid to experiment.
-
Page 35: Detailed Workflow Of Video Imaging Planetary Objects
SkyRaider DS16C User Manual July 14, 2018 Detailed Workflow of Video Imaging Planetary Objects The following instructions will guide you in setting up your SkyRaider camera for imaging Solar, Lunar, or Planetary Objects. For planetary objects, the exposure setting will be very small (as the objects themselves are usually very bright). - Page 36 SkyRaider DS16C User Manual July 14, 2018 Have your telescope pointed to the Planetary Image of interest, and it is Step 3 recommended that you use a Barlow Lens attached to your Telescope to provide a “Larger (Longer Focal Length)” image.
- Page 37 ➢ Click in the Video Mode Selector to choose Video Mode. ➢ Start with the Gain Slider all the way to the Left. ➢ Make sure that the Auto Exposure CheckBox is unchecked. The SkyRaider DS16C has two exposure modes: • Video Mode • Trigger Mode Since we are imaging planetary objects, our exposure should not exceed 5 seconds.
- Page 38 SkyRaider DS16C User Manual July 14, 2018 o You can Click on the Exposure Time’s current setting and a pop-up window will appear that allows you to enter the required exposure time in milliseconds (This allows you to be very precise in the exposure time you require, 5000 ms = 5 seconds).
- Page 39 SkyRaider DS16C User Manual July 14, 2018 This will make the Video Screen contain just the object that was enclosed by the ROI’s Blue Rectangle. To return to Full Video Mode, just Click on the Defaults Button on the ROI Open Tab.
- Page 40 SkyRaider DS16C User Manual July 14, 2018 For any Exposure over 3 seconds (3000 ms), you can determine how long your camera’s exposure time has left by looking at the bottom of MallincamSky’s Hint Window. It will provide a real-time indicator that informs you of the time used of the exposure time that you had previously set.
-
Page 41: Detailed Workflow Of Video Imaging Deep Sky Objects
July 14, 2018 Detailed Workflow of Video Imaging Deep Sky Objects The following instruction will guide you in setting up your SkyRaider DS16C camera for imaging Deep Sky Objects (DSO). For Deep Sky Objects, the exposure setting will be very large (as the objects themselves are usually very dim). - Page 42 SkyRaider DS16C User Manual July 14, 2018 Since you will want to “push” the capabilities of the SkyRaider in displaying the Deep Sky Object, you will require the highest resolution that your particular SkyRaider can produce, along with the largest bits of data (for color or shades of Back and White) for each pixel that the SkyRaider is able to produce.
- Page 43 Either place the Lens cap over your Telescope, or place the dust cover cap over Step 5 your SkyRaider DS16C camera to block any light from hitting the sensor of the camera. Open the Dark Field Correction Tab on the Left SideBar of MallincamSky. You will...
- Page 44 Exposure time unit to set your maximum time. For us, set the seconds (s) time unit to 30 for 30 seconds. To start the SkyRaider DS16C Plus taking continuous exposures, Left-Click on the Loop button.
- Page 45 SkyRaider DS16C User Manual July 14, 2018 Hopefully, your telescope is mostly polar aligned, and you are ready to visit your first DSO, and produce an image to impress one friends, neighbors, and spouse (so you can justify spending all of your hard-earned money on those extra pieces of equipment that you just had to have for imaging).
- Page 46 If you are satisfied with the single image, then Click on the Loop Button to ➢ have the SkyRaider DS16C continuously take images (at 30 seconds in our example. Since we have chosen 30 seconds, MallincamSky will continuously display the...
- Page 47 Dark fields are applied. M57, 20 Seconds exposure, VRC 6", F/4.5 M57, 20 Seconds exposure, VRC 6", F/4.5 with MallinCam 0.5X focal reducer, NO with MallinCam 0.5X focal reducer, One Dark Field Correction. No processing, as Single DARK FIELD CORRECTION APPLIED seen live on monitor.
- Page 48 SkyRaider DS16C User Manual July 14, 2018 Click on the Color Balance Tab and the Color Adjustment Tab to open them up Step 12 and have access to the Color Balance and Color Adjustment (Contrast, Gamma, …) settings to tweak your image.
- Page 49 SkyRaider DS16C User Manual July 14, 2018 This is where you must take over, as each telescope, night-sky, seeing conditions are different from user to user. So, have fun and experiment with the settings and see how they affect your image. Remember, these are your images and you decide what is best for you.
-
Page 50: The Skyraider Software Controls
SkyRaider DS16C User Manual July 14, 2018 The SkyRaider Software Controls This Chapter of the User Manual will describe in exact detail what each control on both the Top Line Menu and the Icon Toolbar does. This Chapter is best read on a rainy day, or can be used to jump to the specific section that describes how to use a particular control. -
Page 51: Open Image
SkyRaider DS16C User Manual July 14, 2018 Open Image The Open Image command is used to open an existing image file. This command can also be used to preview an image in small size, or to view its statistics and information without actually opening the image itself. -
Page 52: Open Video
The Open Video command is only enabled when no SkyRaider Camera is present when MallincamSky is started. Only a single video can be opened at a time. If the SkyRaider DS16C is active, then this Open Video command will be disabled. -
Page 53: Save
SkyRaider DS16C User Manual July 14, 2018 Save The Save command allows you to save the updated image (not live Video) onto your computer. The command immediately stores the current window image to its filename (the filename is listed on the window's title bar) while leaving the image still active in its window. - Page 54 SkyRaider DS16C User Manual July 14, 2018 JPEG Image quality If you save an image in JPEG format (*.jpg), you may adjust image quality in the edit box. The values range from 0 to 100. Default value is 75. Progressive The default is unchecked.
- Page 55 SkyRaider DS16C User Manual July 14, 2018 TIFF Appended Pages Determine whether the current image will be saved in multiple pages’ style or not. Compression Specifies a method for compressing the composite image data. For saving a 32-bit TIFF file, one can specify that the file be saved with predictor compression.
-
Page 56: Batch Save
SkyRaider DS16C User Manual July 14, 2018 Compression Choose Lossless or JPG (Lossy) Image Quality If choosing Compressions as "JPEG", the Image quality can be adjusted by the slider bar. The values range between 0 and 100. The Default value is 75. - Page 57 SkyRaider DS16C User Manual July 14, 2018 Directory: Enter the name of the drive and directory where your captured images will be saved. You may either type the path information or use the Browse button to locate it from a standard Browse Folder dialog.
-
Page 58: Paste As New File
SkyRaider DS16C User Manual July 14, 2018 Paste as New File The File>Paste as New File command will be enabled when there is valid image data on the clipboard first (see the Edit>Copy command). If there is no image data on the clipboard, the File>Paste as New File command will be disabled. -
Page 59: Exit
SkyRaider DS16C User Manual July 14, 2018 Exit Choosing the File>Exit command will close video, all of the image windows and Browse window and remove their windows from the screen. After all of the windows are closed, MallincamSky will end itself. -
Page 60: Copy
SkyRaider DS16C User Manual July 14, 2018 Copy This Edit>Copy command can be used to copy a selected part of your image (see Select Image command) to the Windows Clipboard. Then you can use another software’s Paste Command to place this selected image inside that software, or File>Paste as New File to paste into a new MallincamSky Window. -
Page 61: Select None
SkyRaider DS16C User Manual July 14, 2018 Select None This command can be used to De-Select the image that was selected using either the Image Select or the Select All commands. View This Drop-Down Menu will allow you to Browse folders, Display... -
Page 62: Thumbnail
SkyRaider DS16C User Manual July 14, 2018 You can close the Browse Tab in the Video Window by Right-Clicking on the Hint Tab’s Title (Browse), then choosing Close. Thumbnail The Thumbnail control opens an image tab and displays small (thumbnail) images of all of your current loaded or snapshotted images you have taken during this session. -
Page 63: Histogram
SkyRaider DS16C User Manual July 14, 2018 Histogram Selecting the Histogram Control splits the image screen with your live image on the top half and a live Histogram on the bottom half. You have an option to view the Histogram data as linear or logarithmic. Clicking on the Histogram Control again, closed the Histogram window. - Page 64 SkyRaider DS16C User Manual July 14, 2018 Left-Click on the Grids option on the left of the Preferences Window and adjust the Style (No Grid, Auto Grid, and Manual Grid), Line Style (Solid, Dash, Dot, or DashDot), and Color that you are interested in.
- Page 65 SkyRaider DS16C User Manual July 14, 2018 Manual Grids Choosing this control will display two small Blue Right Arrow and Down Arrows overlaid on the top of the Vertical Ruler and on the left of the Horizontal Ruler as shown below: Use the Left-Click Hold and Drag technique to move the Blue Down Arrow along the Horizontal Ruler to where ever you want.
-
Page 66: Best Fit
SkyRaider DS16C User Manual July 14, 2018 No Grids The No Grids control can be used to temporarily remove the grid overlay from the video/Image. If you re-select Manual Grids, your previous designed Grid Lines will re-appear. Remove All Grids This will remove the Grid Overlay from your video/image. -
Page 67: Reticles
SkyRaider DS16C User Manual July 14, 2018 Left-Click and Hold (the Open Hand will change to a Closed Hand). Now drag the image around inside the video/image Window If the video/image size is smaller than the video/image Window size, then the track operation will be disabled. -
Page 68: Sort
SkyRaider DS16C User Manual July 14, 2018 Sort This control allows you the option of rearranging the image files via a variety of choices (Name, Type, size, Width, and Height. All in either Ascending or Descending order.). Just Left-Click on the choice that best suits your needs and MallincamSky will automatically rearrange the files. -
Page 69: Setup
Left-Clicking on this control will Pause the SkyRaider Camera’s live display. Left- Clicking on this control again will activate the live display. View Properties… Left-Clicking on this control will pop-up the View Properties Window that contains information about the currently activated SkyRaider DS16C Camera. SkyRaider DS16C User Manual Page 67... -
Page 70: St4 Test
Telescope Mount. Connect the ST4 cable provided with the SkyRaider DS16C Camera to the ST4 Port on your Telescope Mount. Turn on the Telescope Mount to ensure that it is ready to be tested. -
Page 71: Capture
SkyRaider DS16C User Manual July 14, 2018 Capture This Top Menu Line command allows you a more in-depth capture routine of either a still image or a video stream. This command will offer connection to Night Skies Network (NSN) in future releases. -
Page 72: Start Record
SkyRaider DS16C User Manual July 14, 2018 Start Record… First you must set up the location, File Format, Prefix, and duration required for the video in the Options>Preferences Tab (see OPTIONS Tab for more detail). To start the capturing process, just Click on this Tab or press the F9 Function key. -
Page 73: Batch Record
SkyRaider DS16C User Manual July 14, 2018 Batch Record This command will allow you to save a sequence of video onto your computer. You will need to have already chosen the location, number and duration of the videos in the Option->Preferences…... - Page 74 SkyRaider DS16C User Manual July 14, 2018 By Clicking on the Red STOP symbol, MallincamSky will only abort the current Video, but will continue with the next sequence. MallincamSky will also provide you in a status on how the recording are going by displaying a Status Information line on the bottom of its window.
-
Page 75: Image
SkyRaider DS16C User Manual July 14, 2018 Image The Image menu will allow you to adjust the properties or any captured image in an active Image Tab in MallincamSky video/image window. You can use the SideBar’s Undo/Redo Tab to revert any correction back to a Hint previous state. -
Page 76: Adjust
SkyRaider DS16C User Manual July 14, 2018 Adjust The Adjust menu will allow you to adjust the Brightness and Contrast of the image. You will be able to modify the RGB Color balance, as well as the High Lights, MidTones and Shadows values. - Page 77 RGB images use three channels to reproduce up to 16.7 million colors on-screen. In addition to being the default mode for new Mallincam images, the RGB mode is used by computer monitors to display colors. This means that when working in color modes other than RGB, such as CMYK, MallincamSky uses RGB mode for display on-screen.
- Page 78 SkyRaider DS16C User Manual July 14, 2018 The CMYK mode is based on the light-absorbing quality of ink CMYK printed on papers. As white light strikes translucent inks, certain visible wavelengths are absorbed while others are reflected back to the eyes.
- Page 79 SkyRaider DS16C User Manual July 14, 2018 The values beside the slider bar show the color changes in various color channels. • The RGB channel values can range from -100 to +100. The Default values are 0. • The CMYK channel values, they can range from -100 to +100. The Default values are 0.
- Page 80 SkyRaider DS16C User Manual July 14, 2018 Filter Color… Select the Image>Adjust>Filter Color command to filter out a special color channel from a color image. Check either Red, Green, or Blue color to filter. For Example, if Red color is checked, then only information about the Red channel will be discarded.
-
Page 81: Rotate
SkyRaider DS16C User Manual July 14, 2018 Detail Enhance This filter works by identifying sharp edge boundaries in the image, such as the edge between a subject and a background of a contrasting color and increasing the image contrast in the area immediately around the edge. -
Page 82: Crop
SkyRaider DS16C User Manual July 14, 2018 This control also allows you to flip your image Horizontally or Vertically. Flip Horizontal reverses the image in the application area so that the top right corner of the original image is now the top left, and the top left corner of the original image is now the top right corner. -
Page 83: Scale
SkyRaider DS16C User Manual July 14, 2018 Scale… Select the Image>Scale••• command to change the image to a specified size. This process actually changes spatial resolution by adding (replicating) or removing (decimating) pixels to achieve the specified dimensions. Width and Height: When choosing the Image Scale command;... -
Page 84: Histogram
SkyRaider DS16C User Manual July 14, 2018 Histogram A Histogram illustrates how pixels in an image are distributed by graphing the number of pixels at each color intensity level. The Histogram shows detail in the shadows (shown in the left part of the histogram),... - Page 85 SkyRaider DS16C User Manual July 14, 2018 If the image is RGB true color, choose R, G and B to display a composite Histogram of the individual color channels in color. Do one of the following: ➢ To view information about a specific pixel value, place the mouse pointer in the Histogram.
-
Page 86: Process
SkyRaider DS16C User Manual July 14, 2018 Process MallincamSky provides some very advance image processing tools. You can apply these tools to your image to tweak the final output. It would take a novel to explain each of these standard graphical enhancement tools. So I will leave it up to you to Google Search the enhancement type to see if it is something you could use. - Page 87 SkyRaider DS16C User Manual July 14, 2018 You can modify the color effectiveness range with the Range control to color sharpen your image. You can modify the image the pixel/no pixel count with the Binary control SkyRaider DS16C User Manual...
- Page 88 SkyRaider DS16C User Manual July 14, 2018 You can examine the image as a 3-D color contour map with the 3-D setup control You can apply the Pseudo Color application tools to turn a Black and White image into color tones.
-
Page 89: Image Stacking
SkyRaider DS16C User Manual July 14, 2018 Image Stacking Image Stacking control will allow you to select a saved video file, then it will do an elementary stacking process on the file. In the Image Stacking process, MallincamSky takes the first frame as the... - Page 90 SkyRaider DS16C User Manual July 14, 2018 MallincamSky will Open an Image Stacking Progress Bar to inform you of the process. Once completed, the stacked image will appear in the Video/Image window. You can now apply other processing techniques to this image which has a large signal to noise ratio.
-
Page 91: Options
SkyRaider DS16C User Manual July 14, 2018 Options The Options Menu provides 7 Tabs in the Preference Window. They are: Record, Batch record, Auto Capture, File, Grids, Video, and Misc. The Options/Preference/Record tab will allow you to set the location, File Format, File Prefix, File Type, duration or Frame Limit for the Video recording of the current SkyRaider camera. - Page 92 SkyRaider DS16C User Manual July 14, 2018 The Options->Preferences…->Batch Record tab will allow you to set the number of Video recordings in the batch, plus the time interval between each separate recording. Clicking on OK accepts the settings. The Options->Preferences…->Auto Capture tab will allow you to set the location, file format, type, interval and number or required images for the Auto Capture (F7) function of MallincamSky.
- Page 93 SkyRaider DS16C User Manual July 14, 2018 Directory: The file Directory can be select by Left- Clicking the Browse button (…). You can also set a subfolder as a specific name such as the Target name. File: The File Name; This can be a combination of Name of Format, File Prefix, and File Type as shown in the Sample.
- Page 94 SkyRaider DS16C User Manual July 14, 2018 One can check a File Extension for the specified file Format and its Abbr. (abbreviation), to determine whether or not it will be displayed in the Browse window or not (The checked Format can be displayed in the Browse window).
- Page 95 SkyRaider DS16C User Manual July 14, 2018 The Grids Tab allows you to determine if you would like a Grid displayed, and if so how should it be draw. Grids can also be used to define the color of the Reticle that can be drawn over the image.
- Page 96 SkyRaider DS16C User Manual July 14, 2018 The Camera Sidebar allows you to choose what options you would like displayed on the left side of the MallincamSky Control Tab. Just you the check boxes to select what you would like to...
-
Page 97: Window
SkyRaider DS16C User Manual July 14, 2018 Window The menu control will close all open windows (Tabs), and can reset the lays back to its default settings. Close All Selecting the Closes All command will close all of the pictures opened or captured inside MallincamSky’s frame. -
Page 98: Windows
SkyRaider DS16C User Manual July 14, 2018 Windows… Choosing the Windows>Windows••• control will open a dialog box that lets you manage the currently opened windows. The dialog allows you to manage large lists of open windows by assigning them into groups. Let us say you have eight windows open but want to close four of them scattered through the list. -
Page 99: Mallincamsky Toolbar
SkyRaider DS16C User Manual July 14, 2018 MallincamSky Toolbar Open The Open Image command is used to open an existing image file. This command can also be used to preview an image in small size, or to view its statistics and information without actually opening the image itself. -
Page 100: Save
SkyRaider DS16C User Manual July 14, 2018 Save The Save Icon allows you to save an image onto your computer. The command immediately stores the current window image to its file (the filename is listed on the window's title bar) while leaving the image still active in its window. -
Page 101: Thumbnail
SkyRaider DS16C User Manual July 14, 2018 As you get deeper into the Browse Window, you can Back-Out or Move Deeper into the File Folders via the Green Left or Right Arrow in the Browse Window. The Blue Right Arrow will take you to your computer’s Root Directory. -
Page 102: Image Type
SkyRaider DS16C User Manual July 14, 2018 Image Type This icon allows you to designate the type of image you are saving. This is only for your reference. Just select an image type from the drop-down list Auto Capture This icon activates the Auto Capture routine in MallincamSky. -
Page 103: Open Video Folder
SkyRaider DS16C User Manual July 14, 2018 Open Video Folder This icon will allow you to open up and view either the default Record or the default Image folder. This way you can examine the results of the recording. Zoom The Zoom Icon allows you to Zoom-In or Zoom-Out while viewing a Video/image window. -
Page 104: Histogram
SkyRaider DS16C User Manual July 14, 2018 (make sure to choose a location outside a Region of Interest rectangle. You may need to close the ROI rectangle if necessary) on the actual video/image. Left-Click and Hold (the Open Hand will change to a Closed Hand). Now drag... -
Page 105: St4 Test
SkyRaider DS16C User Manual July 14, 2018 You can change the color of the Reticle via the Option>Preferences control in the Top Menu Line. ST4 Test If your SkyRaider camera (such as the SkyRaiderDS16C) has a ST4 port, then it can be used to AutoGuide your telescope mount. -
Page 106: Advance/Reverse
(this stops the camera). Then choose File->Open Video and Hint select the ser format video to view. The icons will now become active. You can now restart the Mallincam camera if required. Stitch When the Video Window is active, choosing the Stitch Icon will invoke the video... - Page 107 SkyRaider DS16C User Manual July 14, 2018 The purpose on this control is to stich (glue) together images to create a panoramic view (image) so plan ahead with this control; are you going to create a horizontal panoramic image, or a vertical panoramic image.
-
Page 108: Panorama Straighten
SkyRaider DS16C User Manual July 14, 2018 ➢ Examine the options in this window and make the appropriate decisions on how you would like MallincamSky to Stich the snapped images together (this is where the pre-planning comes in handy). You will still be experimenting with your decisions. - Page 109 SkyRaider DS16C User Manual July 14, 2018 ➢ Once completed, Left-Click on Next to bring up the final Stich Window. ➢ Again, make some logical guesses with the numbers, and Left-Click on the Finish button when decisions have been made.
- Page 110 SkyRaider DS16C User Manual July 14, 2018 You can try other Stitching decision by having the Stitched imaged active in your Video Window and Left Clicking on the Stitch Icon again. You will notice that your original snapped image is available for you to play with and combine in other ways.
-
Page 111: Preferences
SkyRaider DS16C User Manual July 14, 2018 Preferences This icon opens up the preferences window. This icon is identical to the Main Tab line Options->Preferences… . See above in the Options Tab. SkyRaider DS16C User Manual Page 109... -
Page 112: Controlling The Skyraider
SkyRaider DS16C User Manual July 14, 2018 Controlling the SkyRaider Once you have a connection to the SkyRaider Camera, your next task will be to adjust the controls that make it possible to improve the image the SkyRaider is capturing. These controls are located on the Left SideBar Menu on MallincamSky. -
Page 113: Capture And Resolution
July 14, 2018 Capture and Resolution The Capture and Resolution Tab allows you to adjust the resolution (the current SkyRaider DS16C has a fixed resolution), modify the Gain, and choose the type of Exposure Mode that you require for the camera. Resolution Located at the top of this control is the Resolution Command. -
Page 114: Record
SkyRaider (you will now be able to see the image being recorded as the Record Button will activate the camera). When the Mallincam SkyRaider is recording, the Icon will change to a Red STOP Symbol. By Clicking on the Stop Icon, MallincamSky will terminate the Video recording process. -
Page 115: Gain
Mode were exposures from 25us to 16 minutes and 40 seconds can be taken. Video Mode This control allows the SkyRaider DS16C to have an exposure up to 5 seconds (5000ms), this mode is ideal for focusing the telescope and imaging planetary objects. - Page 116 SkyRaider DS16C User Manual July 14, 2018 Exposure Target MallincamSky uses the image contained in the Green Rectangle to aid in determining the best method to match the Exposure target. To use Exposure Target, Auto Exposure must be checked. You can change the Exposure Target by Left-Click-Hold and Drag the marker bar to the required value.
- Page 117 The SkyRaider DS16C will use the following format to inform you of the current exposure condition: Time Used/Exposure Time SkyRaider DS16C User Manual...
-
Page 118: Trigger Mode
(it will change its name to Stop, so you can again Click on the button to stop the Looping). To capture a sequence of images using the Mallincam SkyRaider DS16C, there is are a series of command controls available for you. - Page 119 SkyRaider DS16C User Manual July 14, 2018 Options Clicking on this Button opens up the Sequence Options Window. This Window allows you to either display the sequence of automatic captures in a window on MallincamSky (not recommended… too many windows), or Save the sequence images to a file.
-
Page 120: Bit Depth
SkyRaider DS16C User Manual July 14, 2018 Bit Depth Pixel Bit Depth relates the number of bits assigned to produce a color (or shade of Gray). The larger the number of bits, the larger the number of assigned colors (or shades of Gray) that the camera can produce. -
Page 121: White Balance
Left-Clicking on the Default Button. Color Adjustment The Color Adjustment control will allow you to adjust: The Hue, The Saturation, The Brightness, The Contrast, and the Gamma of the object that the SkyRaider DS16C is exposing. Any changes to these commands will only be display after the next camera refresh. -
Page 122: Hue
SkyRaider DS16C User Manual July 14, 2018 This command controls the Hue of the Video image. Hue is one of the main properties of color. By adjusting Hue, you are changing the balance of Red, Green, and Blue in the image. -
Page 123: Gamma
SkyRaider DS16C User Manual July 14, 2018 When you adjust the Contrast, you increase the separation between bright and dark. You can either use the Left-Click-Hold and Drag technique to move the slider to the left or right, or just Left-Click on the Contrast’s slider (this selects it), then use your Left and Right arrow keys on your Keyboard to adjust the value (small Contrast adjustments are easier with this technique). -
Page 124: Color/Gray
Rate can sometime resolve the problem. Color/Gray This control contains commands allow the SkyRaider DS16C to display its displayed images I color (these colors can be adjusted using the commands seen above) or display the image in shades of grey. Some uses prefer the subtle contrast variations that a grey image provides, especially when imaging the Moon. -
Page 125: Sampling
This has 2 benefits: smaller files sizes, and as an added bonus, will allow for a faster frame rate. The ROI command only works while the SkyRaider DS16C is in Video Mode but, see below for a work around. - Page 126 SkyRaider DS16C User Manual July 14, 2018 You can then resize the New Video Window by either the Drop-Down Size command in the MallincamSky Tool Bar or by scrolling the wheel on your mouse (if your mouse has a scroll wheel).
-
Page 127: Histogram
SkyRaider DS16C User Manual July 14, 2018 Histogram A Histogram illustrates how pixels in an image This is are distributed by graphing the number of your Data pixels at each color intensity level. The Histogram shows detail in the shadows (shown... - Page 128 SkyRaider DS16C User Manual July 14, 2018 To illustrate what you can do with the Histogram, I have (thanks to Jim Meadow’s amazing images) included some before and after pictures. ➢ Increasing the Left Bar Darkens the image ➢ Decreasing the Right Bar Brightens the image...
-
Page 129: Digital Binning
July 14, 2018 Digital Binning This process allows you to increase the sensitivity of the Mallincam Camera by providing you the option of combining sensor cells together to increase the photon capture area. For example, a 2 x 2 binning will link 4 cells (in a 2 by 2 array) together so you have about 4 times the capture area than one cell. -
Page 130: Method
SkyRaider DS16C User Manual July 14, 2018 Method You have two choices here, either Additive or Average. For Deep sky objects you will choose Additive. For Planets and the moon, try Average to see if it improves your image. Number... -
Page 131: Dark Frame Subtraction In Digital Binning
SkyRaider DS16C User Manual July 14, 2018 Dark Frame subtraction in Digital Binning You must make dark frames with the same Digital Binning settings, else, weird looking images will occur. We suggest saving a set of Darks for each of the binning modes. -
Page 132: Dark Field Correction
SkyRaider DS16C User Manual July 14, 2018 Dark Field Correction What makes the Mallincam SkyRaider series of cameras unique is the built-in ability to take Dark Fields. The best explanation of what a Dark Field is came from Simon Hanmer. See Appendix for his explanation. - Page 133 SkyRaider DS16C User Manual July 14, 2018 Take Dark Field Correction Step 3 Ensure that the cover is either on the SkyRaider Camera or the Telescope itself is covered, then Left-Click on the Dark Field Correction Line. The Dark Field Correction Line will open up allowing you to select the Quantity of Dark Fields and the option to start the Dark Field Capture process.
-
Page 134: Flat Field Correction
SkyRaider DS16C User Manual July 14, 2018 Flat Field Correction Introduction: When imaging using a CCD/CMOS device, and when trying to use those images for scientific purposes, it is essential to reduce the amount of unwanted signal and unwanted noise from each image frame. The optical path “noise” (some of which is actually signal), is such a problem that many astronomers had to suffer with. -
Page 135: Taking Flats
SkyRaider DS16C User Manual July 14, 2018 Taking Flats: A Flat Field is an image taken of an evenly illuminated object like the dusk sky, or a special illuminated white card hanging on the wall of the observatory or even a white T-shirt placed over the telescope. -
Page 136: Black Level
SkyRaider DS16C User Manual July 14, 2018 Take Flat Field Correction Step 1 Ensure that you are pointing the telescope at your Flat Field source (dusk sky, white board), select an exposure time, then Left-Click on the Flat Field Correction Line. -
Page 137: Conversion Gain
SkyRaider DS16C User Manual July 14, 2018 Conversion Gain Conversion Gain is not avialable on the SkyRaider DS16. A Higher Conversion Gain means higher sensitivity, as one signal electron can be more easily detected. The high-CG sensor shows a very clear responsivity advantage;... -
Page 138: Live Stack
Mount), but can also be very beneficial to all mounts. The follwing images captured live illustrate the advantages of Stacking : M5, a single 5 second exposure using SkyRaider DS16C on 10” VRC. M5, two 5 second exposures stacked using SkyRaider DS16C on 10”... - Page 139 SkyRaider DS16C User Manual July 14, 2018 Here you can activate the stacking by check-boxing the Enable, you can have MallincamSky Align the frames by checking the Align Frames Box. You can select the number of frames you would like stacked in the Number Box. You can...
-
Page 140: Cooling
Cooling The Mallincam SkyRaider DS16C comes with a Fan that can aid in cooling the camera when conditions are getting warm. The SkyRaider’s default setting is for the Fan to be ON, but you can manually turn it OFF by using the Slider on the Cooling Tab. -
Page 141: Parameters
SkyRaider DS16C User Manual July 14, 2018 The TEC command is not implemented in this version of the camera. Parameters The Parameters control allows you to: Load a previous set of camera control parameters, or Save the current camera control parameters for another session. The... - Page 142 SkyRaider DS16C User Manual July 14, 2018 Give a Name that is easy to determine what the parameters in the file contain. That is, choosing a name like Eagle Nebula Dark Skies, would indicate that the Hint parameters in the File are designed for the Eagle Nebula when you have great dark skies.
- Page 143 SkyRaider DS16C User Manual July 14, 2018 When you import a set of parameter files into your system, it will overwrite all of your parameter files. So use caution. See Hint below. After you have created a list of parameter files that you are using. Save them in...
-
Page 144: Installing Optional Software
SkyRaider DS16C User Manual July 14, 2018 Installing Optional Software Visit the Software Downloads Page in the Support Tab located on the website: Step 1 www.mallincam.net Select the Blue Click Here Button to download the Drivers and MallincamSky Step 2 Software for a Windows PC. -
Page 145: Installing Directshow Driver
SkyRaider DS16C User Manual July 14, 2018 Double-Click on the folder to open it up, revealing the 3 programs (or 1 program Step 4 if downloading just MallincamSky) it contains. The ASCOM DRIVER folders contains the ASCOM Drivers for the camera The DIRECTSHOW DRIVER folder contains the Direct Show Drivers for the camera The WINDOWS APPLICATION folder contains the camera control software. - Page 146 SkyRaider DS16C User Manual July 14, 2018 Click on Install to start the installation process. Step 3 Click on Finish to close the process. Step 4 The DirectShow driver will give you the ability to display the SkyRaider video using other video display software.
-
Page 147: Installing Mallincam Ascom Driver
SkyRaider DS16C User Manual July 14, 2018 Installing Mallincam ASCOM Driver You must have already installed the latest ASCOM Platform on your computer (www.ascom-standards.org). Double Click on the Driver to install it onto your computer system (Windows). Step 1 Depending upon the version of Windows, the following screen might appear. - Page 148 SkyRaider DS16C User Manual July 14, 2018 Click in the ‘I accept the agreement’ Radial Button, then Click on Next. The Step 4 Ready to Install Window will appear. Click on Install to install the ASCOM Driver. Depending upon the version of Step 5 Windows, you may see the Following Pop-up.
-
Page 149: Autoguiding With Skyraider
July 14, 2018 AutoGuiding with SkyRaider Guiding with MaximDL and Mallincam ASCOM The following is a pictorial procedure on how to select the Mallincam ASCOM driver (assumes you have already installed this driver on your computer) in MaximDL. Start MaximDL... - Page 150 SkyRaider DS16C User Manual July 14, 2018 Step 3 Left-Click the Setup Camera button on Camera 2 from the Setup Tab. Choose ASCOM (from Camera Model in Setup ASCOM popup Window) Step 4 Now Left-Click on the Advanced… Button in the Setup ASCOM popup Window.
- Page 151 July 14, 2018 Choose ASCOM Mallincam Driver from the pull-down selector. Step 6 Left-Click on the OK Button to accept the Mallincam Driver in the ASCOM Step 7 Camera Chooser Window. You will be returned to the Setup ASCOM window, then Left-Click on its OK button to accept this, and you will be returned to the Camera Control Window.
- Page 152 SkyRaider DS16C User Manual July 14, 2018 Left-Click on the Settings Button in the Guide Tab, and the Guider Settings Step 9 Window will pop up. Select Guider Relays in the Autoguider Output Control pull down selector. Step 10 Left-Click on the OK Button to accept the settings and return to the Camera Step 11 Control Window.
-
Page 153: Guiding In Phd2 With Mallincam Ascom Driver
SkyRaider DS16C User Manual July 14, 2018 Guiding in PHD2 with Mallincam ASCOM Driver Start the PHD2 software. Step 1 Click on the Connection Icon to open up Connect Equipment Window. Step 2 SkyRaider DS16C User Manual Page 151... - Page 154 SkyRaider DS16C User Manual July 14, 2018 Choose ASCOM Mallincam Driver from Camera Drop Down List. Step 3 Left-Click on the Camera Setup Button to open Setup Window. Step 4 Setup Recommendations for SkyRaider is to use 640 * 480 Resolution with the 8 Bit Step 5 Depth and Low Frame Rate.
- Page 155 SkyRaider DS16C User Manual July 14, 2018 Left-Click on the Connect button on Camera List to connect camera. Step 6 Select On-Camera from the Mount Dropdown list Step 7 Left-Click on the Connect on Mount List and select On-camera to tell PHD2 that Step 8 the mount that the SkyRaider controls the ST4 port itself.
- Page 156 PHD2 as you normally would. PHD can control the exposure time of the SkyRaider Camera with the exposure drop down button. If you are using a Mallincam SkyRaider DS16C camera to do your auto-guiding with PHD, and you are using another MallinCam camera, say the DS model, for imaging in MallincamSky, then: Connect the Guide camera with PHD first, followed by connecting the DS model to MallincamSky.
-
Page 157: Running Phd2 With Wdm Driver + Toupst4 Driver
SkyRaider DS16C User Manual July 14, 2018 Running PHD2 with WDM Driver + ToupST4 Driver Start PHD2 software Step 1 Click on the Camera Icon to open up Connect Equipment Window. Step 2 SkyRaider DS16C User Manual Page 155... - Page 158 Choose WDM-style webcam camera from Camera Dropdown List. Step 3 Left-Click on the Connect button on Camera List. Step 4 The Camera choice window will pop-up. Select MALLINCAM and Click on OK. Step 5 SkyRaider DS16C User Manual Page 156...
- Page 159 SkyRaider DS16C User Manual July 14, 2018 Select Resolution (recommend 640x480) and Click on OK Step 6 Choose ToupST4 (ASCOM) from the Mount Dropdown List Step 7 SkyRaider DS16C User Manual Page 157...
- Page 160 SkyRaider DS16C User Manual July 14, 2018 You can check to see if the SkyRaider can control your Mount by Left Clicking on the Mount Setup Icon and use the Arrow Buttons to see if your mount moves. Left-Click on the Mount Connect Button activate the connection.
- Page 161 SkyRaider DS16C User Manual July 14, 2018 Left-Click on the Looping Icon to start the SkyRaider imaging. Step 10 Since WDM is only a Video image from the SkyRaider, you will need to set the PHD2 Exposure Duration to a value other than AUTO (say 1 second). This will NOT...
-
Page 162: Appendix
SkyRaider DS16C User Manual July 14, 2018 Appendix Imaging in SharpCap With the addition of the SkyRaider Direct Show Driver, you can control the SkyRaider with a variety of other pieces of Software such as SharpCap. Now this is the first generation of DirectShow/Sharpcap driver interaction and as such, not all of the commands are perfect for user control. - Page 163 SkyRaider DS16C User Manual July 14, 2018 Once you have selected, the Mallincam Directshow Driver, SharpCap will display what the SkyRaider is imaging. The controls on the right of the screen (Exposure, Gain, Gamma, …) allow you to change the settings of the SkyRaider.
-
Page 164: Sharpcap Will Start The Imaging Process
SkyRaider DS16C User Manual July 14, 2018 The Pop-Up Window gives you some familiarity with settings as it provides you with more comfortable units (exposure time in ms). You can choose the Exposure Tab in the Filter window to slide the Tab to match the exposure time in ms (divide by 1000 to get seconds). -
Page 165: Astrotoaster And Mallinsky
SkyRaider DS16C User Manual July 14, 2018 AstroToaster and MallinSky AstroToaster is a freeware application for obtaining semi-live views of astronomical images using the SkyRaider camera. These instructions are just a quick guide to get you going, read the AstroToaster User Guide. -
Page 166: Preparing Astrotoaster
SkyRaider DS16C User Manual July 14, 2018 The File List Monitoring Window manages the image files, sent by MallincamSky, used by AstroToaster. If the Monitor Button is activated, then any new files appearing in the monitoring folder will automatically appear in the FileList. -
Page 167: Click On Monitor
SkyRaider DS16C User Manual July 14, 2018 Click on Monitor on AstroToaster Tab line, so it will see and analyze the file images as they are added to the Monitoring Folder. Tell MallincamSky to Save images in to the Monitoring Folder of AstroToaster. -
Page 168: Click On The Stack Tab
SkyRaider DS16C User Manual July 14, 2018 As MallincamSky sends the images to the Monitoring Folder, you will see them appear with Yellow squares besides their name Click on the Stack Tab on AstroToaster and Viewer Tab (if not activated) to activate the automatic Stack and watch the results appear in the Viewer in real time as each image is stacked. -
Page 169: Adjust The Image In Astrotoaser
SkyRaider DS16C User Manual July 14, 2018 You will notice in the AstroToaster FileList, a file named stacked###.tif with a Green Square besides its name. This is the Stacked image that you are seeing in the AstroToaster Viewer Window. Adjust the Image in AstroToaser Click on Color Adj Tab to popup a window that will allow you to adjust the display parameters of your stacked image, as well as save the final image. -
Page 170: Astrolive And The Skyraiderds16C
As of this writing, the Version of AstroLive is v1.4. This version did not have the SkyRaider series of camera in mind. But, the MALLINCAM ASCOM Driver does partly work with AstroLive. This allows you to do imaging, and you are able to adjust and save your images. -
Page 171: From The Pull Down List Select Ascom Mallincam Driver
July 14, 2018 A popup window will appear. From the Pull Down list select ASCOM Mallincam Driver. Click on the Properties Box to pop-up the SkyRaider Setup Control Window Make any adjustments you need, then Click on the OK Button, to Accept. You will be returned to the ASCOM Camera Chooser Window, Click on OK to return to the AstroLive Window. -
Page 172: Sequence Generator Pro And Skyraider Ds16C
SkyRaider DS16C User Manual July 14, 2018 Sequence Generator Pro and SkyRaider DS16C Sequence Generator Pro is a software package that is capable of executing complex sequences of capture events which will allow you to spend more time using and less time fighting with your equipment. You have lots of hardware that is sometimes difficult to get it all working together. - Page 173 SkyRaider DS16C User Manual July 14, 2018 Select the required resolution and ensure that you are using as the format. Running Sequences Start based on your needs. If you are using Sequence Generator Pro then you will need to save flats, biases, and darks as you would with every other camera.
-
Page 174: How Do I
SkyRaider DS16C User Manual July 14, 2018 How Do I … How do I get rid of the Green Exposure Rectangle? First remember the Green Exposure Rectangle is only used for the auto-exposure process, but it can be annoying when you are imaging. -
Page 175: How Do I Automatically Save 1 Image Every 30 Seconds
SkyRaider DS16C User Manual July 14, 2018 How do I automatically save 1 image every 30 seconds? ➢ Choose the Time-Lapse (Auto Capture) from the Capture Menu on the Top Menu Line. Now determine your naming convention and location. ➢ Enter 30 in the Time slot ➢... -
Page 176: How Do I Pause The Video
SkyRaider DS16C User Manual July 14, 2018 How Do I Pause the Video? You can Pause or Resume the live video by either choose Setup>Pause from the Top Menu Line, or even easier, just press on the pause key on your keyboard. -
Page 177: First Aid For The Skyraider Series
Uninstall the current driver through the Control Panel (or if you cannot find it in the Control Panel check out the c:/PROGRAM FILES/MALLINCAM/MALLINCAMSKY folder, there is a program called uninst. Double-Click on uninst to uninstall MallincamSky and its drivers). Once uninstalled, reboot your computer, then reinstall MallincamSky again. This should fix the issue. -
Page 178: How Do I Optimize My Computer
SkyRaider DS16C User Manual July 14, 2018 How do I Optimize my Computer? Recommended Solution: Optimizing your windows computer sometime is a never-ending process but visit the website: https://www.youtube.com/watch?v=Hdb4iybN8gg for some great suggestions on how to optimize your computer. To summarize as per the research done by Doug Murphy... -
Page 179: Stacking Is Going Very Slow Or Stops Completely
SkyRaider DS16C User Manual July 14, 2018 Stacking is going very slow or Stops completely? The reason for the slowing or freezing of the stacking process is not completely understood, but it is encountered by many processes that task the usb and video processes of computers. This problem is experienced by many video gamers and the solution that resolves this problem is to select only 1 or 2 of the CPUs running the program. - Page 180 SkyRaider DS16C User Manual July 14, 2018 Step 3 Using your mouse, Choose Task Manager from the list. This will open-up the task Manager Window. Step 4 Locate and Right-Click on mallincamsky Process located in the Task Manager. This will open up a small Selection Window, Click on Go to details in that selection window.
- Page 181 SkyRaider DS16C User Manual July 14, 2018 In the Task Manager Window locate and Right-Click on the mallincamsky.exe file and another Step 5 selection window will appear, choose Set affinity from that list. This will pop-up the Processor affinity window.
- Page 182 SkyRaider DS16C User Manual July 14, 2018 Close the Task Manager Window Step 8 Note: you will have to repeat this every time you restart the MallincamSky, as windows doesn’t remember you selecting 1 processor from the Task Manager. SkyRaider DS16C User Manual...
-
Page 183: I See A Pink Floyd Kaleidoscope Effect On My Screen
SkyRaider DS16C User Manual July 14, 2018 I see a Pink Floyd Kaleidoscope effect on my Screen This effect has to do with star alignment difficulties when stacking images. You need bright stars to get a successful frame alignment. In other words, increase gain or increase exposure or re- adjust histogram to deliver a brighter image. -
Page 184: Dark Field Explanation
SkyRaider DS16C User Manual July 14, 2018 Dark Field Explanation The following is the best explanation of what Dark Field is, and it comes from the work of Simon Hanmer. Dark Frame vs Dark Field Dark Frame Subtraction First, take an image with the camera shutter closed or the camera/scope covered under the same conditions of exposure time and temperature as the light frames you are going to capture of your astronomical target. - Page 185 SkyRaider DS16C User Manual July 14, 2018 Note that stacked and combined frame #10 represents information derived from all 10 frames. But hold on … we are not talking CCD imaging here – this is video. When a CCD chip is activated it cranks at full blast and requires effective cooling to prevent it from rapidly heating up beyond a user-determined temperature.
- Page 186 SkyRaider DS16C User Manual July 14, 2018 The two screen captures below demonstrate the difference that applying a Dark Field to an image can provide. 90 second exposure, lens covered. No Dark Field Applied 90 second exposure, lens covered. 10 Dark...
-
Page 187: Setting Up To Broadcast On Night Skies Network
I using, and what am I trying to do this session). Remember, it’s all about having fun, and time and patience are your best friends (not to mention all the guys and gals, and the Yahoo – MallinCam site: http://tech.groups.yahoo.com/group/mallincam/messages One of the most important decisions you will need to make with broadcasting the image of the SKYRAIDER is what Video capture software are you going to use. - Page 188 SkyRaider DS16C User Manual July 14, 2018 Step 2 Start MallincamSky Get the image of your object on the Image Window of MallincamSky, adjust the settings on the software for your planned object and size the window so you have room for other software on your monitor real-estate.
- Page 189 SkyRaider DS16C User Manual July 14, 2018 Step 4 Have KVYcam grab the window image KVYcam will display a translucent rectangle on the upper left corner of your window. By left- click and dragging and/or grabbing a side or corner and left-click and resizing overlay the sizing...
- Page 190 SkyRaider DS16C User Manual July 14, 2018 Do not move the MallincamSky Window around your desktop when broadcasting, since KVYcam is just grabbing the real-estate location that currently your MallincamSky Software image is situated at. If you move the MallincamSky Software Window, then KVYcam will still grab the desktop location, but may not grab the whole MallincamSky Video Image.
- Page 191 SkyRaider DS16C User Manual July 14, 2018 A popup Window will appear, where you will enter your Username and Password. Click on the orange LOGIN button to accept. You will next be presented with the Channel Line Up screen for Night Skies network. Click on Login selection on the upper right-hand side of the screen.
- Page 192 SkyRaider DS16C User Manual July 14, 2018 Step 9 Allow Adobe Flash to use your KVYcam/Splitcam/WebcamMax Adobe Flash Player Settings window will pop up on your screen asking you for permission to use your camera and your microphone. Select Allow.
- Page 193 SkyRaider DS16C User Manual July 14, 2018 When you are us and running and everything is working as it should, you will change the message to indicate, what telescope, mount, and camera you are using. For that is the most frequently asked question from the NSN viewers.
- Page 194 SkyRaider DS16C User Manual July 14, 2018 NSN will remember what camera you chose from the last visit. So usually you only must go through this process whenever you want to change what camera device you would like the flash driver to use.
- Page 195 SkyRaider DS16C User Manual July 14, 2018 You can now re-adjust the different windows in the Night Skies Network to make the best use of your screen. You will be seeing what you are Broadcasting in the NSN View Window, you can see who has logged into your Channel in the User’s Window, and you can Participate in the Channel Chat...
- Page 196 SkyRaider DS16C User Manual July 14, 2018 The following is a possible arrangement scenario. You would have KVYcam select the region of the window that encloses MallincamSky. You will freeze (and I don’t mean like what Rock does when he broadcasts in winter till 3am), I mean from time to time your NSN connection will freeze for no apparent reason.
-
Page 197: Customizing The Screen
SkyRaider DS16C User Manual July 14, 2018 Customizing the Screen You can customize what controls (and the defaults for most of the controls) you want active, by Left-Clicking anywhere in the Left Control Panel then choose the Settings choice to open-up a Preference Window that allows you to make various setting changes. -
Page 198: Focal Reducers
Focal Reducers MFR-10 Focal Reducer Because of the Large sensor size on the SkyRaider DS16C, the best focal reducers to use is the Mallincam 2-inch version. The MallinCam MFR-10 (MallinCam Focal Reducer-10) is a breakthrough in optical performance only from MallinCam. You can now have a focal reducer for your larger size (up to 28.4mm diagonal) CCD... -
Page 199: User Notes
SkyRaider DS16C User Manual July 14, 2018 User Notes SkyRaider DS16C User Manual Page 197...
Need help?
Do you have a question about the SKYRAIDER DS16C and is the answer not in the manual?
Questions and answers