Table of Contents
Advertisement
Quick Links
MALLINCAM HD-10 II
[Version 1.0]
Michael Burns
Rock Mallin
[
Mallincam HD-10 II User Manual
This document will quickly introduce you to the wonders of the Mallincam HD-10 II
Camera. We will include instructions on how to install the Software and Drivers and
how connect the HD-10 II to your HDMI Monitor or computer along with explanations
of the camera's major settings. The purpose of this guide is to quickly get you up and
running with the HD-10 II Camera so that you can image the skies and share your
passion with others.
HD-10 II User Manual
Revision Sheet
]
Page i
Advertisement
Table of Contents

Subscribe to Our Youtube Channel
Related Manuals for MallinCam HD-10 II


Summary of Contents for MallinCam HD-10 II
- Page 1 HD-10 II to your HDMI Monitor or computer along with explanations of the camera’s major settings. The purpose of this guide is to quickly get you up and running with the HD-10 II Camera so that you can image the skies and share your passion with others.
-
Page 2: Revision History
Revision Sheet Revision History Version Date Revision Description 03/17/2020 Template Creation HD-10 II User Manual Page ii... -
Page 3: Table Of Contents
Connecting the HD-10 II to your Computer ..................19 First Time Installation of Software ........................19 Starting on the HD-10 II on the Computer ......................22 HD-10 II Quick Setup and Pictorial Work-Flow ................23 Detailed Work-Flow Procedures on a Computer ....................24 Exposure ................................ - Page 4 Gamma......................................28 Capture a Still Image ............................28 Capture and Save a Video Sequence ......................30 Exit the Software ............................31 Mallincam Software Commands .......................32 HD-10 II Status Bar (Computer) ......................32 Action Tabs ............................32 Capture Tab .........................33 Snapshot Icon ..............................33 Resolution Tab ..............................
- Page 5 Mallincam HD-10 II User Manual March 30, 2020 ROI Tab ................................41 Select ROI ..............................41 Select ROI coordinates ........................... 42 Image Stitching (Live) Tab ........................... 43 Stitching Speed .............................. 43 Background Color ............................43 Start Stitching ..............................43 EDF (Live) Tab .............................. 44 Quality ................................
- Page 6 Mallincam HD-10 II User Manual March 30, 2020 Image Dye Tab ............................... 51 Current ................................51 RGB ................................51 Add To New Dye ............................51 Dye Type ................................ 51 New Dye ................................ 51 Delete ................................51 Apply As A New Image ..........................51 Cancel ................................
- Page 7 When I save my AVI Video it only saves part of the Video.............. 73 My HD-10 II is frozen, or the commands do not seem to be working correctly......73 My Image on the Screen is great, but when I try to Modify it, the image is all White....73 Appendix F: Notes ..........................74...
-
Page 8: Introduction
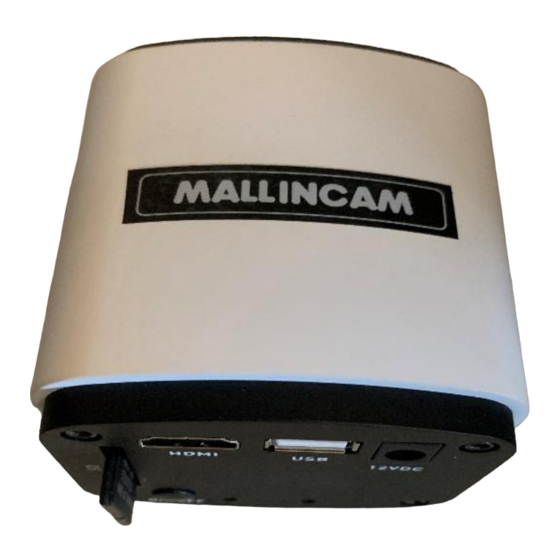
HDMI. The new MallinCam HD-10 II has a computer, memories and processor all built in the camera which can be used as a stand-alone unit without any external computer assistance. If a user does want to use a computer however, the USB2 permits full camera control via computer and software. -
Page 9: The Contents Of The Hd-10 Ii - Package
Mallincam HD-10 II User Manual March 30, 2020 The Contents of the HD-10 II - Package Specifications: CCD sensor: Sony CMOS sensor Sensor size: 5.6. x 3.2 mm Active pixel array size: 1945 (H) × 1097 (V) (2.1 Mega Pixels) Pixel size: 2.9 x 2.9 microns... -
Page 10: Included In Package
⑥ Flash drive containing software installation files ⑦ 1.25” eyepiece adapter ⑧ AC Power Supply You can use your own wireless mouse with the HD-10 II. This will make it easier to control the camera, rather than be tethered so close to the camera. Optional Components ➢... -
Page 11: Installing Driver And Software
Visit the Software Downloads Page in the Support Tab located on the website: Step 1 www.mallincam.net Select the Blue Click Here Button to download the HD-10 II Driver. Step 2 MALLINCAM HD-10 II Software After you have clicked on the Blue... -
Page 12: The Mallincam Hd-10 Ii With A Hdmi Monitor
• HDMI Monitor (with power cable) Remove the rubber dust cover from the front of the HD-10 II camera (place it back in the box for safe keeping). Screw in the 1.25” nose piece adapter to the front of the HD-10 II. - Page 13 Move the mouse to the Left Side of the screen and the Photo and Setting Icons will appear on the monitor’s screen. Clicking on Photo Icon will have the HD-10 II take an image and store it on the SD card. ➢...
-
Page 14: Hd-10 Ii Control Icons
March 30, 2020 HD-10 II Control Icons The following image provides a fast description and location of the various Control Icon that are available for you to control the Mallincam HD-10 II camera using just a HDMI Monitor. Mouse on Left... -
Page 15: Detailed Icon Description
Detailed Icon Description Camera Icon Clicking on this Icon will tell the Mallincam HD-10 II to save the current image on the SD card inserted into the back on the camera. The format of the image will be JPEG (.jpg). Once the image has been saved, the HD-10 II Camera will revert back to live view. -
Page 16: Image Action Window
Mallincam HD-10 II User Manual March 30, 2020 Image Action Window Calibration Click on this Icon to start a calibration process of matching the number of pixels on screen to practical measurement units. Flip Horizontally Click on this Icon to Move the left side of the image to the right side, and the right side of the image to the left. - Page 17 Click on this Icon to Display currently saved images on the SD card. A larger box will contain the live image from the HD-10 II camera. Located on the bottom of the screen are controls to scan forward (right arrow) or backward (left arrow) through other images on the SD card.
-
Page 18: Imaging With The Hdmi Monitor Work-Flow
Click on the bottom icon (the Settings Icon), and a Settings Control Window will pop-up. The Step 2 HD-10 II remembers if this window was clicked open, and it will automatically appear when you next move the mouse icon to the left side of your monitor. -
Page 19: Brightness
Step 3 focus on your object by adjusting the telescope’s focuser, but you can have the HD-10 II automatically fine tune the focus for you (One—shot AF), or you can manual drag the focus bar to obtain your best focus. -
Page 20: Sharpness
(this happens as you slowly learn what controls best work for your system), you can display click on the Default Button located on the bottom right of the Control window. The Mallincam HD-10 II will reset all the controls back to their defaults. HD-10 II User Manual... - Page 21 IMG0001.JPG. To Start a .avi (VID001.AVI) recording of the images being captured on HD-10 II, just click on the Video Camera Icon. The status timer will appear and the lower right side of the image indicating how long the video currently is.
-
Page 22: The Mallincam Hd-10 Ii With A Computer
Laptop or Computer First Time Installation of Software Copy the MallinCam2.1 Setup Software from the provided USB Stick (or the latest download from Mallincam.net) into folder of your choice on your computer. Double-Click on the Mallincam2.1 Setup to start the installation process. - Page 23 Mallincam HD-10 II User Manual March 30, 2020 An Acceptance Window will now appear. Either accept the file location for the Mallincam2.1 Software to be installed in or choose a folder of your choice. We recommend accepting the default location.
- Page 24 The Mallincam2.1 and Drivers will be installed on your computer. Then the Completing the MallinCam Setup Window will pop-up. Click on Finish to acknowledge the installation. Once complete, you will now have a Mallincam Icon on your desktop. HD-10 II User Manual Page 21...
-
Page 25: Starting On The Hd-10 Ii On The Computer
Attach the provided usb cable from the MallinCam HD-10 II to a usb port on your Computer. Plugin the AC Power Adapter into the back of the HD-10 II (a Red LED will indicate that the camera has power) Power on the HD-10 II by pressing on the ON/OFF button located on the back of the camera. -
Page 26: Hd-10 Ii Quick Setup And Pictorial Work-Flow
Mallincam HD-10 II User Manual March 30, 2020 HD-10 II Quick Setup and Pictorial Work-Flow A typical workflow when using the HD-10 II. Start HD-10 II HDMI Monitor Computer Set Focus Set Focus Set Exposure Set Exposure Adjust Image Adjust Image... -
Page 27: Detailed Work-Flow Procedures On A Computer
HD-10 II Control Software below. Once you have the HD-10 II’s Mallincam Software up and running, you should see an image of whatever the HD-10 II camera is looking at (at whatever exposure setting the software is set at). -
Page 28: Focus
Mallincam HD-10 II User Manual March 30, 2020 The HD-10 II will not change the exposure value until you give it permission by clicking on the OK button. 2. By using the Exposure Time slider. Left-click-hold and drag the slider to adjust the exposure time. You will notice the exposure time value in the manual entry boxes for the time change in real time along with the real time response from the camera. -
Page 29: White Balance
Step 3 Different planetary objects in combinations with different sky conditions, may throw off the colour balance of the HD-10 II. We can bring everything back to normal by using the White Balance control which is located in the Feature Tab. -
Page 30: Contrast
Mallincam HD-10 II User Manual March 30, 2020 Contrast - Contrast is the scale of difference between black and white in your images. Without contrast you wouldn't have an image because there wouldn't be any differentiation between light and dark; everything would be black, white, or a single shade of grey somewhere in between. -
Page 31: Gamma
The Histogram allows you to manually or automatically adjust the image levels of all color components the image that the HD-10 II camera is producing. You can control each individual channel (Red, Green, and Blue) are the combined color channel. - Page 32 Mallincam HD-10 II User Manual March 30, 2020 Click on this Thumbnail to move into the Image component of the Mallincam Software. From here we can tweak the image before saving it (but most of us will use another image software later after we have finished with the session).
-
Page 33: Capture And Save A Video Sequence
Step 7 So, you might be thinking that still captures are good, but video captures are better. Well, let’s save a short video of what our Mallincam HD-10 II is looking at. The first thing we should do is select a location to save the video In the Capture Tab select the File Save Tab Then use the Browse button to select the location you would like your Videos saved. -
Page 34: Exit The Software
The Software will ask you for verification, Select Yes to shut down the Mallincam Software. Now to power-down the HD-10 II, press the ON/OFF button on the back of the camera. The Blue light will turn off when the Mallincam HD-10 II is turned off. -
Page 35: Mallincam Software Commands
March 30, 2020 Mallincam Software Commands This section covers in detail all the controls and settings in the various regions of the HD-10 II Mallincam Software. It will take a while to become comfortable with them, but the reward is worth the effort. -
Page 36: Capture Tab
Snapshot Icon The Snapshot icon allows you to take an immediate snapshot of what the Mallincam HD-10 II camera is displaying. The image will be saved in the location designated in the File Save Tab (see below). A thumbnail of the image will appear in the Image Tray on the right side of the Window. -
Page 37: Exposure Control Tab
Exposure Control Tab It is here in the Exposure Control Tab that you have complete control of the exposure process. You can have the HD-10 II camera try to pick the best exposure for the current image, or you can take control of the exposure yourself. -
Page 38: Exposure Time
(brighten the image) and to the left to decrease the gain (darken the image). This control resets the HD-10 II exposure and gain settings back to the factor defaults Default The Factory default is Auto Exposure, so both the time and the gain will be automatically adjusted to the current conditions. -
Page 39: Gray
The ranges for the colors go from 0 to 48. This control resets the HD-10 II White Balance back Default to factory defaults which is automatic with a color image. -
Page 40: Contrast
Mallincam HD-10 II User Manual March 30, 2020 Feature Title Usage Contrast is the scale of difference between Black and White in your images. Without contrast you wouldn't have an image because there wouldn't be any differentiation between light and dark. -
Page 41: Histogram Tab
Mallincam HD-10 II User Manual March 30, 2020 Histogram Tab It is here in the Histogram Tab that you have complete control of the Live Image Histogram which allows you to either manually control the brightness of each of the color channels or let the software perform this task for you. -
Page 42: Gamma
Mallincam HD-10 II User Manual March 30, 2020 Feature Title Usage Gamma defines the relationship between a pixel's numerical value and its actual luminance (brightness). While the gamma setting affects the brightness of a display, it is not identical to the brightness. -
Page 43: File Save Tab
File Save Tab It is here in the File Save Tab where you have complete control of the Filename, File Format, and File location when you save snapshots or video of what the HD-10 II is imaging. Feature Title Usage... -
Page 44: Roi Tab
Mallincam HD-10 II User Manual March 30, 2020 ROI Tab It is here in the ROI Tab (Region of Interest) where you can select a rectangular area of the whole image to become the only region to display in the Image Window. -
Page 45: Select Roi Coordinates
Mallincam HD-10 II User Manual March 30, 2020 Feature Title Usage When this is selected (it is either this or Select Region), you will be able to enter the coordinates of the upper left corner of the rectangle, then enter the width and the height of the region into the boxes provided. -
Page 46: Image Stitching (Live) Tab
Mallincam HD-10 II User Manual March 30, 2020 Image Stitching (Live) Tab It is here in the Image Sticking Tab where you can join overlapping images to create a mosaic of a larger area of an object of interest. This control will have very little use in planetary imaging as the objects as relatively small as compare to the Image Window. -
Page 47: Edf (Live) Tab
Mallincam HD-10 II User Manual March 30, 2020 EDF (Live) Tab It is here in the EDF Tab (Extended Depth of Field) where you can combine the same image with different focus locations. This control will have very little use in planetary imaging except for the Moon, as most object will have the same focus location. -
Page 48: Video Record Tab
Mallincam HD-10 II User Manual March 30, 2020 Video Record Tab It is here in the Video Record Tab where you can save the real time videos of what you are imaging. You have full control on how you want the video saved. Again, the File Save Tab indicates the path location, name, …... -
Page 49: Auto Stop
It is here in the Delay Capture Tab where you can delay the capture of both the snapshot and the video recording of what the Mallincam HD-10 II is imaging. You can use this tab to have the software automatically capture up to 9999 snapshots. You can also use this tab record a video of the still snapshots. -
Page 50: Interval Time
Mallincam HD-10 II User Manual March 30, 2020 You have a range from 1 to 9999 snapshots to use. Feature Title Usage This control allows you to enter the amount of pause the software should take between each snapshot (entered in the Total Frame above). -
Page 51: Save Settings Tab
Group Name Click on the Save button to save this group. Once you click on the button all the current parameters set in the HD-10 II will be saved under the Group Name entered above. Save The Group command (see below will now contain the name of this group for easy access). -
Page 52: Auto Focus Tab
March 30, 2020 Auto Focus Tab It is in this Tab where you either have the Mallincam HD-10 II auto focus the camera for you, or you can take manual control of the camera’s focus routine. You should get your telescope to focus the best it can, then this control can fine tune the focus throughout the evening’s imaging. -
Page 53: Image Tab
Mallincam HD-10 II User Manual March 30, 2020 Image Tab The Image Tab is the Tab used for adjusting image details of your snapshot images. This Tab allows quick and simple adjustments, but most of us may use other image adjusting software as well. -
Page 54: Apply As A New Image
Mallincam HD-10 II User Manual March 30, 2020 Feature Title Usage When clicked, will create a new thumbnail of the Image with the changes. You will need to save this image if you want a permanent copy (Click on the Apply as a New Save image as …... -
Page 55: Advanced Computational Imaging Tab
Mallincam HD-10 II User Manual March 30, 2020 Advanced Computational Imaging Tab The Advanced Computational Tab allows you merge saved images to either improve their depth of view, create a mosaic of the overlapping images, or produce an image with a High-Dynamic Range. -
Page 56: Binaryzation Tab
Mallincam HD-10 II User Manual March 30, 2020 Binaryzation Tab The Binaryzation Tab allows you to set the grayscale value of the pixels from a range of 0 to 255. The end result of this process is to create an image which is truly Black and White (no grays). -
Page 57: Histogram Tab
Mallincam HD-10 II User Manual March 30, 2020 Histogram Tab It is here in the Histogram Tab that you have complete control of the Saved Image Histogram which allows you to either manually control the brightness of each of the color channels or let the software perform this task for you. -
Page 58: Smooth Tab
Mallincam HD-10 II User Manual March 30, 2020 Smooth Tab The Smooth Tab allows you apply any of the three techniques of smoothing your image to both reduce the noise and the level of detail. The choices are Gaussian Blur, Box filter, and Median Blur. -
Page 59: Radius
Mallincam HD-10 II User Manual March 30, 2020 Feature Title Usage The purpose of this slider is to control the amount Radius the selected algorithm will affect the image. The range is from 0 (no affect) to 30 (maximum affect). -
Page 60: Extract Color
Mallincam HD-10 II User Manual March 30, 2020 Feature Title Usage This control will filter out every color except the selected color from the pixels of the image. This leaves an image consisting of only the selected color. For example, see below on the right an image of the Moon with the Red channel Extracted. -
Page 61: Display Tab
Mallincam HD-10 II User Manual March 30, 2020 Display Tab The Display Tab allows you to zoom in or out, resize or even reset the real time image screen to its default size. Here you also will be able to flip or rotate the image for your needs. -
Page 62: Black Background
Mallincam HD-10 II User Manual March 30, 2020 Feature Title Usage Clicking on this control will make your image take up the whole screen (no control tabs visible). You can return to a screen with control tabs by either hitting the ESC key on your computer or clicking on the curvy arrow located at the bottom right side of your image. -
Page 63: Rotate 90
Feature Title Usage Click on the language you would like to use with the Mallincam software, press the OK button then restart the software with that language. Preferences Not installed (after all – you are reading the best Help... -
Page 64: On Screen Controls
Mallincam HD-10 II User Manual March 30, 2020 On Screen Controls Feature Title Usage When in the Image Tab, this icon is located on the upper right of the Display Window, Clicking on this icon will open up the Save image window where... -
Page 65: Appendix A: Using Hd-10 Ii Both On A Computer And A Hdmi Monitor
A focal reducer is a set of converging (or positive) lenses that cause the light from a telescope objective to converge at a steeper angle to the focal plane of the HD-10 II camera. It is as if it were coming from an objective with a faster (lower) focal ratio and a shorter focal length. -
Page 66: Appendix C: Using Filters
(or block) specified wavelengths of light hit the sensor. Each filter has a job to do, and the more specialized that job, usually the more expensive the filter. For use with the Mallincam HD-10 II there are two filters that may be of interest to you. -
Page 67: Appendix D: Connecting To Night Skies Network (Nsn) Using The Hd-10 Ii Software
The HD-10 II Control Software is not capable of modifying the Video Image and having that Video Image be directly captured by NSN Flash. So, if you want to use all the features of the HD-10 II software and broadcast those results, as well as save screen shots and videos of your images, then we need another program to capture the HD-10 II’s... - Page 68 Double Click on the HD-10 II Control Software icon. Get the image of your object on the Image Window of the HD-10 II Software, adjust the settings on the software for your planned object and size the window so you have room for other software on your monitor real-estate.
- Page 69 Manycam/Splitcam/Webcam Max window from your desktop (it should now appear on the bottom of your desktop monitor), but note that the software is still running and still has hold of your desktop (HD-10 II VIDEO Software) image location. HD-10 II User Manual...
- Page 70 /Splitcam/ Webcam Max will still grab the desktop location but may not grab the whole HD- 10 II Video Image. Don’t be afraid to practice moving the HD-10 II Software window when not broadcasting to learn how it affects the displayed Manycam/ Splitcam/ WebcamMax Window.
- Page 71 Mallincam HD-10 II User Manual March 30, 2020 Step 9 Allow Adobe Flash to use your Manycam/Splitcam/WebcamMax Adobe Flash Player Settings window will pop up on your screen asking you for permission to use your camera and your microphone. Select Allow.
- Page 72 Mallincam HD-10 II User Manual March 30, 2020 Step 11 Set a message for the NSN observers It is a good idea to display a message above the NSN display window, so that the other NSN views understand what you are doing. When initially setting up (which usually takes longer when you are learning), I usually type the message “Setting Up the...
- Page 73 Mallincam HD-10 II User Manual March 30, 2020 ➢ CLICK CLOSE to Continue (After you have selected WebCamMax , SplitCam, or ManyCam). NSN will remember what camera you chose from the last visit. So usually you only have to go...
- Page 74 That’s it, you are done. If everything is working well and the Window’s gods are in a good mood, you should be broadcasting whatever object the HD-10 II is capturing. You should now enter another Message and SEND it out to indicate what system you are using and what object you are viewing.
-
Page 75: Appendix E - First Aid For The Hd-10 Ii
Appendix E – First Aid for the HD-10 II The HD-10 II Software says it can’t find the Camera Diagnosis: This software automatically looks for the HD-10 II camera when it starts. If it cannot locate the camera attached to a USB Port, it will shut down. Cure: First step: Make sure the blue LED light on the camera is lit. -
Page 76: When I Save My Avi Video It Only Saves Part Of The Video
ManyCam, Spltcam, and WebCamMax also have the ability to save videos. My HD-10 II is frozen, or the commands do not seem to be working correctly. Diagnosis: Somehow the HD-10 II internals have become corrupted (power surge, static, cosmic ray) and all we need to do is reboot the camera and software. -
Page 77: Appendix F: Notes
Mallincam HD-10 II User Manual March 30, 2020 Appendix F: Notes _______________________________________________ _______________________________________________ _______________________________________________ _______________________________________________ _______________________________________________ _______________________________________________ _______________________________________________ _______________________________________________ _______________________________________________ _______________________________________________ _______________________________________________ _______________________________________________ _______________________________________________ _______________________________________________ _______________________________________________ _______________________________________________ _______________________________________________ _______________________________________________ _______________________________________________ HD-10 II User Manual Page 74... - Page 78 Mallincam HD-10 II User Manual March 30, 2020 HD-10 II Quick Guide Page 1...
Need help?
Do you have a question about the HD-10 II and is the answer not in the manual?
Questions and answers